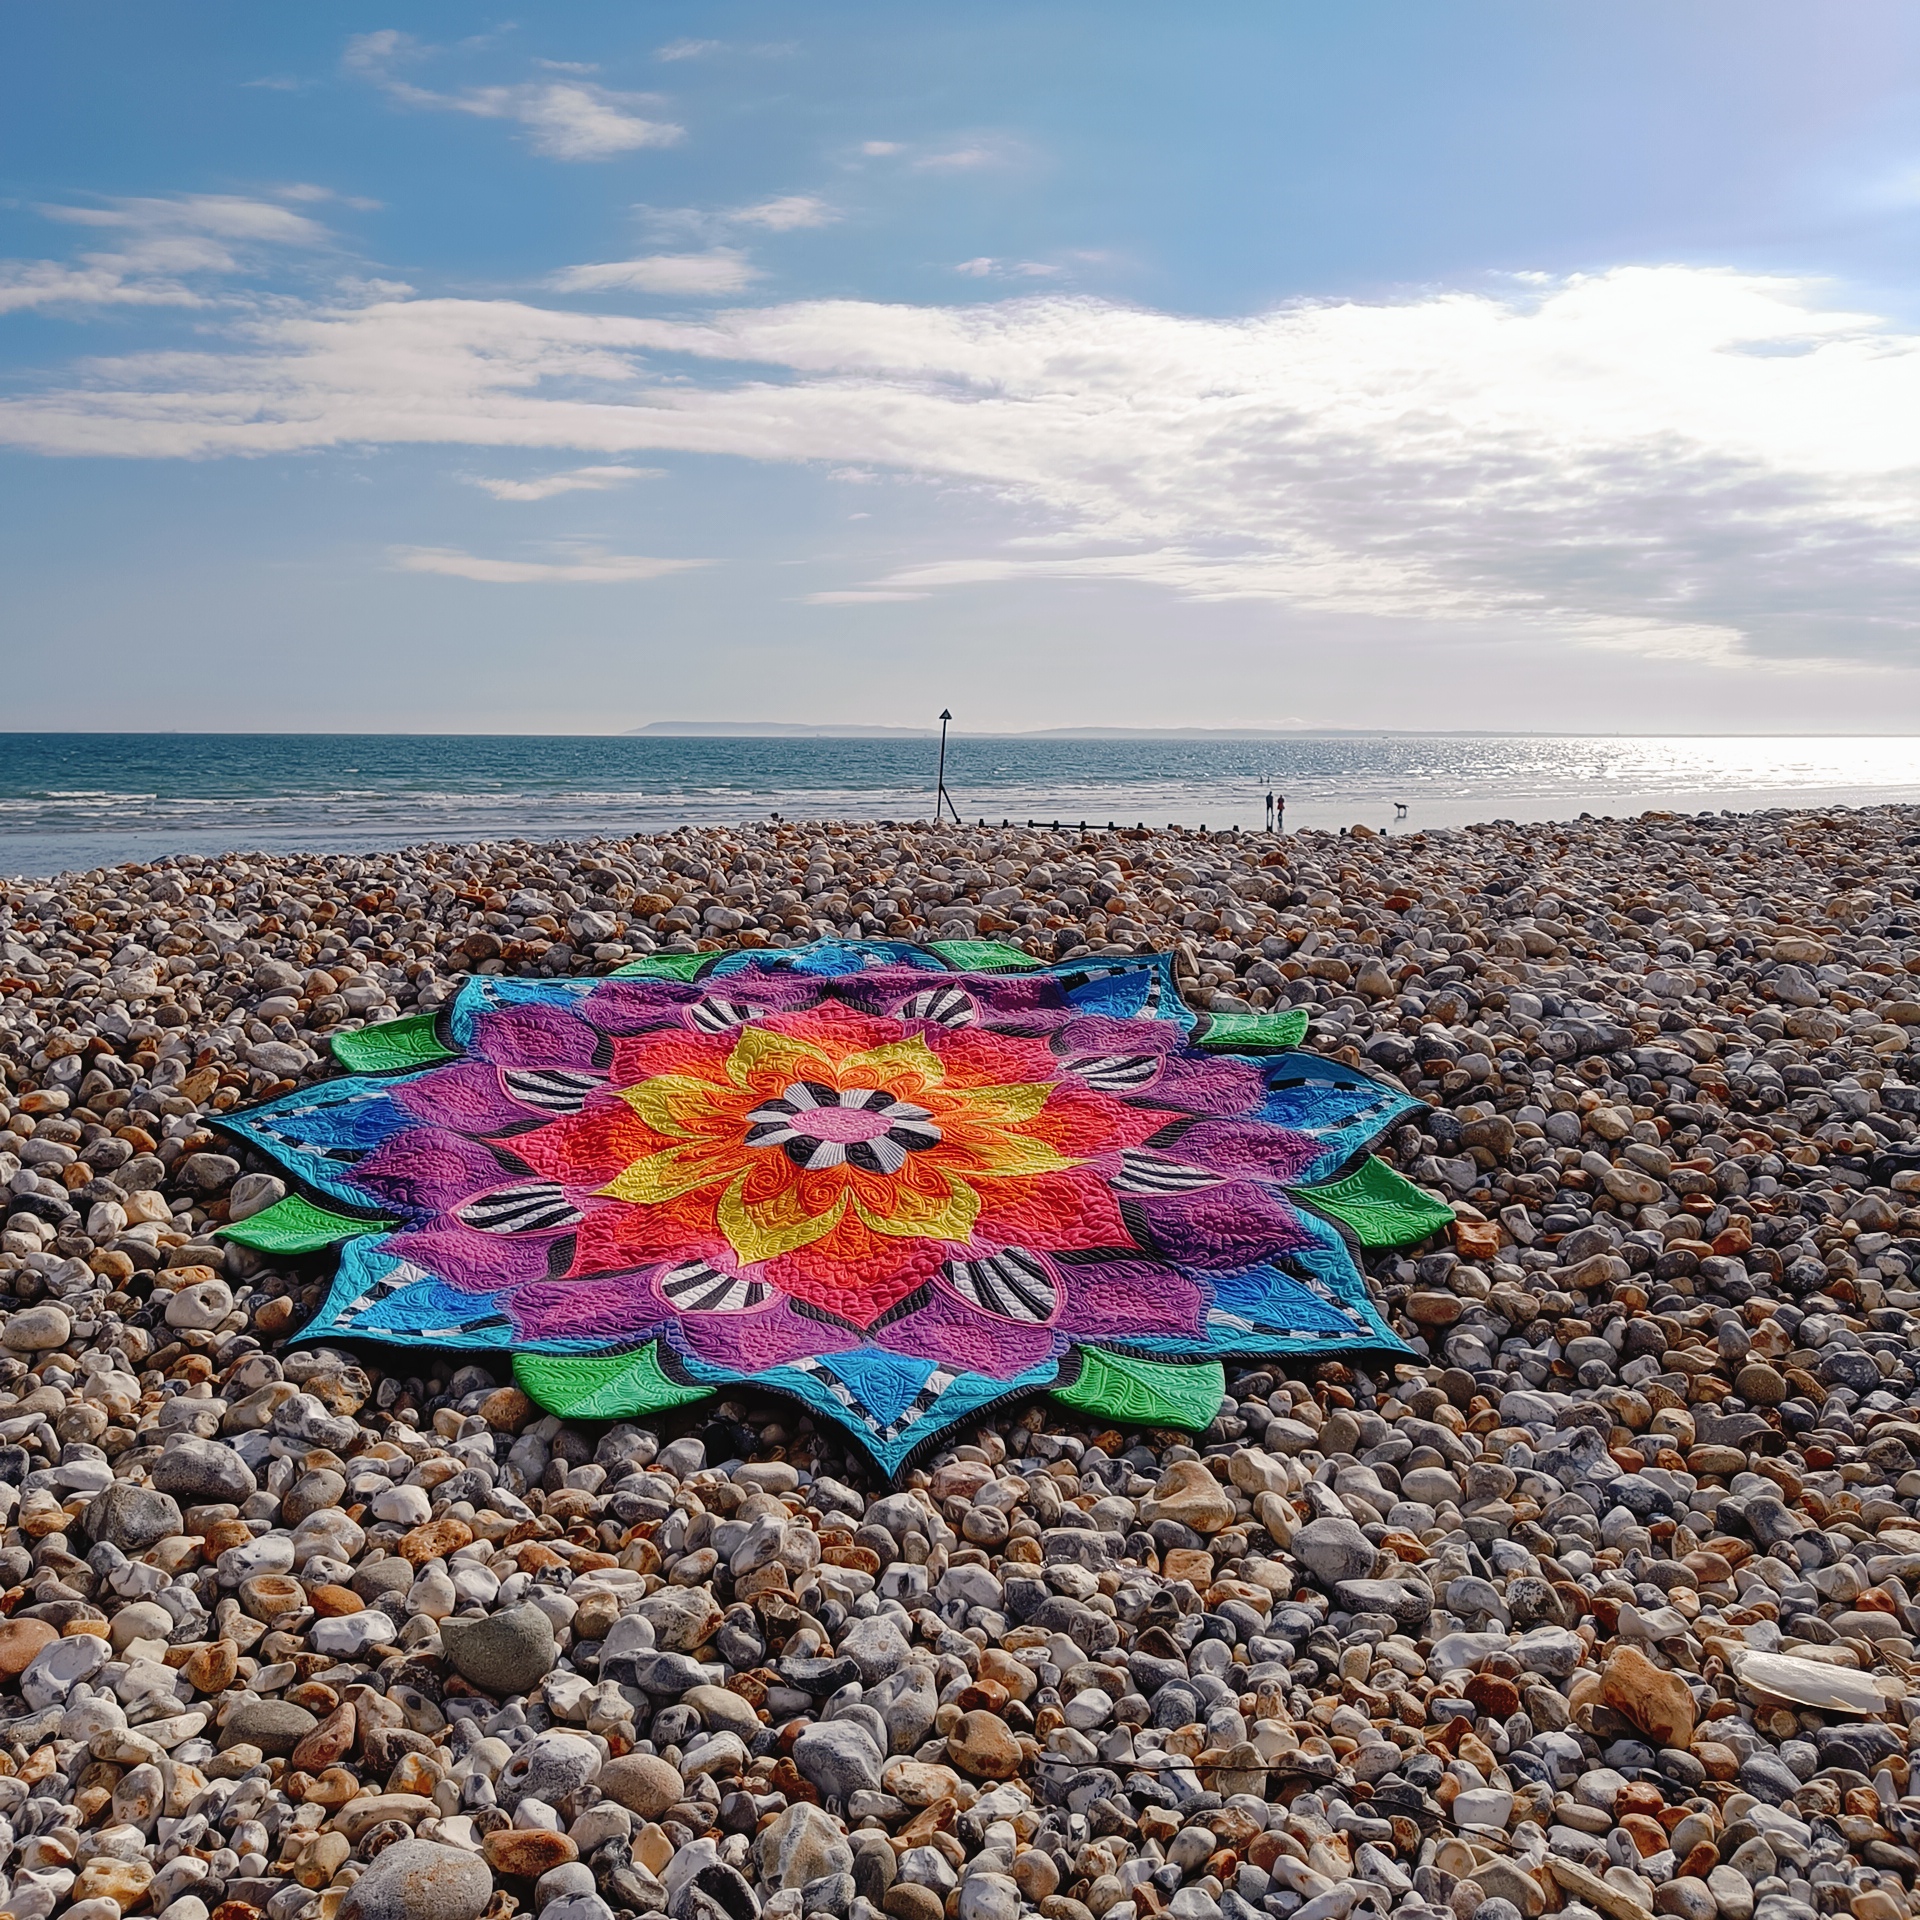
Entered into Festival of Quilts 2024, Birmingham, England, Contemporary Category
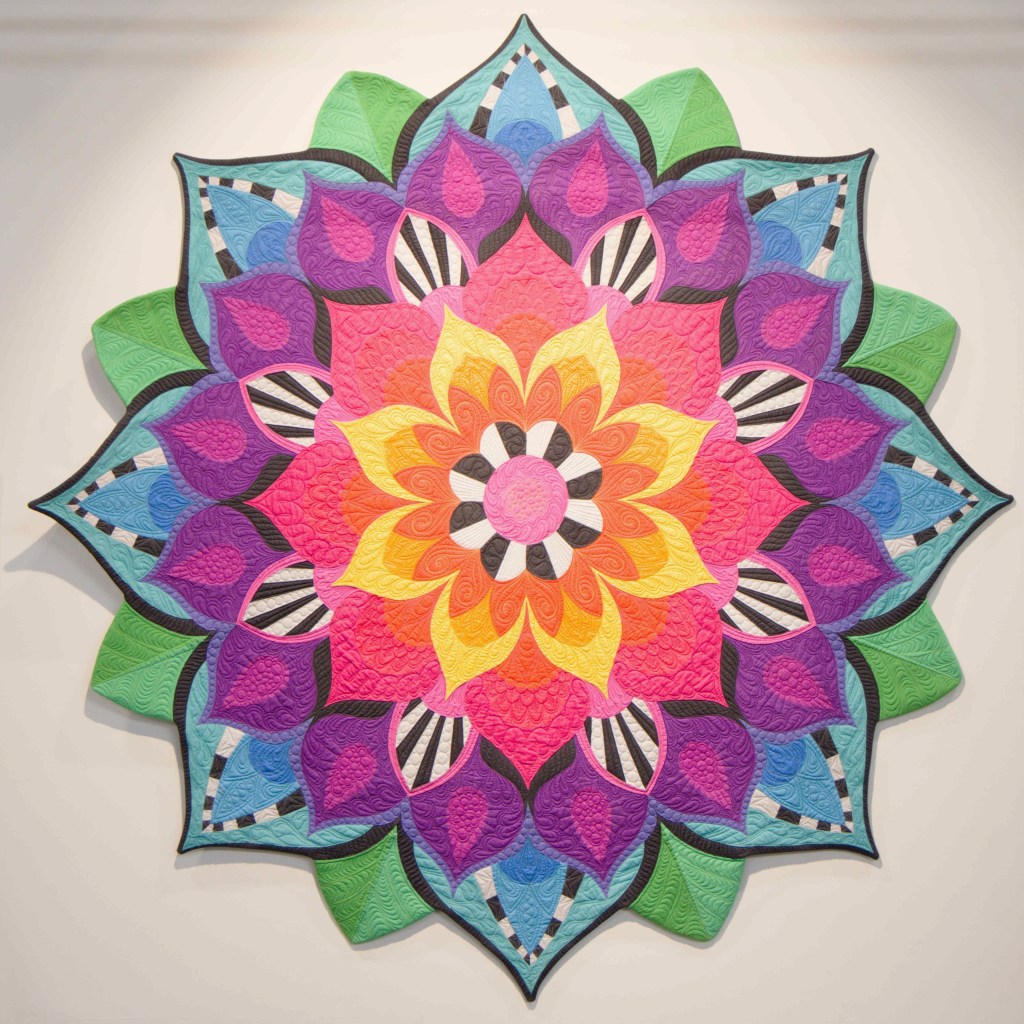
Artist Statement – A self-imposed challenge. Drafting my own graphic symbol of self-improvement with signature use of bold colours & progression. The pieced compound & reverse curves, plus precise repetition, pushed me to develop my skills. FMQ referencing blooms and the shaped periphery adds interest and complexity.
Materials – Quilting cotton, wadding, thread & corset boning
Techniques – Machine curved piecing with partial seams, foundation paper piecing, free motion quilting on static machine.
Size – 196cm radius
A ROCKY START
After winning the Visitors’ Choice Award at Festival of Quilts in 2023 with “Reaching,” I found myself anxious about how to follow it up. I felt pressure that this year’s submission would need to be even bigger and better.
In the months after Festival ’23 life got a bit much. I had lots of health tests and discovered I had an autoimmune disorder. During that processes a cancerous growth was also found (thankfully small, early and very treatable) and I had surgery. All very stressful and mentally challenging. It also became apparent both daughters were struggling more than we thought at school.
I took a step beck and reminded myself that all my pressure was self imposed. I committed to improving my health, and took time for my family. I continued to be creative, sewing and experimented with a freedom that since I started viewing AND SEW I as a business I had not allowed myself.
These are a couple of the things I can see retrospectively helped lead to the Blooming Mandala Quilt:
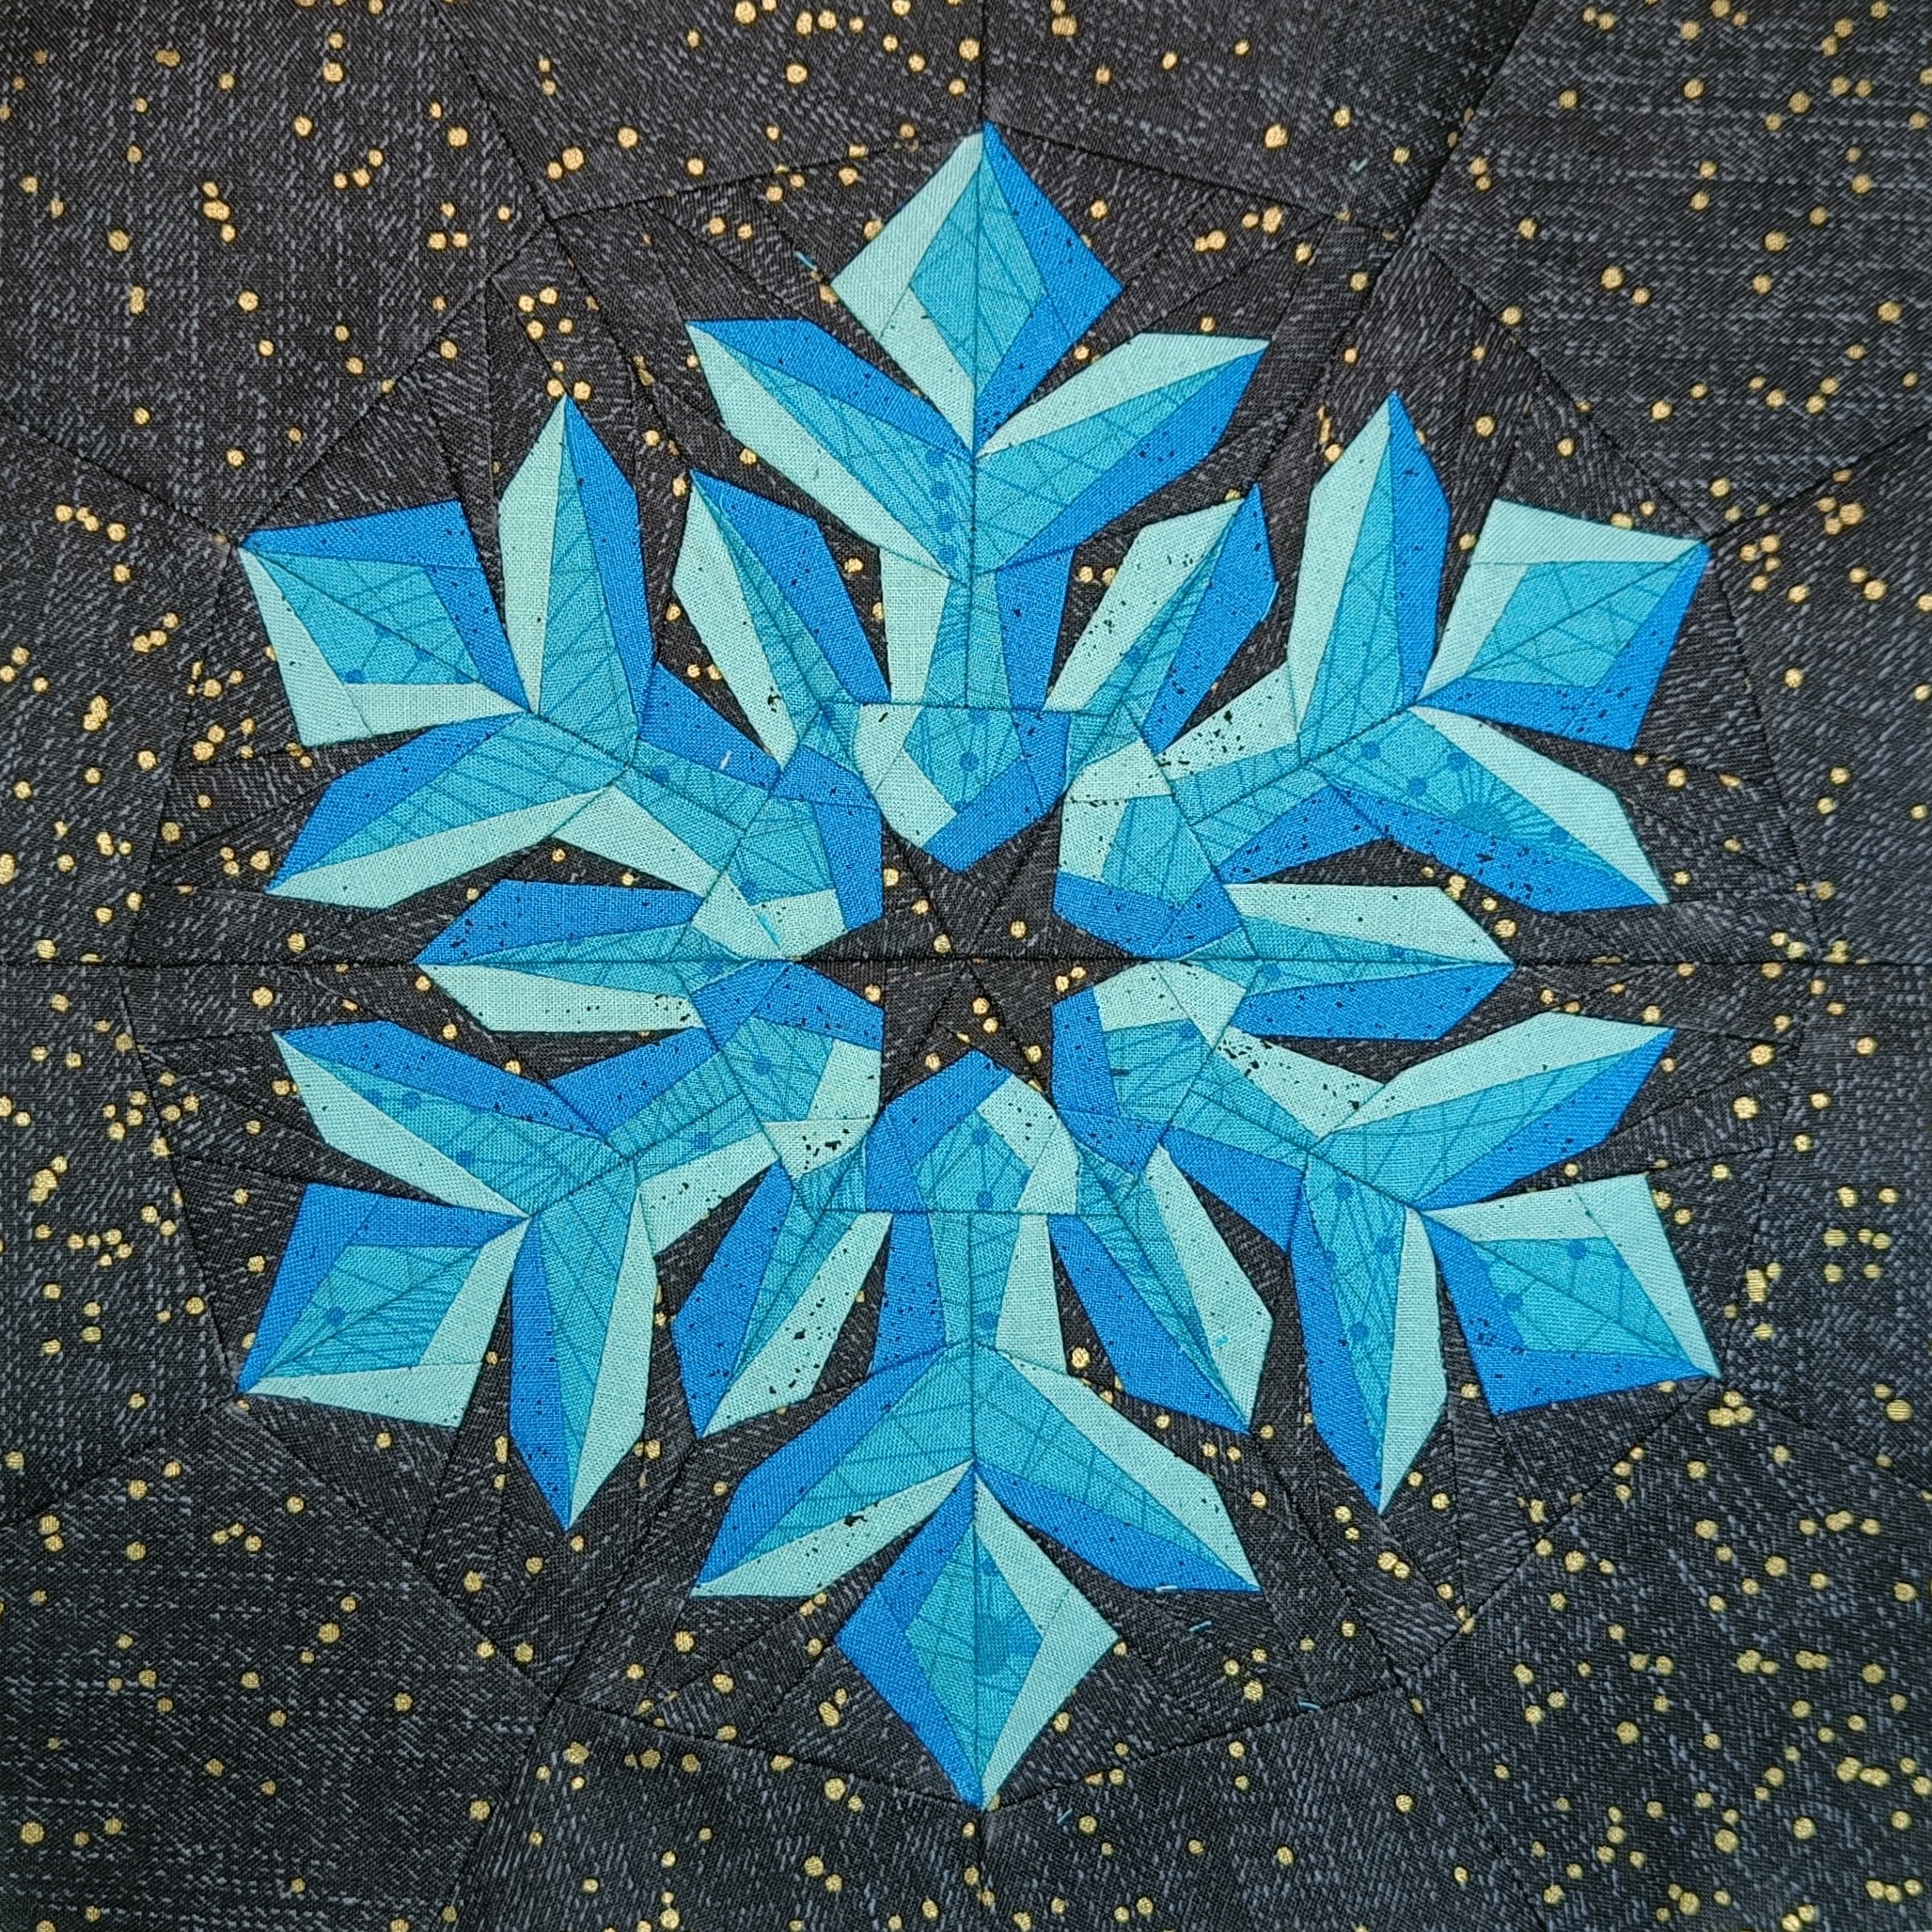
SIMPLE SNOWFLAKE PATTERN
A pattern designed in early 2023, but put to one side to work on my “Reaching” quilt. In autumn 2023, I finished writing the instructions and released the Simple Snowflake Pattern.
I really enjoyed returning to a design which had repetitive elements and more possible colour variations than the “Reaching” quilt pattern. Also marginally less pictorial and simpler so creating the 3 dimensional feel to my work was easier.
GRAFFITTI QUILTING
I took Karlee Porter’s Graffiti Quilting Course to up my Free Motion Quilting (FMQ) skills. To practice I ended up doodling lots as relaxation and meditation. Karlee is hosting a big 10 year class starting in September and I’m taking part again! If you want to join in check out the details and video here and get $25 off using my affiliate code (asi25).

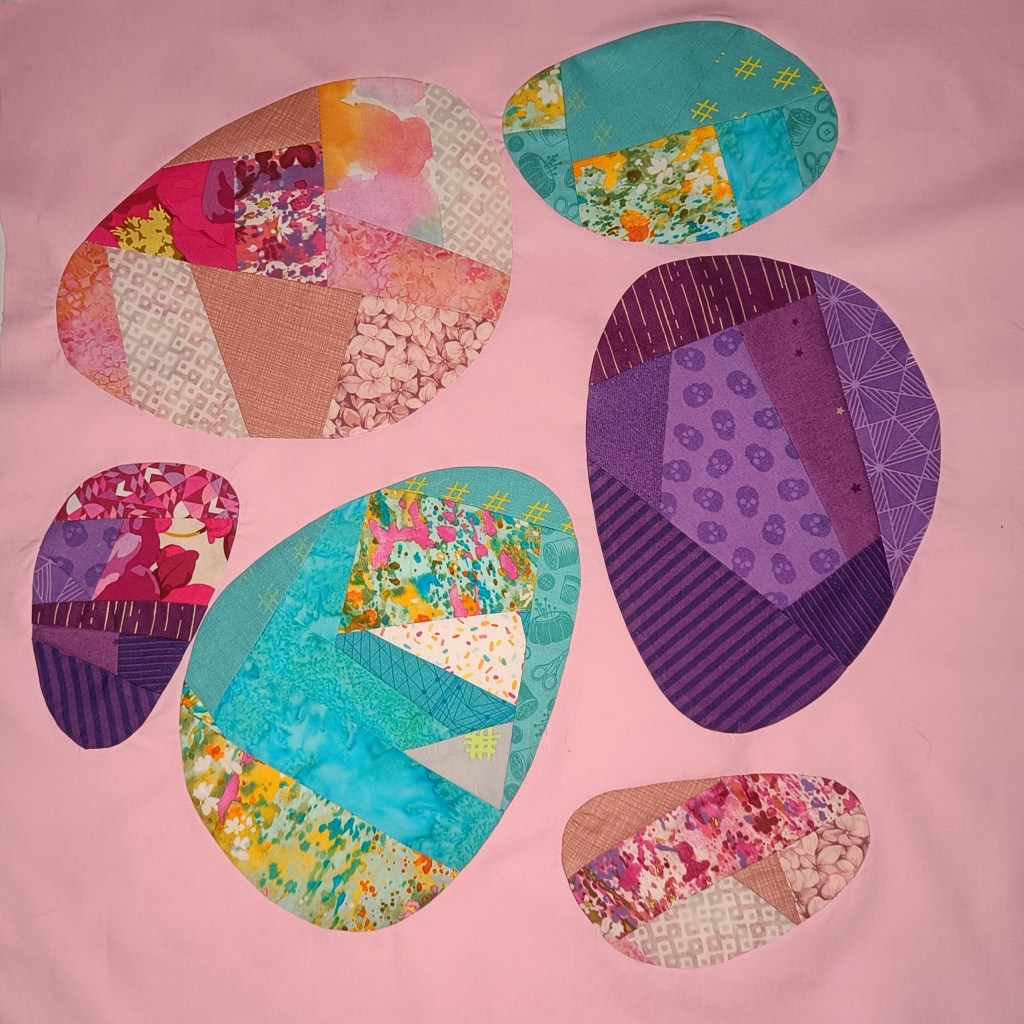
PEBBLES
I was inspired by a talk by Audrey Esarey from Cotton and Borbon, via Libs Elliott’s Sew Squad. Having rarely dabbled in curves my interest was spiked by seeing how paper templates can be used to create more complex curved pieces. I experimented creating these scrappy pebbles with super tight curves in places.
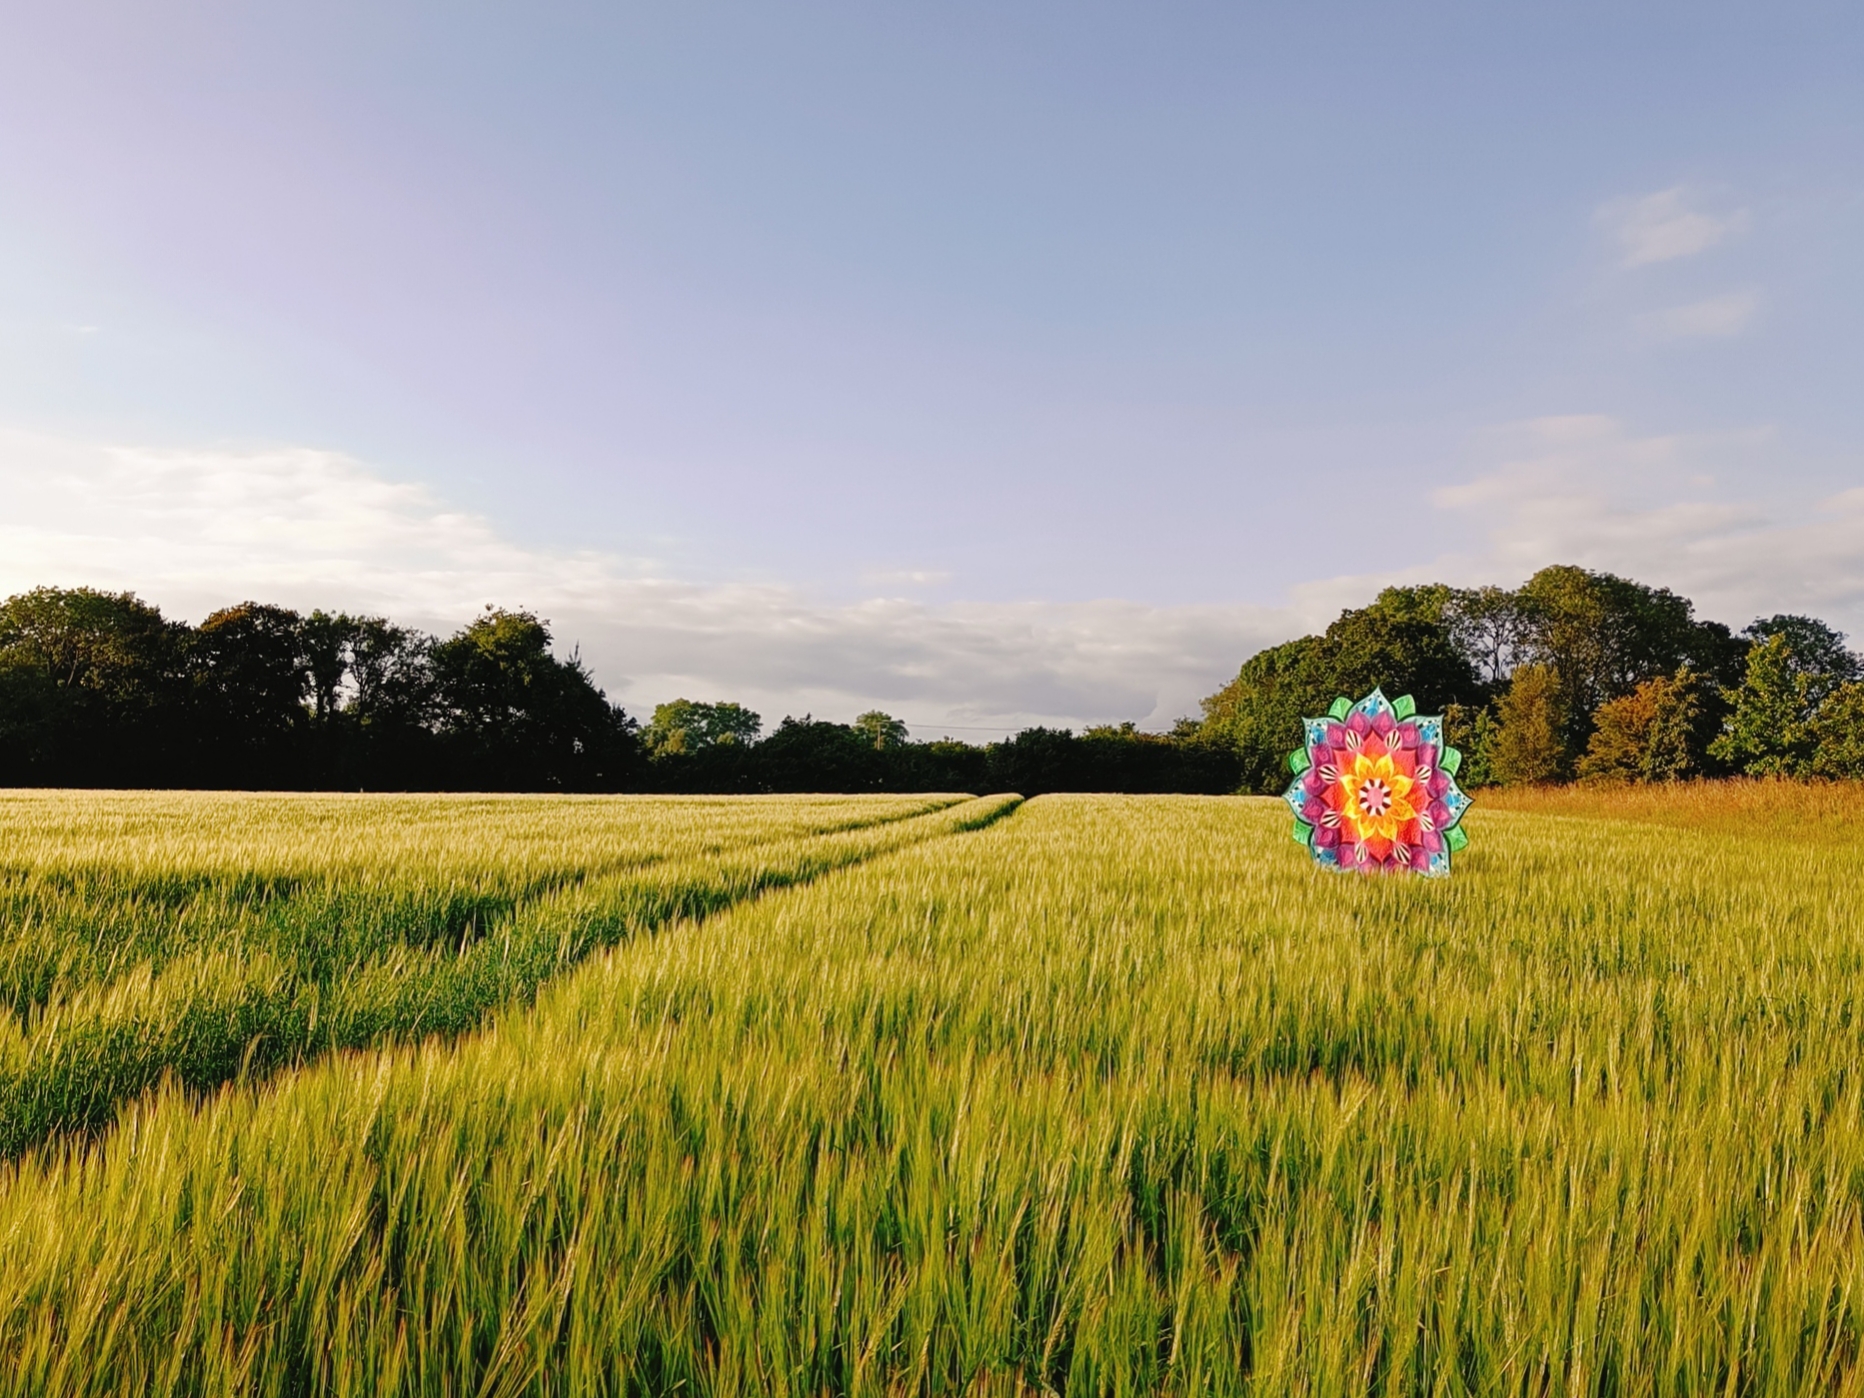
CONCEPT
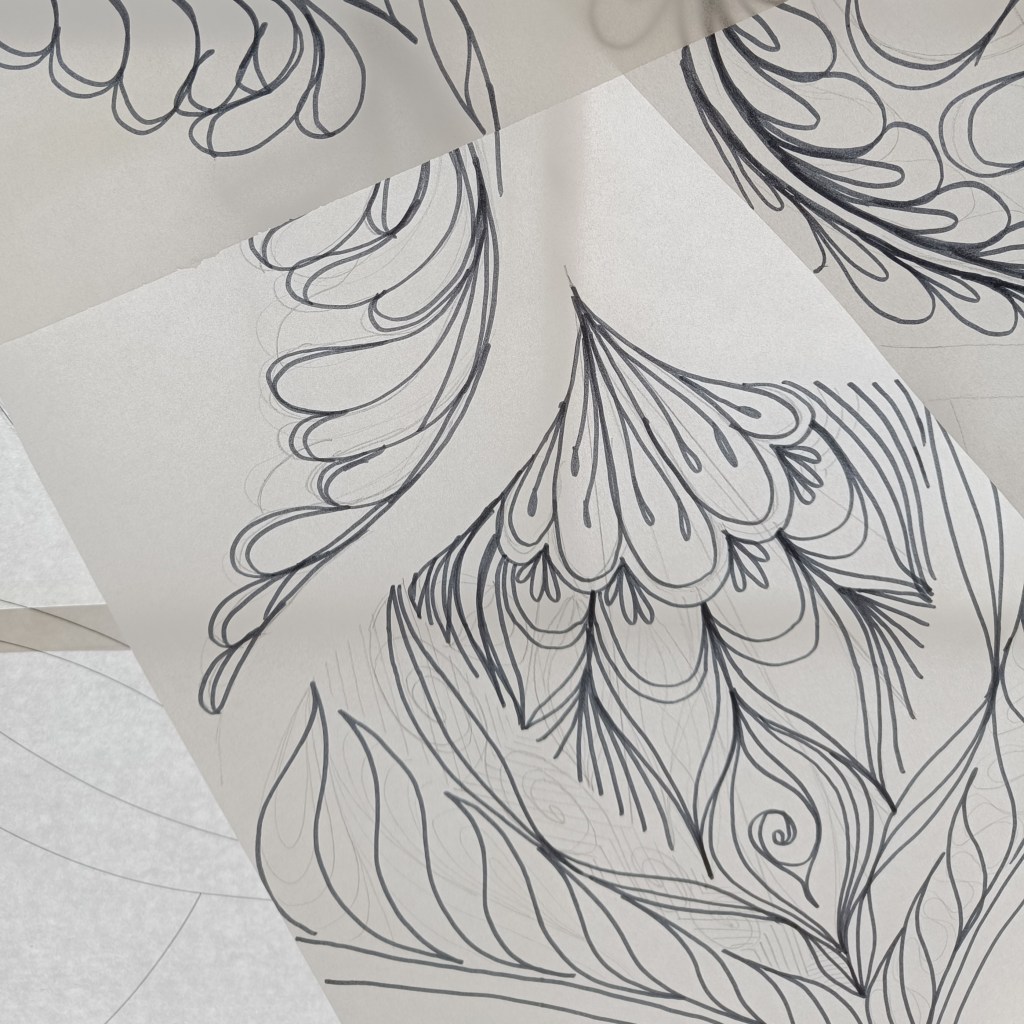
In March, it finally felt possible to consider making a quilt and the Festivals of Quilts deadline was still achievable. During the past months focusing on myself I tried meditating and kept stumbling over the mandala graphic as well as while doodling for FMQ practicing, I found myself creating Mandalas as the repetition helped improve my line placement and consistency.
The Mandala as a graphic had also been at the back of my mind especially since designing the simple snowflake quilt due to the similarities in a section being repeated until circular. My enquiring mind lead me to look into the origins of the Mandala. I discovered the Buddhist concept of the Eightfold Path, which lead me to design the mandala using eight points, whereas the simple snowflake has 6 points.
All of my major quilts have had a symbolic meaning to me. The Fractured Skull Quilt as a Memento Mori, “The Unique-orn Quilt”- a celebration of unique and magical qualities we all have, and “Reaching” The Mermaid Quilt – a representation of struggles to achieve a desire and sacrifices made. A Mandala Quilt felt right, blending artistic creativity with spiritual symbolism of the last few months.
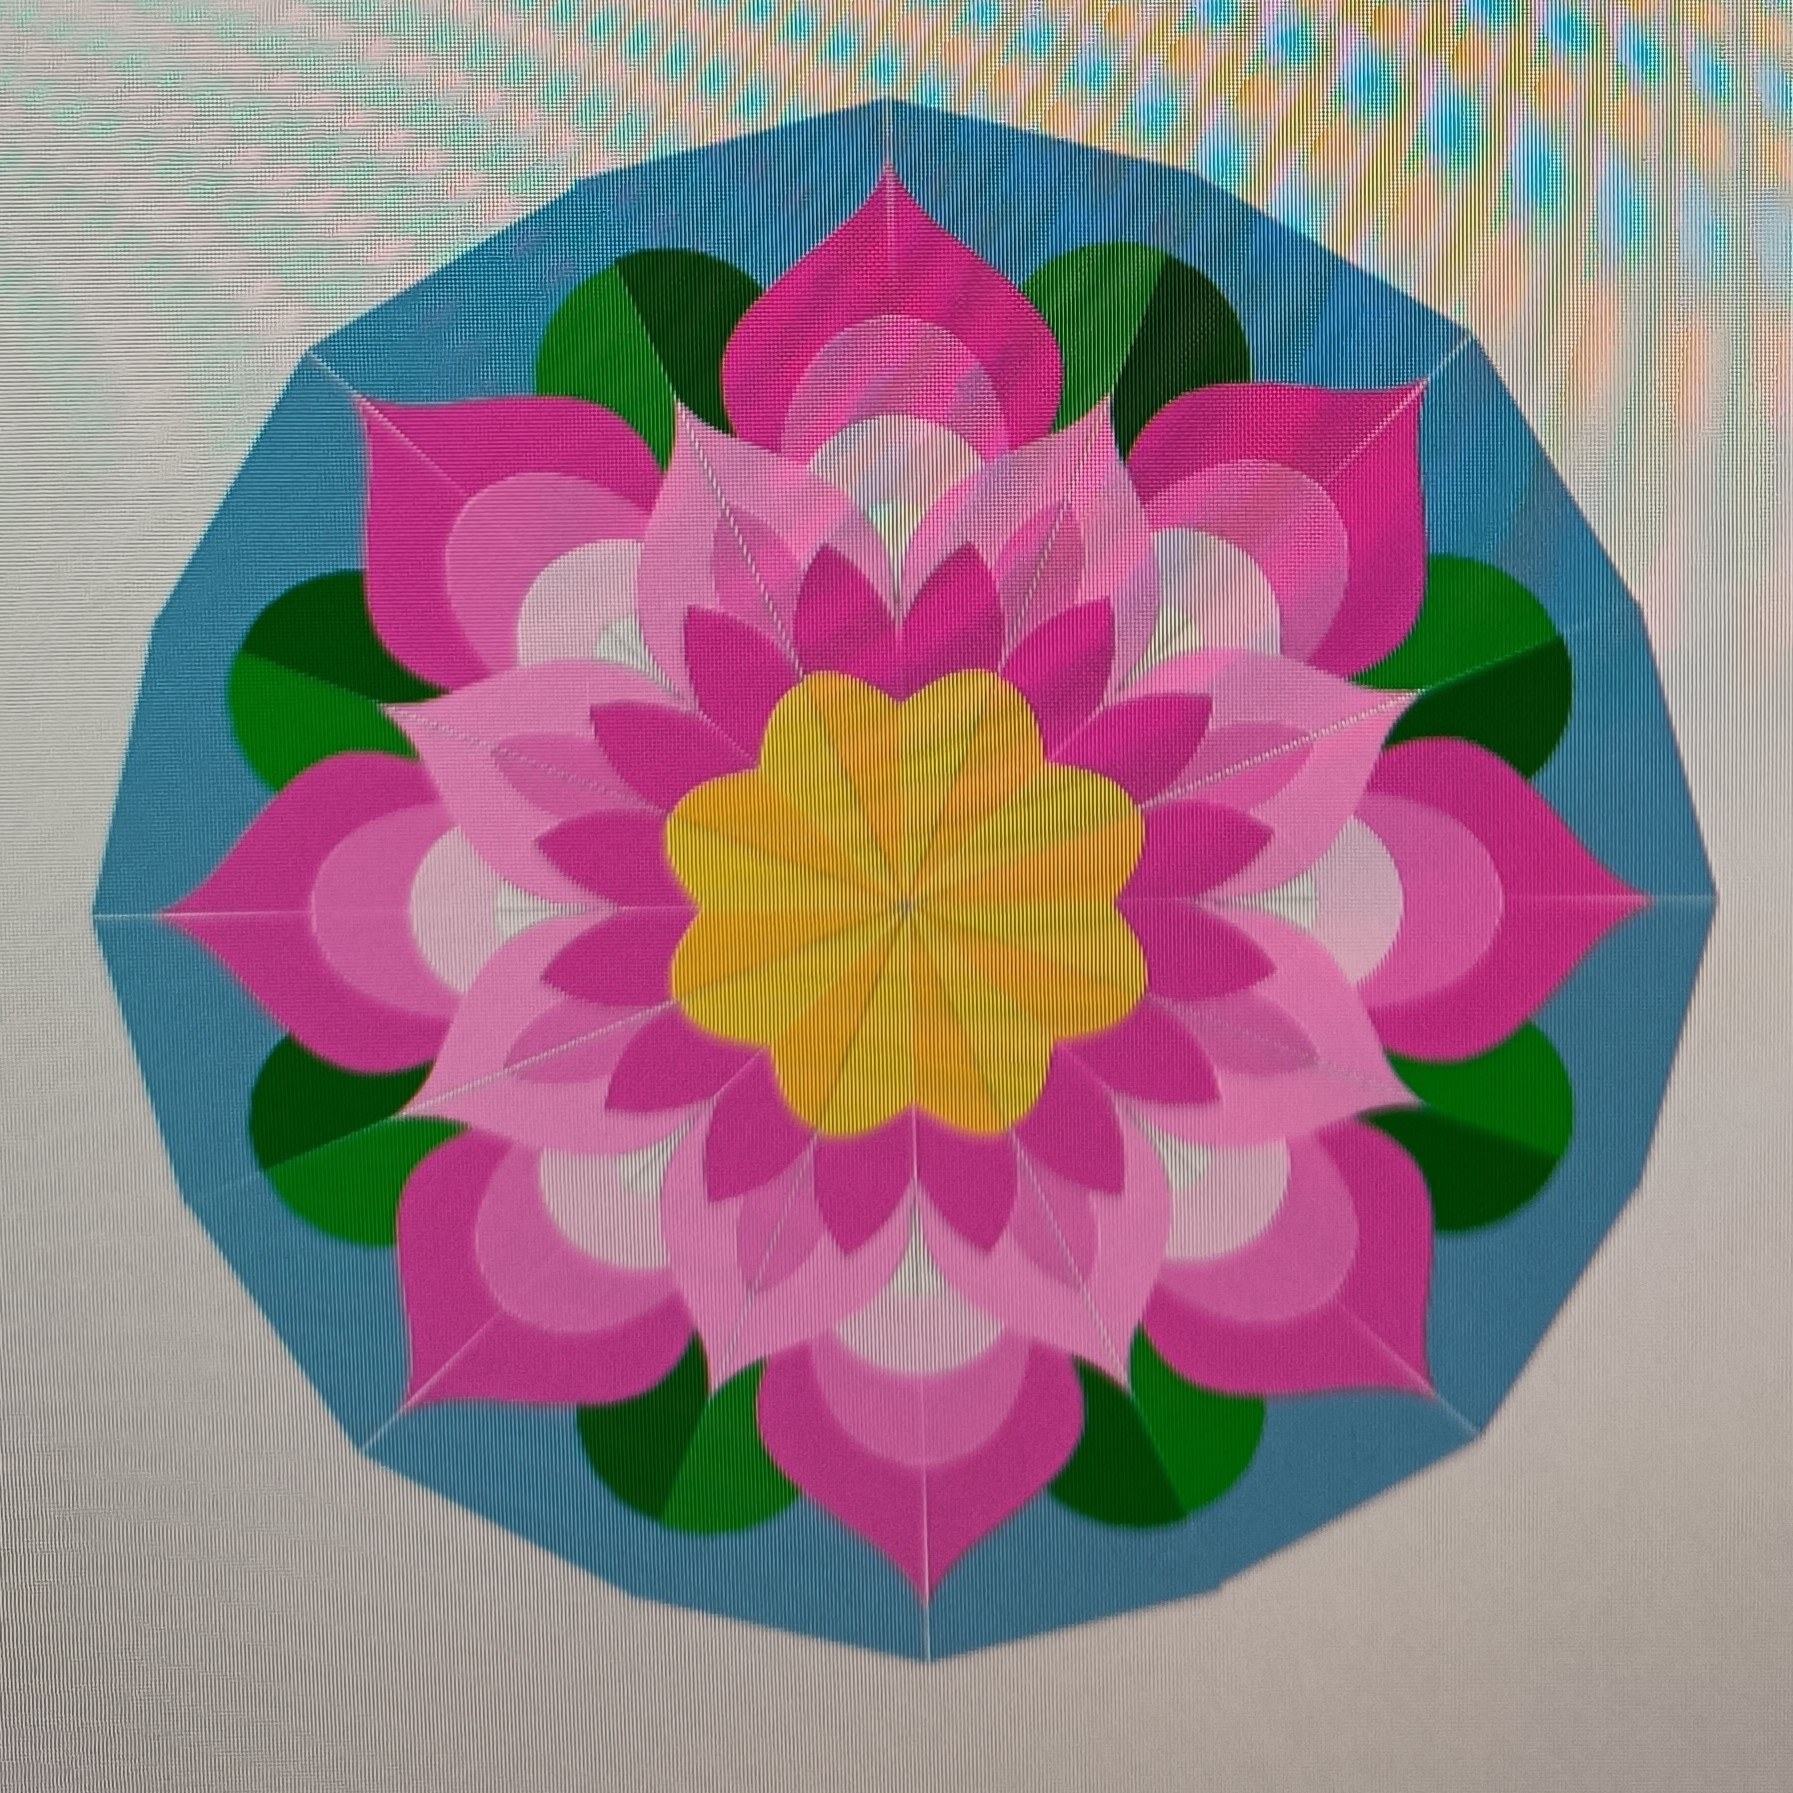
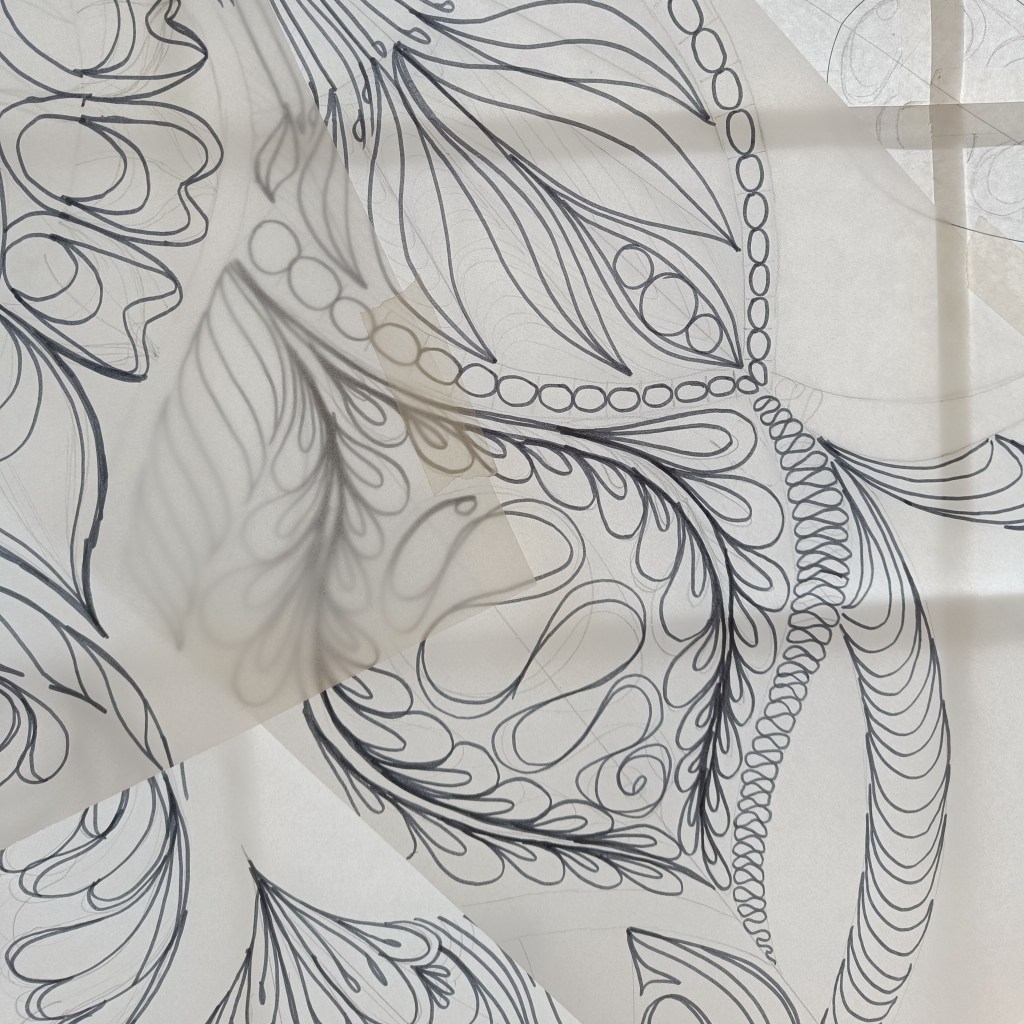
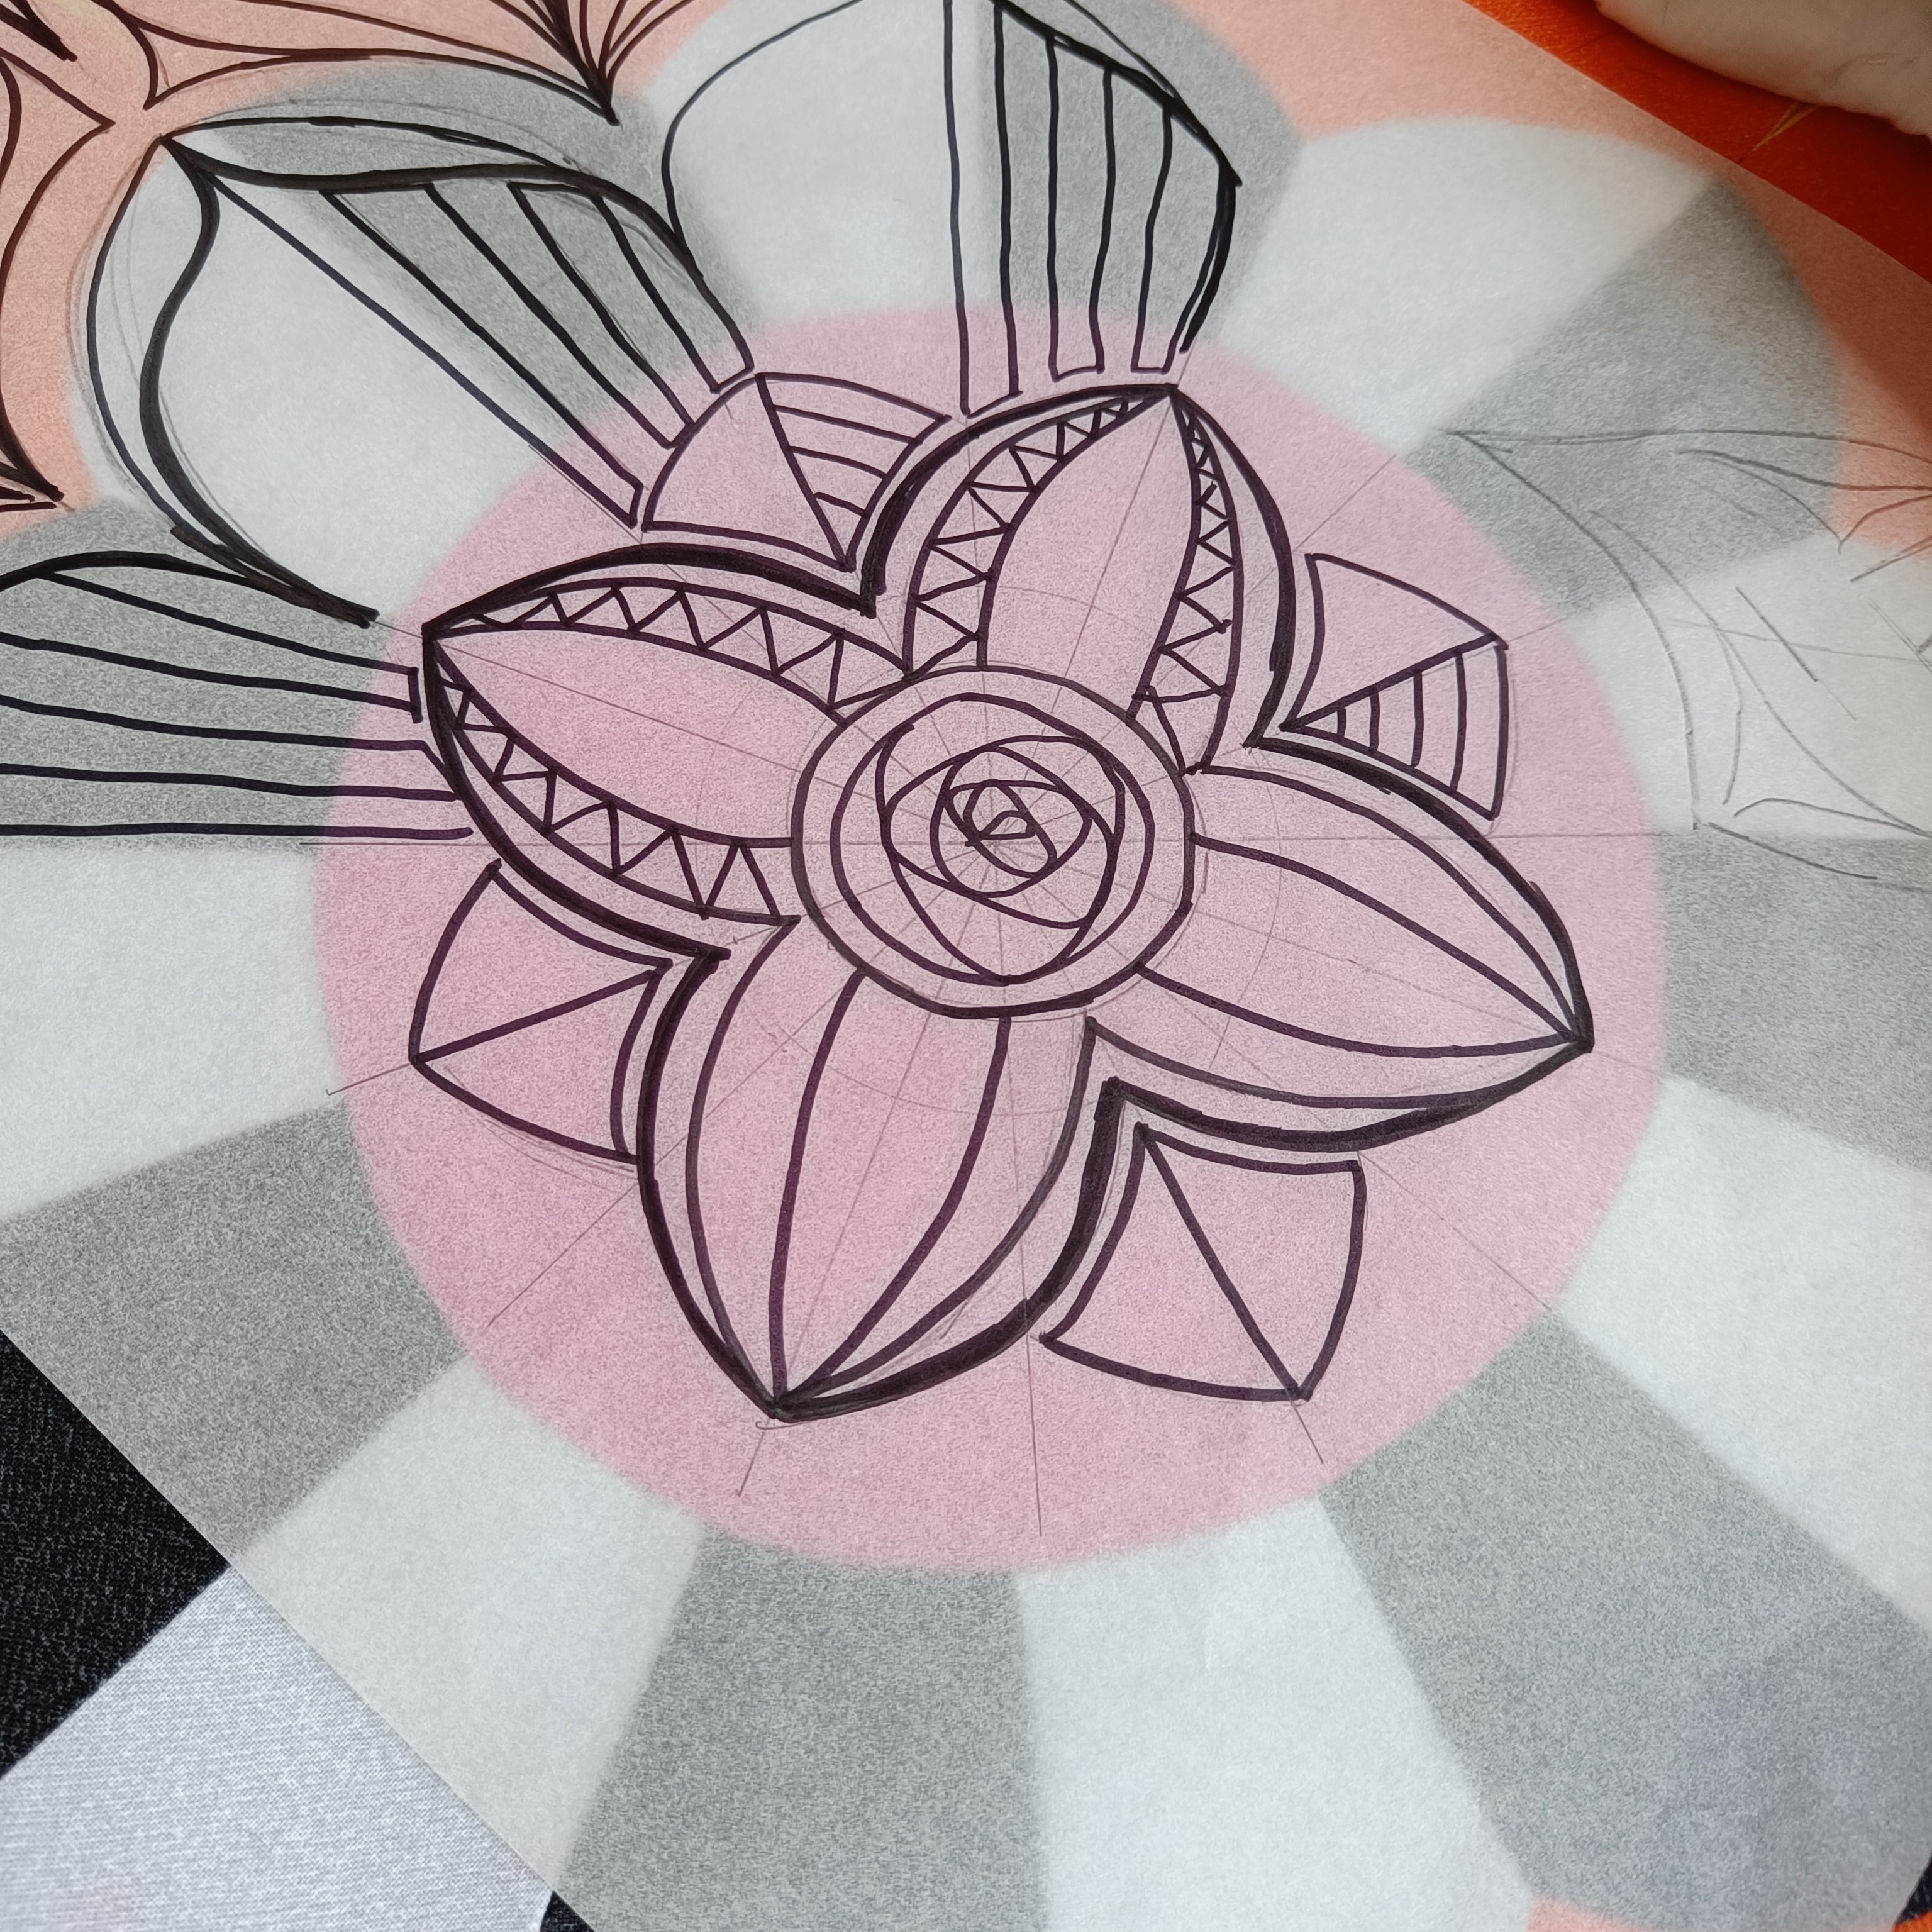
I played around creating a simple line drawing looking at how the octants were reflected and how it looked as a whole. A couple of small changes could dramatically alter the overall look of the Mandala. Once I had a frame work for a mandala I liked I considered how I would make it.
OPTIONS
FREE MOTION QUILTING
Having taken Karlee Porter’s class I felt doing a whole cloth FMQ mandala with multiple thread colours would be possible. Looking around I found some examples but they didn’t have the depth of colour I love with one background colour.
I also felt that this would only focus on one technique and I wanted more of a challenge. I wanted the FMQ to be the icing on the cake so to speak.
FOUNDTION PAPER PIECIED
After a quick attempt at converting my line drawing with lots of curves to FPP templates, I determined it would result in a truly excessive number of seams. It wouldn’t have a clean look I wanted for quilting and require an excessive amount of fabric.
Deciding not to use this construction method also allowed me to shed a majority of the anxiety I had about the comparison between last year’s quilt and this.
With probably some naivety and stubbornness I decided that curved piecing would be possible. I looked around for similar patterns of Mandalas using this method but found very few, it dawned on me then that maybe I was being too confident. I tweaked my mandala framework so the radius of the curves were in general larger than a 5″ diameter circle I was confident I could sew. I worked out the order in which I could sew the seams to end up with octants.
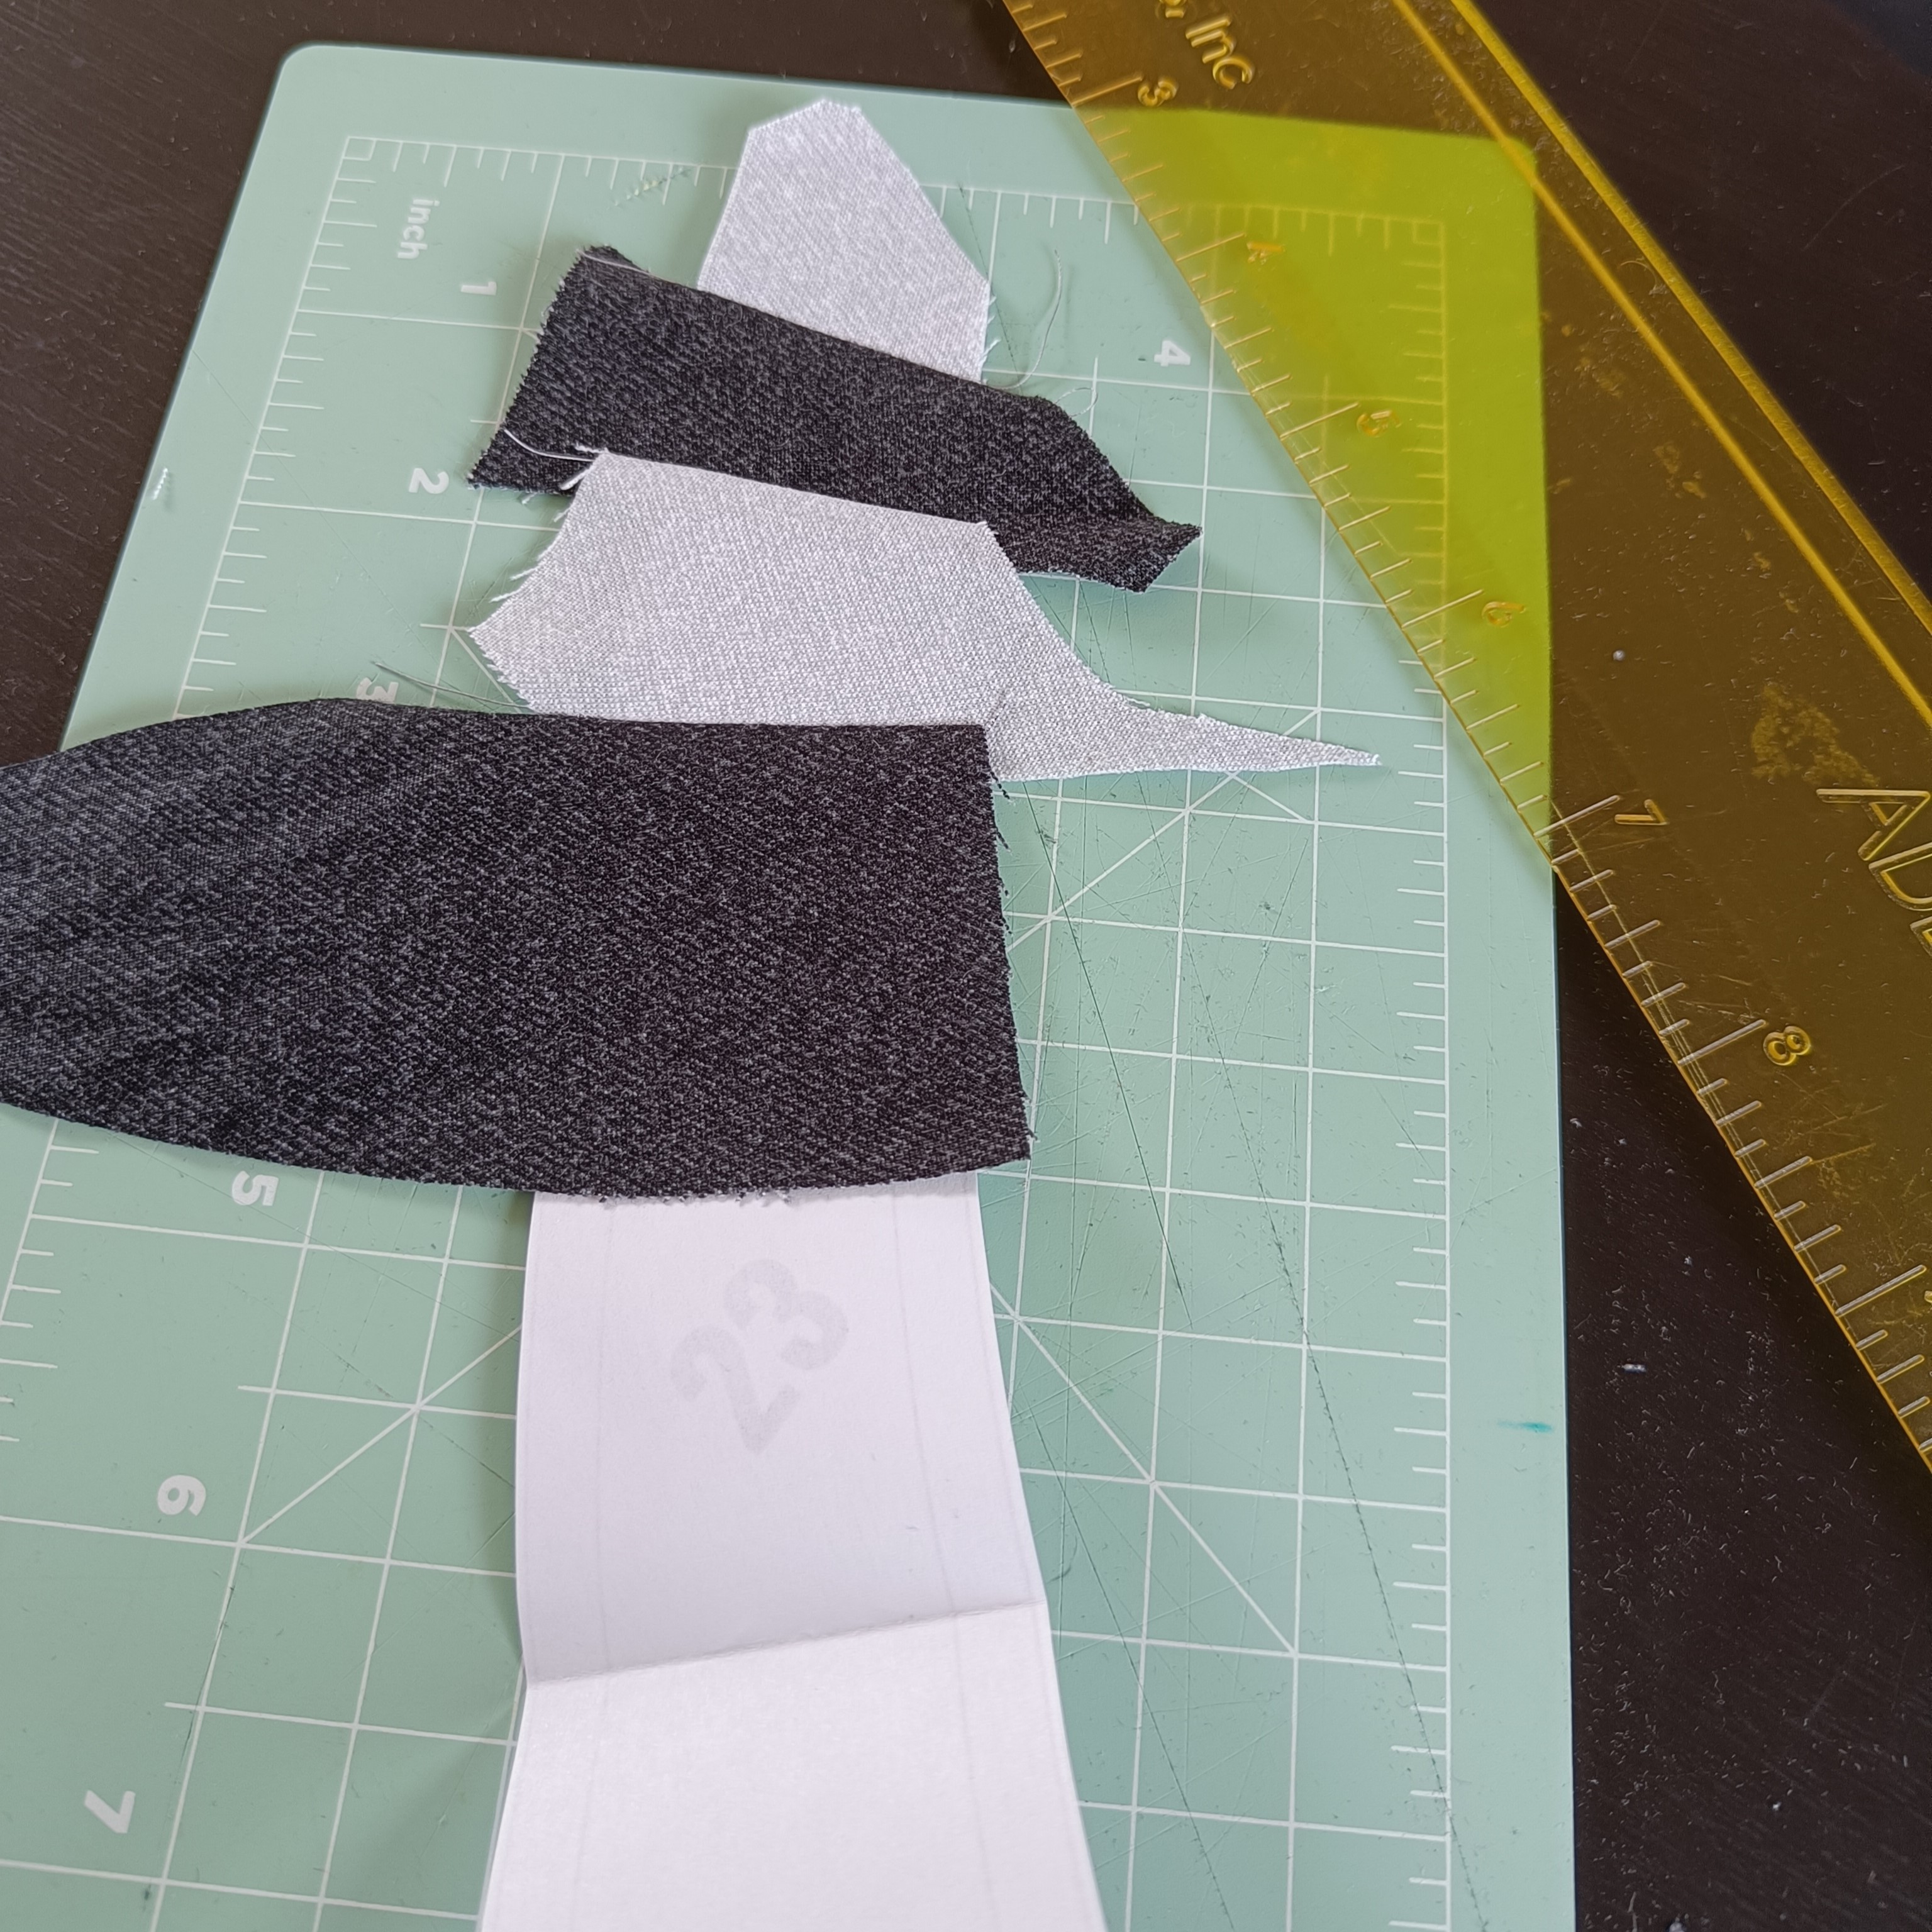
IS IT EVEN POSSIBLE?
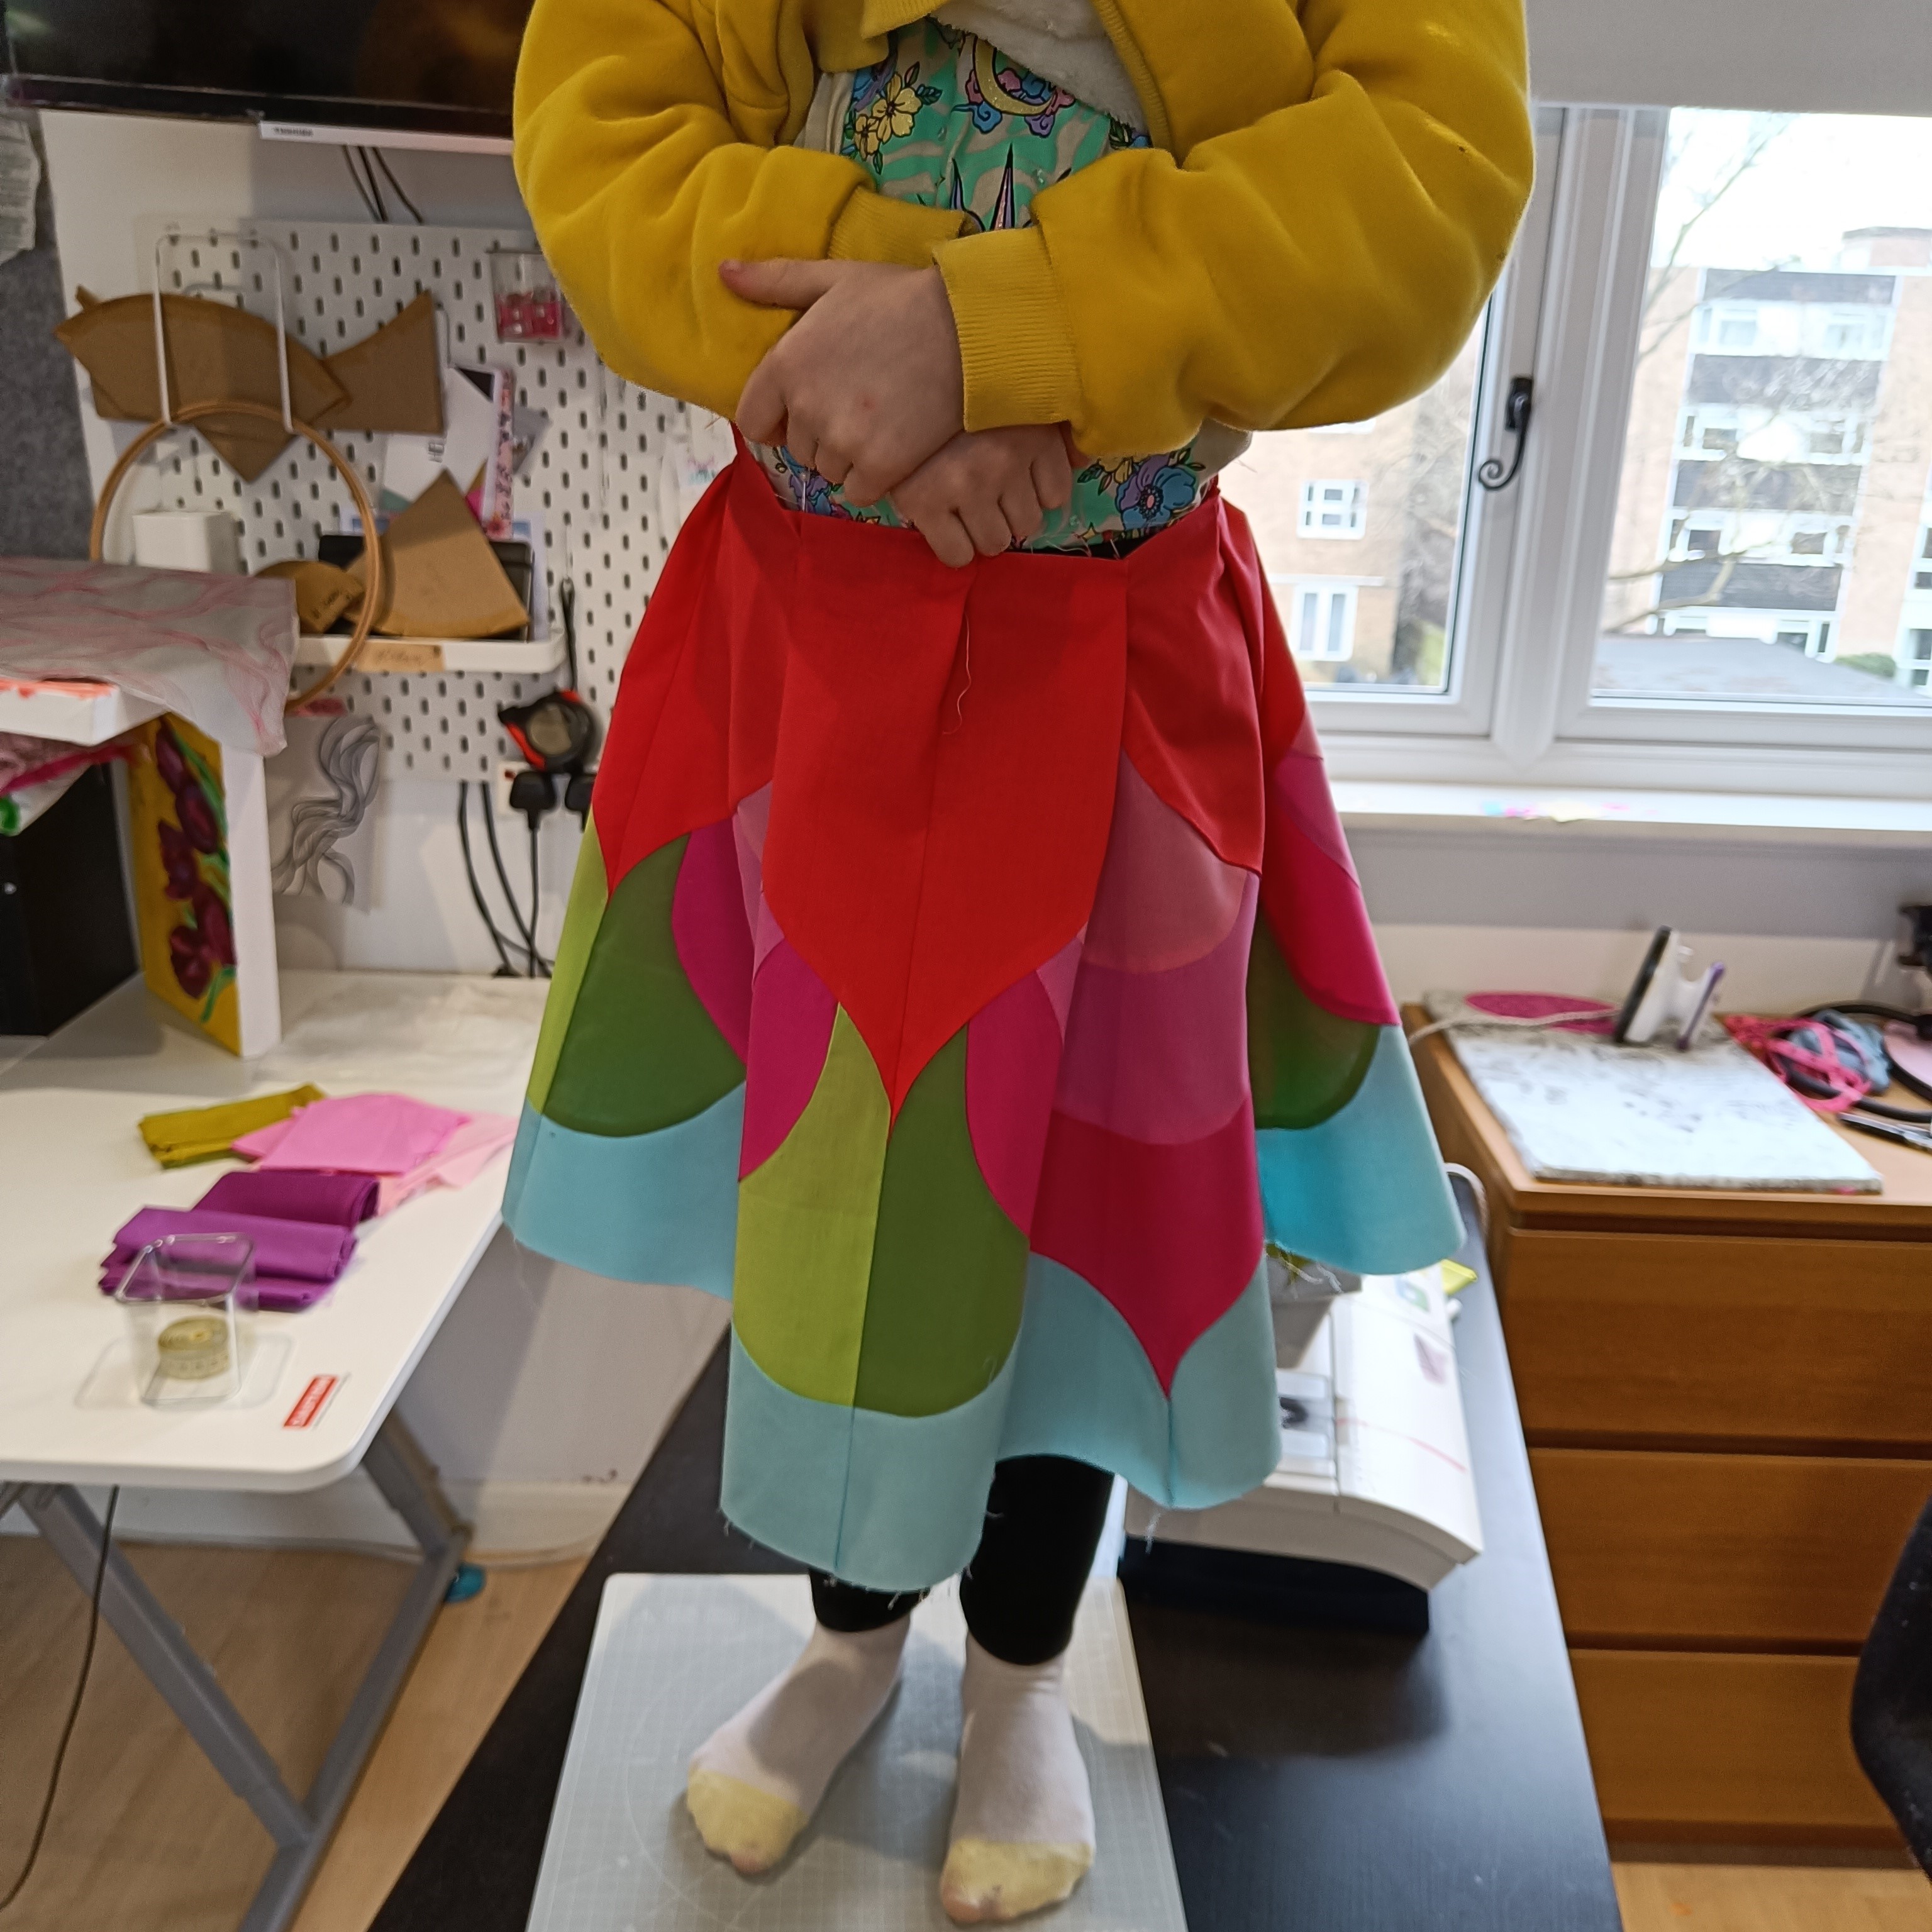
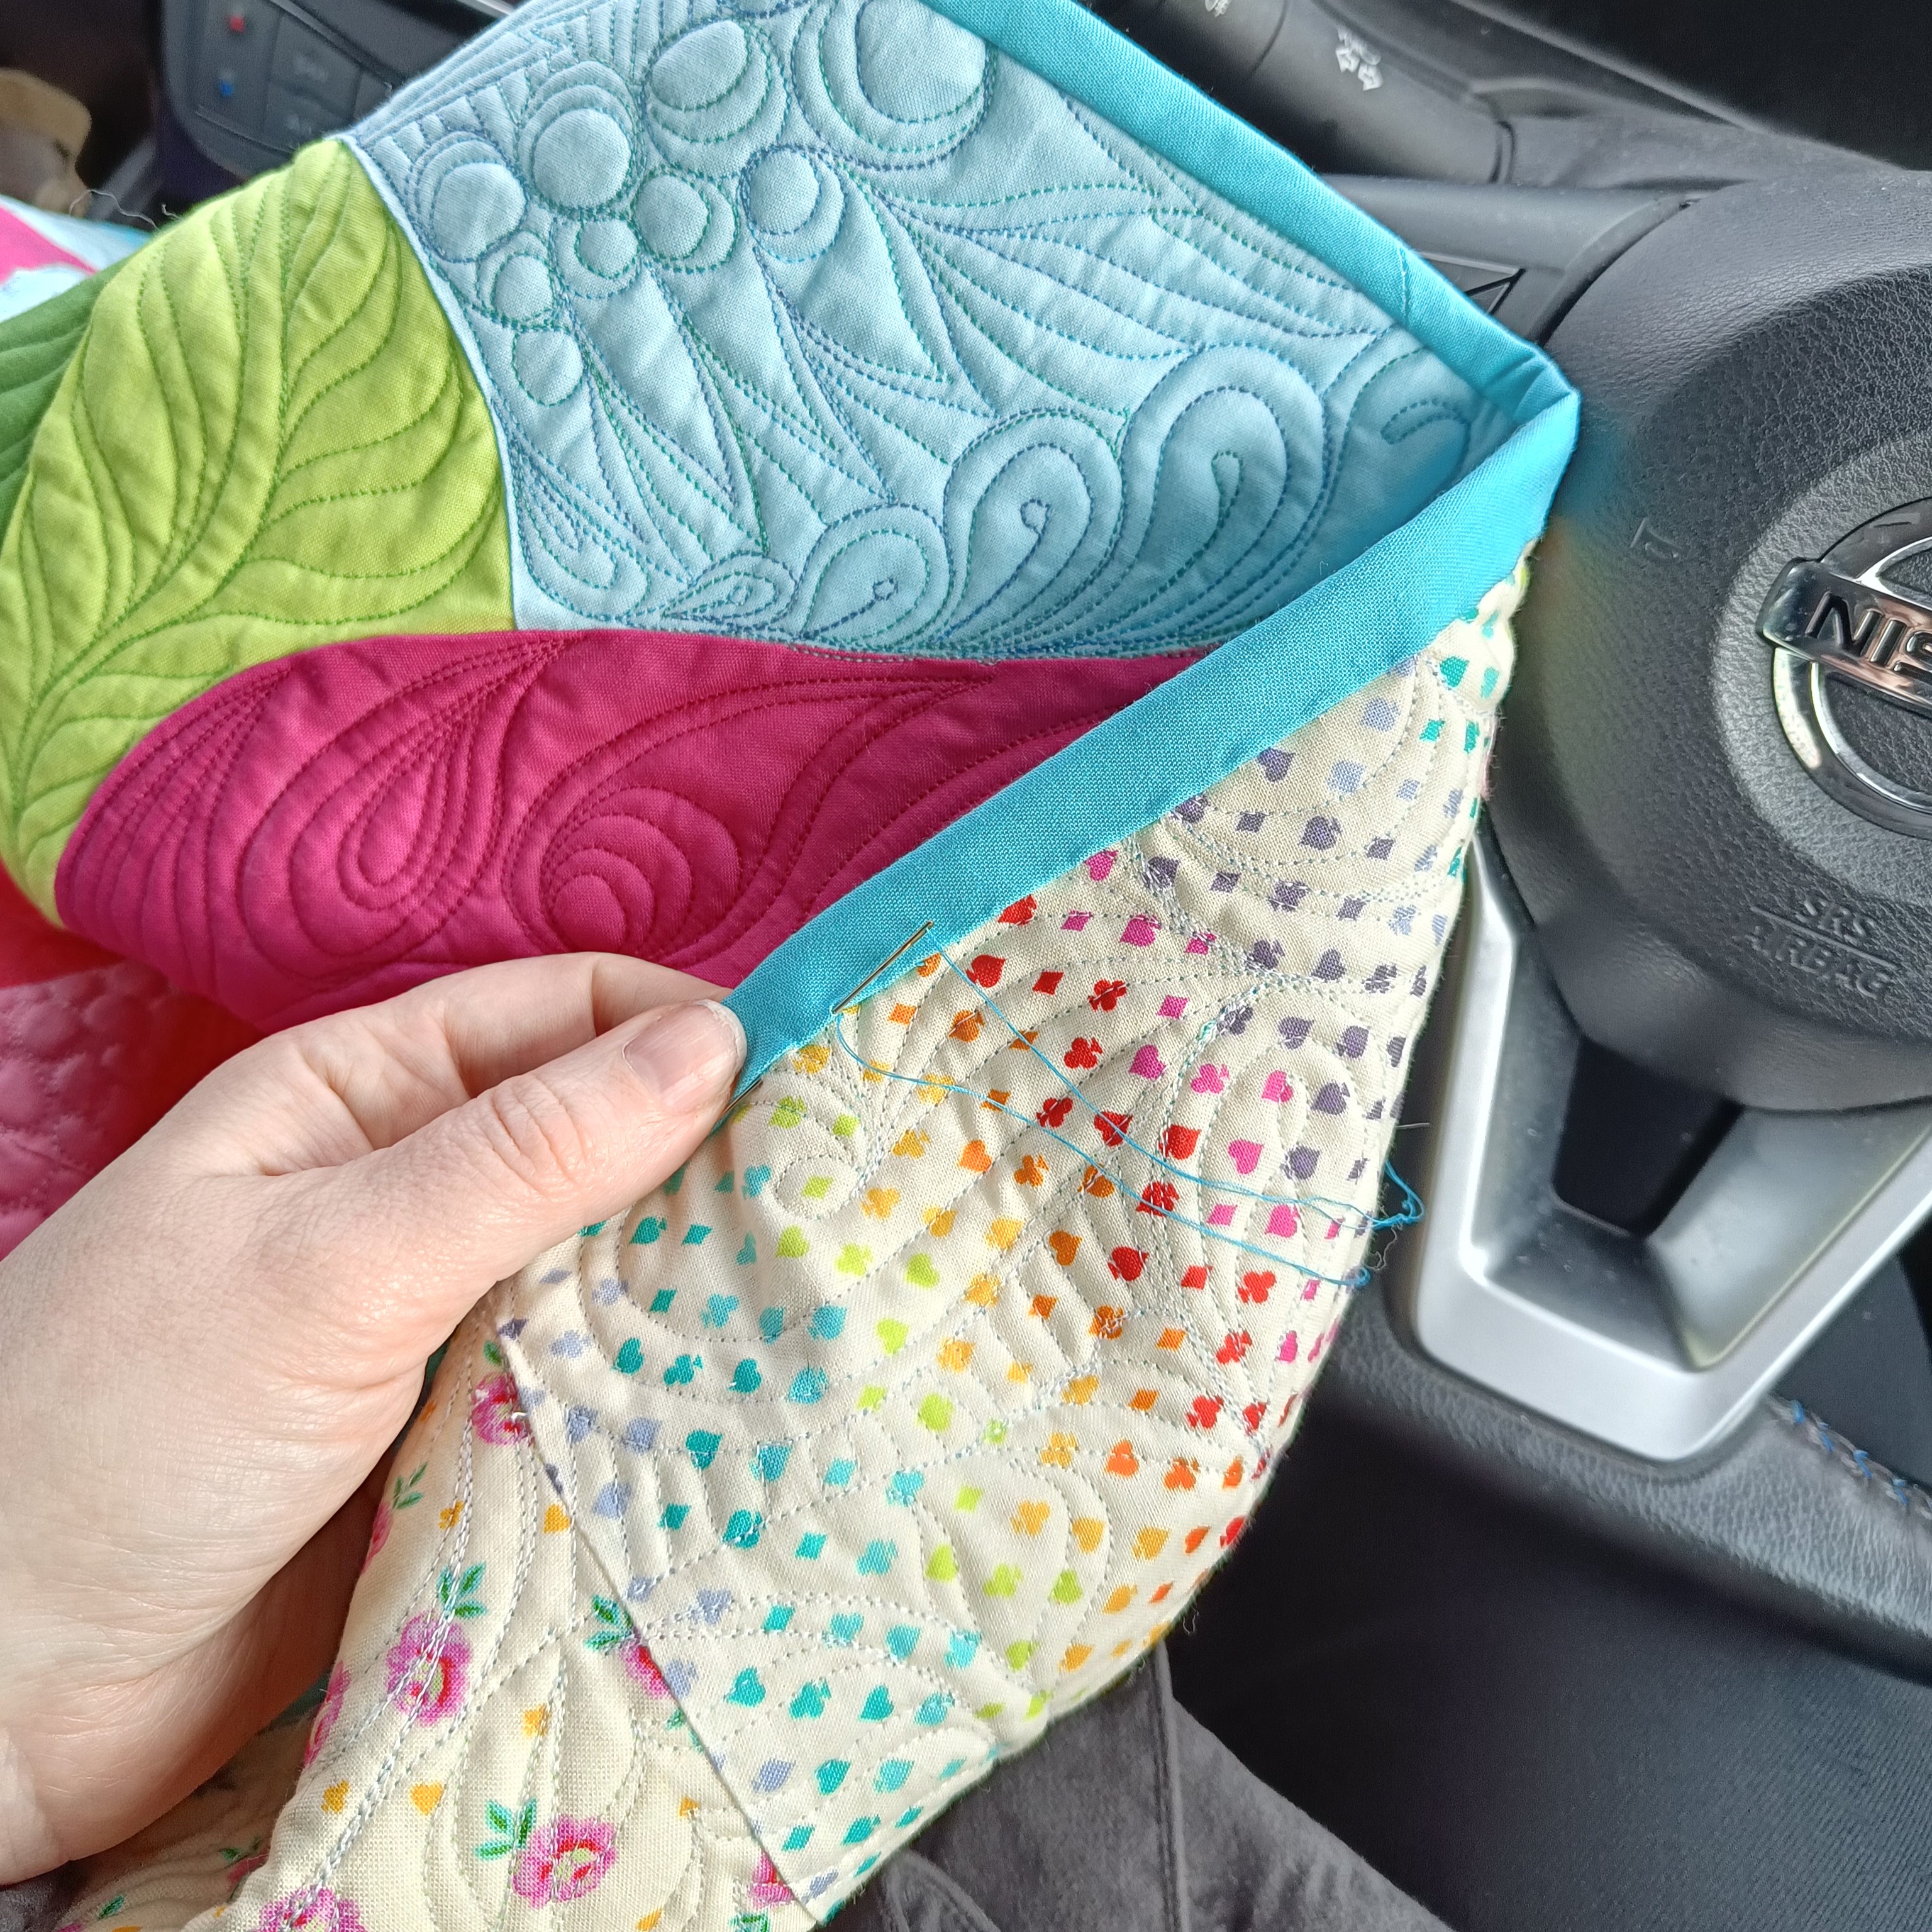
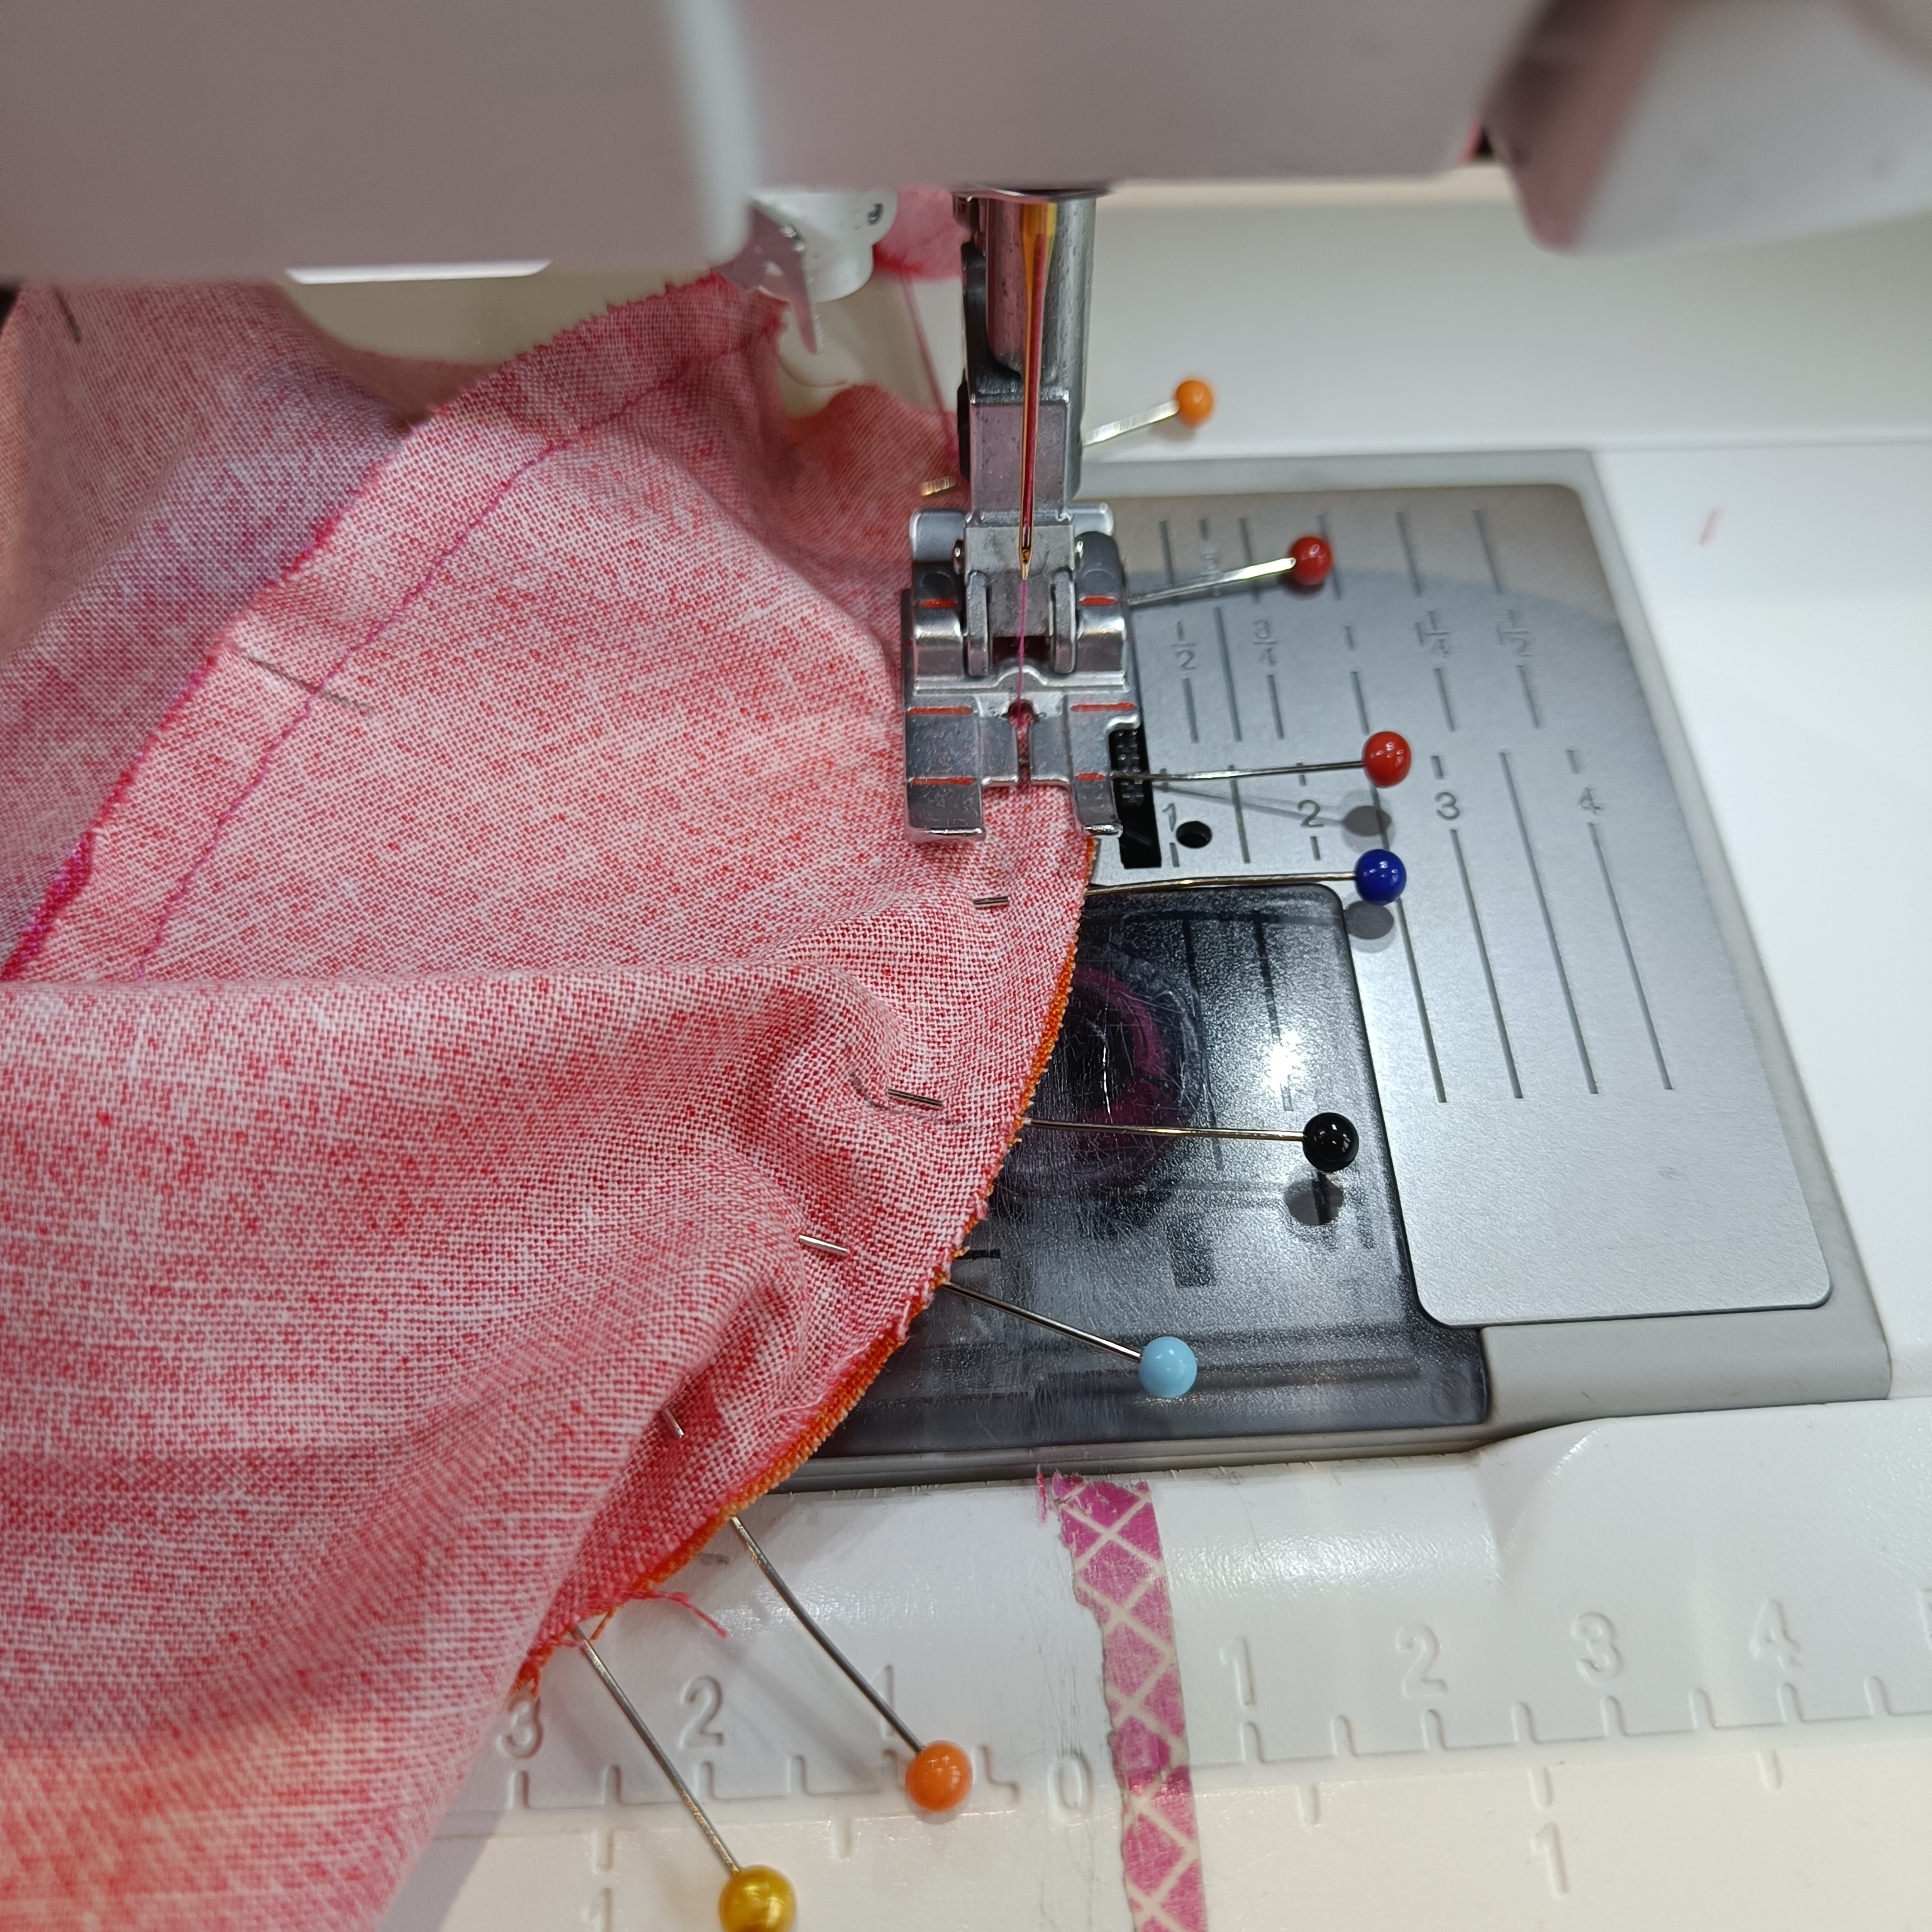
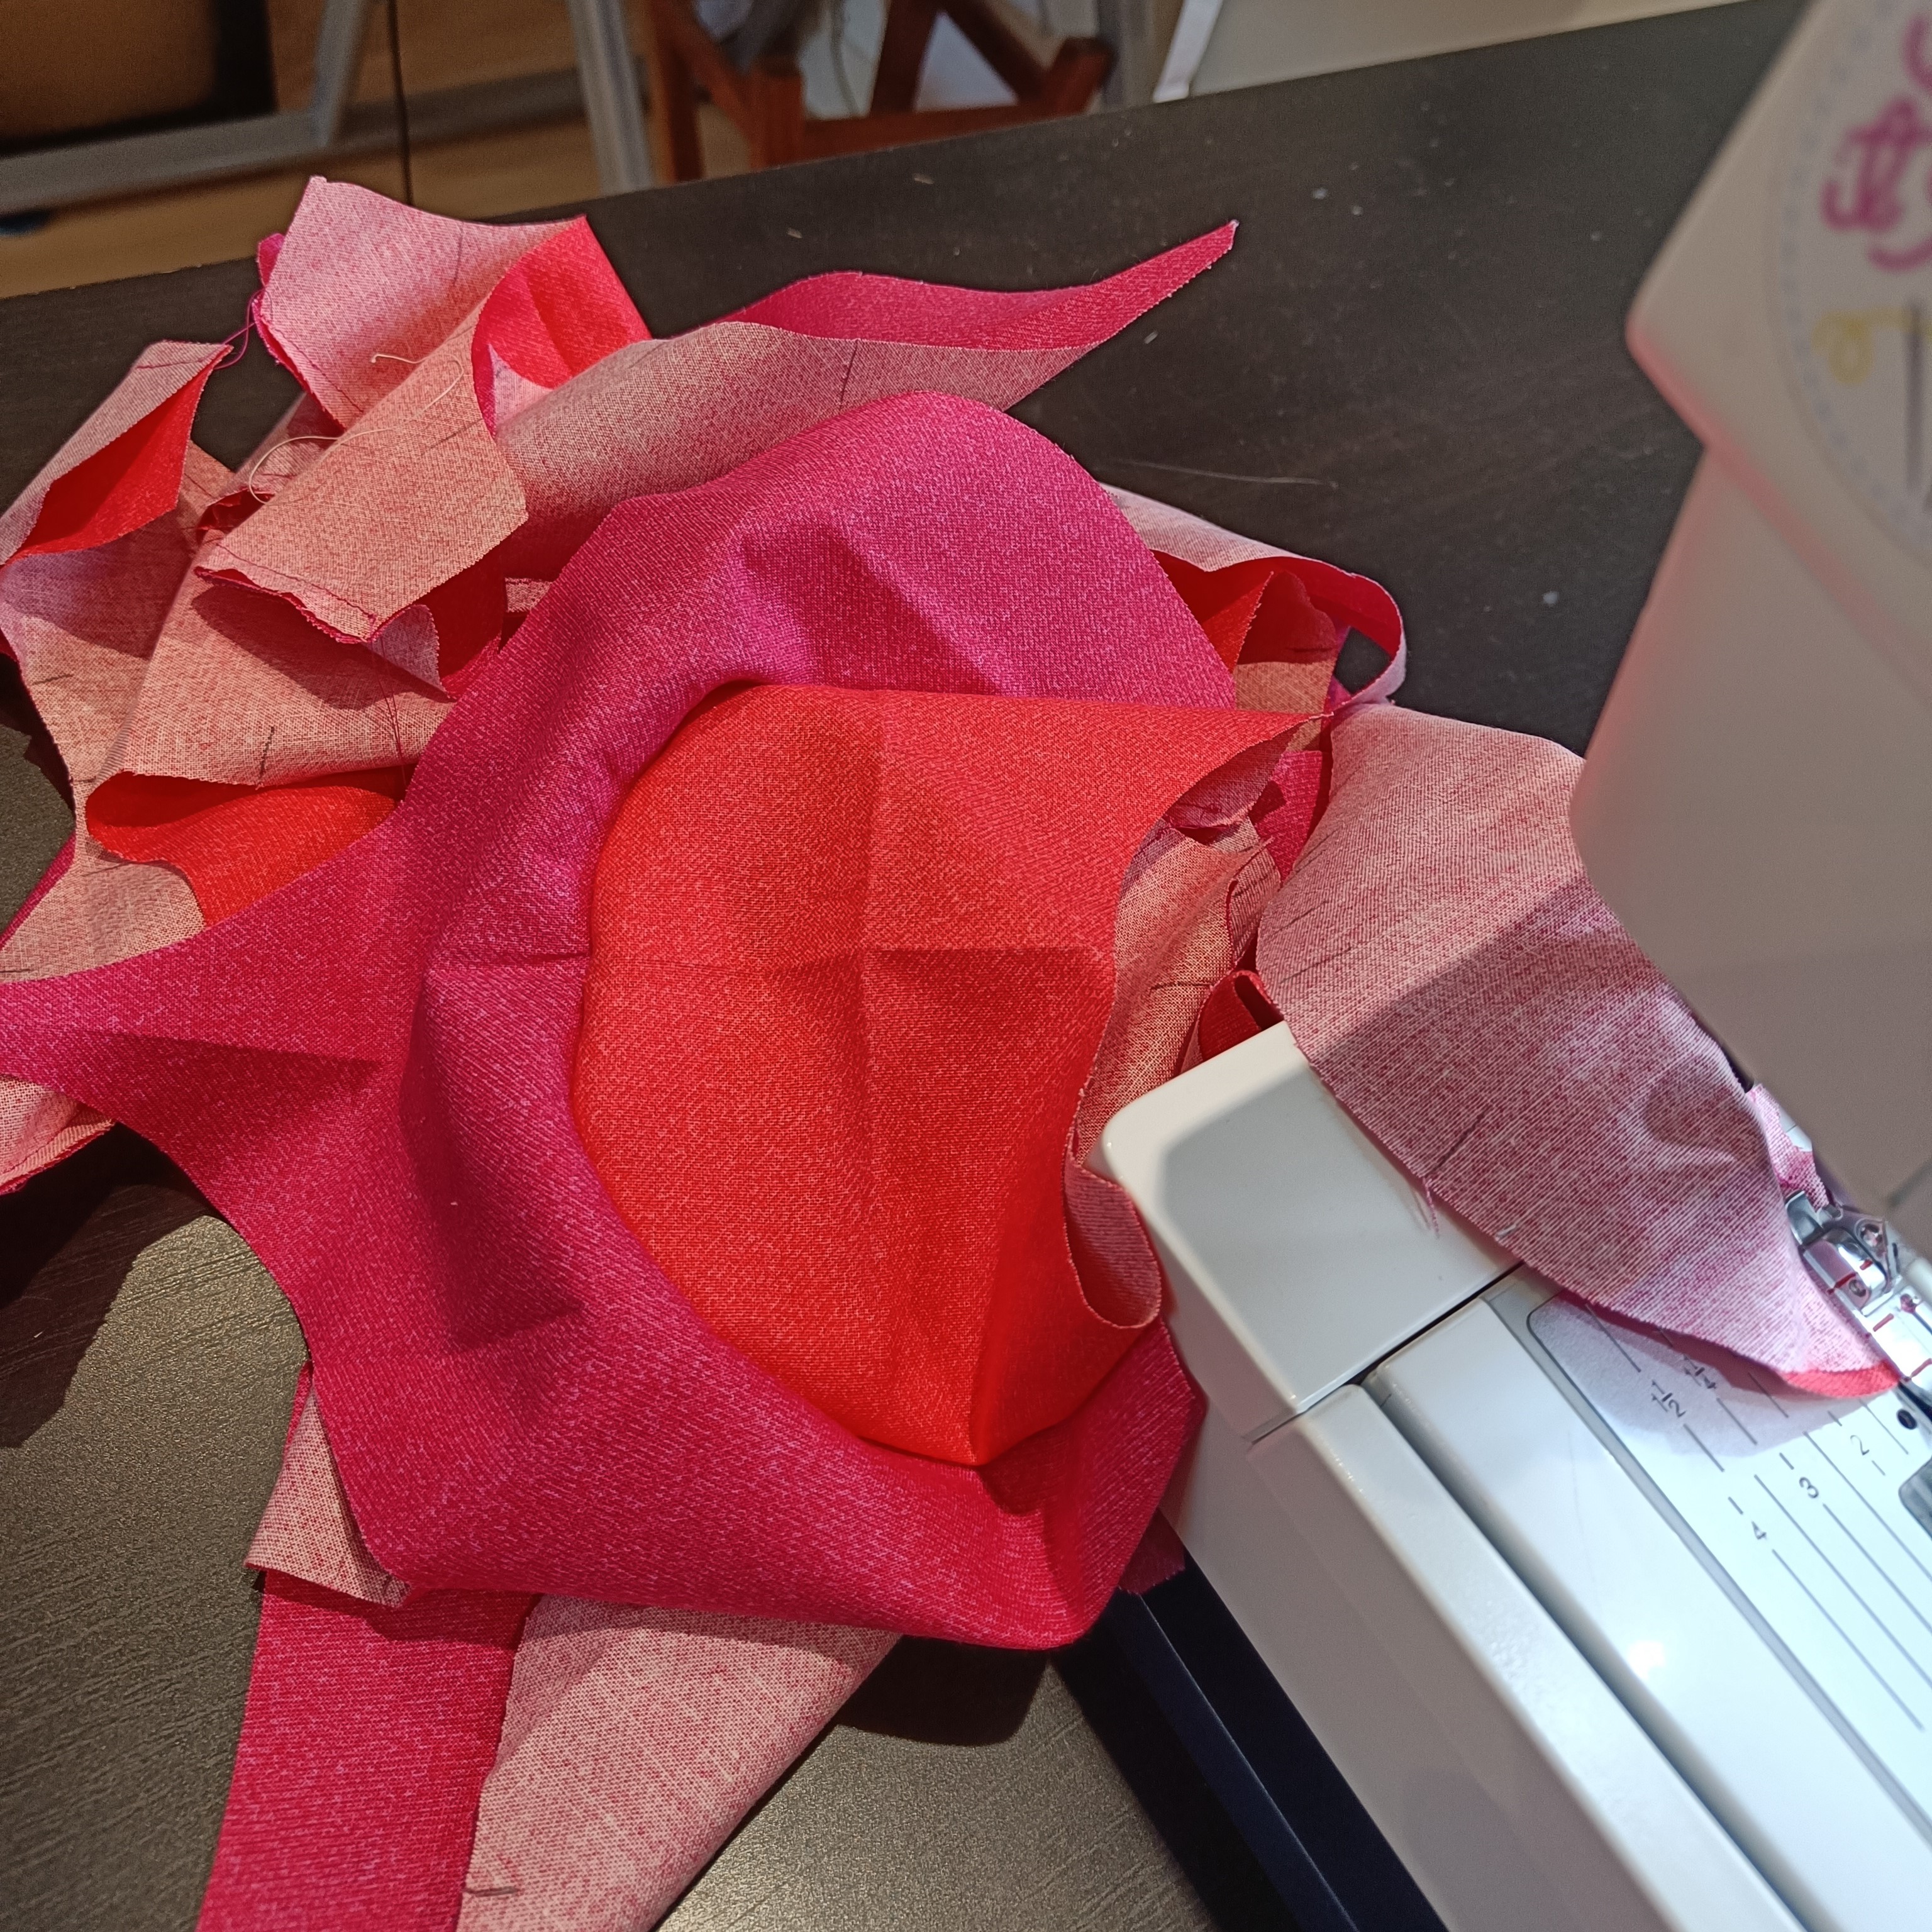
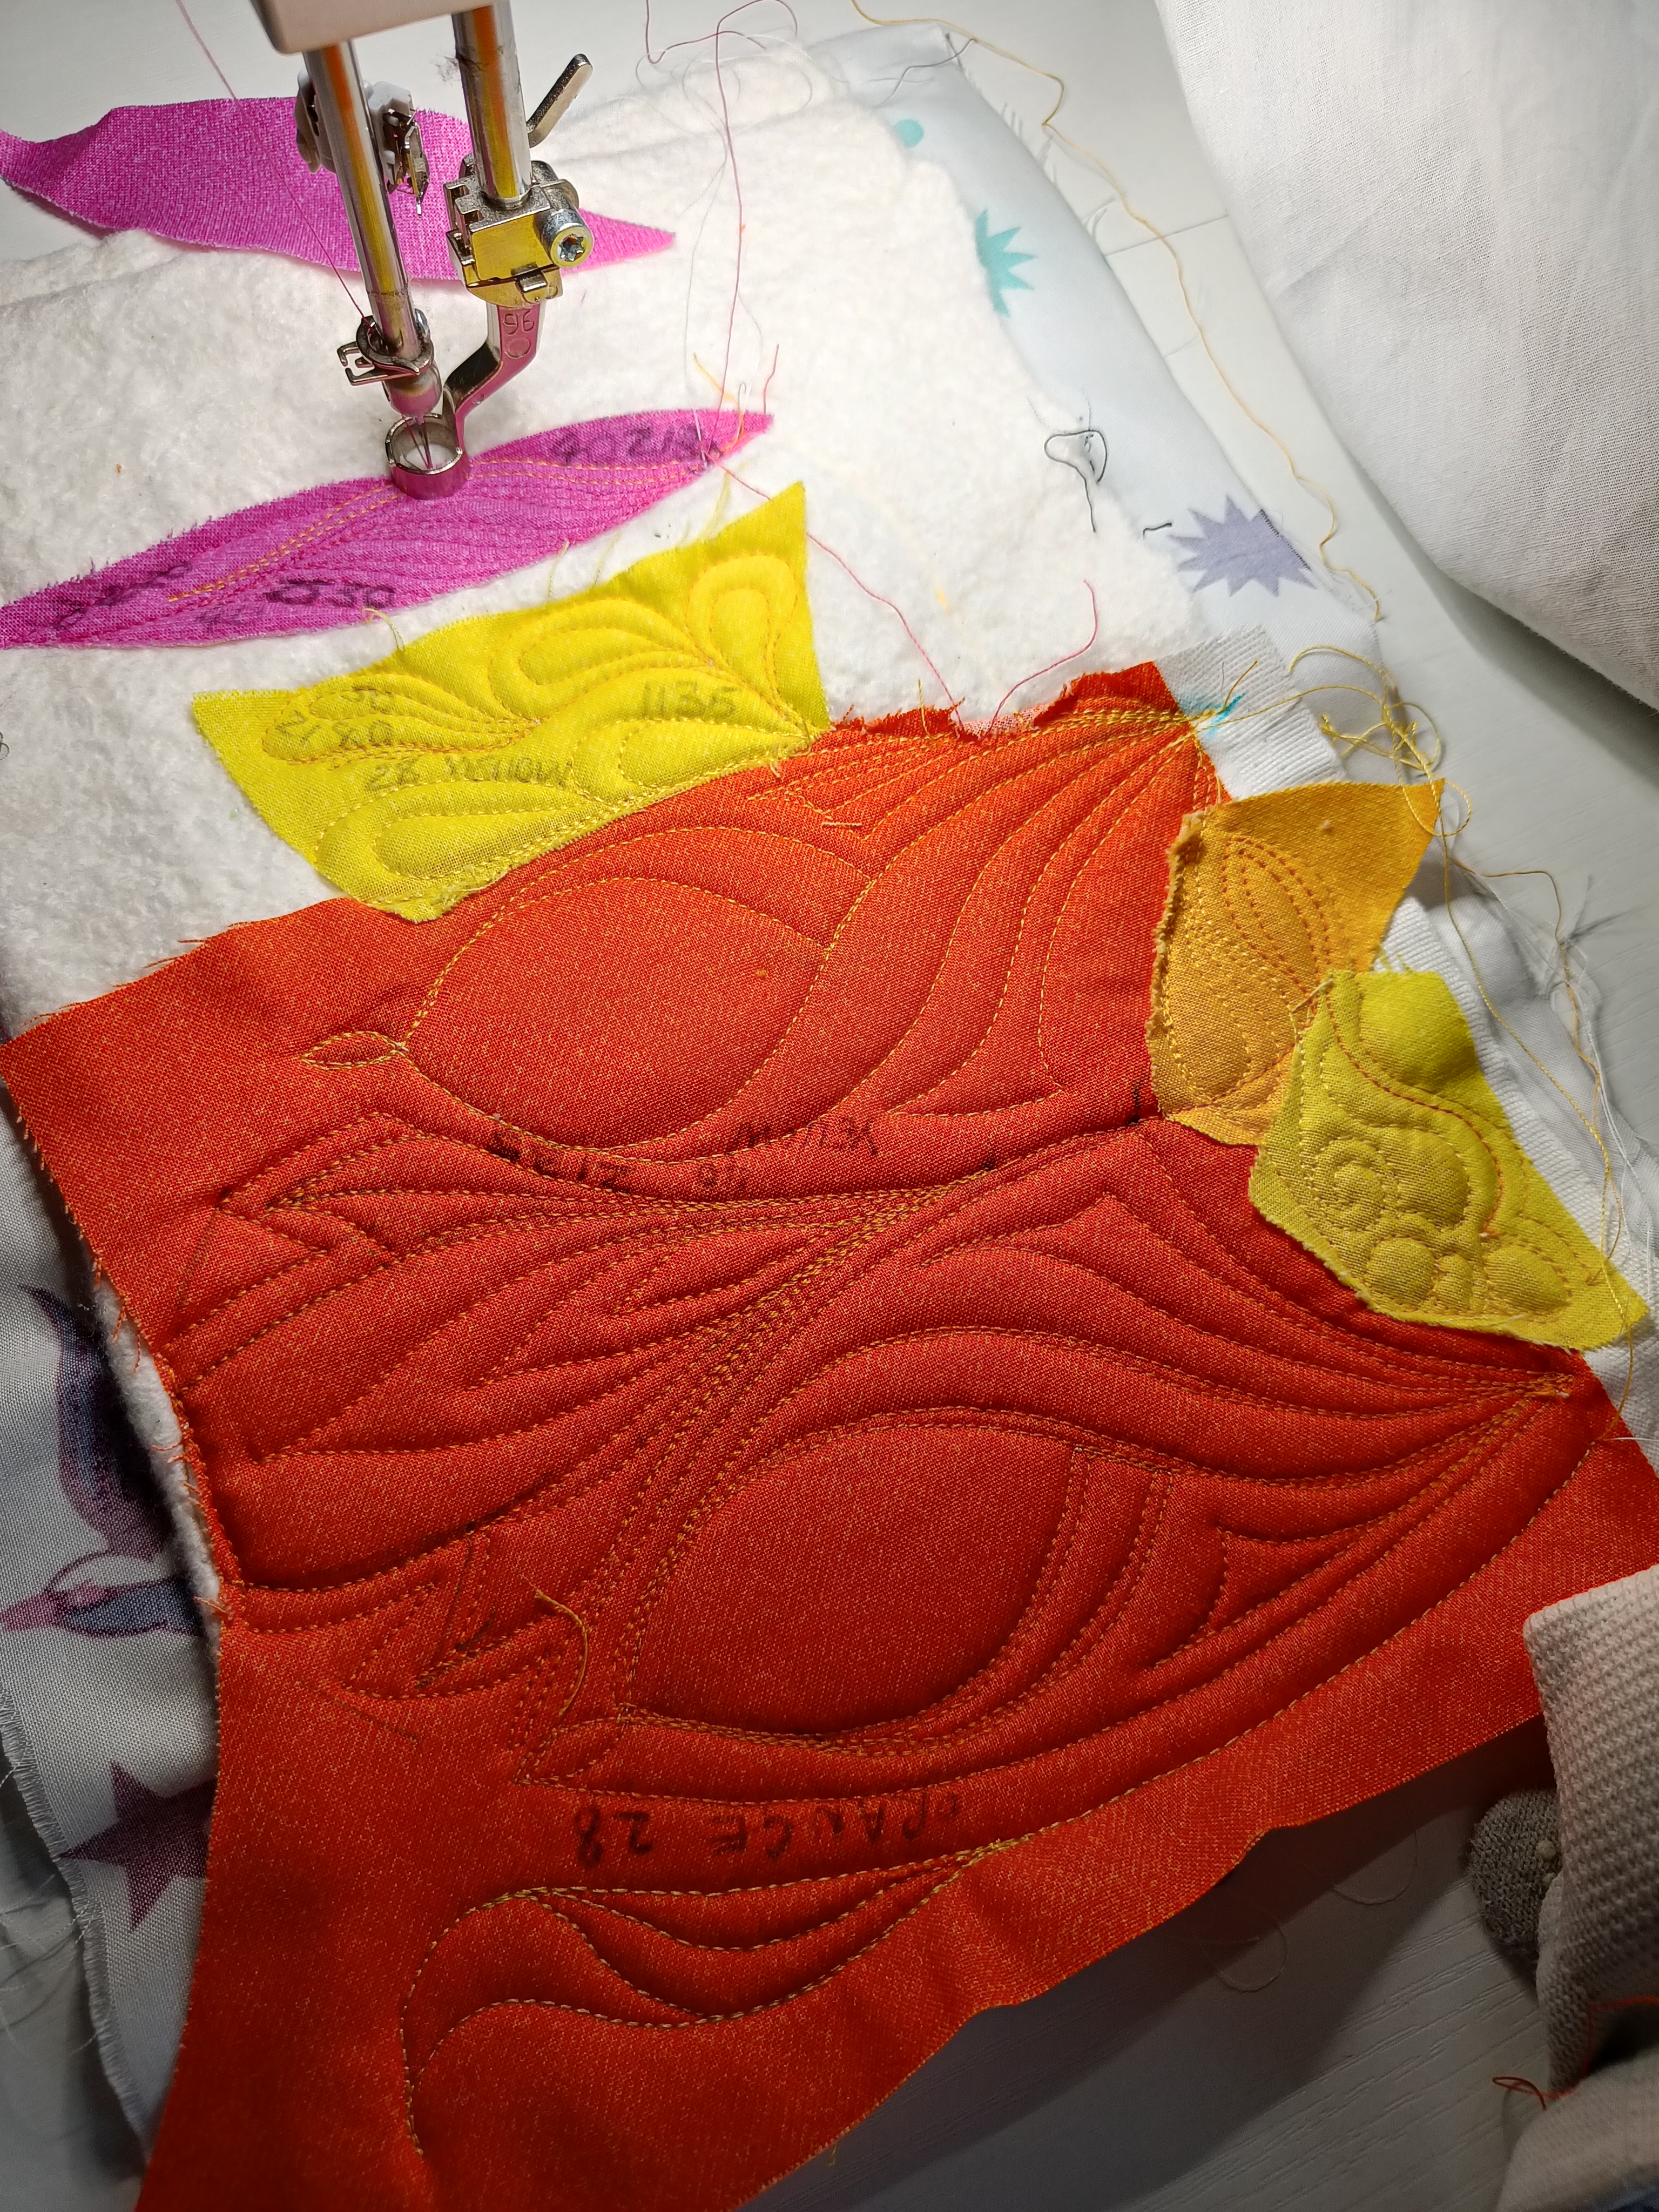
Unusually for me I did the grown up thing and decided not to jump straight in a hope for the best but to test to see if I could piece these curves I thought in theory would work. Grabbing solids from my stash I gave it a go not a whole quilt just 4 octants.
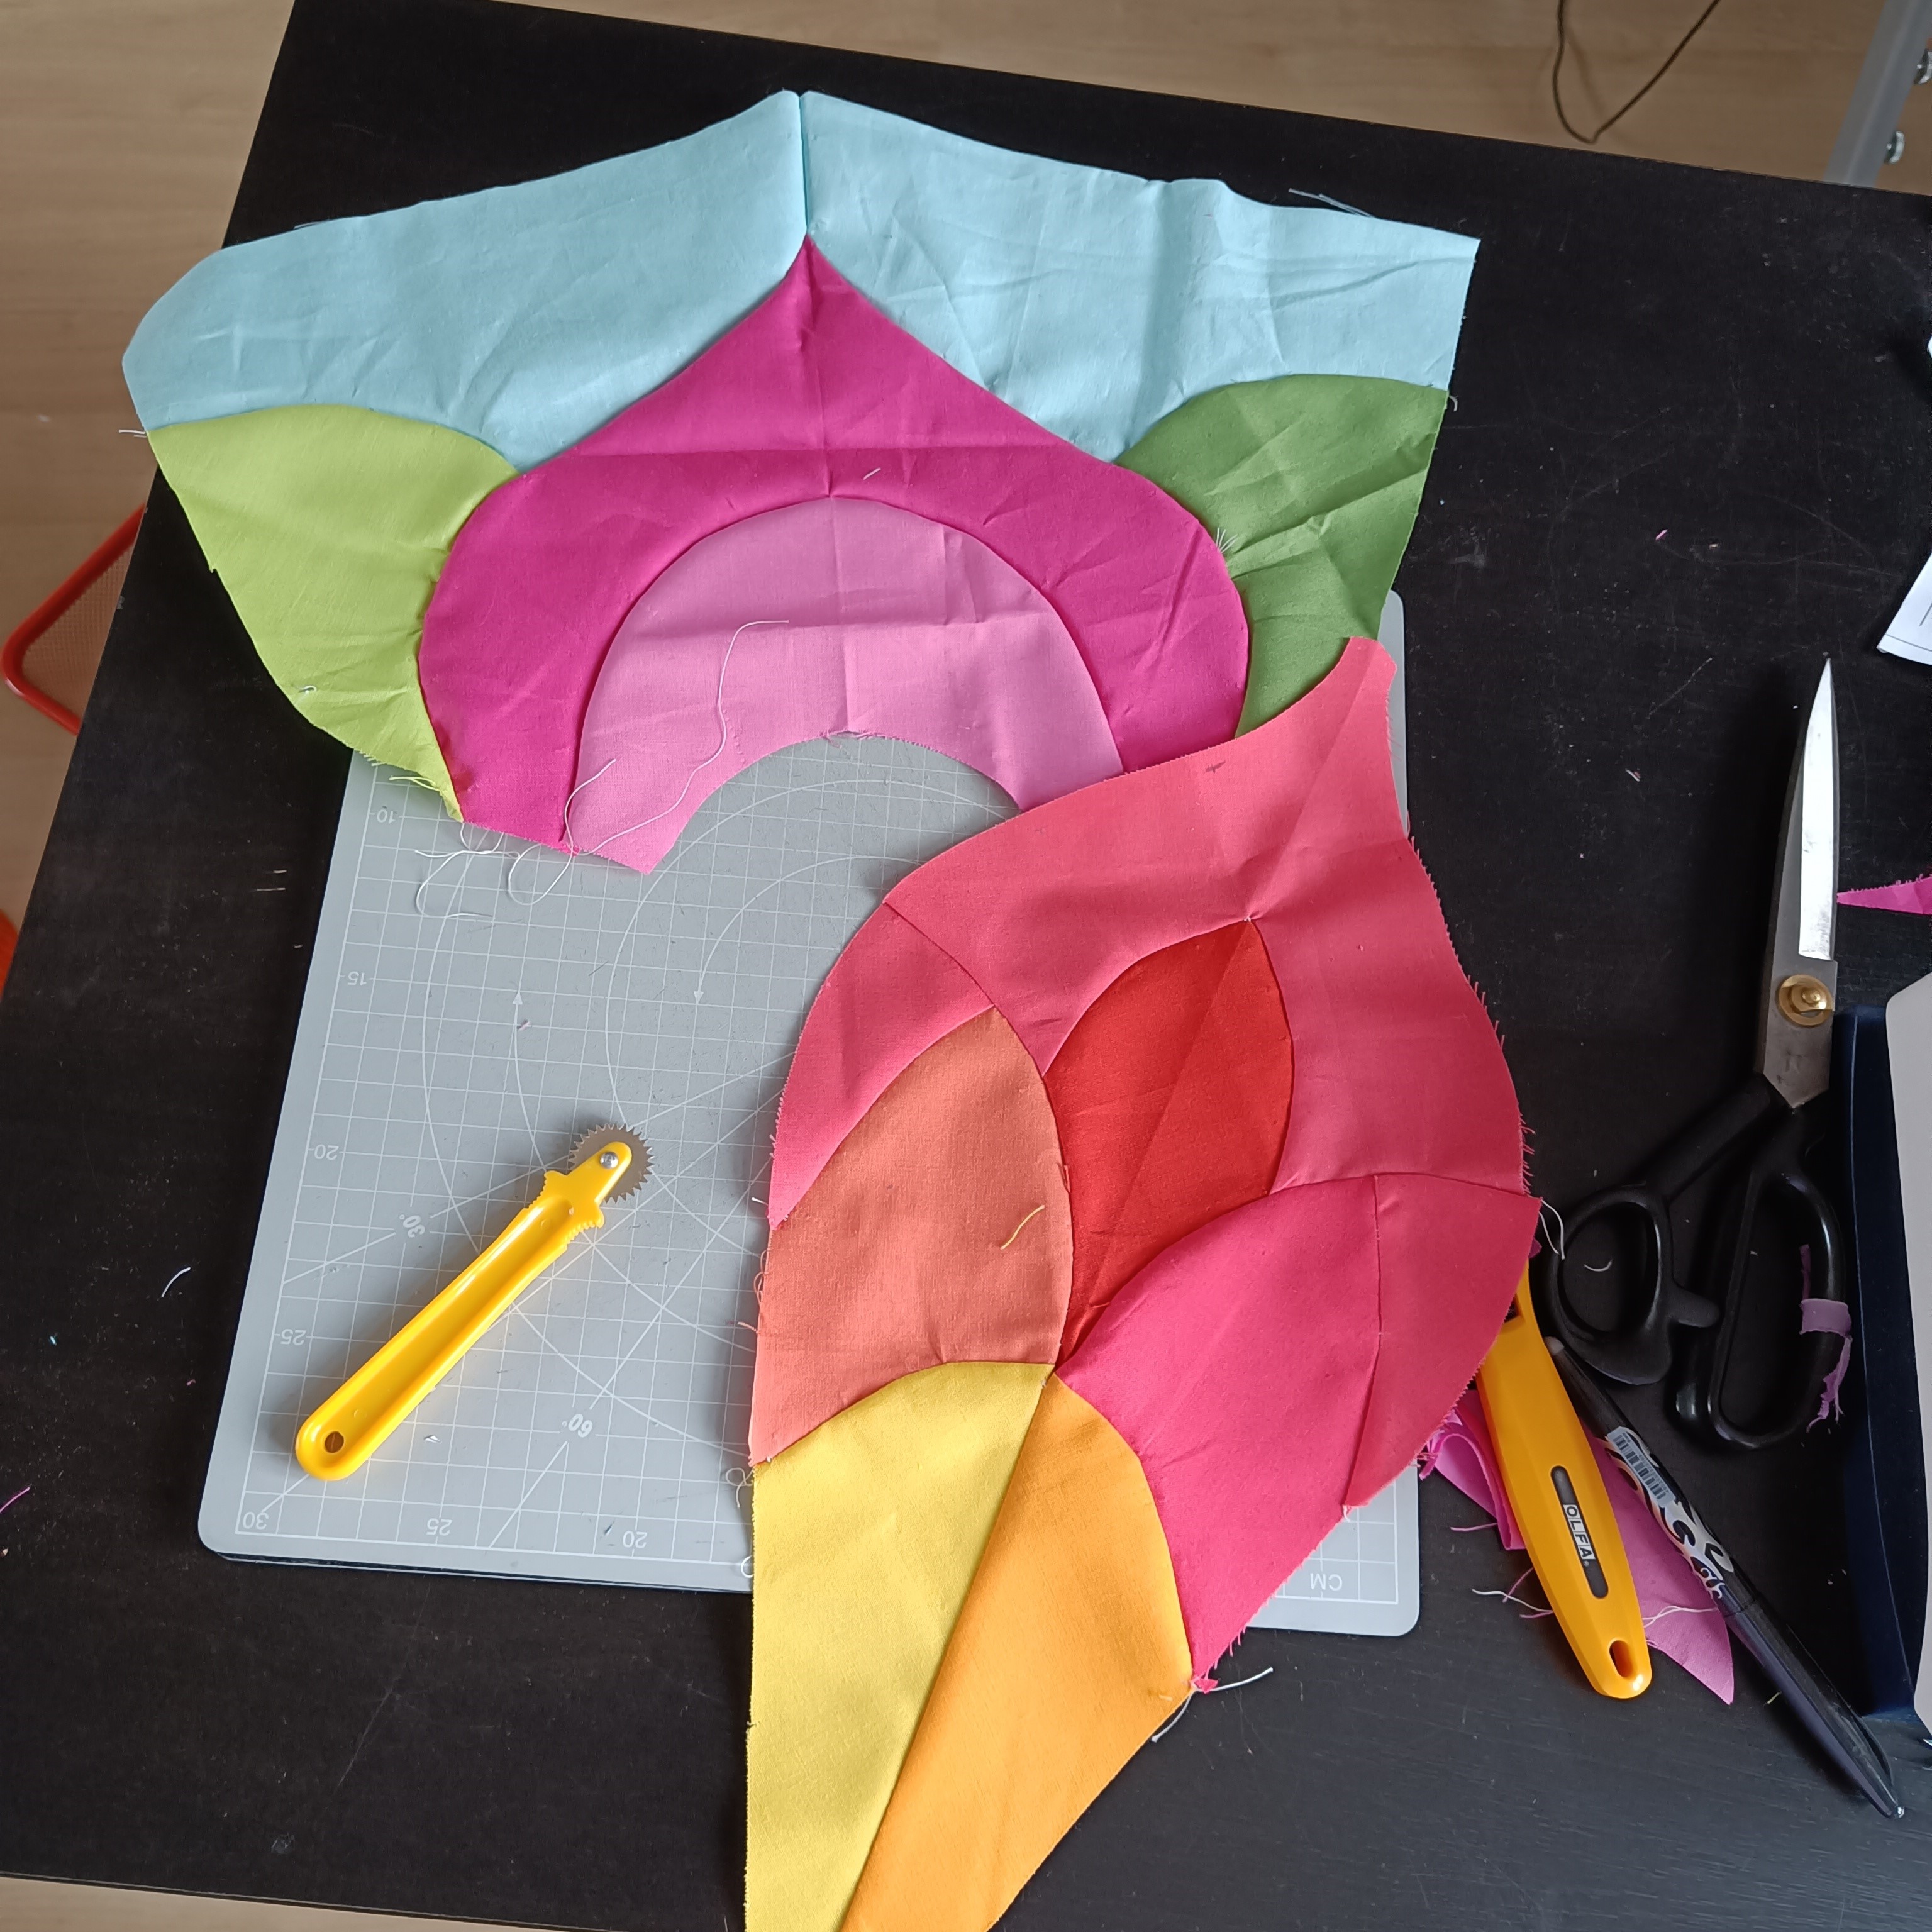
Once pieced and having learnt some lessons (Shocker!!), I decided to quilt it to practice my FMQ and see how easy (clue it was not!!) to repeat motifs in repetitive sections.

I didn’t want this test piece to languish in a corner, so I went on on a side quest to make a skirt or my daughters. I’m not sure they will wearing it much but I for sure think it’s super cute and I am seriously considering making an adult version for me!
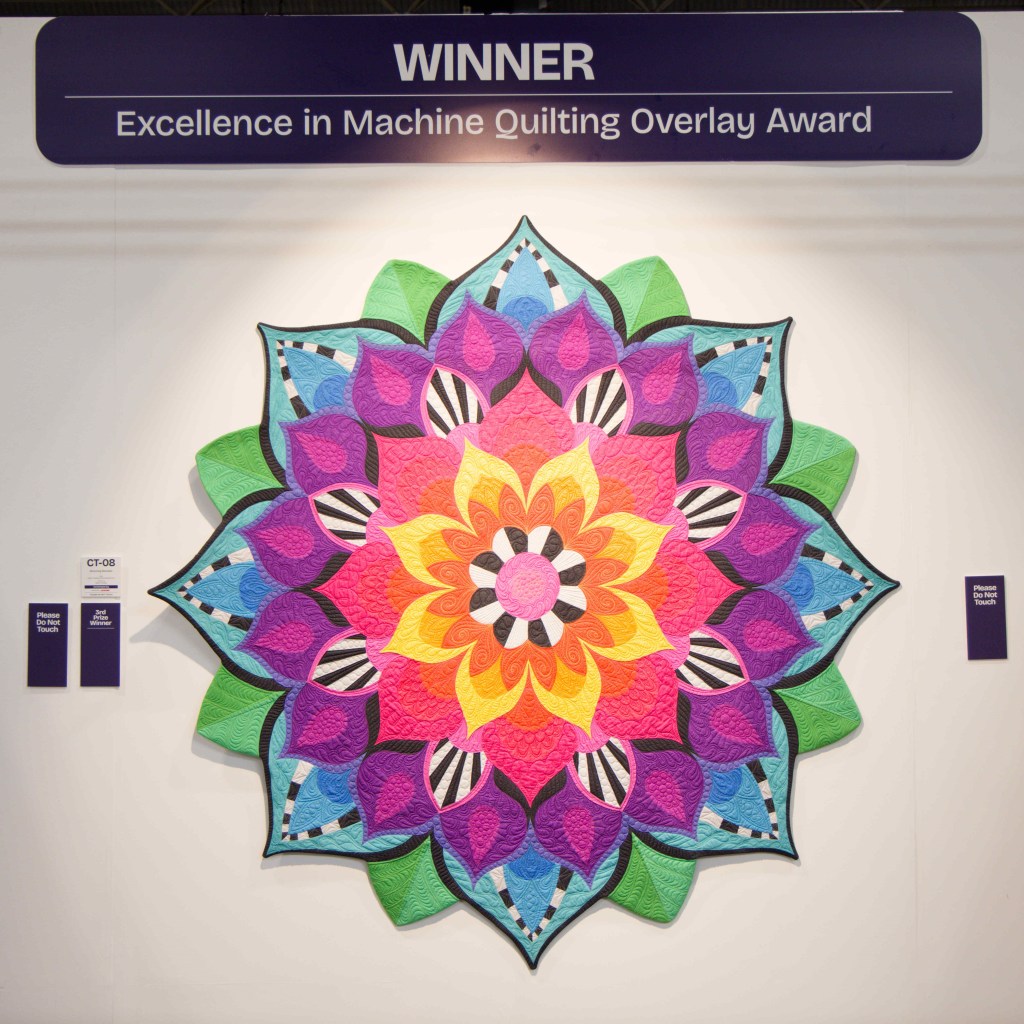
FABRIC CHOICE & COLOUR PROGRESSION
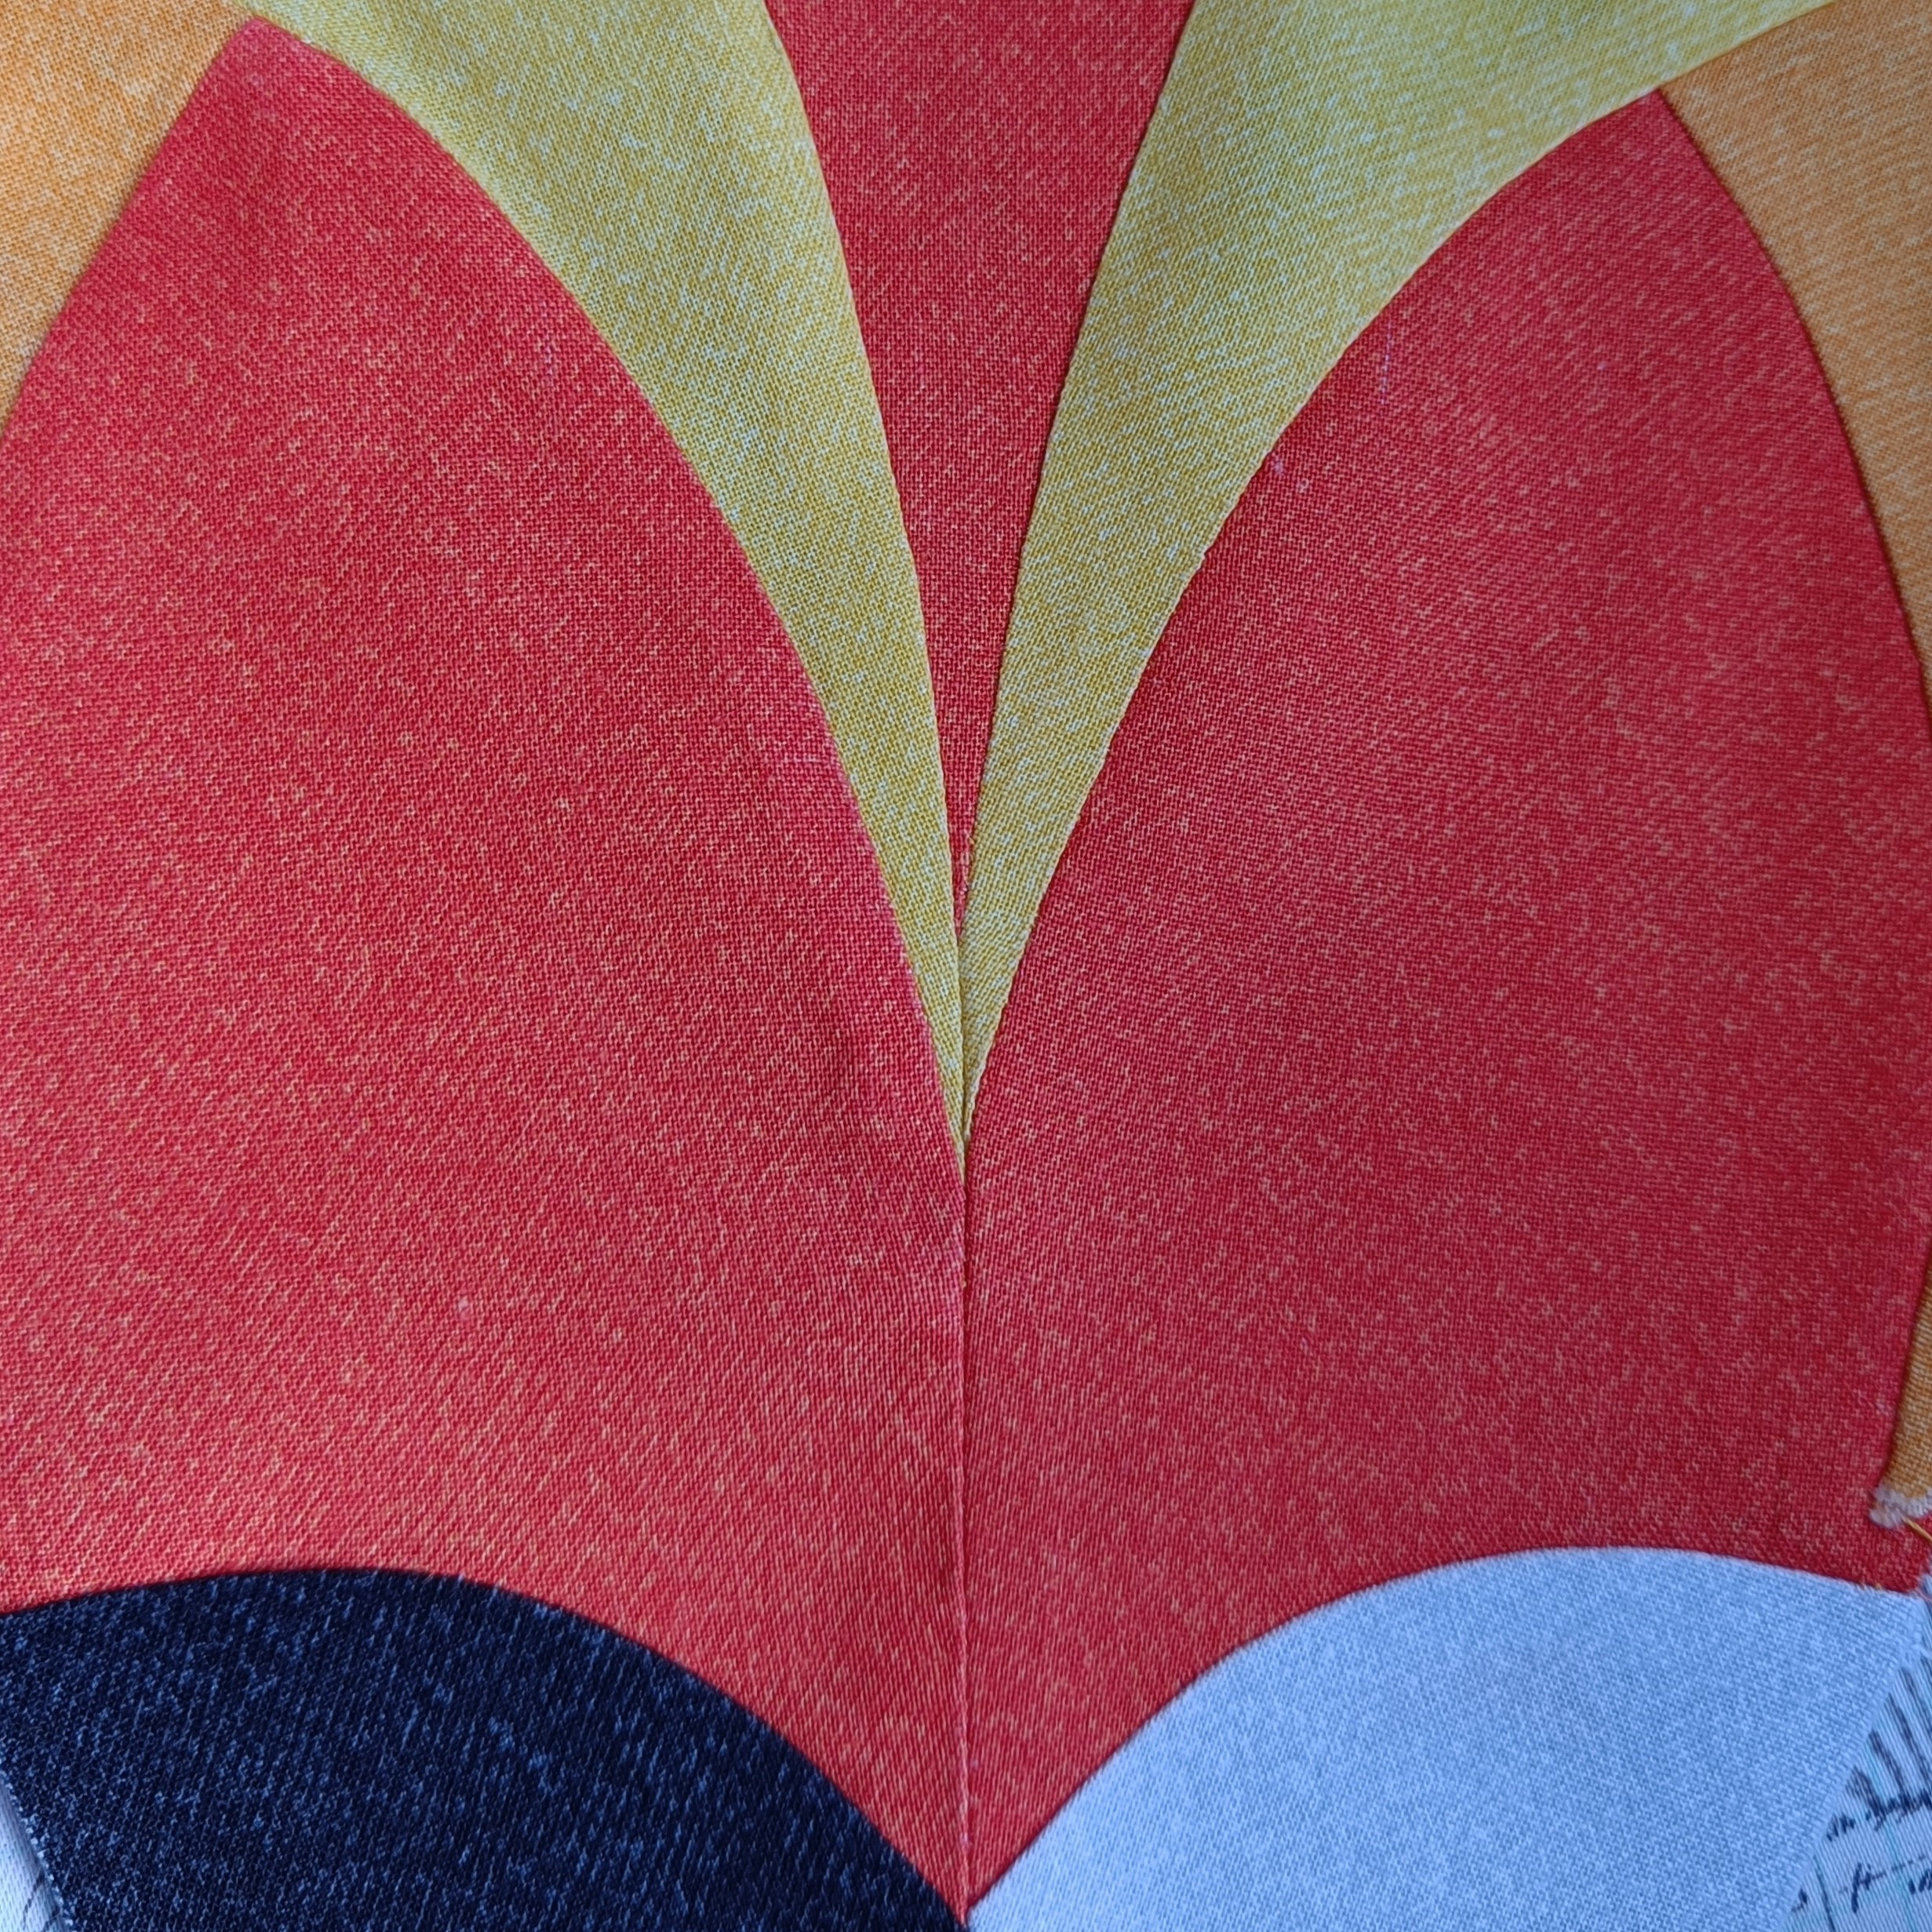
I can’t identify when I decided but in my mind the Mandala quilt I had envisioned would always be made from Libs Elliott’s Phosphor Electric collection. The complete colour wheel in this bright collection is to die for and completely set off by the dark and light which visually read as B & W. I love the jeans texture rather than it just being solid colour but there is not so much texture that it becomes distracting.
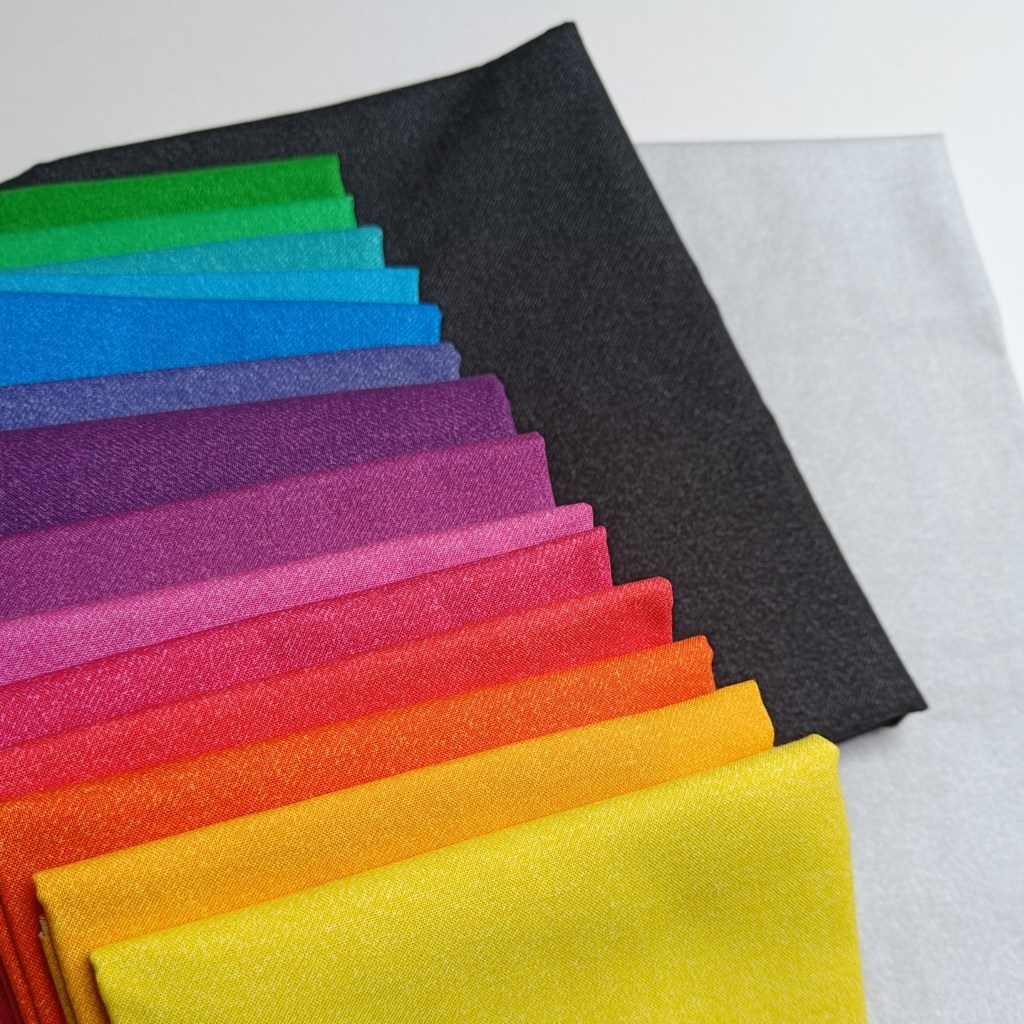
I made so many different mock ups with just these 16 shades it ended up being overwhelming trying to choose between them. Below are just a few examples. I realised I strongly felt I wanted to keep the colour placements as a progression to create a harmonious feel but still try to have enough contrast that the main elements would stand out from each other.
I’m sure all of you would pick a different layout to me. This is probably what is driving me most to produce a pattern, I’m excited to see all the different combinations that are created.


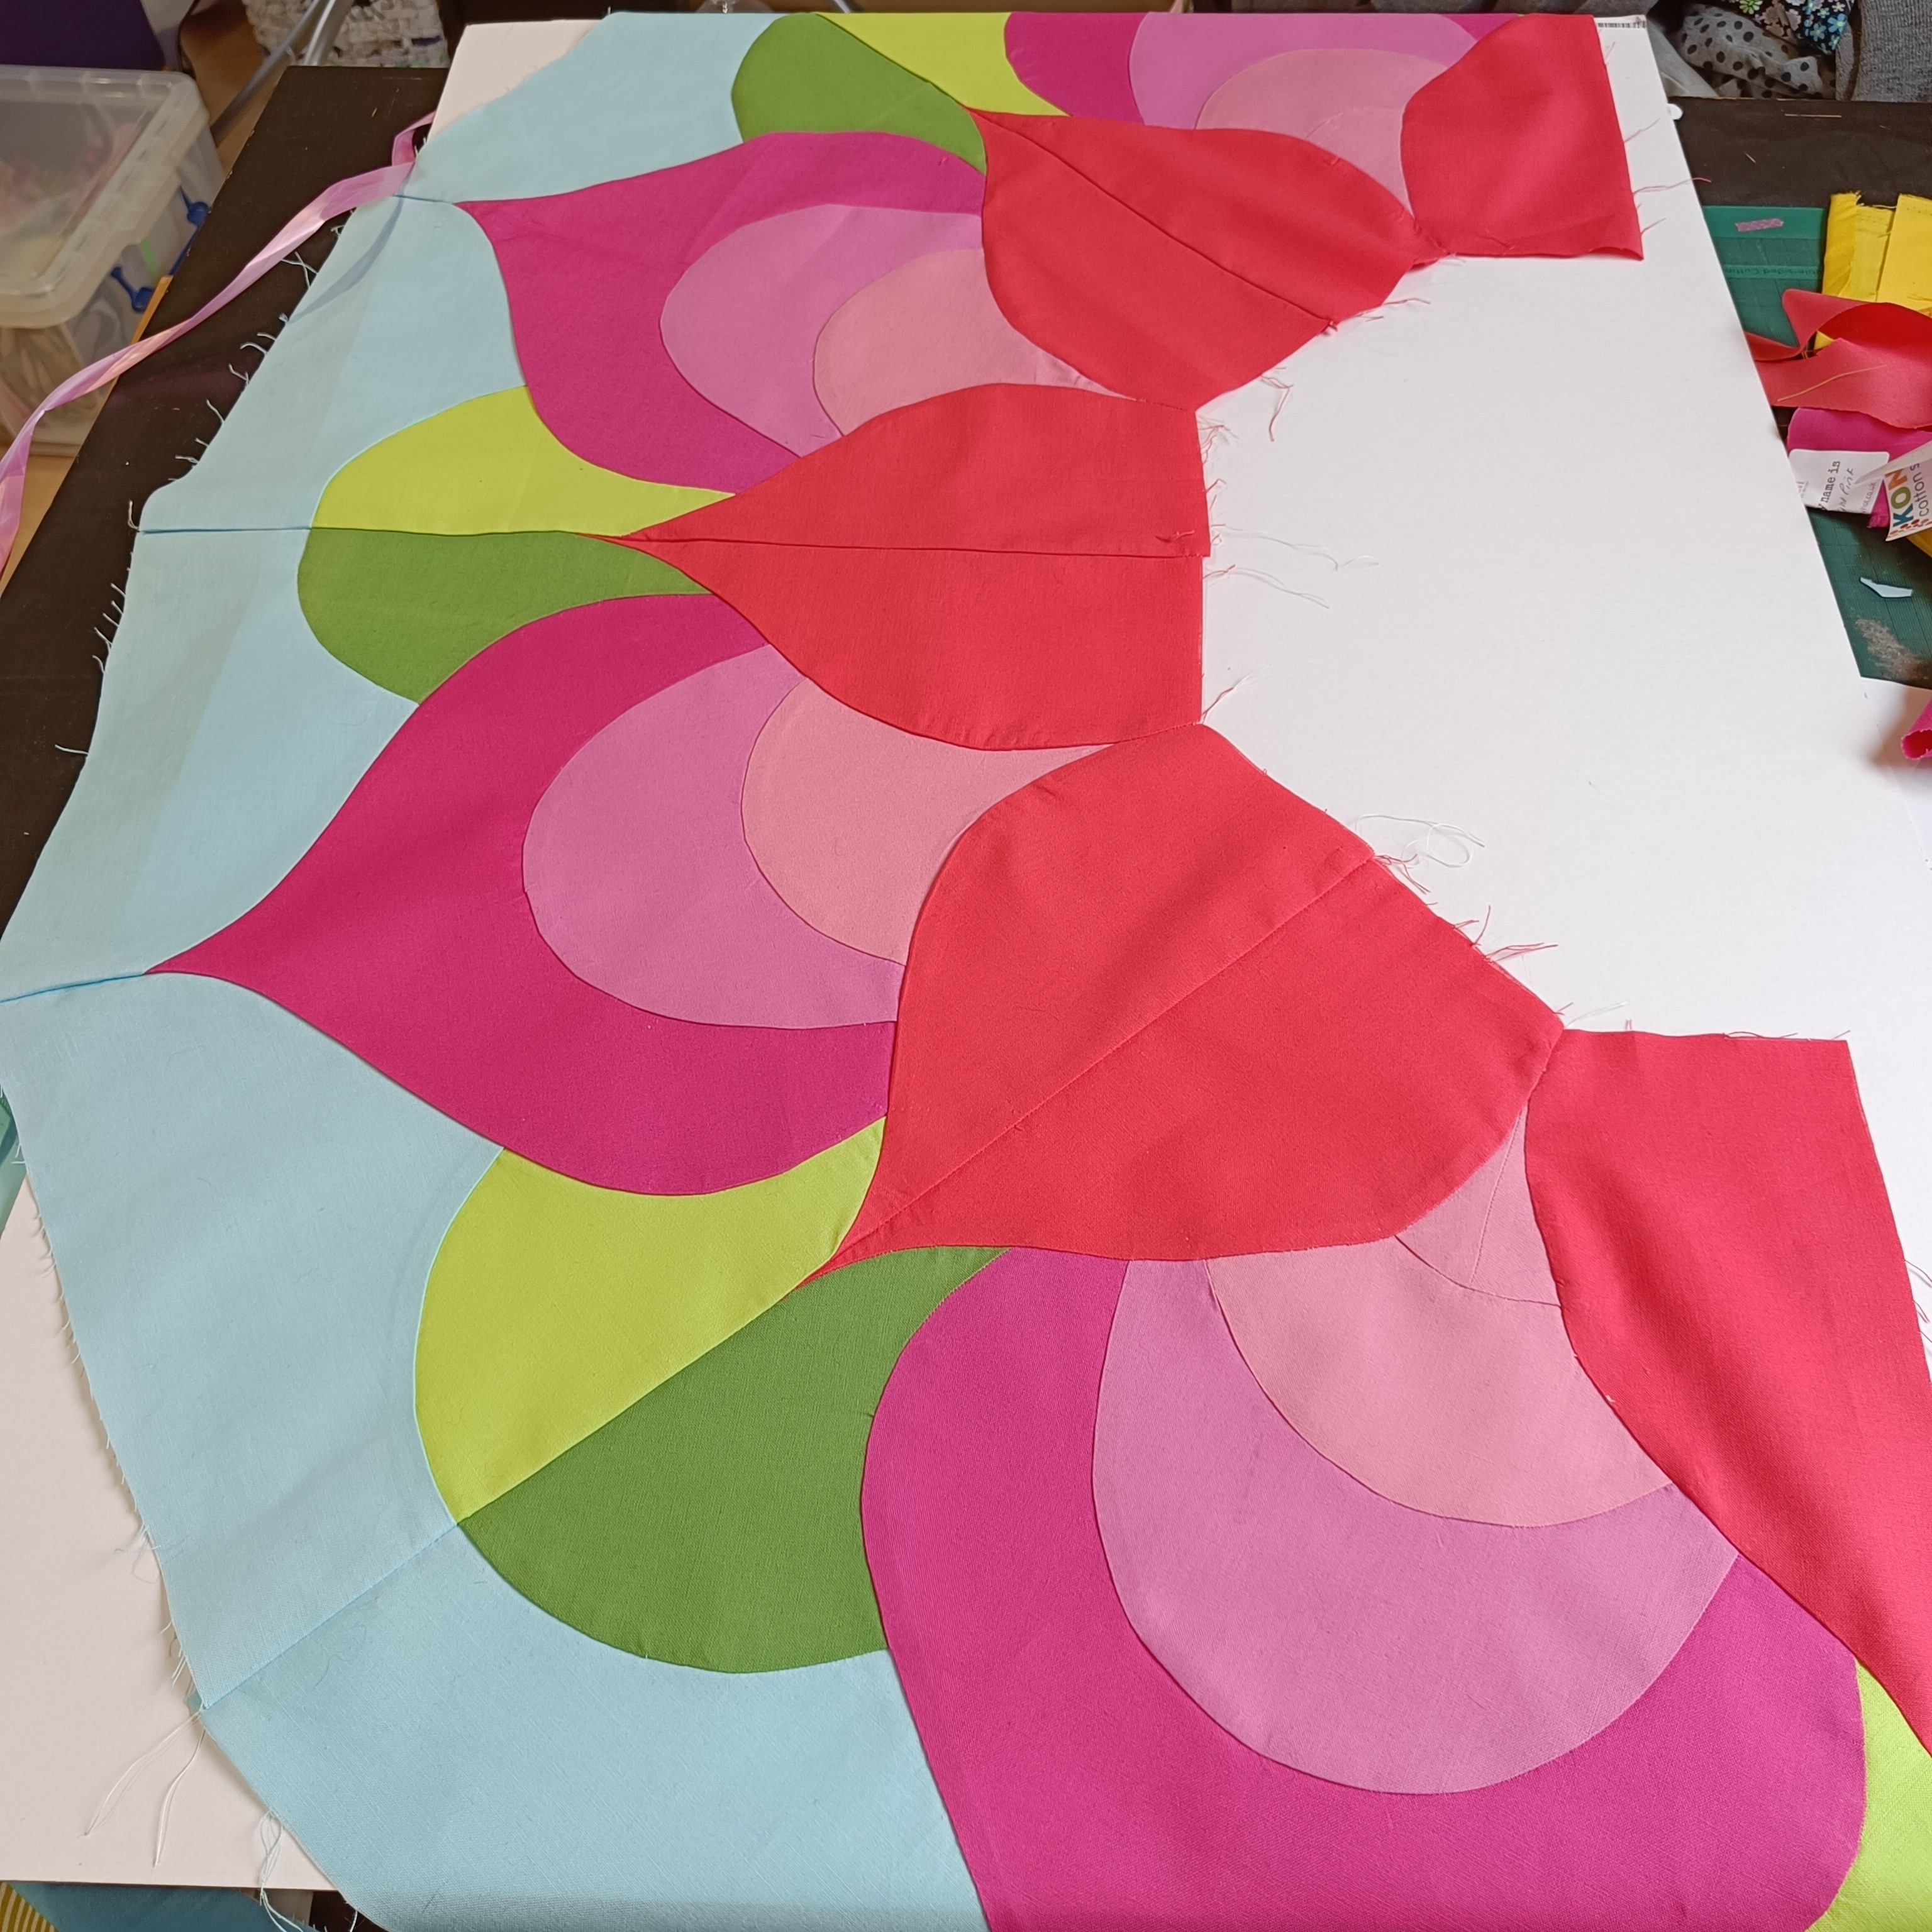
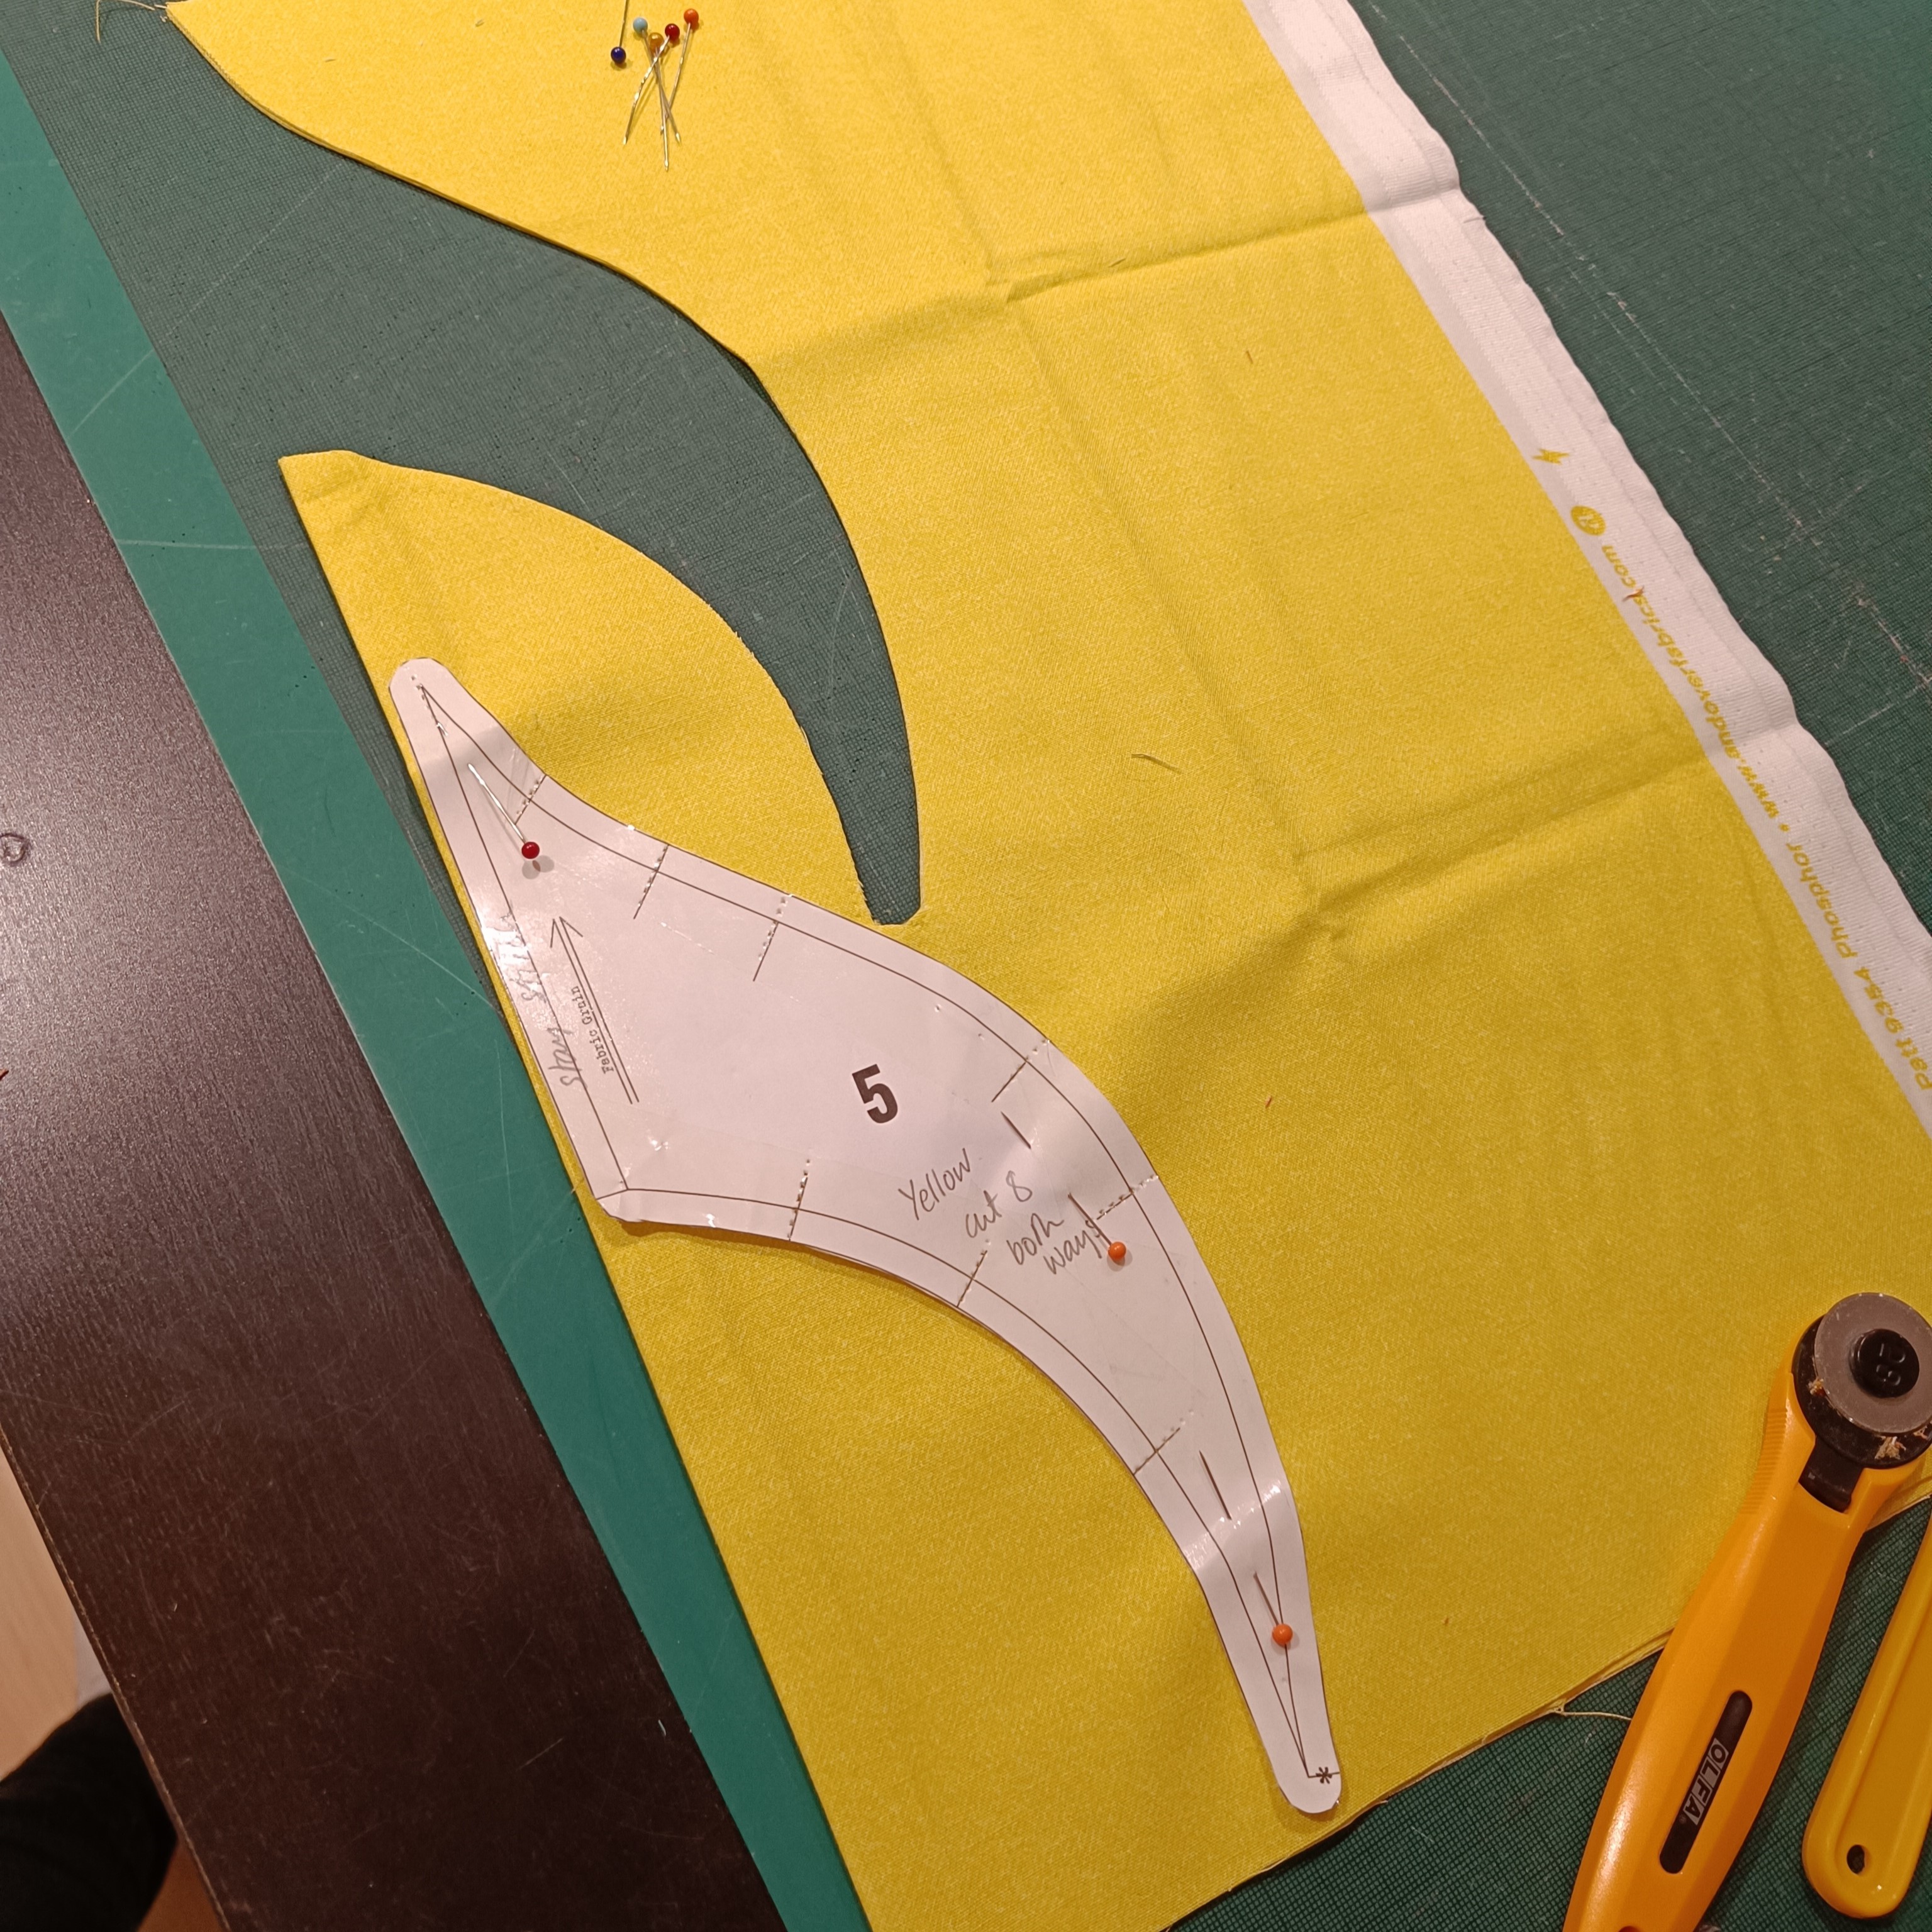
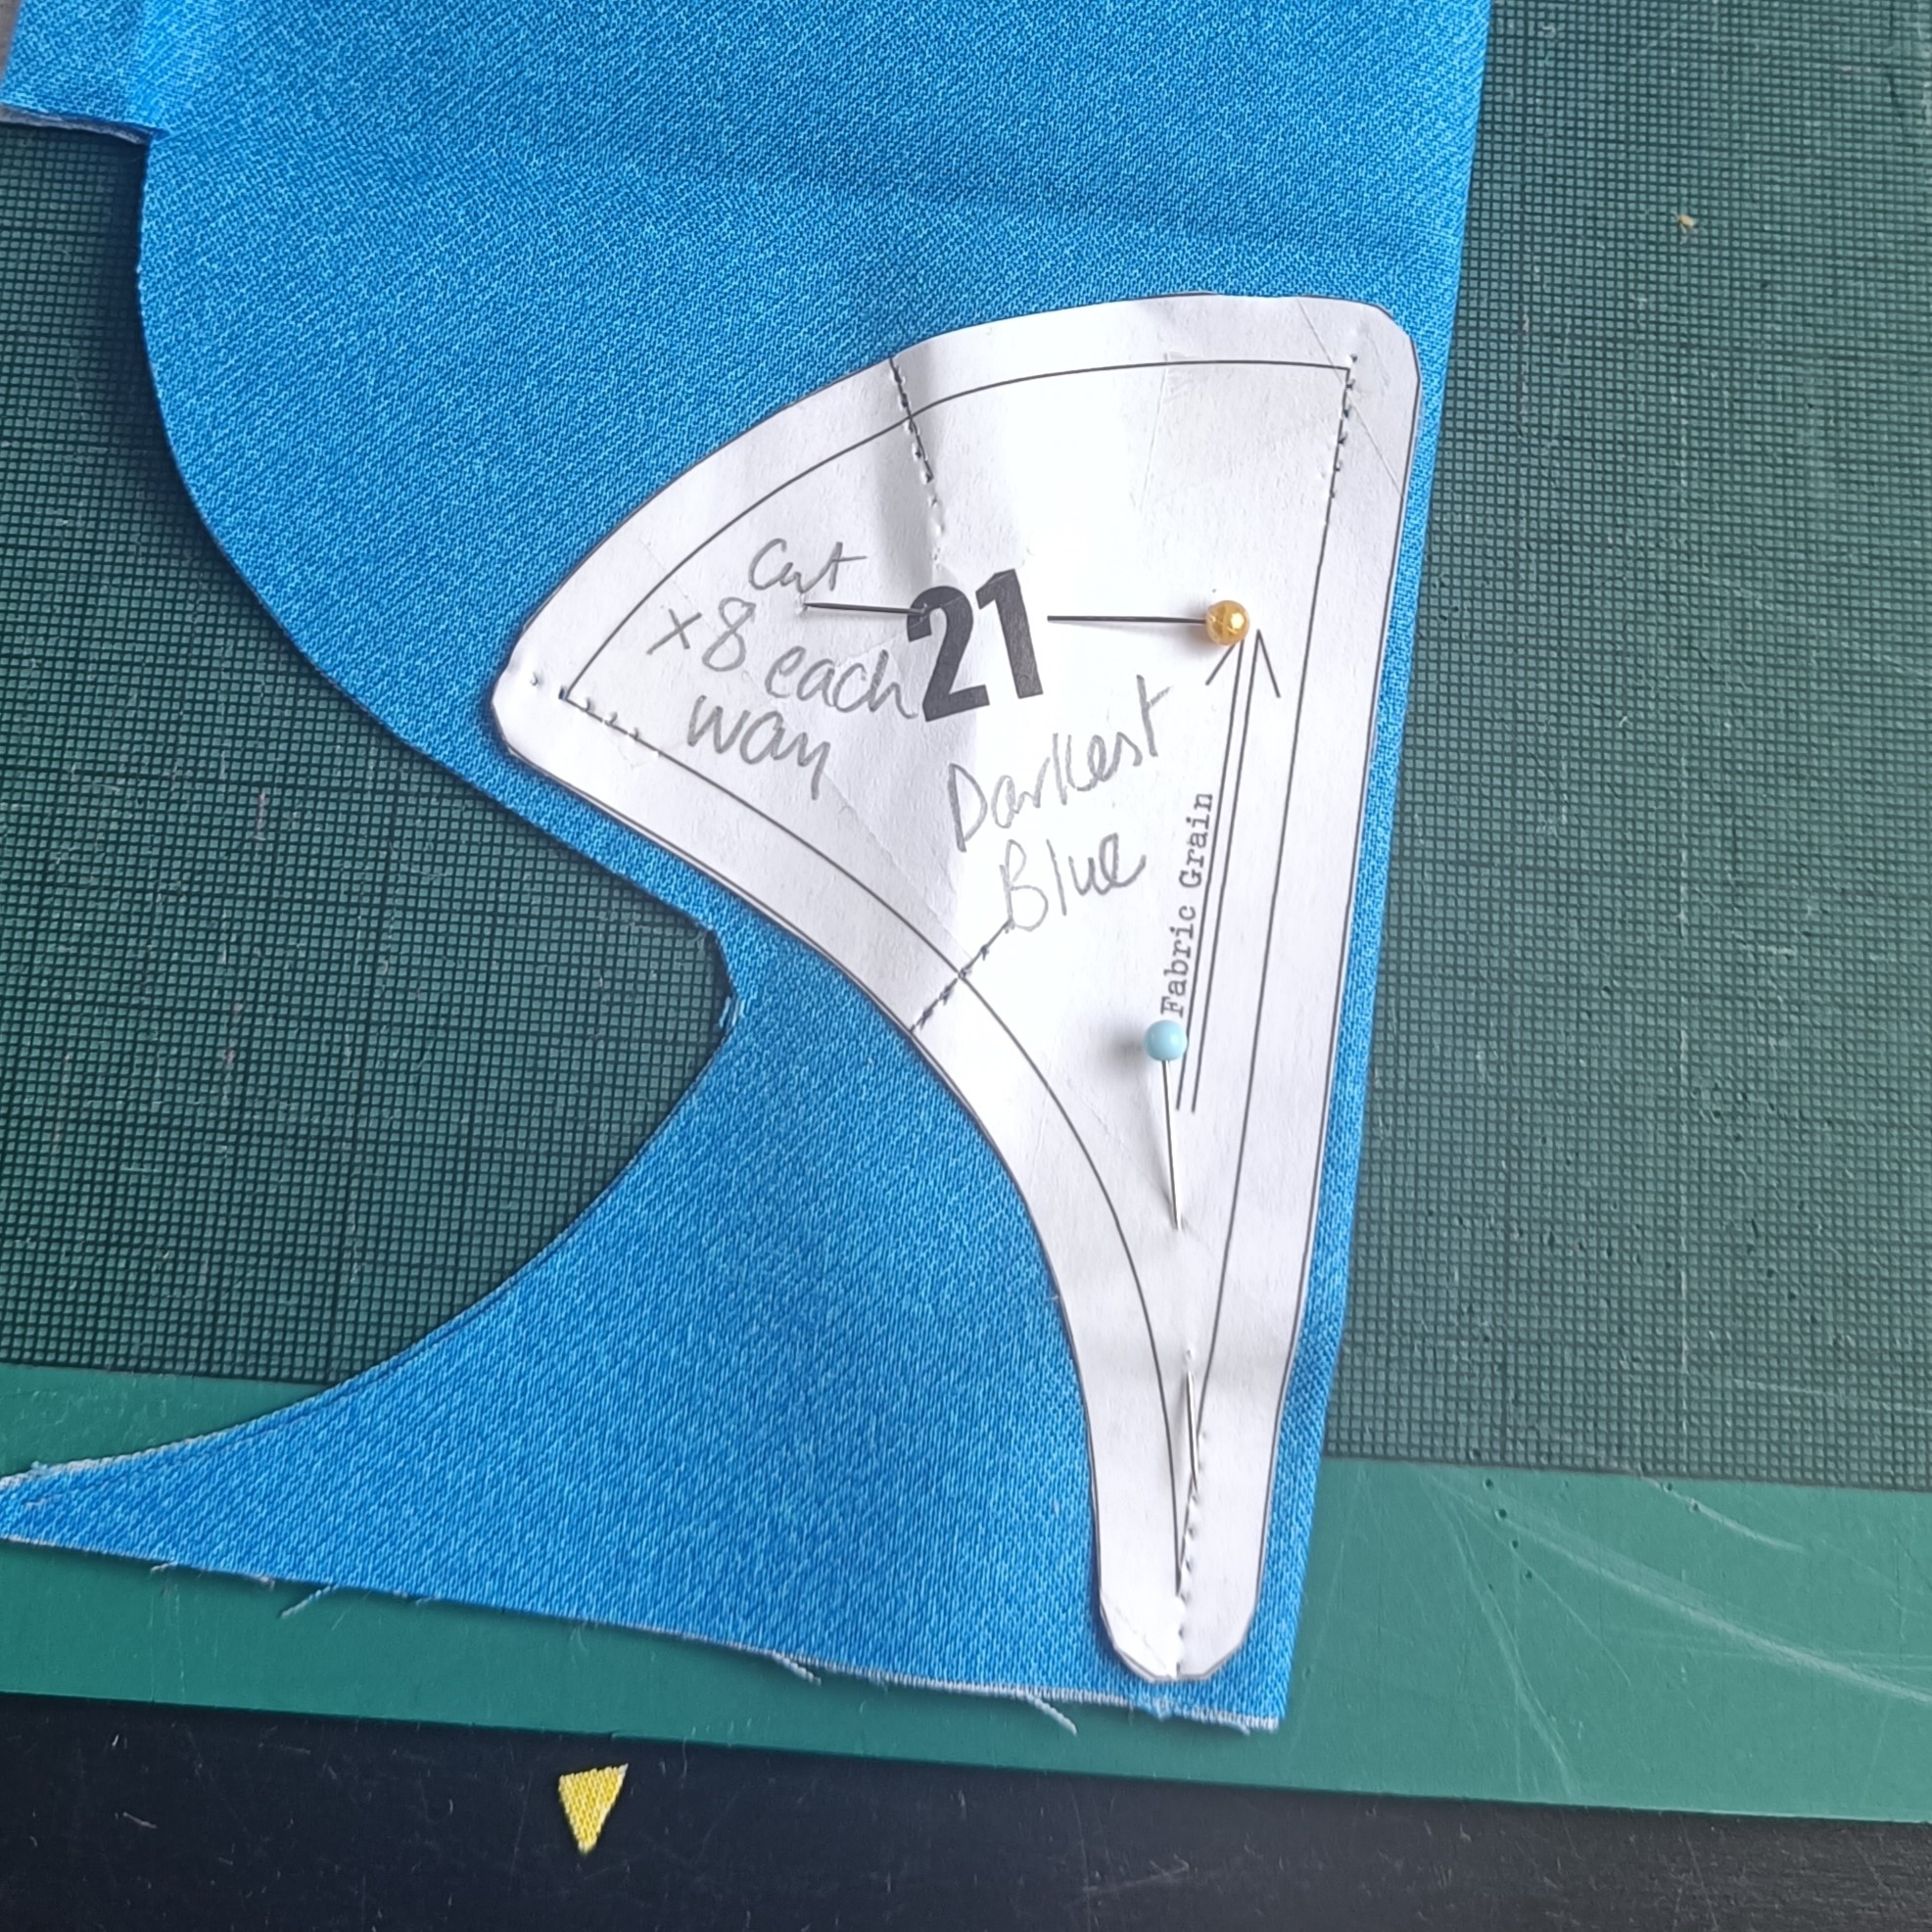
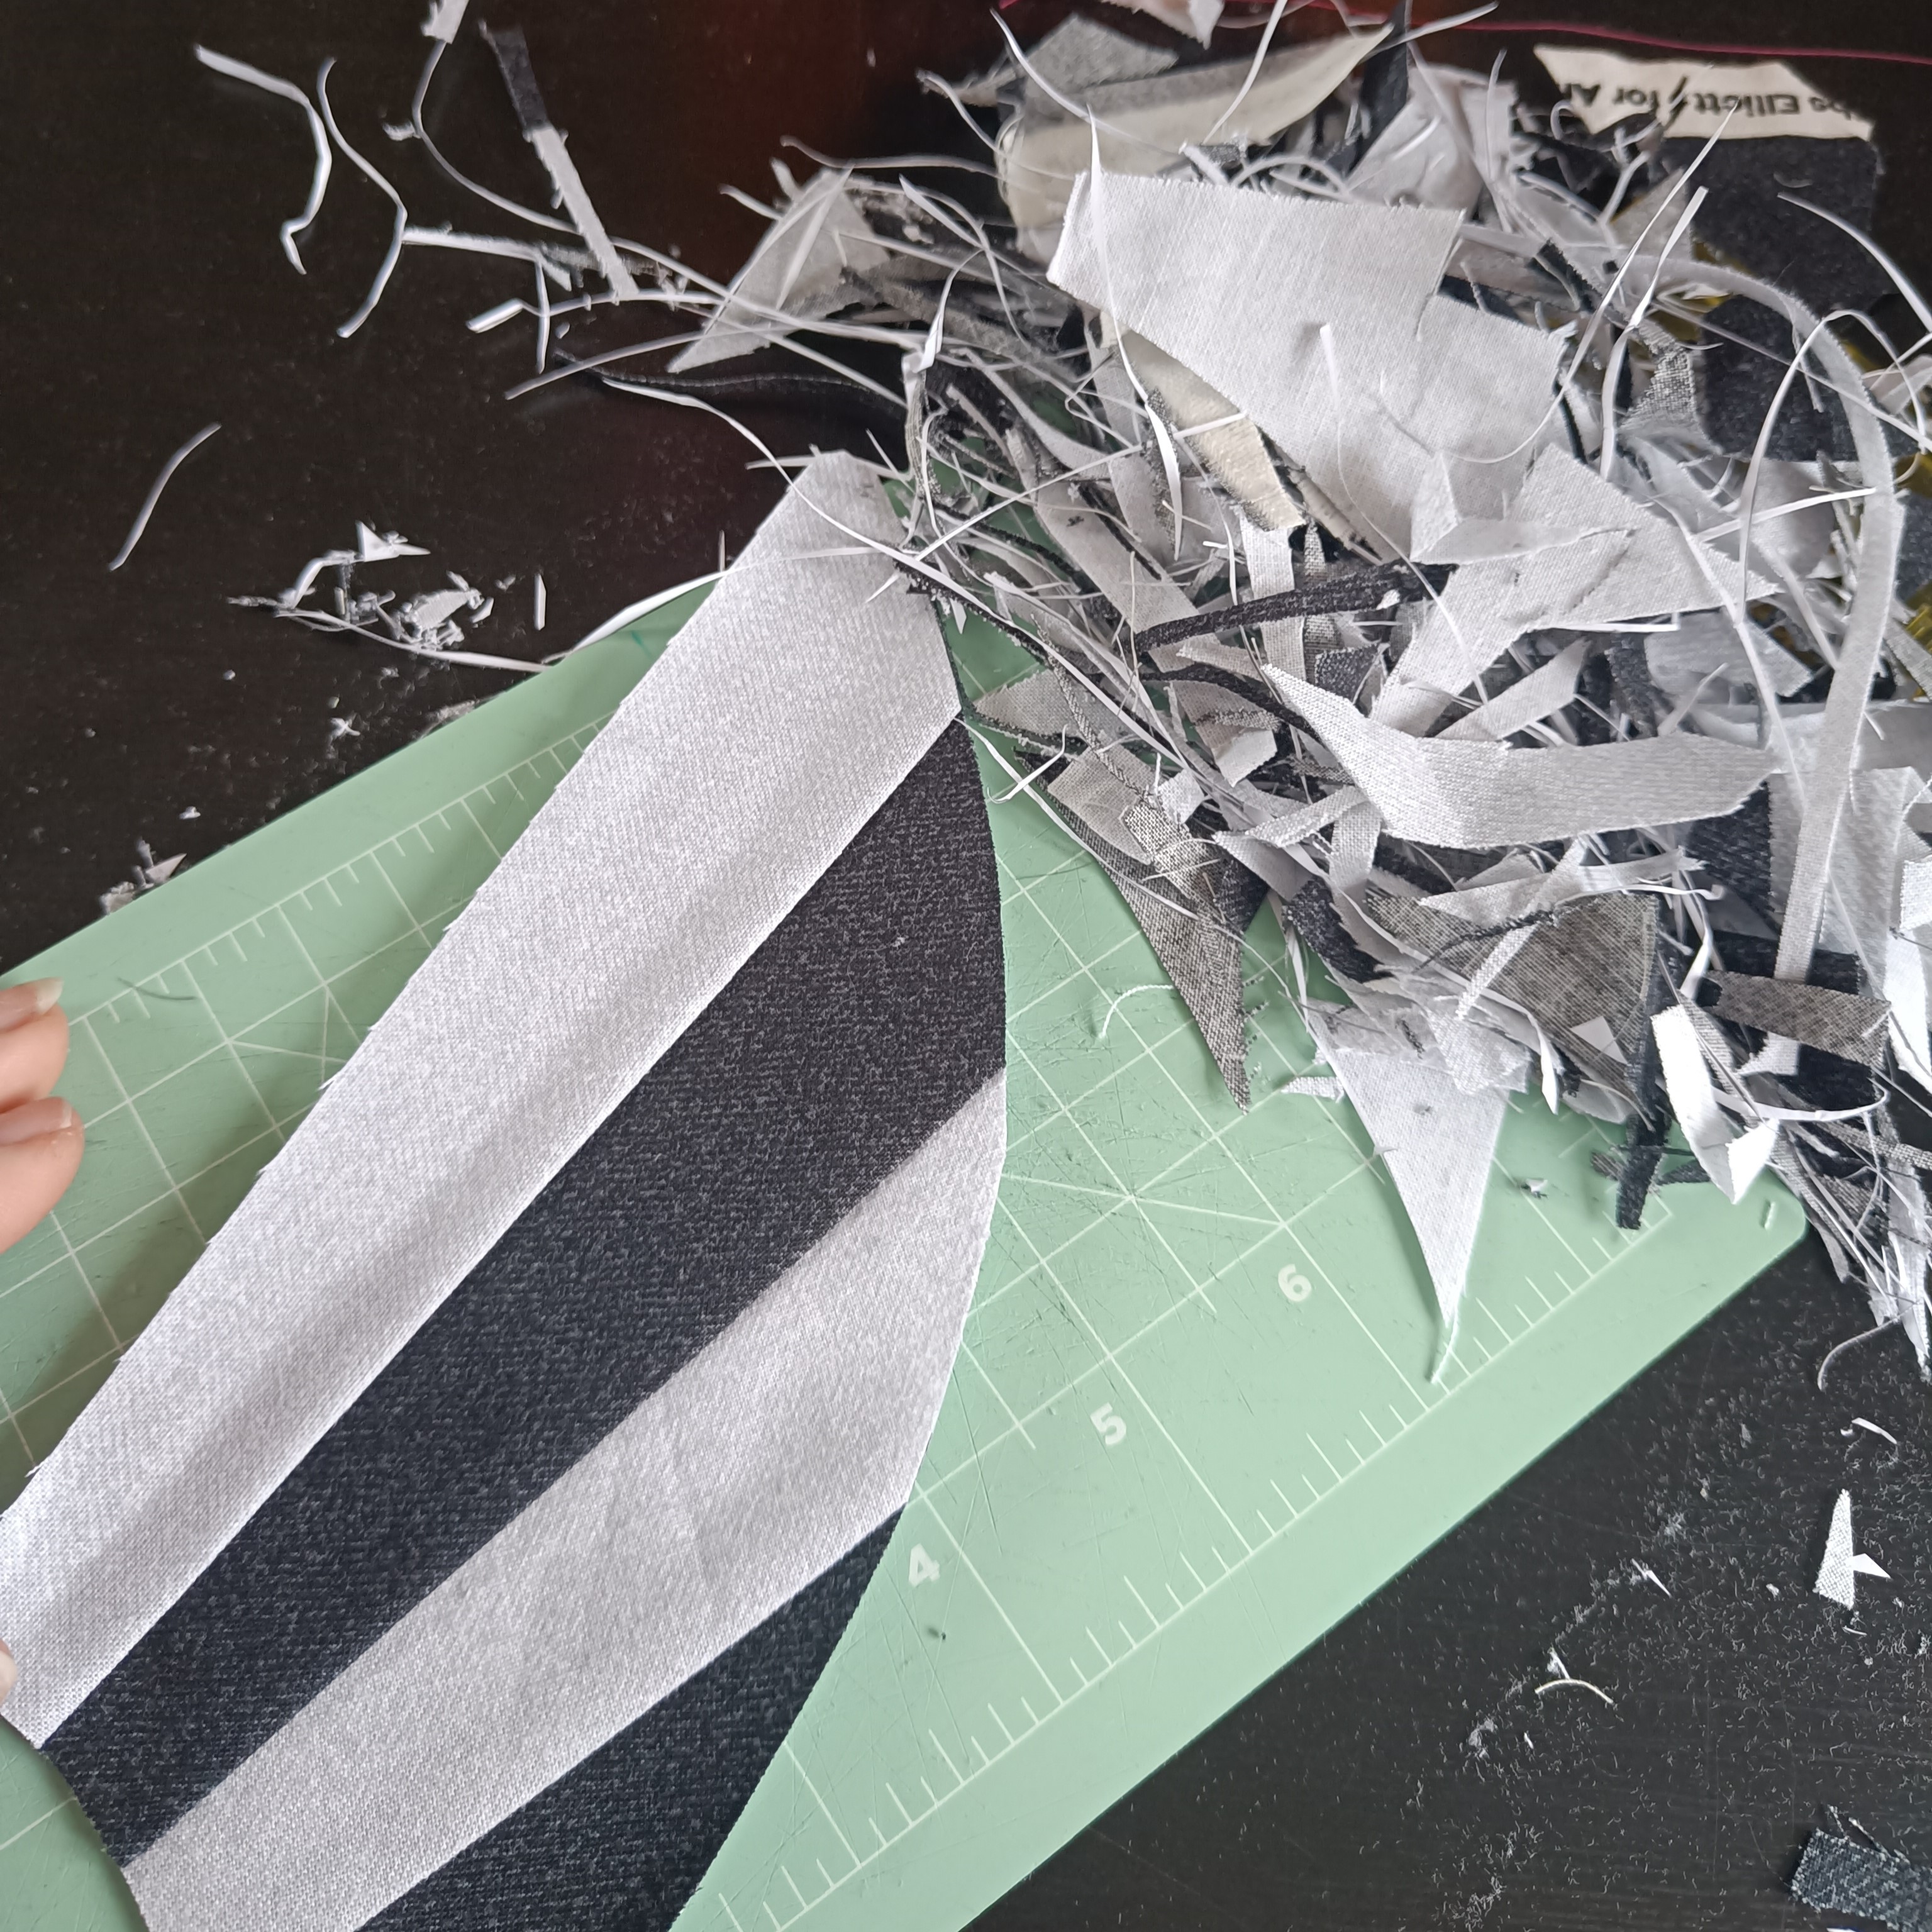
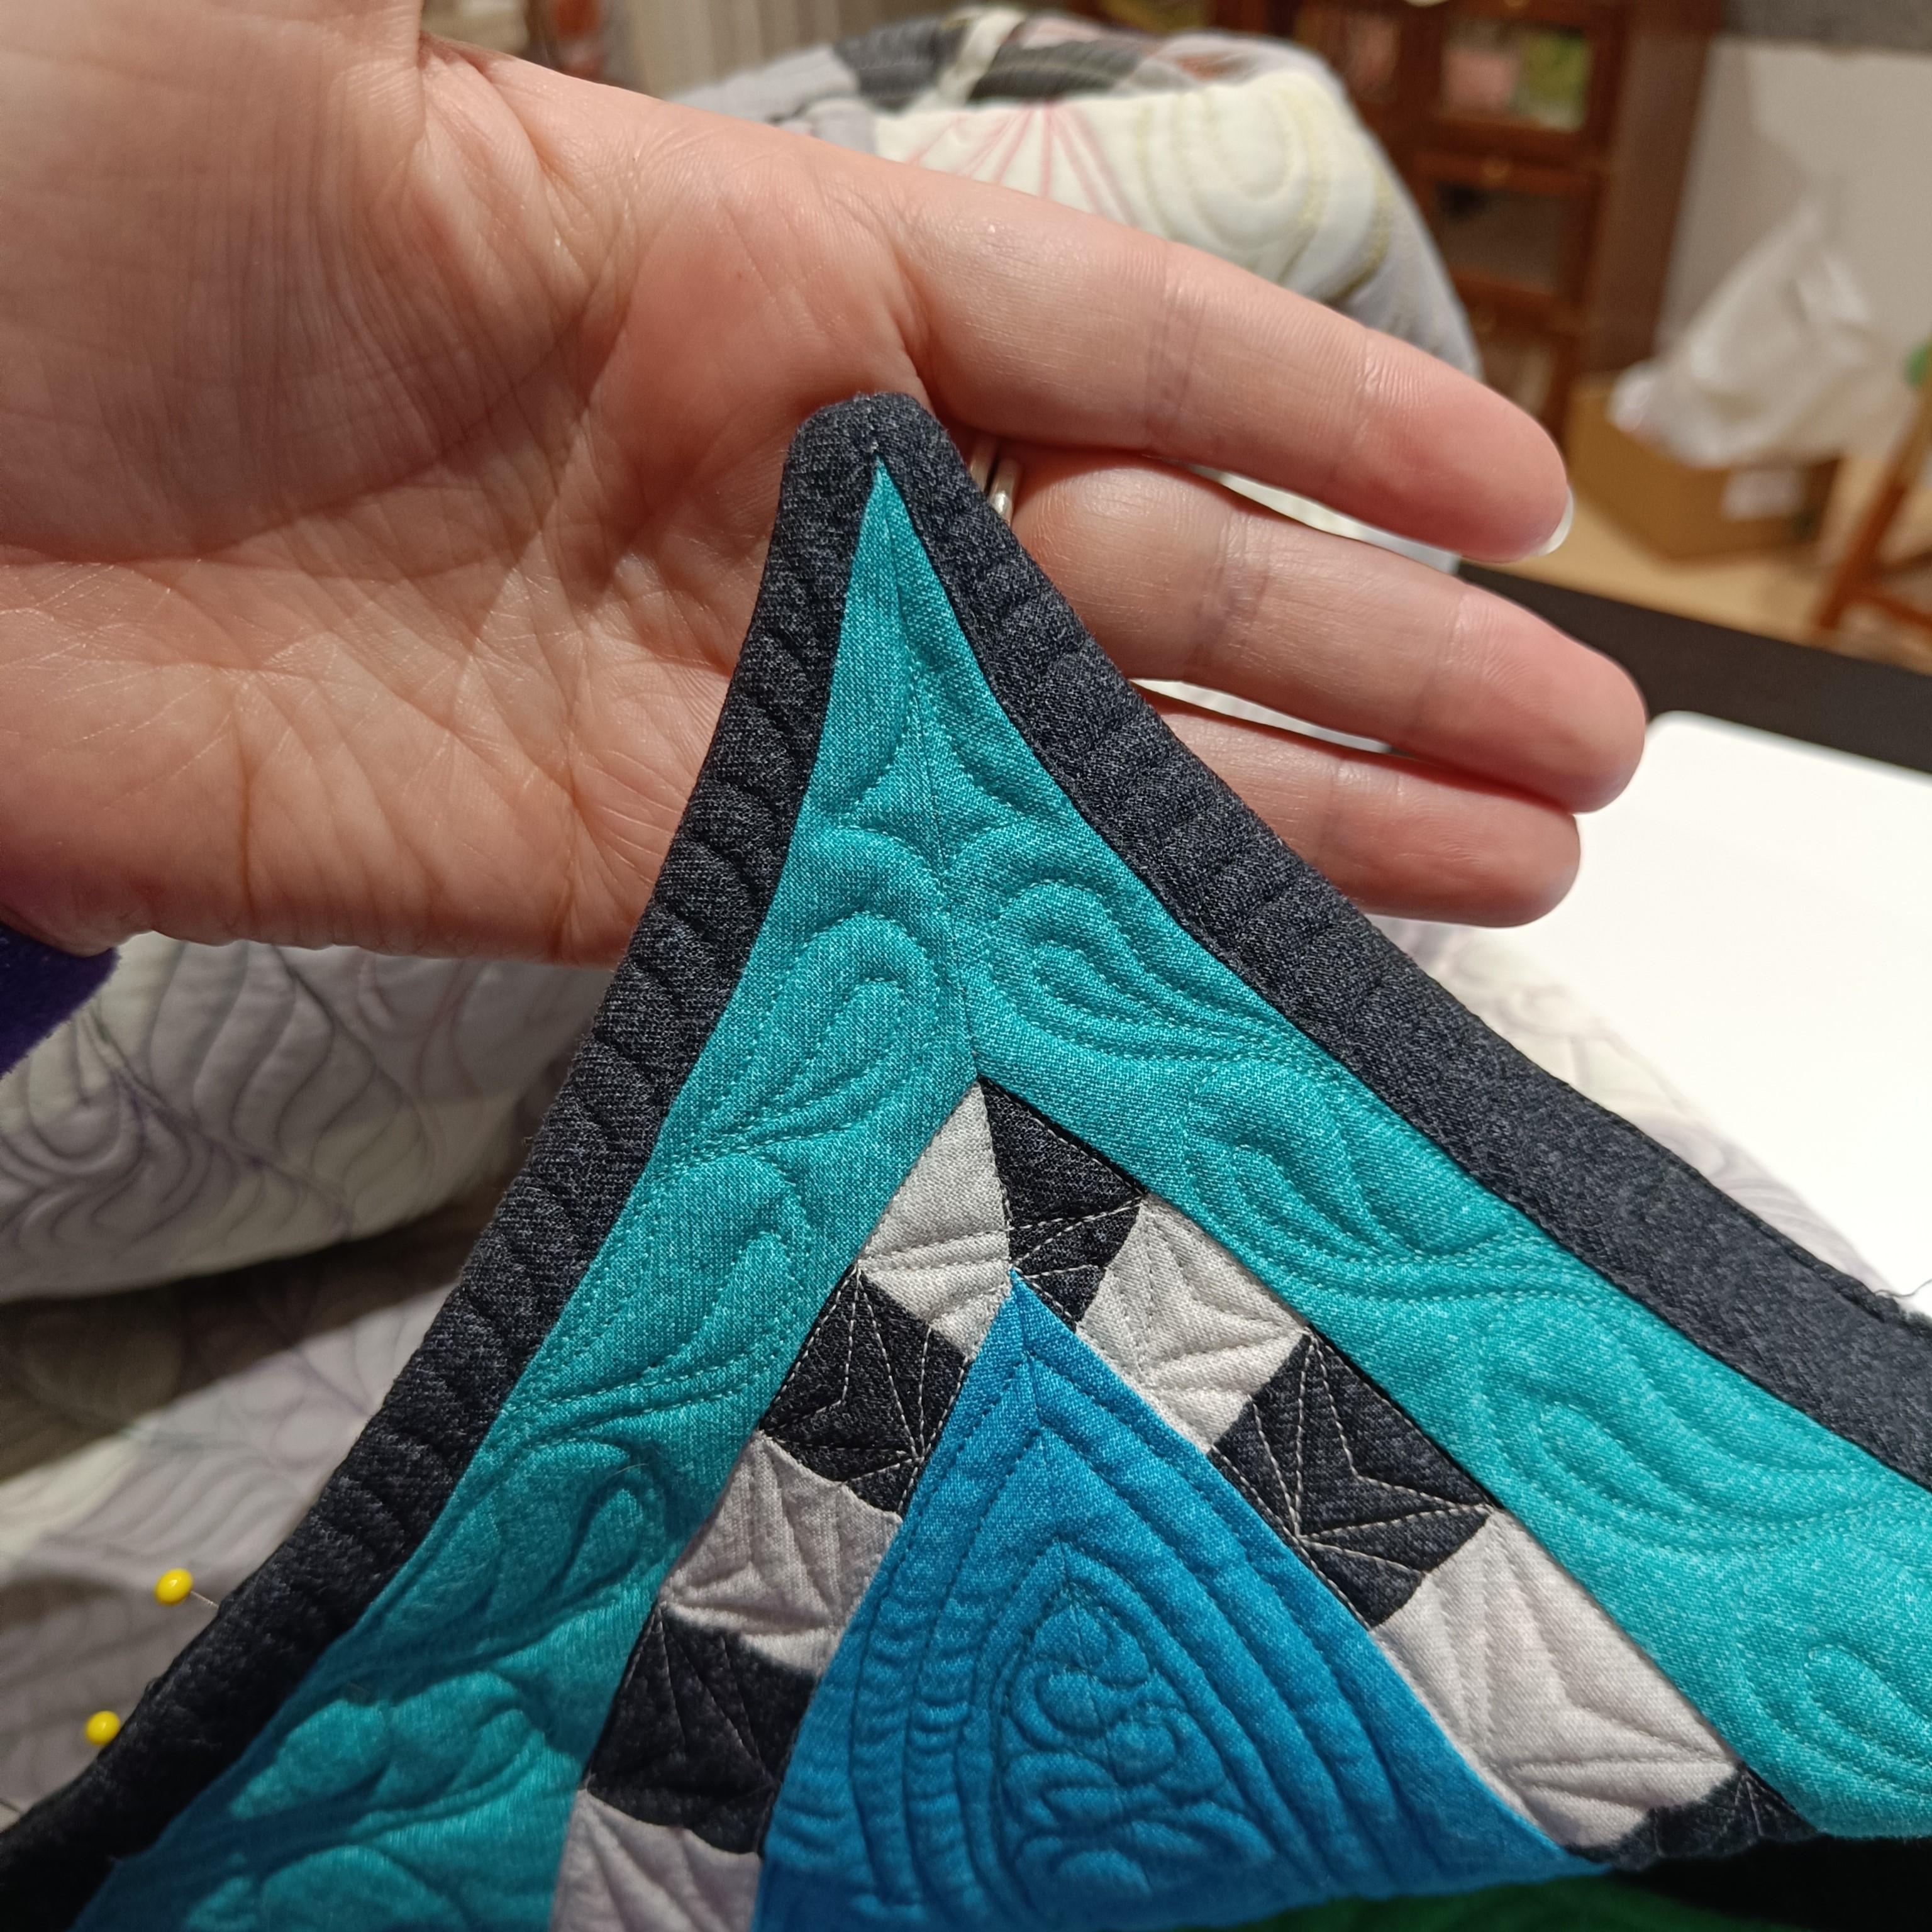
CUTTING & PIECING
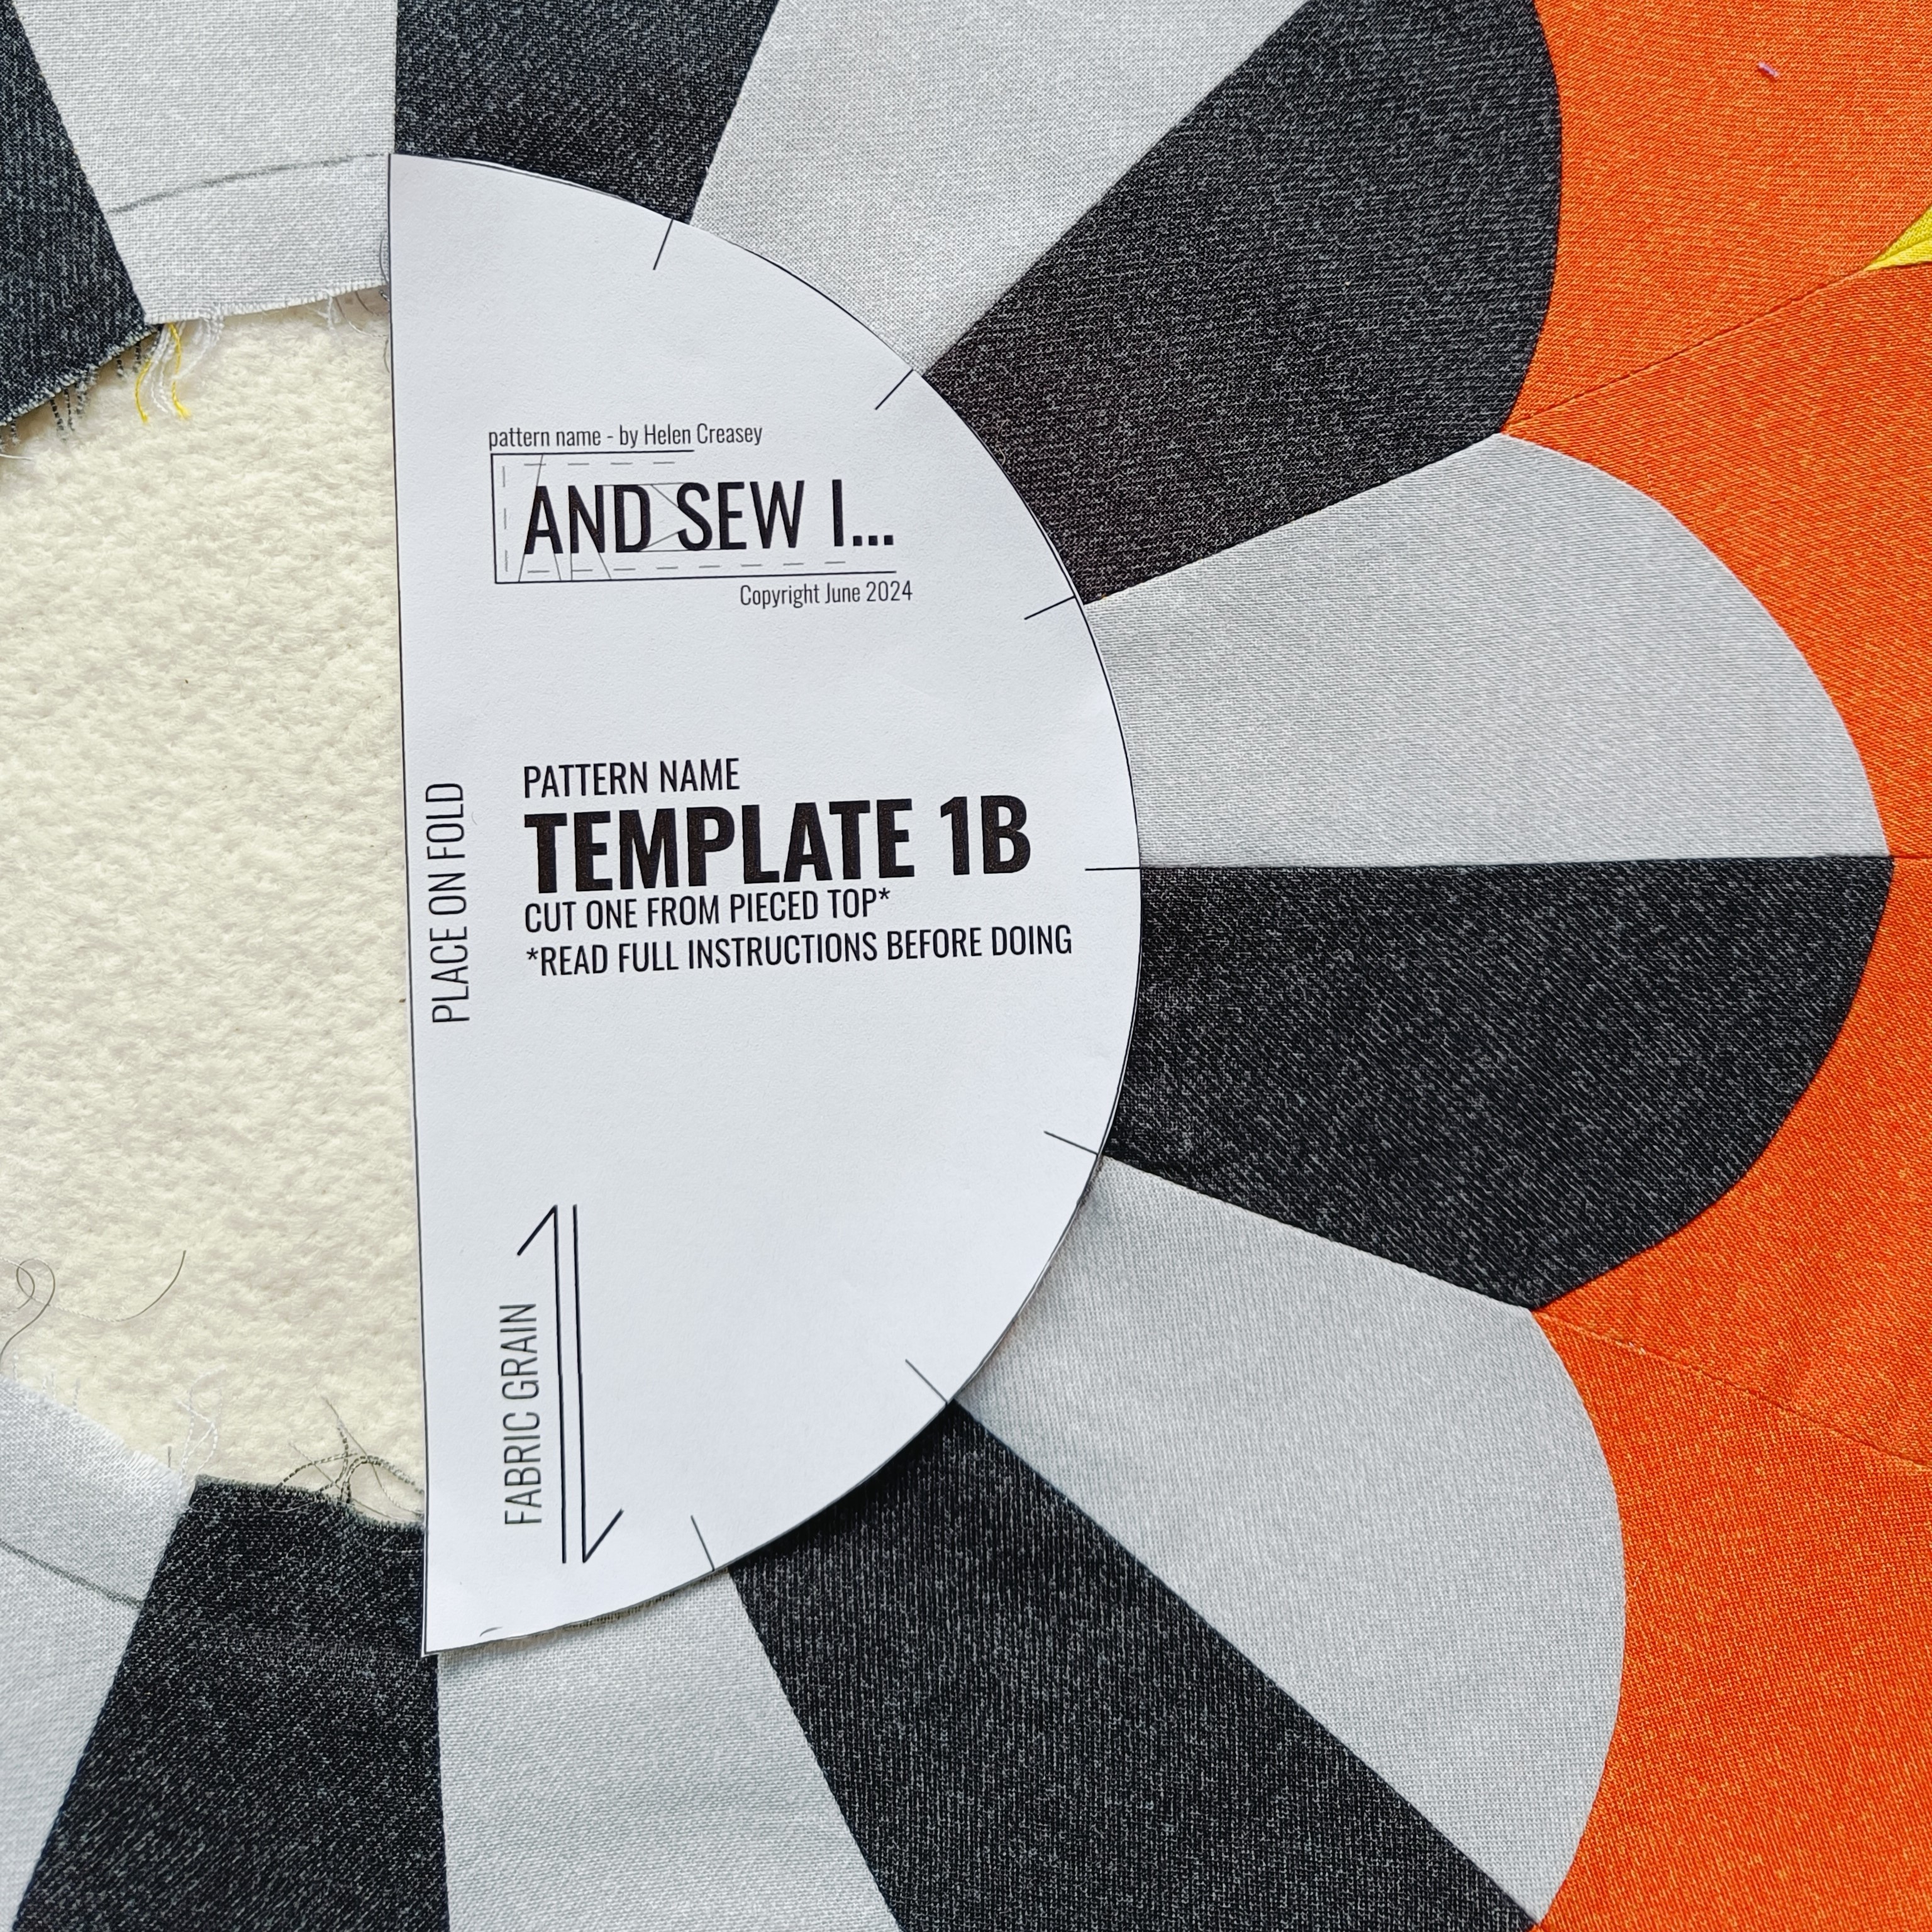
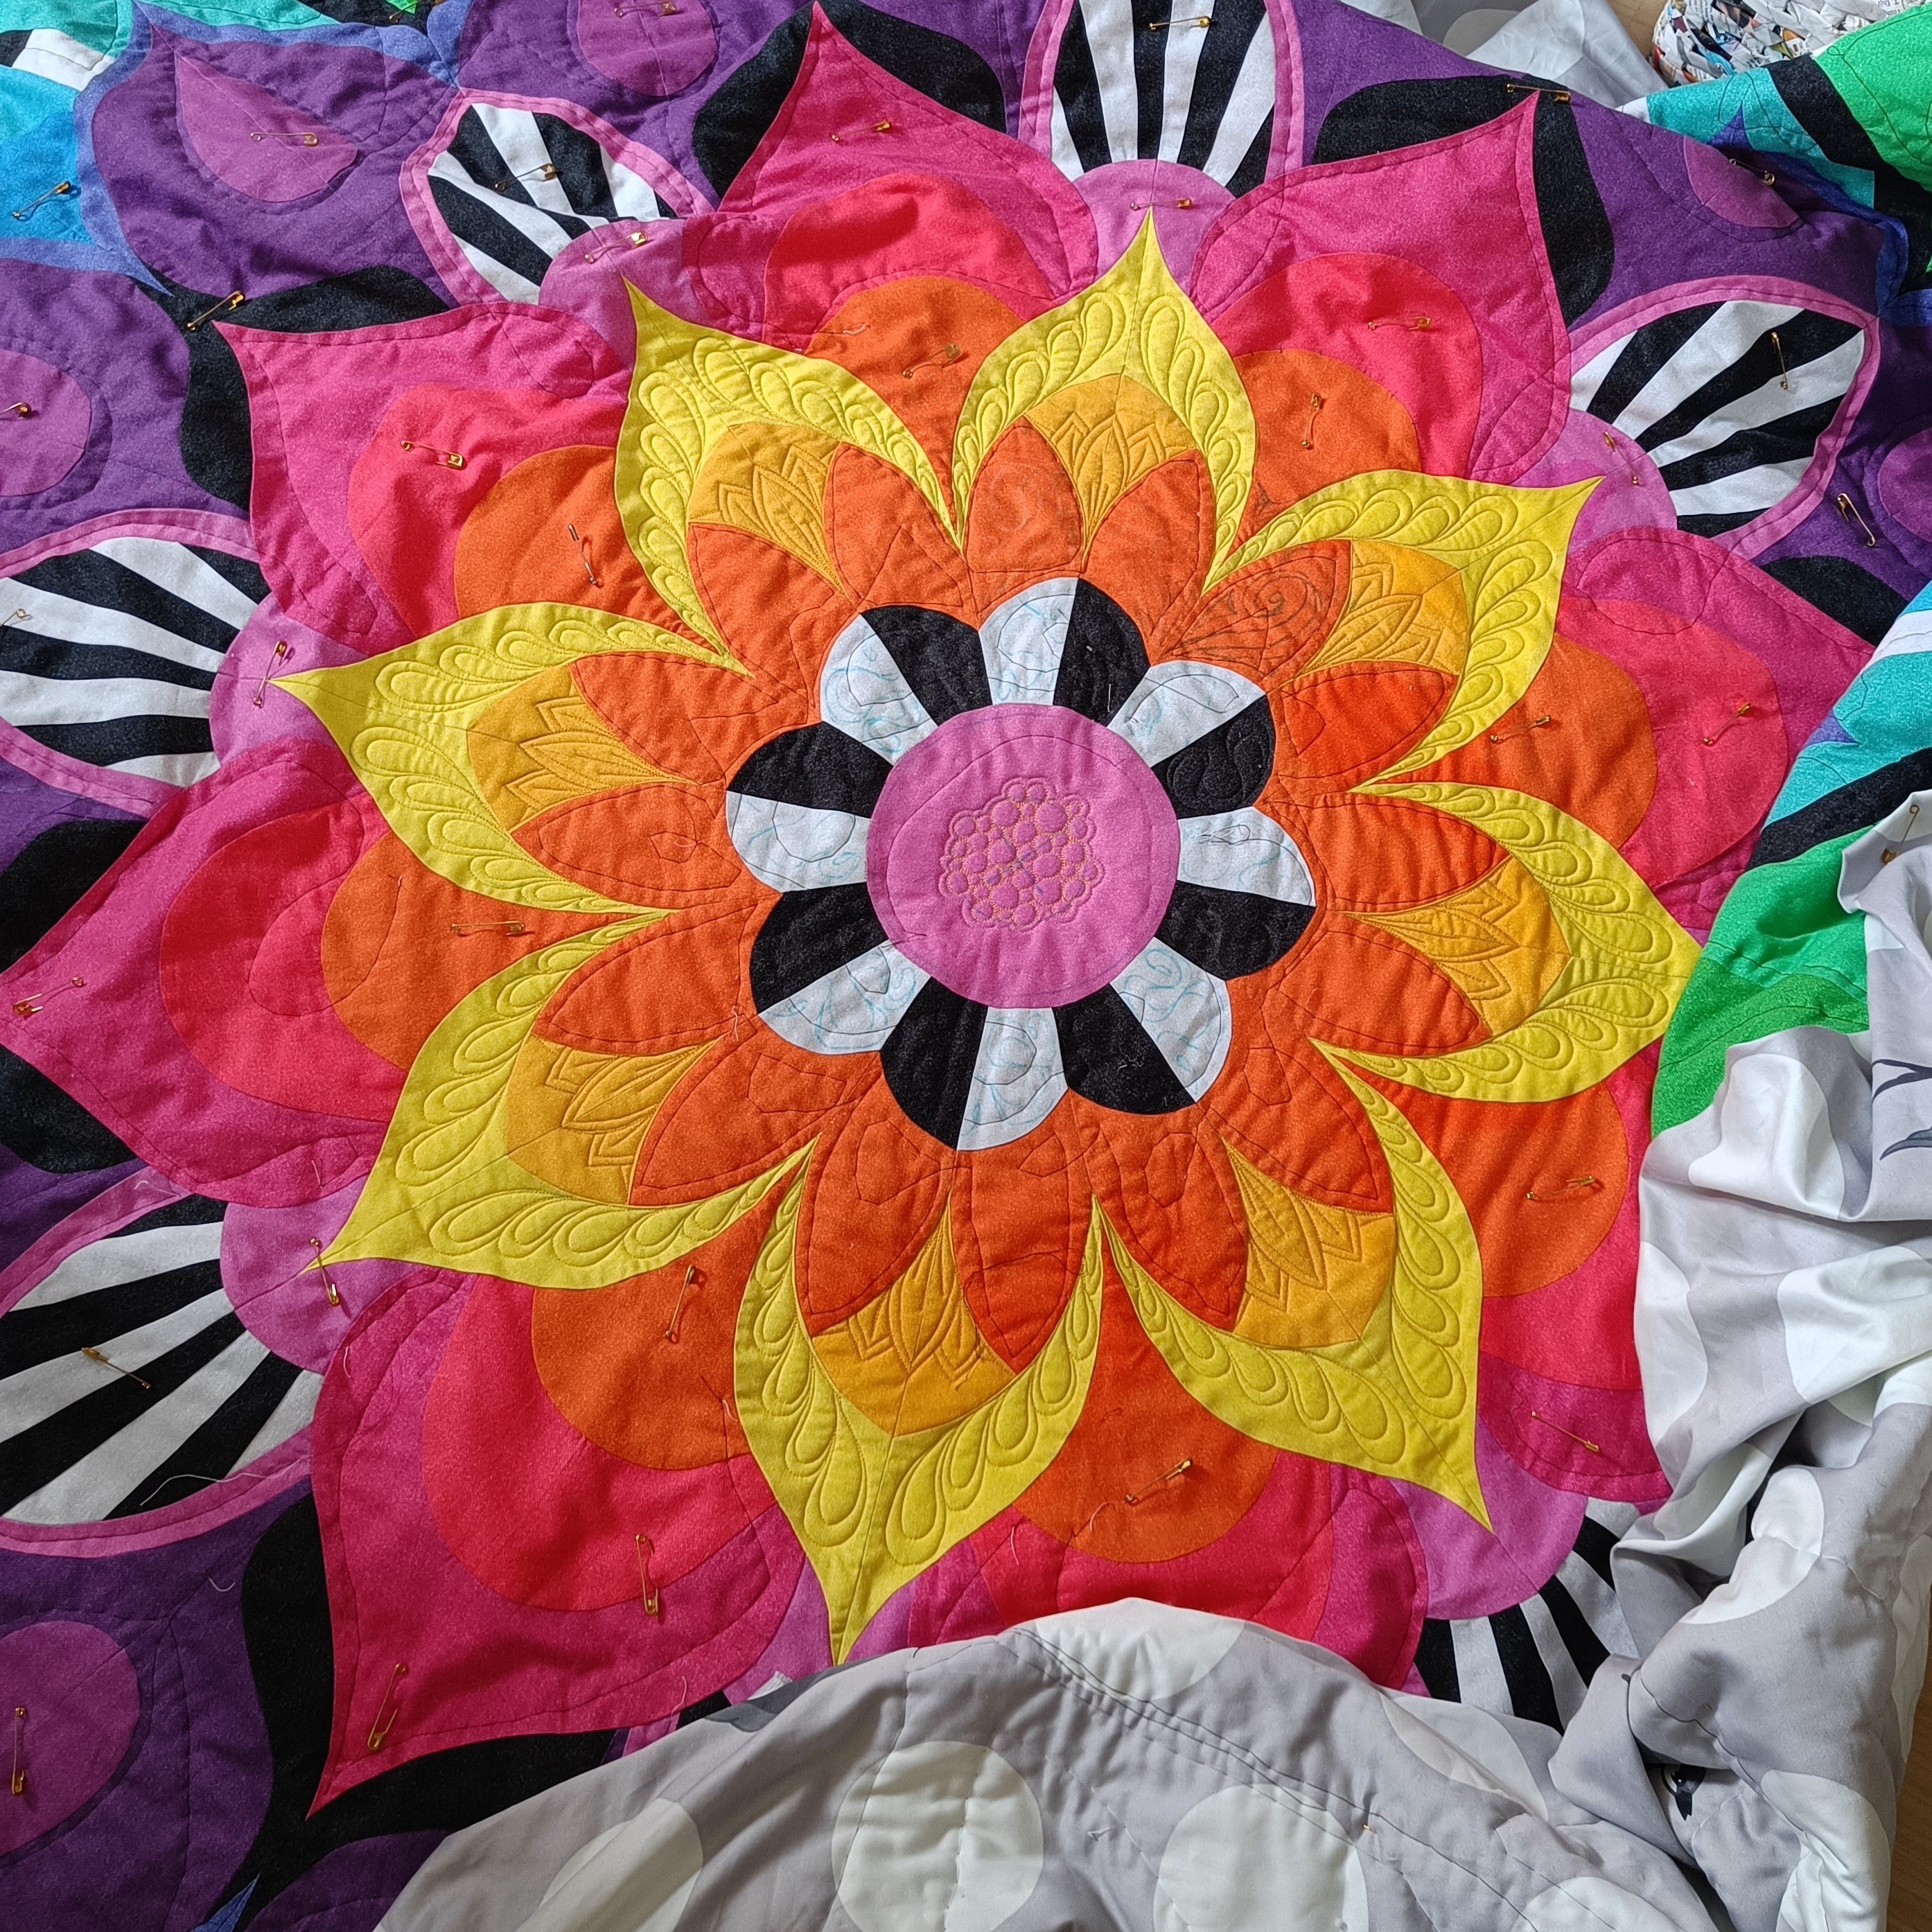
I created templates on the computer from my initial line drawing, adding seam allowance, reference marks and grain direction and away I went. Cutting out was quick, but transferring the refence marks was a bit of a pain until I worked out a good bulk method. Having learnt from my test sew, the piecing in batches came together well and much quicker than my usual FPP projects. In case you thought I had fallen out of love with FPP, you’re wrong, I slipped in a couple of FPP sections per octant with the b & w details. I pinned all my curves as they were not a consistent radius and was cautious with my pressing. I worked out the best position for seams to sit, improved my method for point matching and the long partial seams as I went along with only a few minor surgeries required.
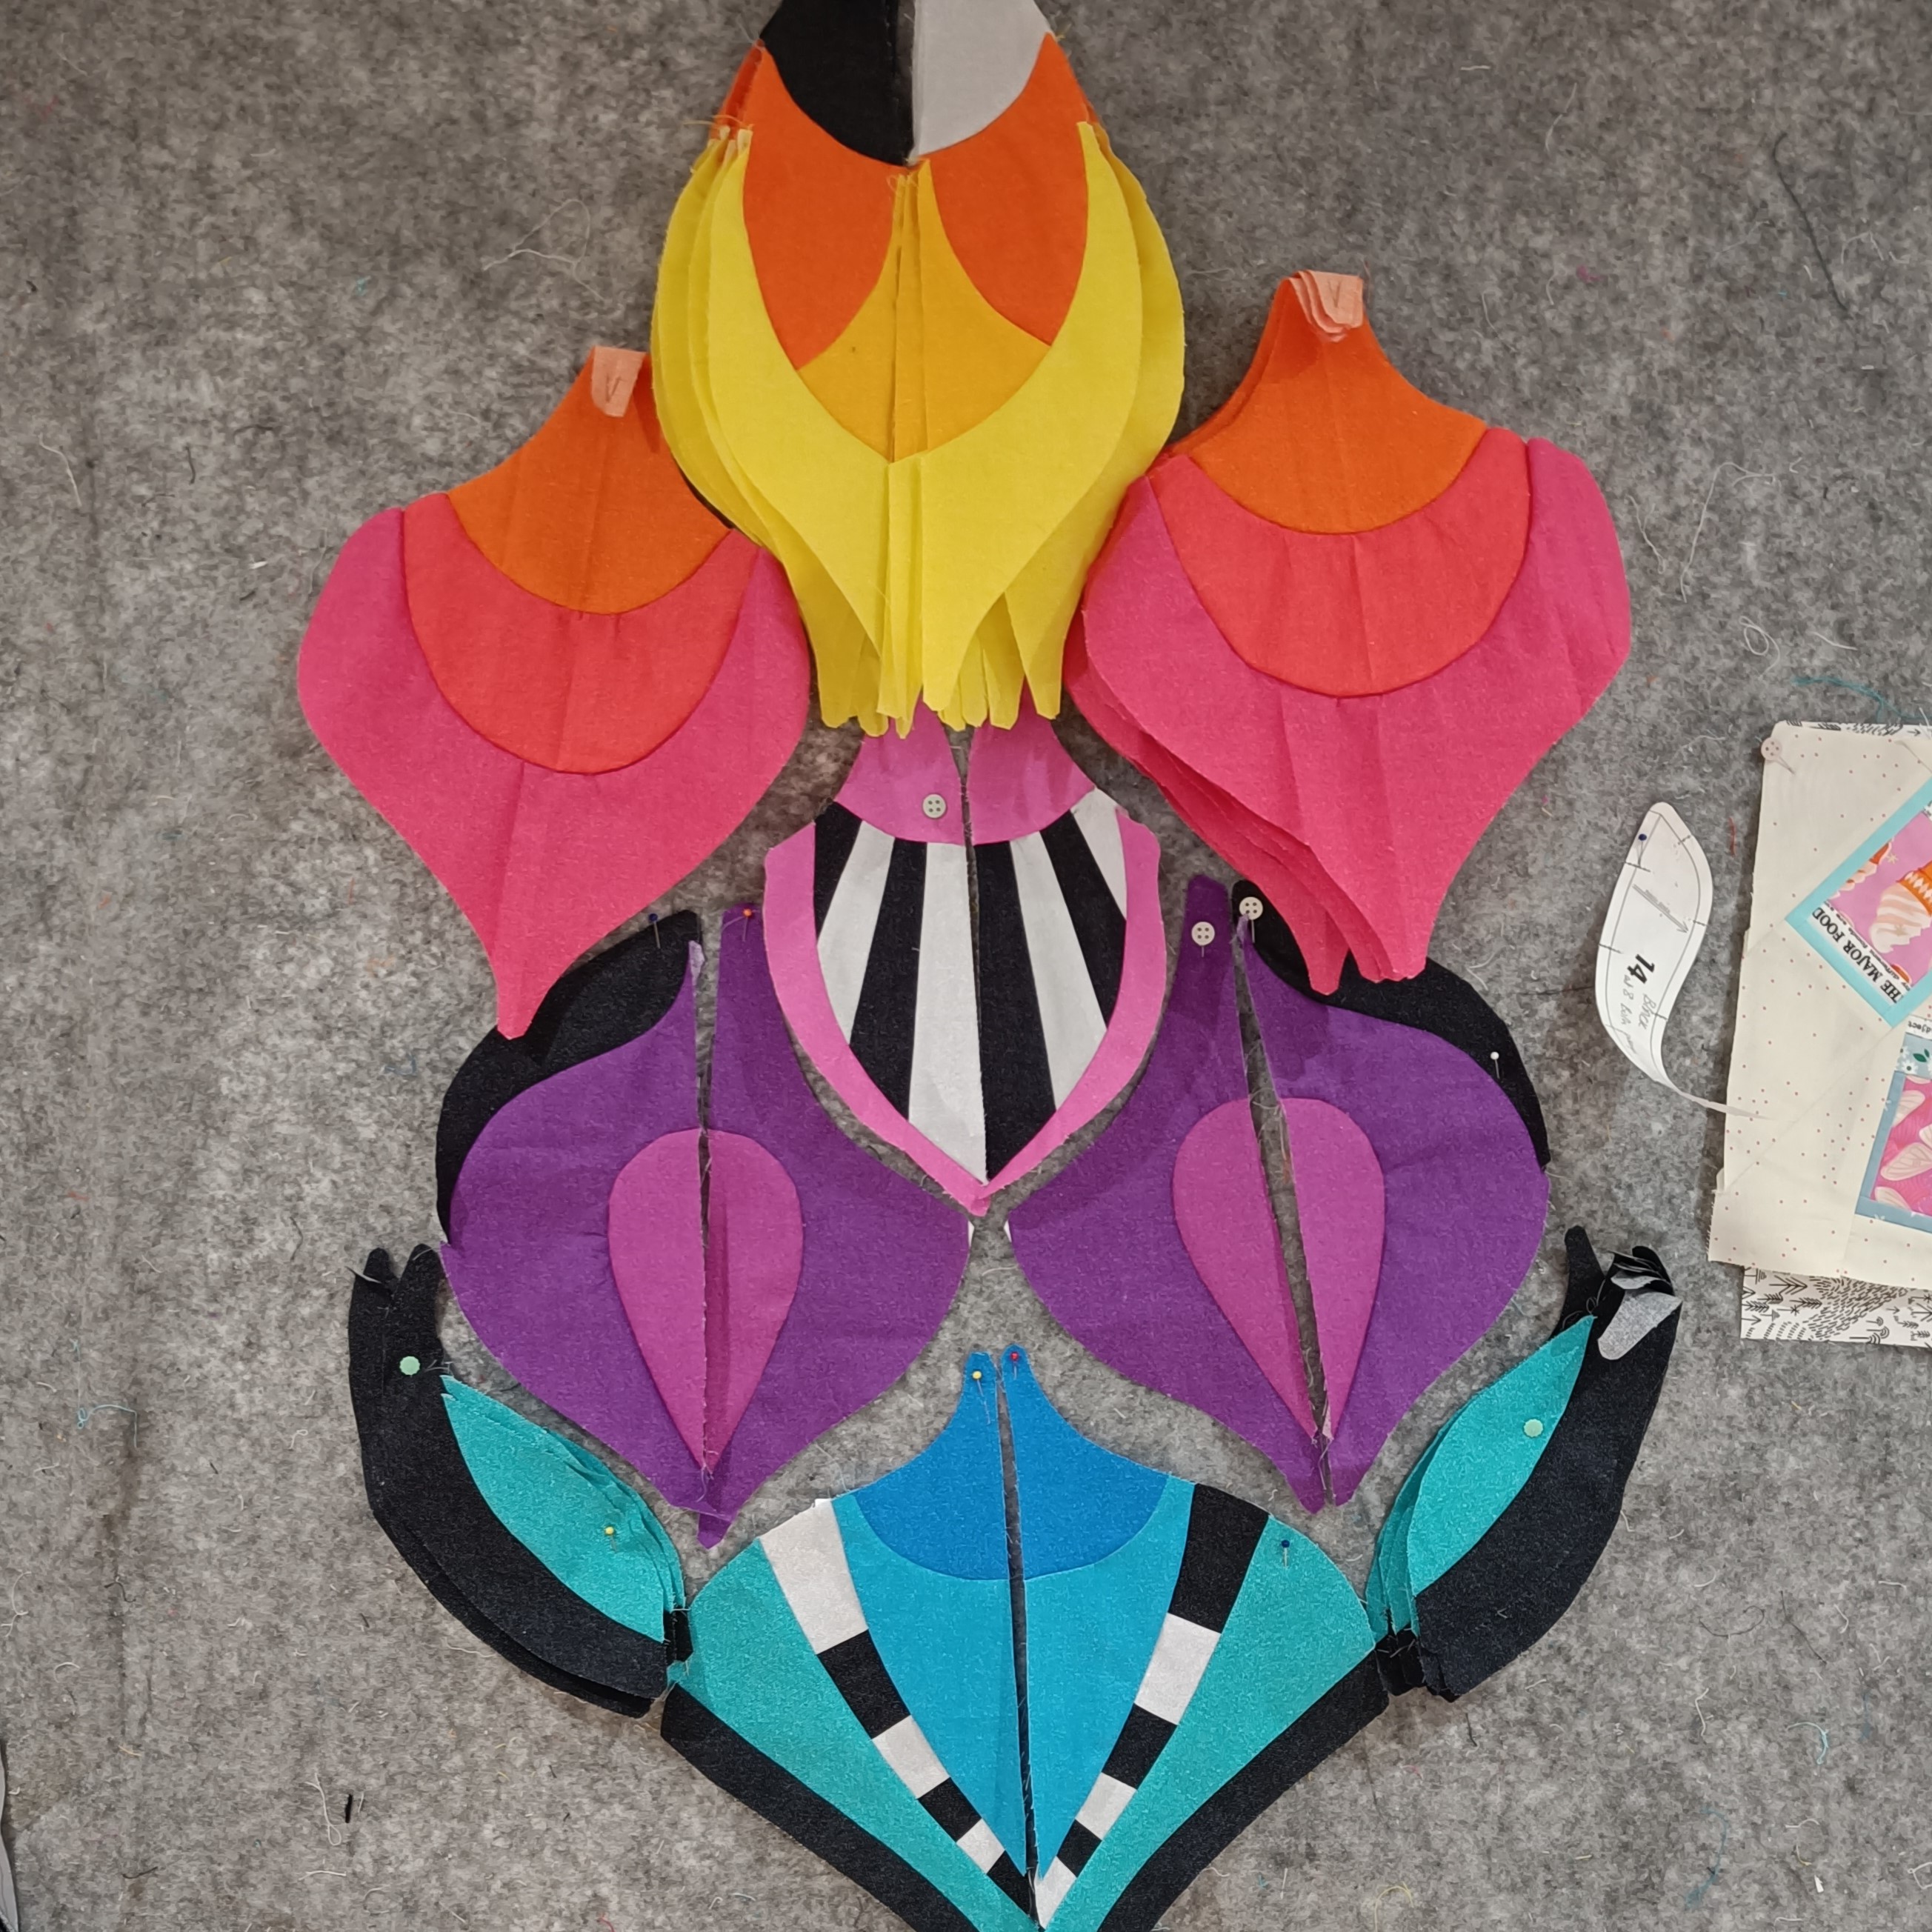
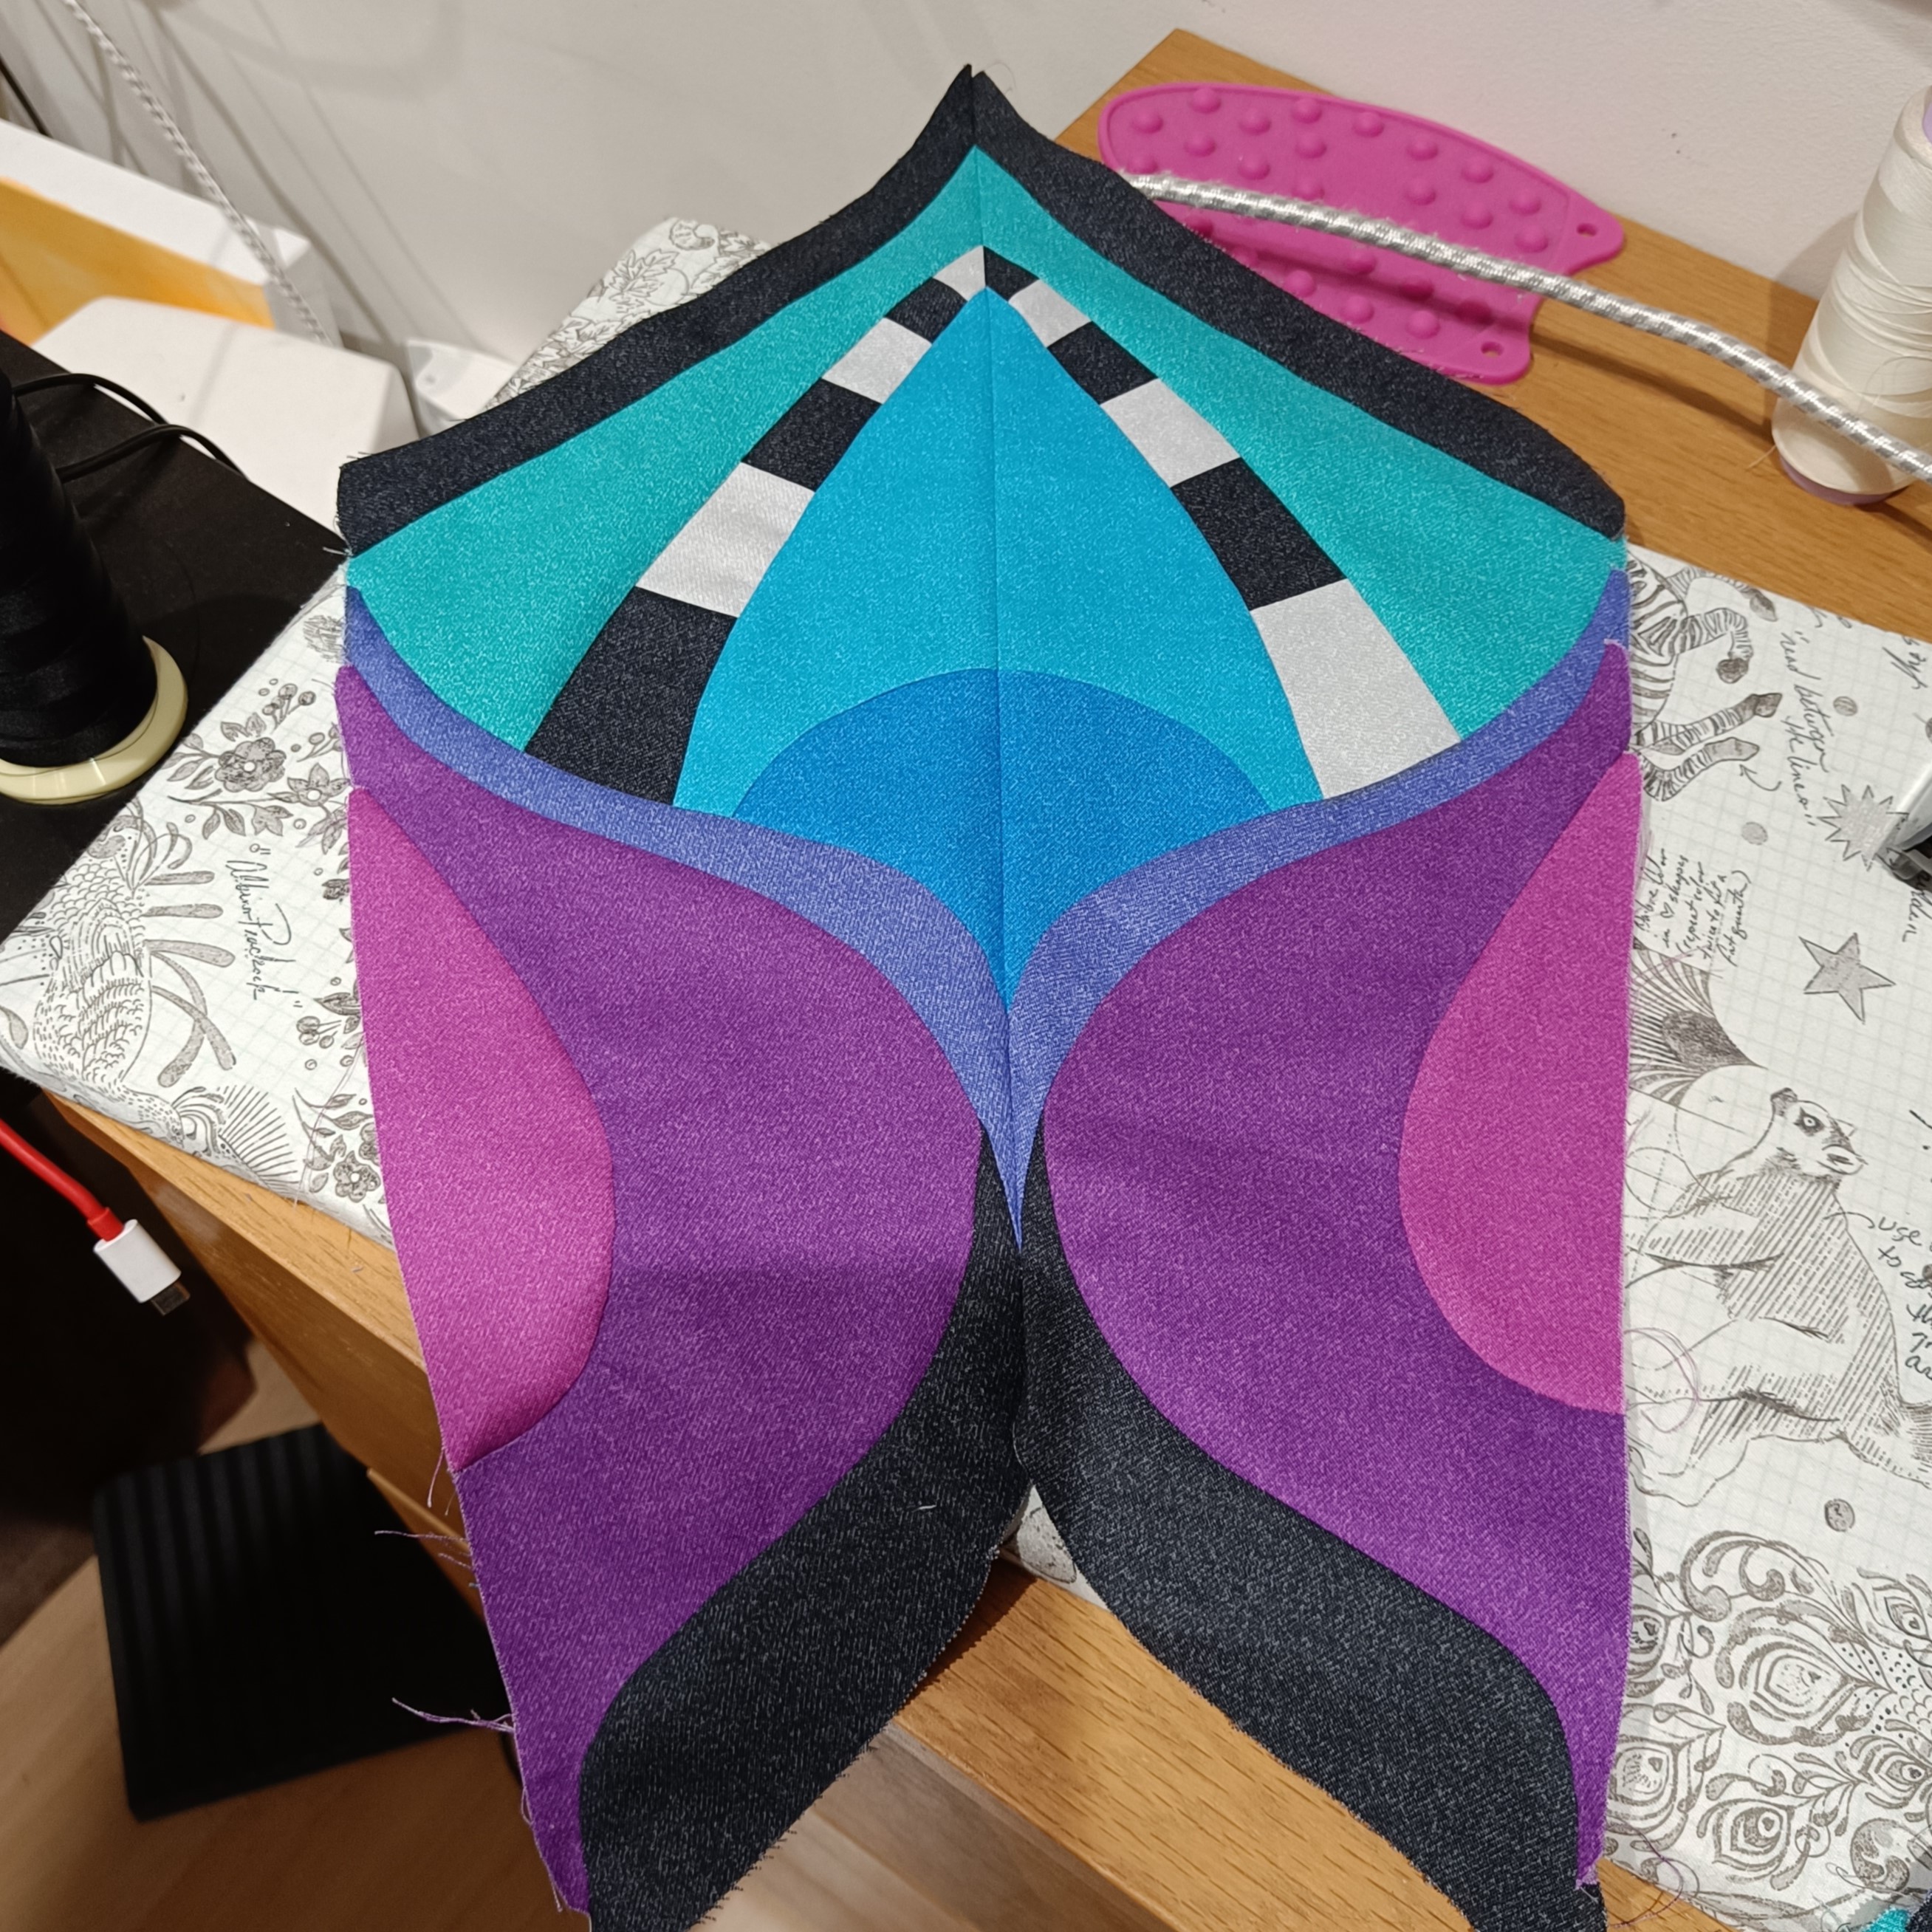
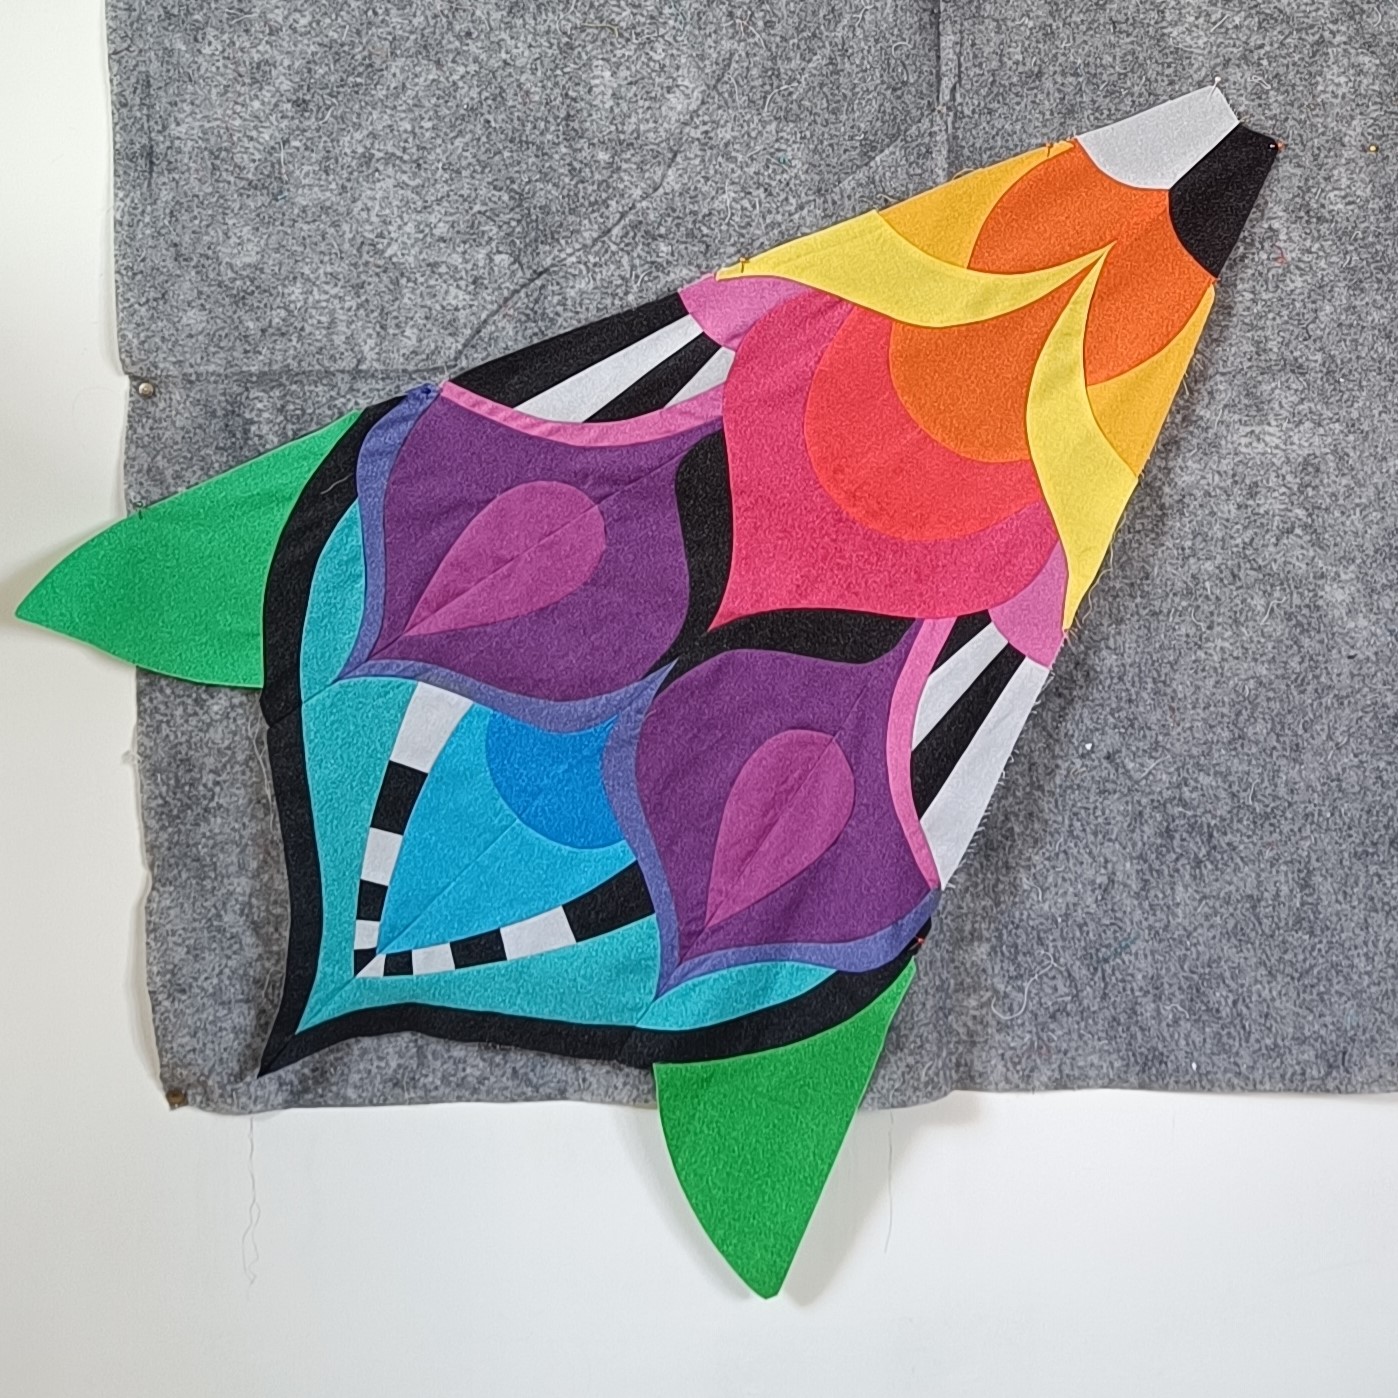
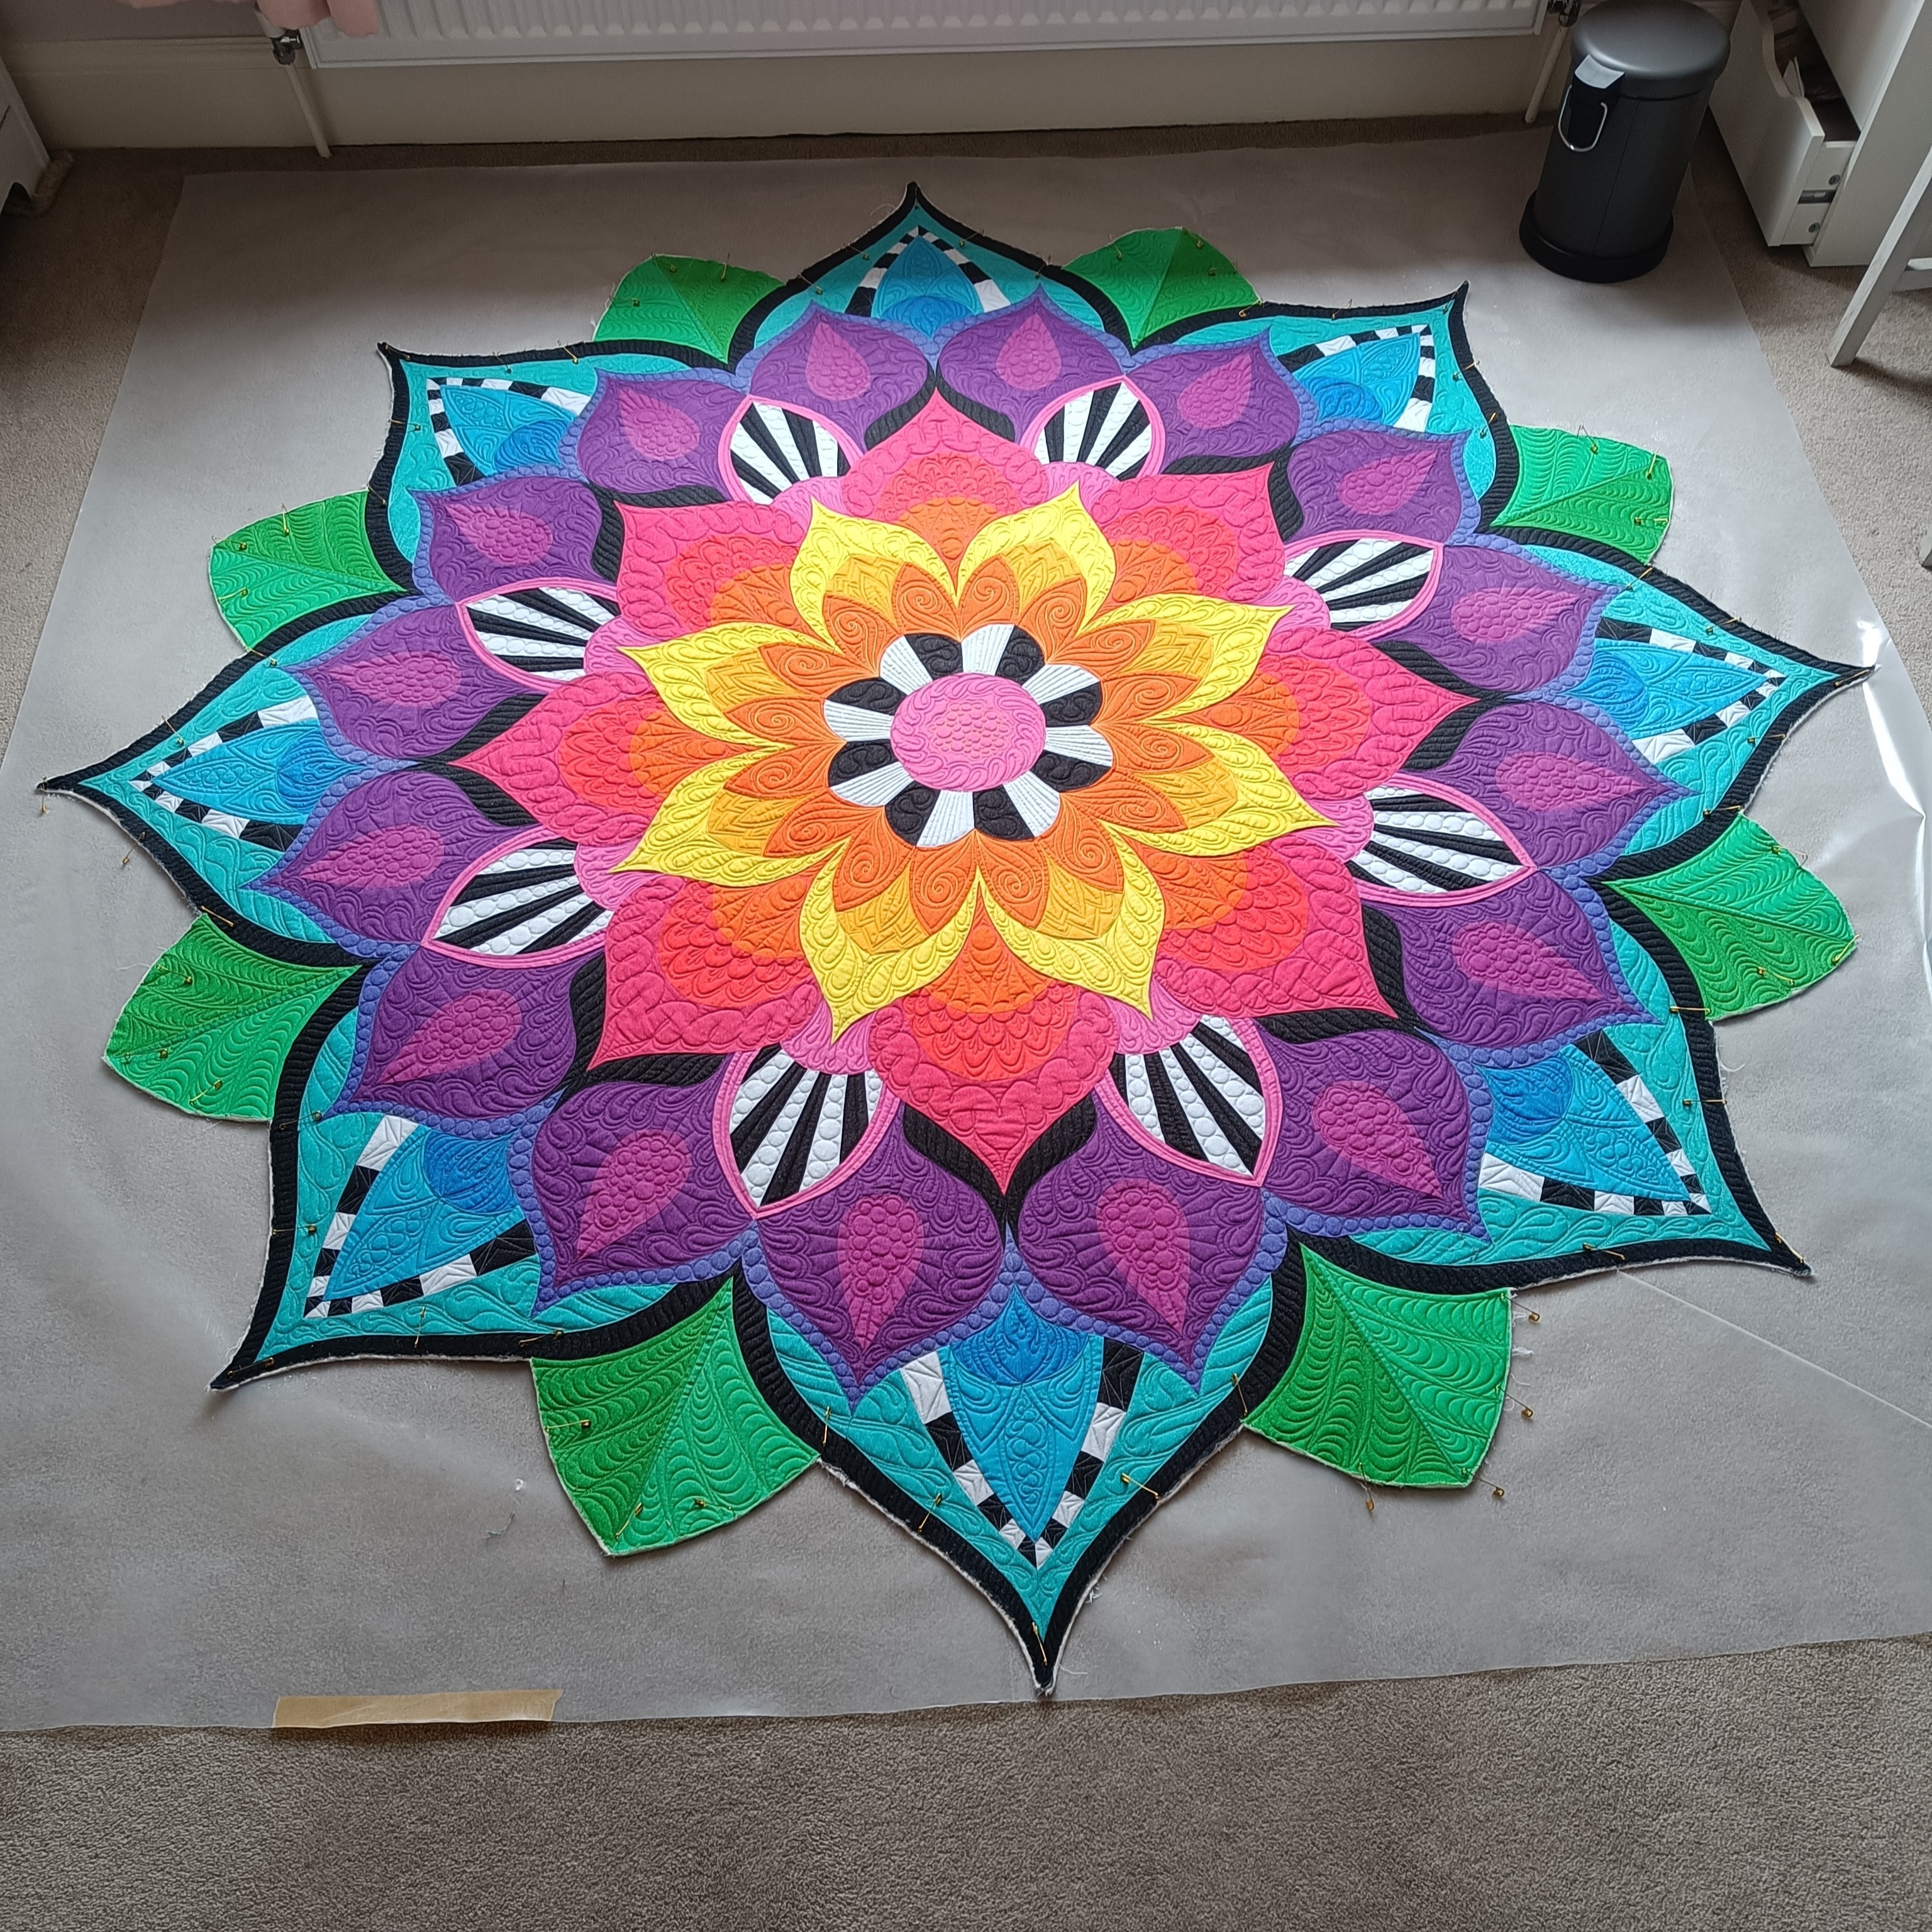
I couldn’t resist laying it out every time a section was finished to get a feel for how it would look. I even took a whole series of photos to create a stop motion clip of it coming together but of course I got inpatient and got carried away forgetting to photograph some steps. Once the octants came together they were joined with straight seams and I could see if I had a flat quilt top or one that dished! It was pretty much perfect except the outer edge needed a little persuasive pressing. Finally, I could trim the top and inset the final circle.
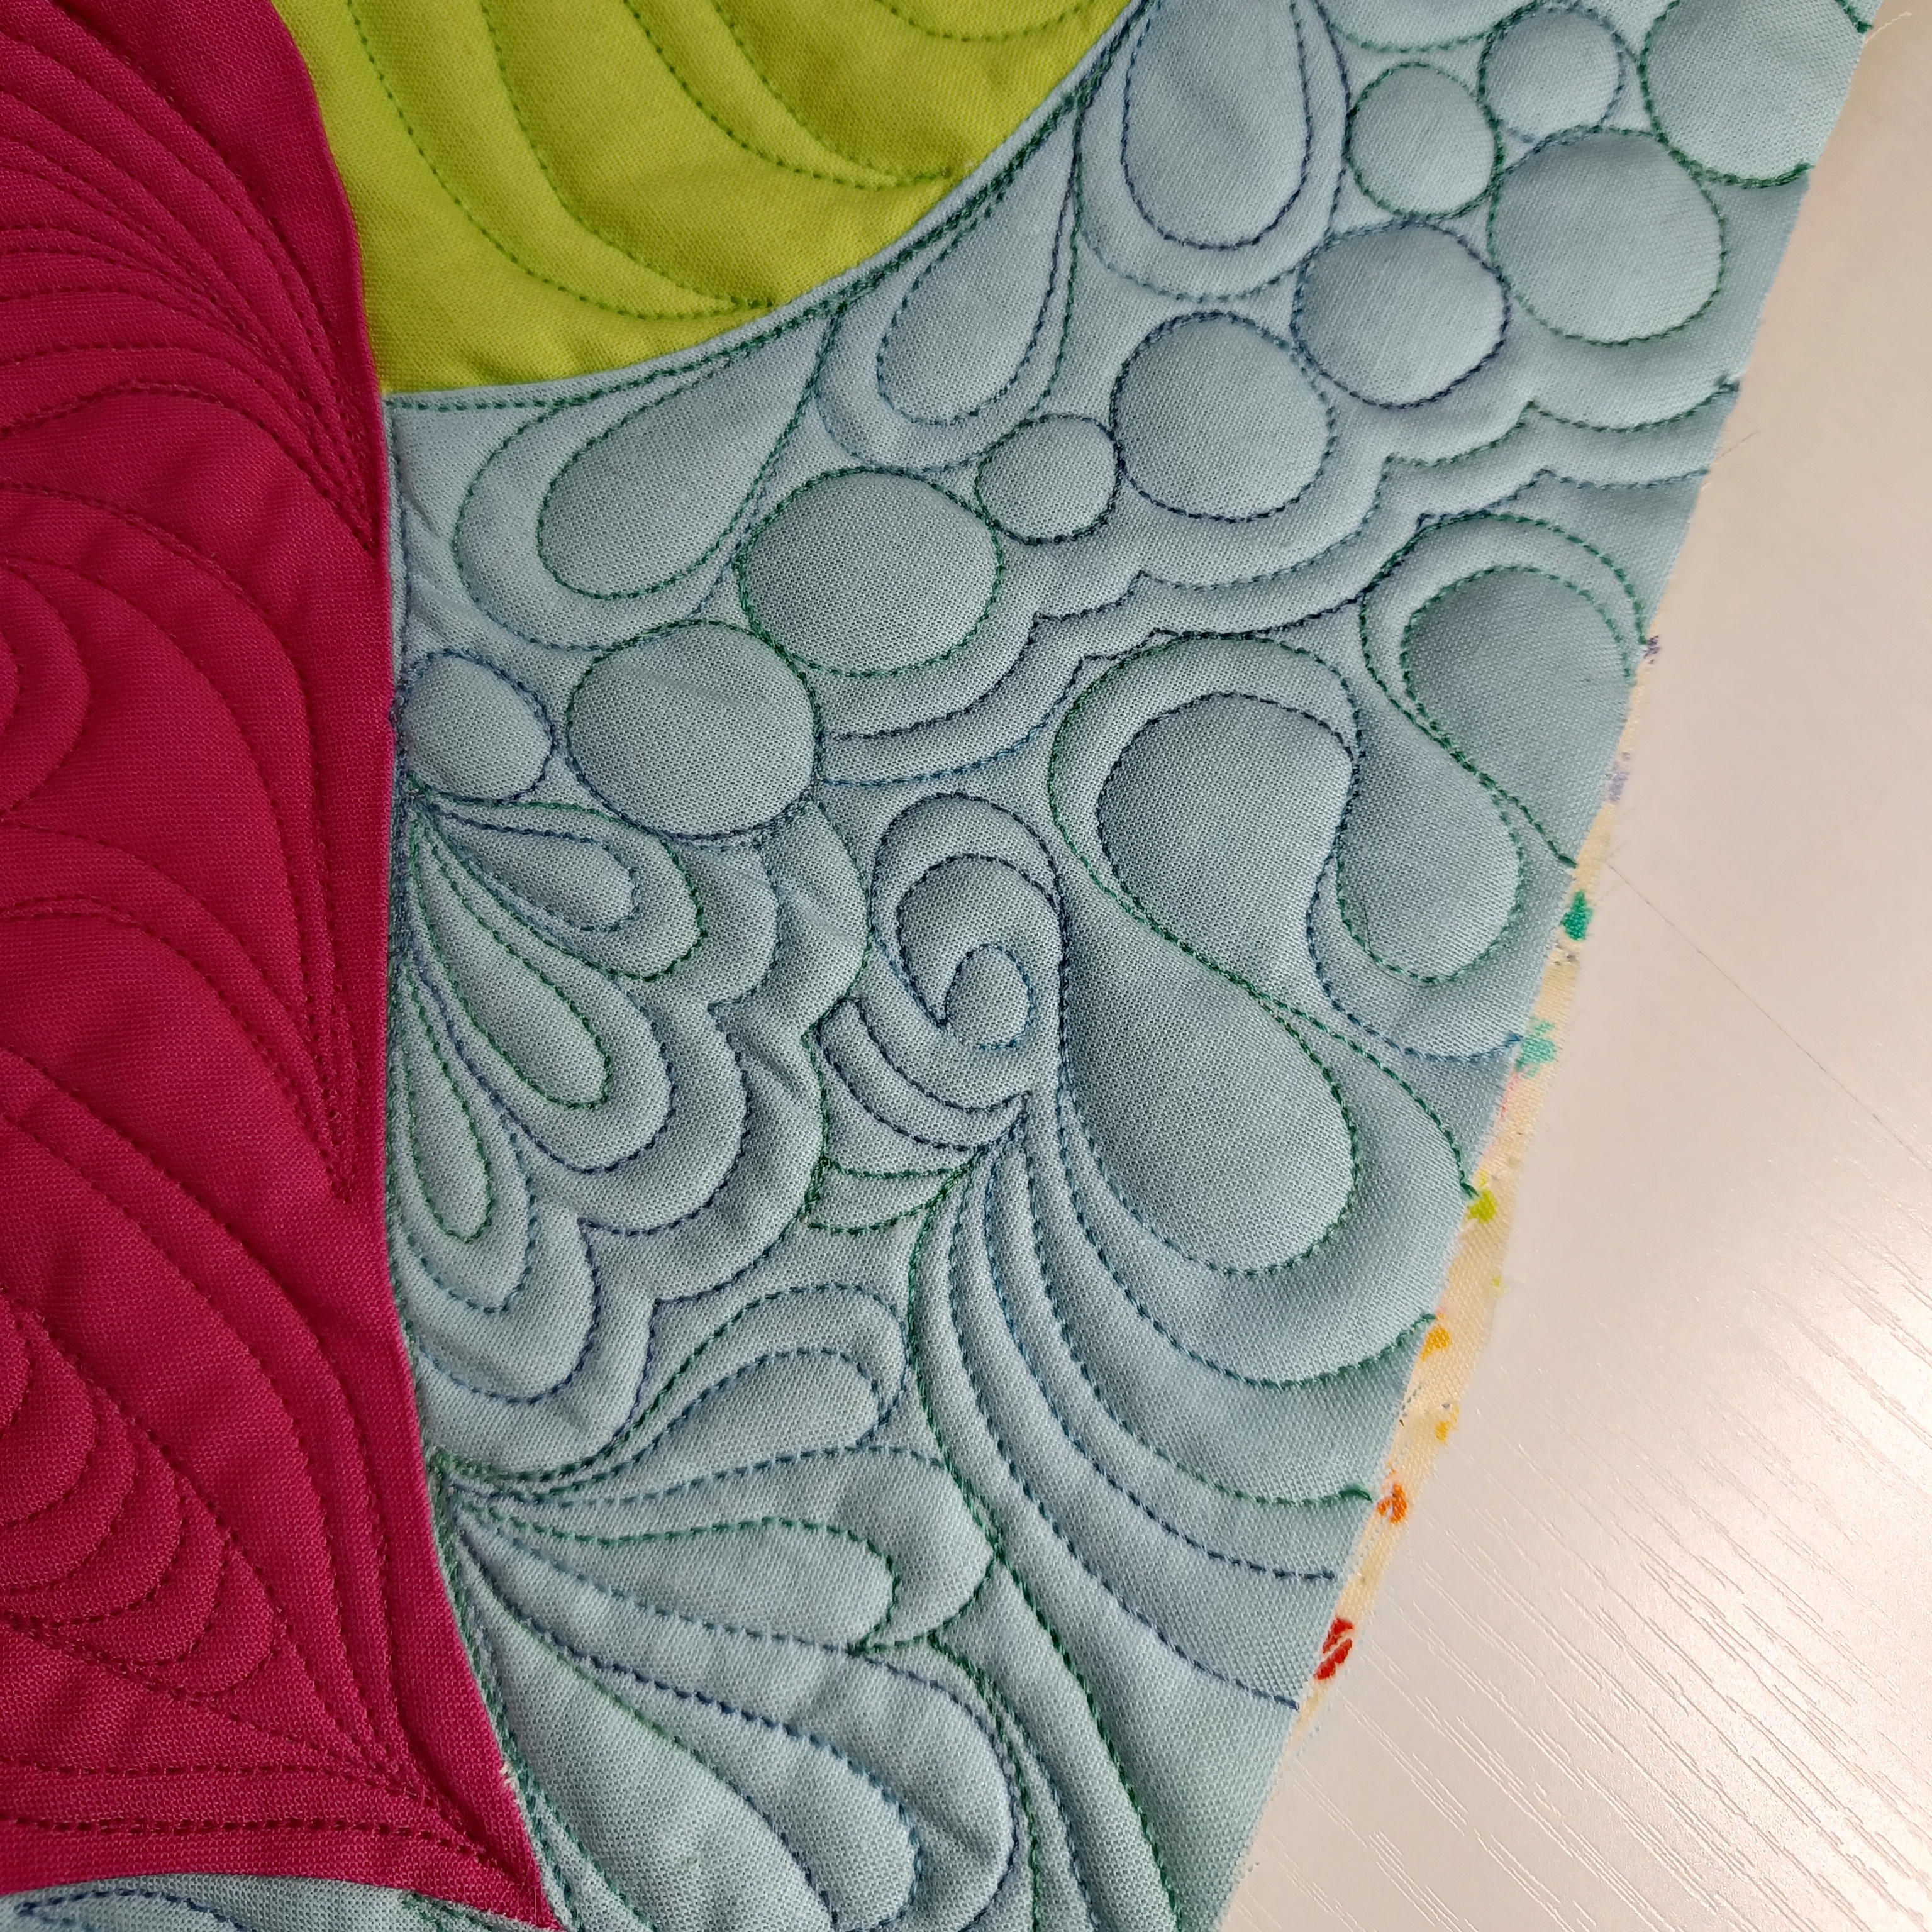
QUILTING
Well of course after piecing of these beautiful curves and smashing the point matching and partial seams I was petrified I was going to ruin the top with my quilting! The top actually spent 2 weeks laid out on my daughter’s floor with another quilt over the top to protect it from cats, glitter and spills but it was the only place I knew it wouldn’t get crumpled.
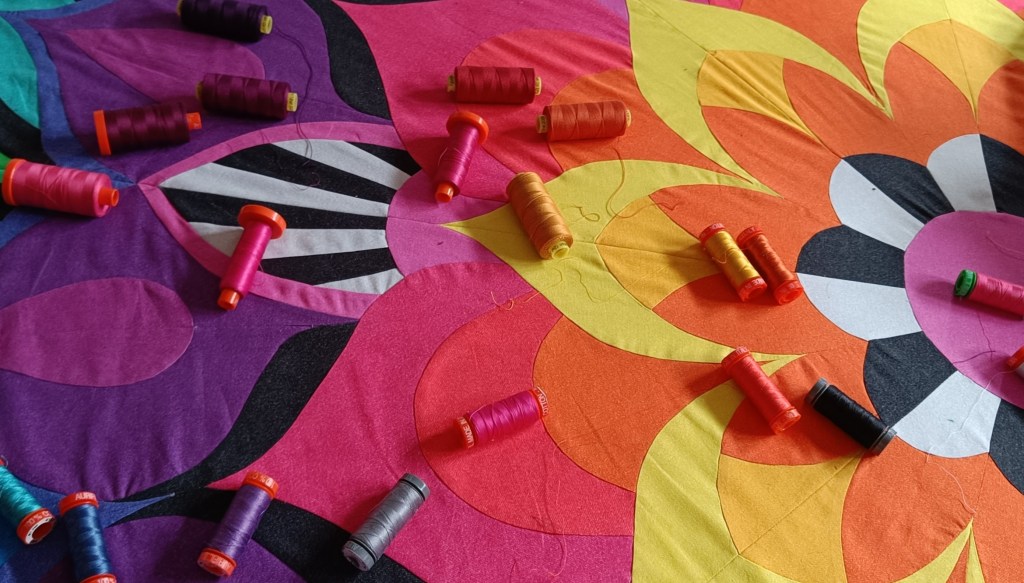
During these weeks I played with all of my threads on the top and got familiar with my machine again. I ended up using threads I already had with the exception of a few I bought at Malvern in different weights. I used a couple of 28wt, as many 40wt as I could and a couple of 50wt when i couldn’t justify buying a different weight of a thread for a colour I already had. They were all Aurifil except 1 yellow and used 15 or 16 shades in total. I think they were: 2870,1147, 2815, 2810, 1148, 2582, 2540, 1243, 4020,1100, 2530, 2692 & 2600.
One thing I have learnt with FMQ is “practice practice practice”. That doesn’t mean it has to be time at the machine but doodling with a pen. I printed out the outline of one octant of the quilt sticking it together and then to my patio doors next to our dinning table. I popped tracing paper over the top and doodled – if I don’t like something i binned it and if did i kept it. I sometimes needed to split up areas as if i struggled to do smooth lines as i would be moving my hand to far I knew I wouldn’t be able to create a smooth stitch line on the machine without readjusting my hands or stopping when quilting.

I used a double layer of Vlieseline 268 Bamboo mix 50/50 wadding, basted with a little spray, pins and long basting 1/2″ stitches on my Bernina Q20. I mostly worked from the middle of the quilt out, but had not decided what I wanted in the centre when I started. I actually started with the dark orange petals working round the circle. I then progressed out to the yellow before returning to the centre. At each stage I practiced the motif with the thread I intended to use, on an identical sandwich to ensure tension and my hands were working well, before setting my quilt up under my machine and working round the 8 or 16 sections.
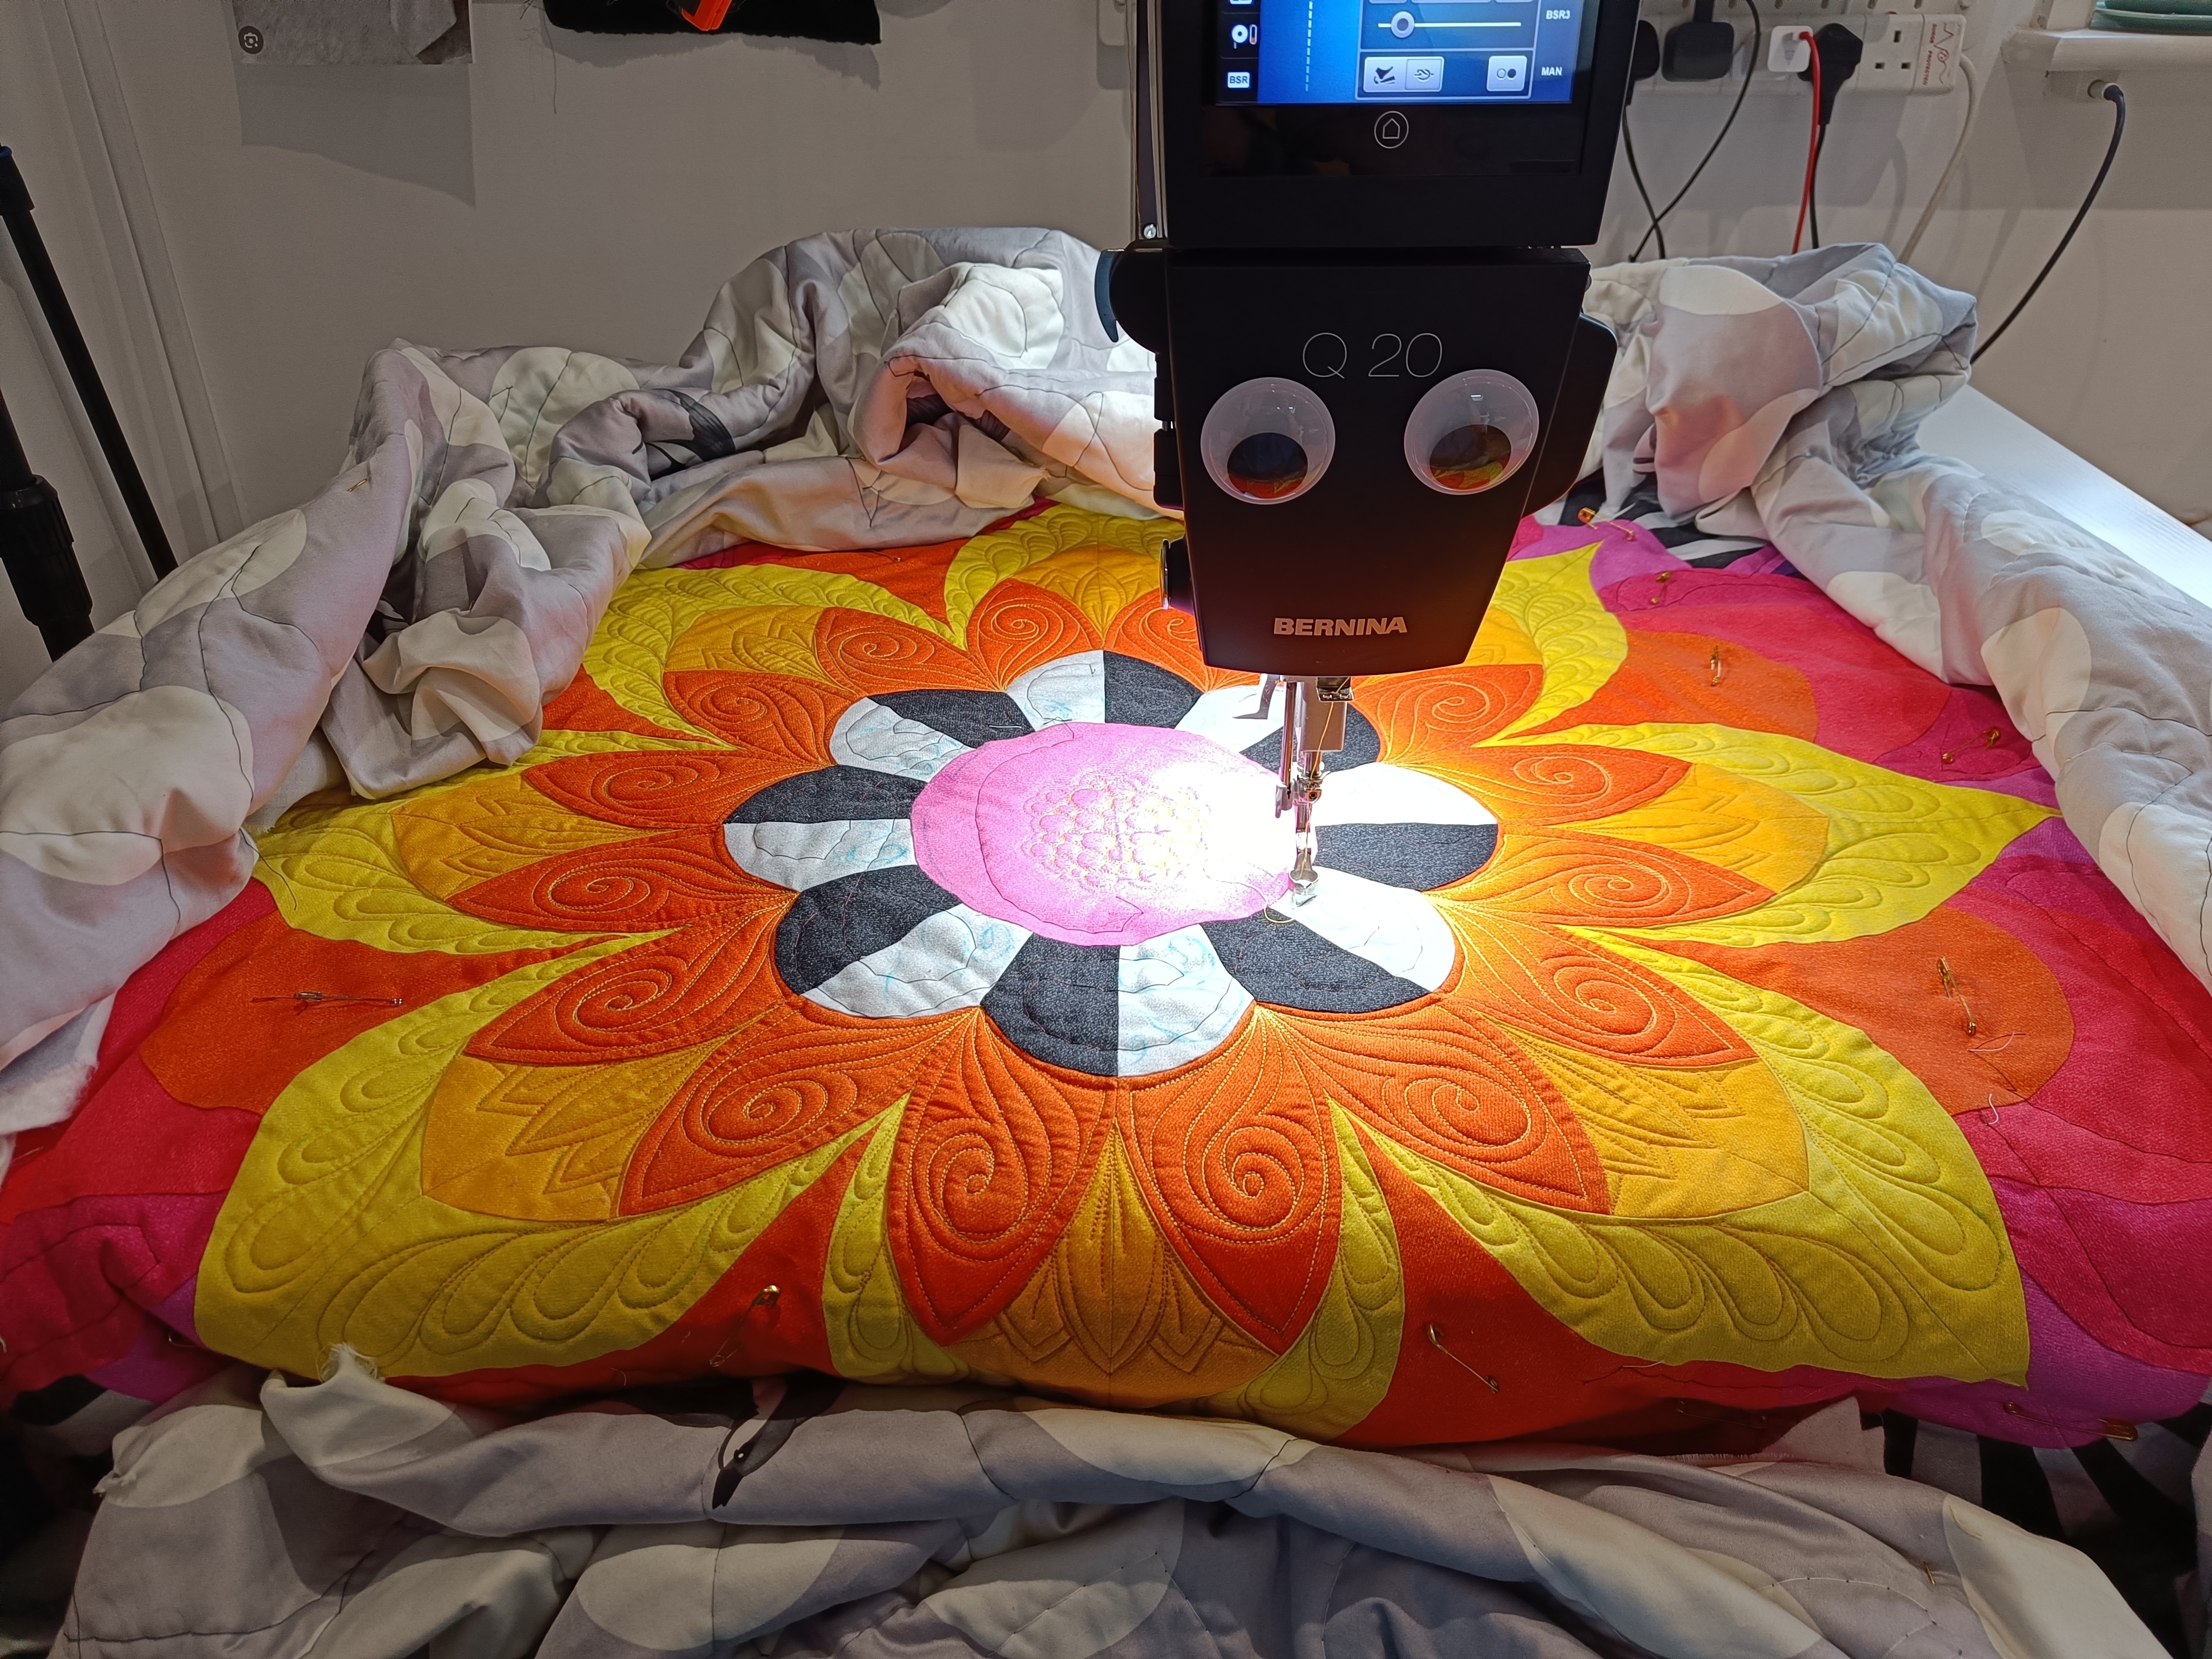
A little about the machine I used a Bernina Q20 – the throat is 20″ and I have the foldable table as its set up in our spare room, so when people come to stay I can fold it up and it hardly takes any space (20cm wide apposed to 1.15m). When the table is folded out it is 91cm x 1.15m (36“x 45“) so pretty compact and though it does make quilting small things easy moving a 2m (80″) square quilt is not. The quilts constantly gets caught on the front edge and excess falls of the side or back (and due to the weight you can’t pull it back so it gets stuck. I rigged up a bungy cord and rail system to help which is an improvement but you certainly get an arm and shoulder workout.

FINISHING TOUCHES
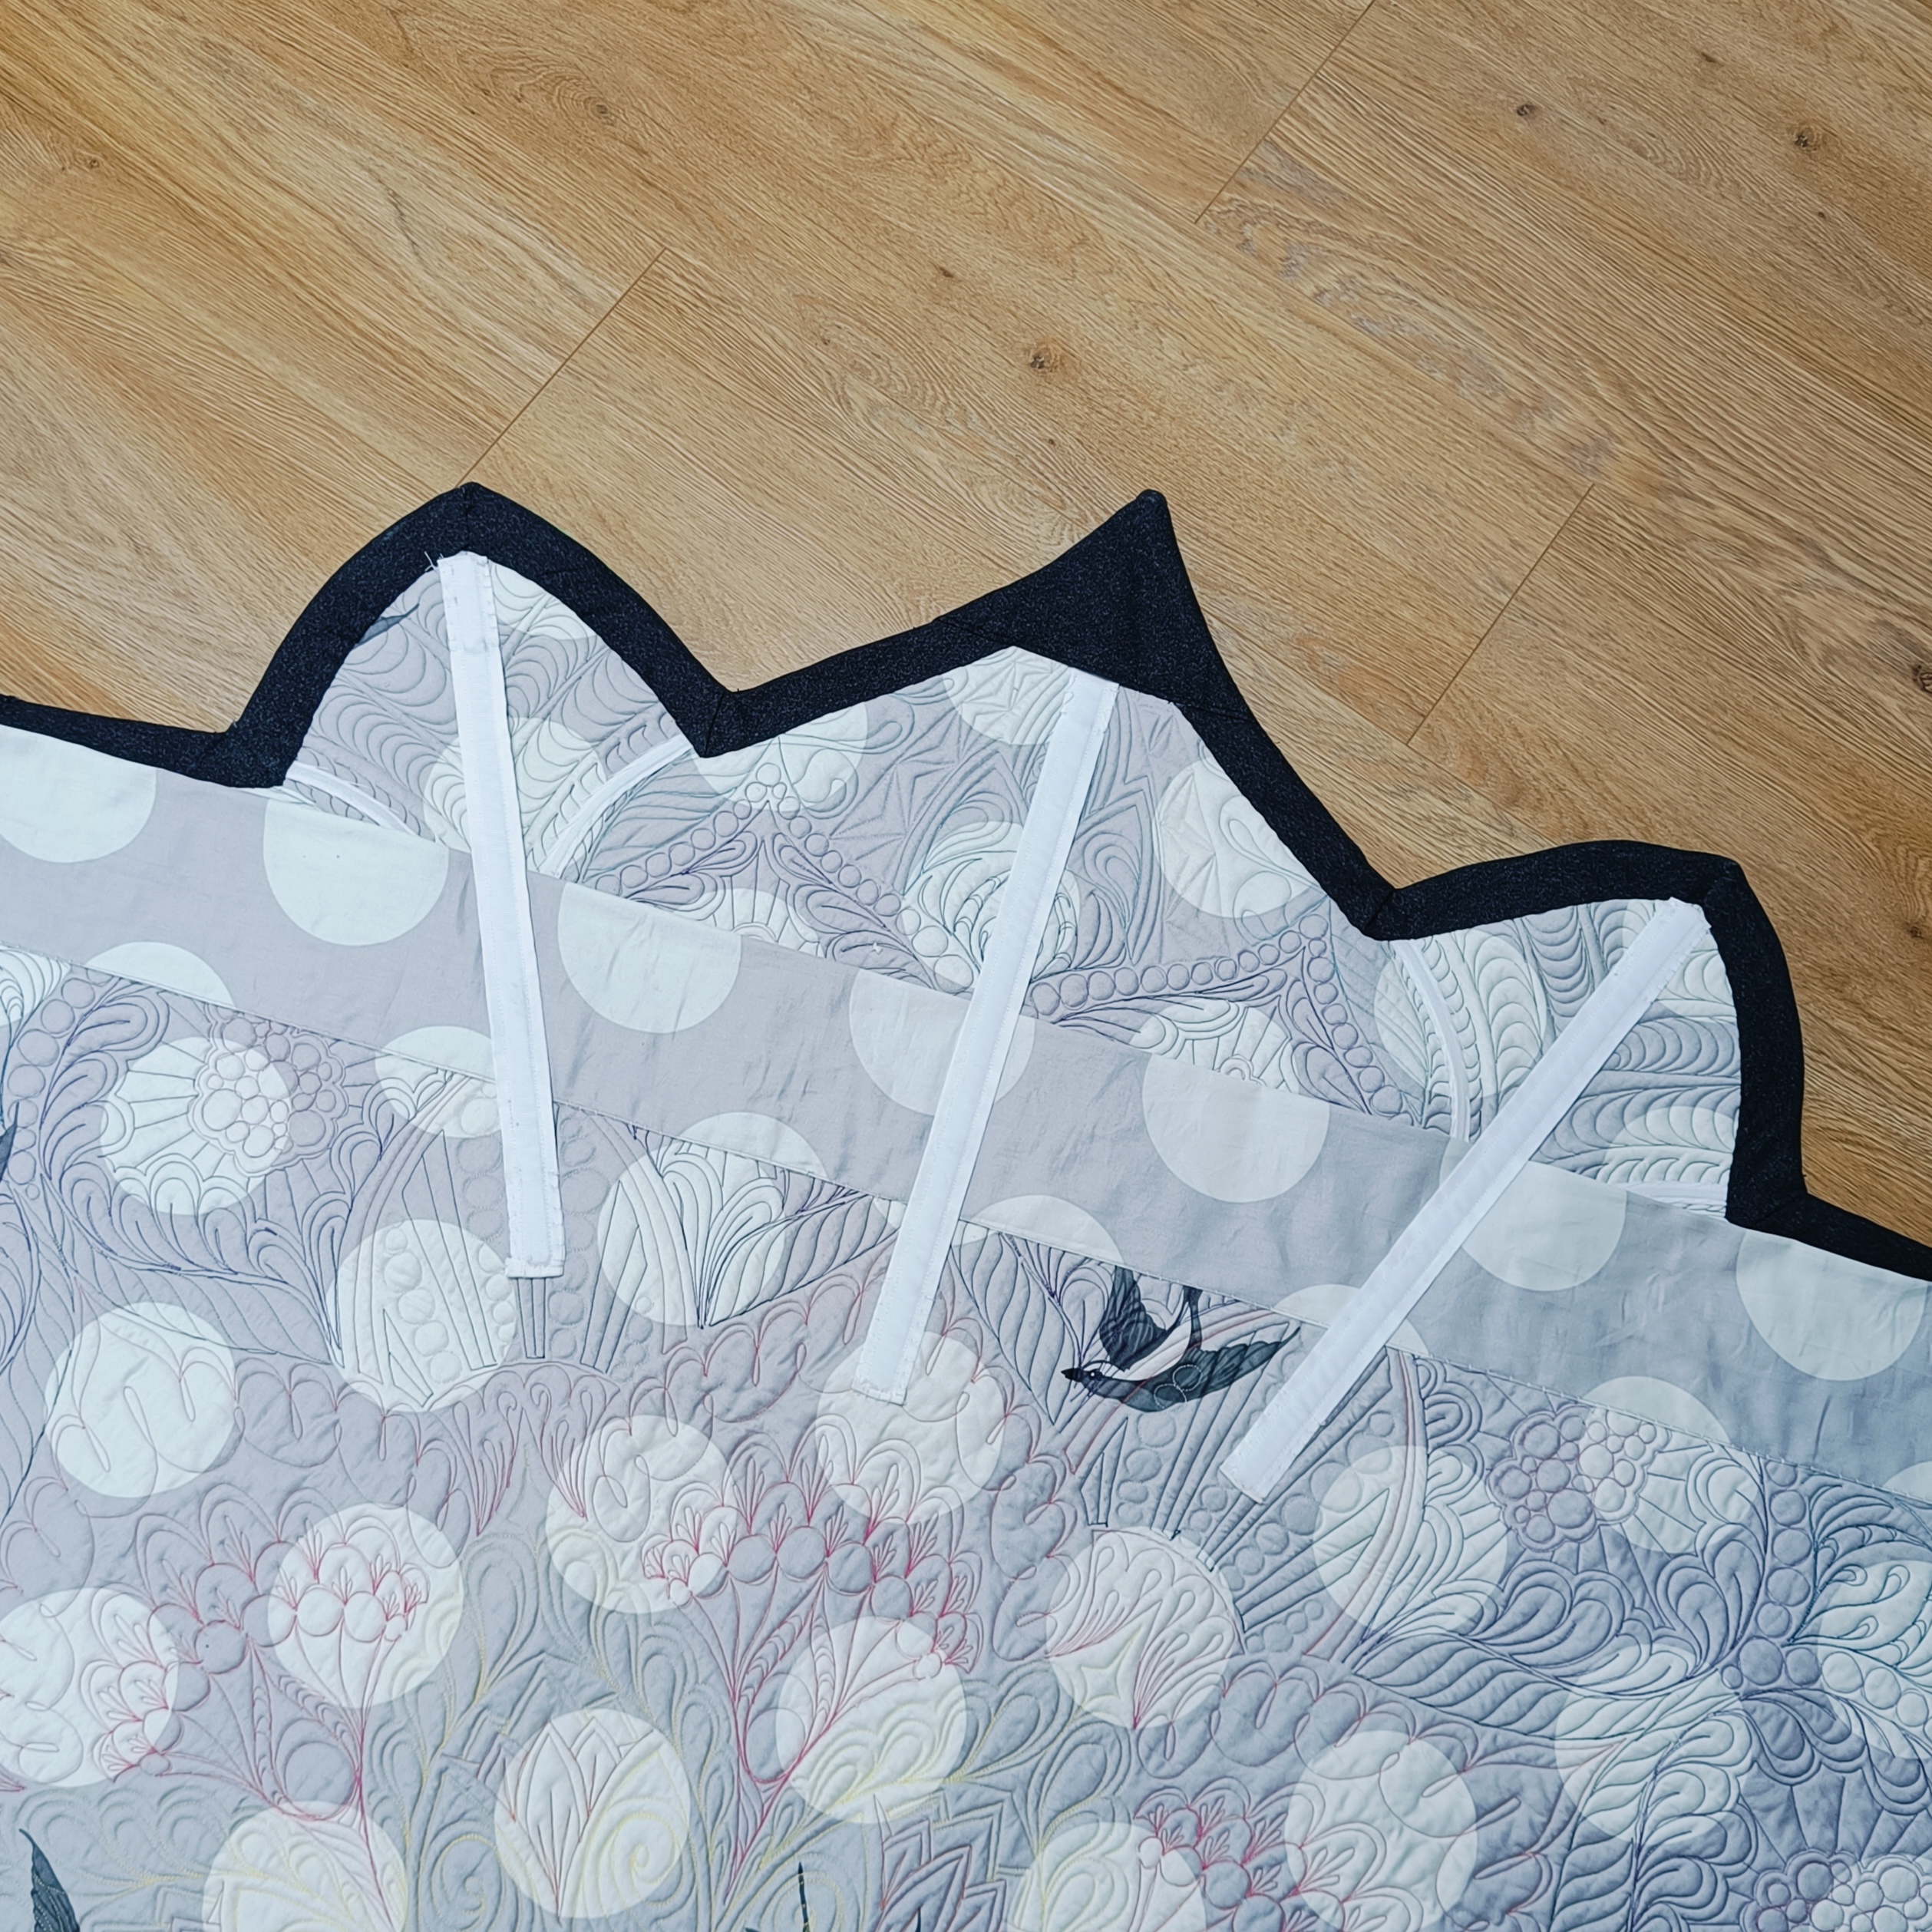
Of course I didn’t want to make it too easy for myself! I had decided I didn’t want the quilt to be square! I had designed the quilt so the mandala could sit in a square background but I felt a circular quilt (with irregular shape????) would be much more interesting and challenging so ideal for a competition quilt.
After quilting I was pretty happy with how flat it it ended up. From past years I had also learnt that it’s worth taking extra care to ensure it hangs well. There was a little ruffling (extra) around the outer edge and it didn’t lay completely flat so I decided to block it! I hoped the centre would relax a little and stretch out to match the outer diameter. I bravely drenched the quilt, gently squeezed it out and lay it on a plastic sheet to protect the carpet and then pinned and tugged until she lay flat! Fingers were crossed and several days later I was overjoyed to discover she had dried perfectly!
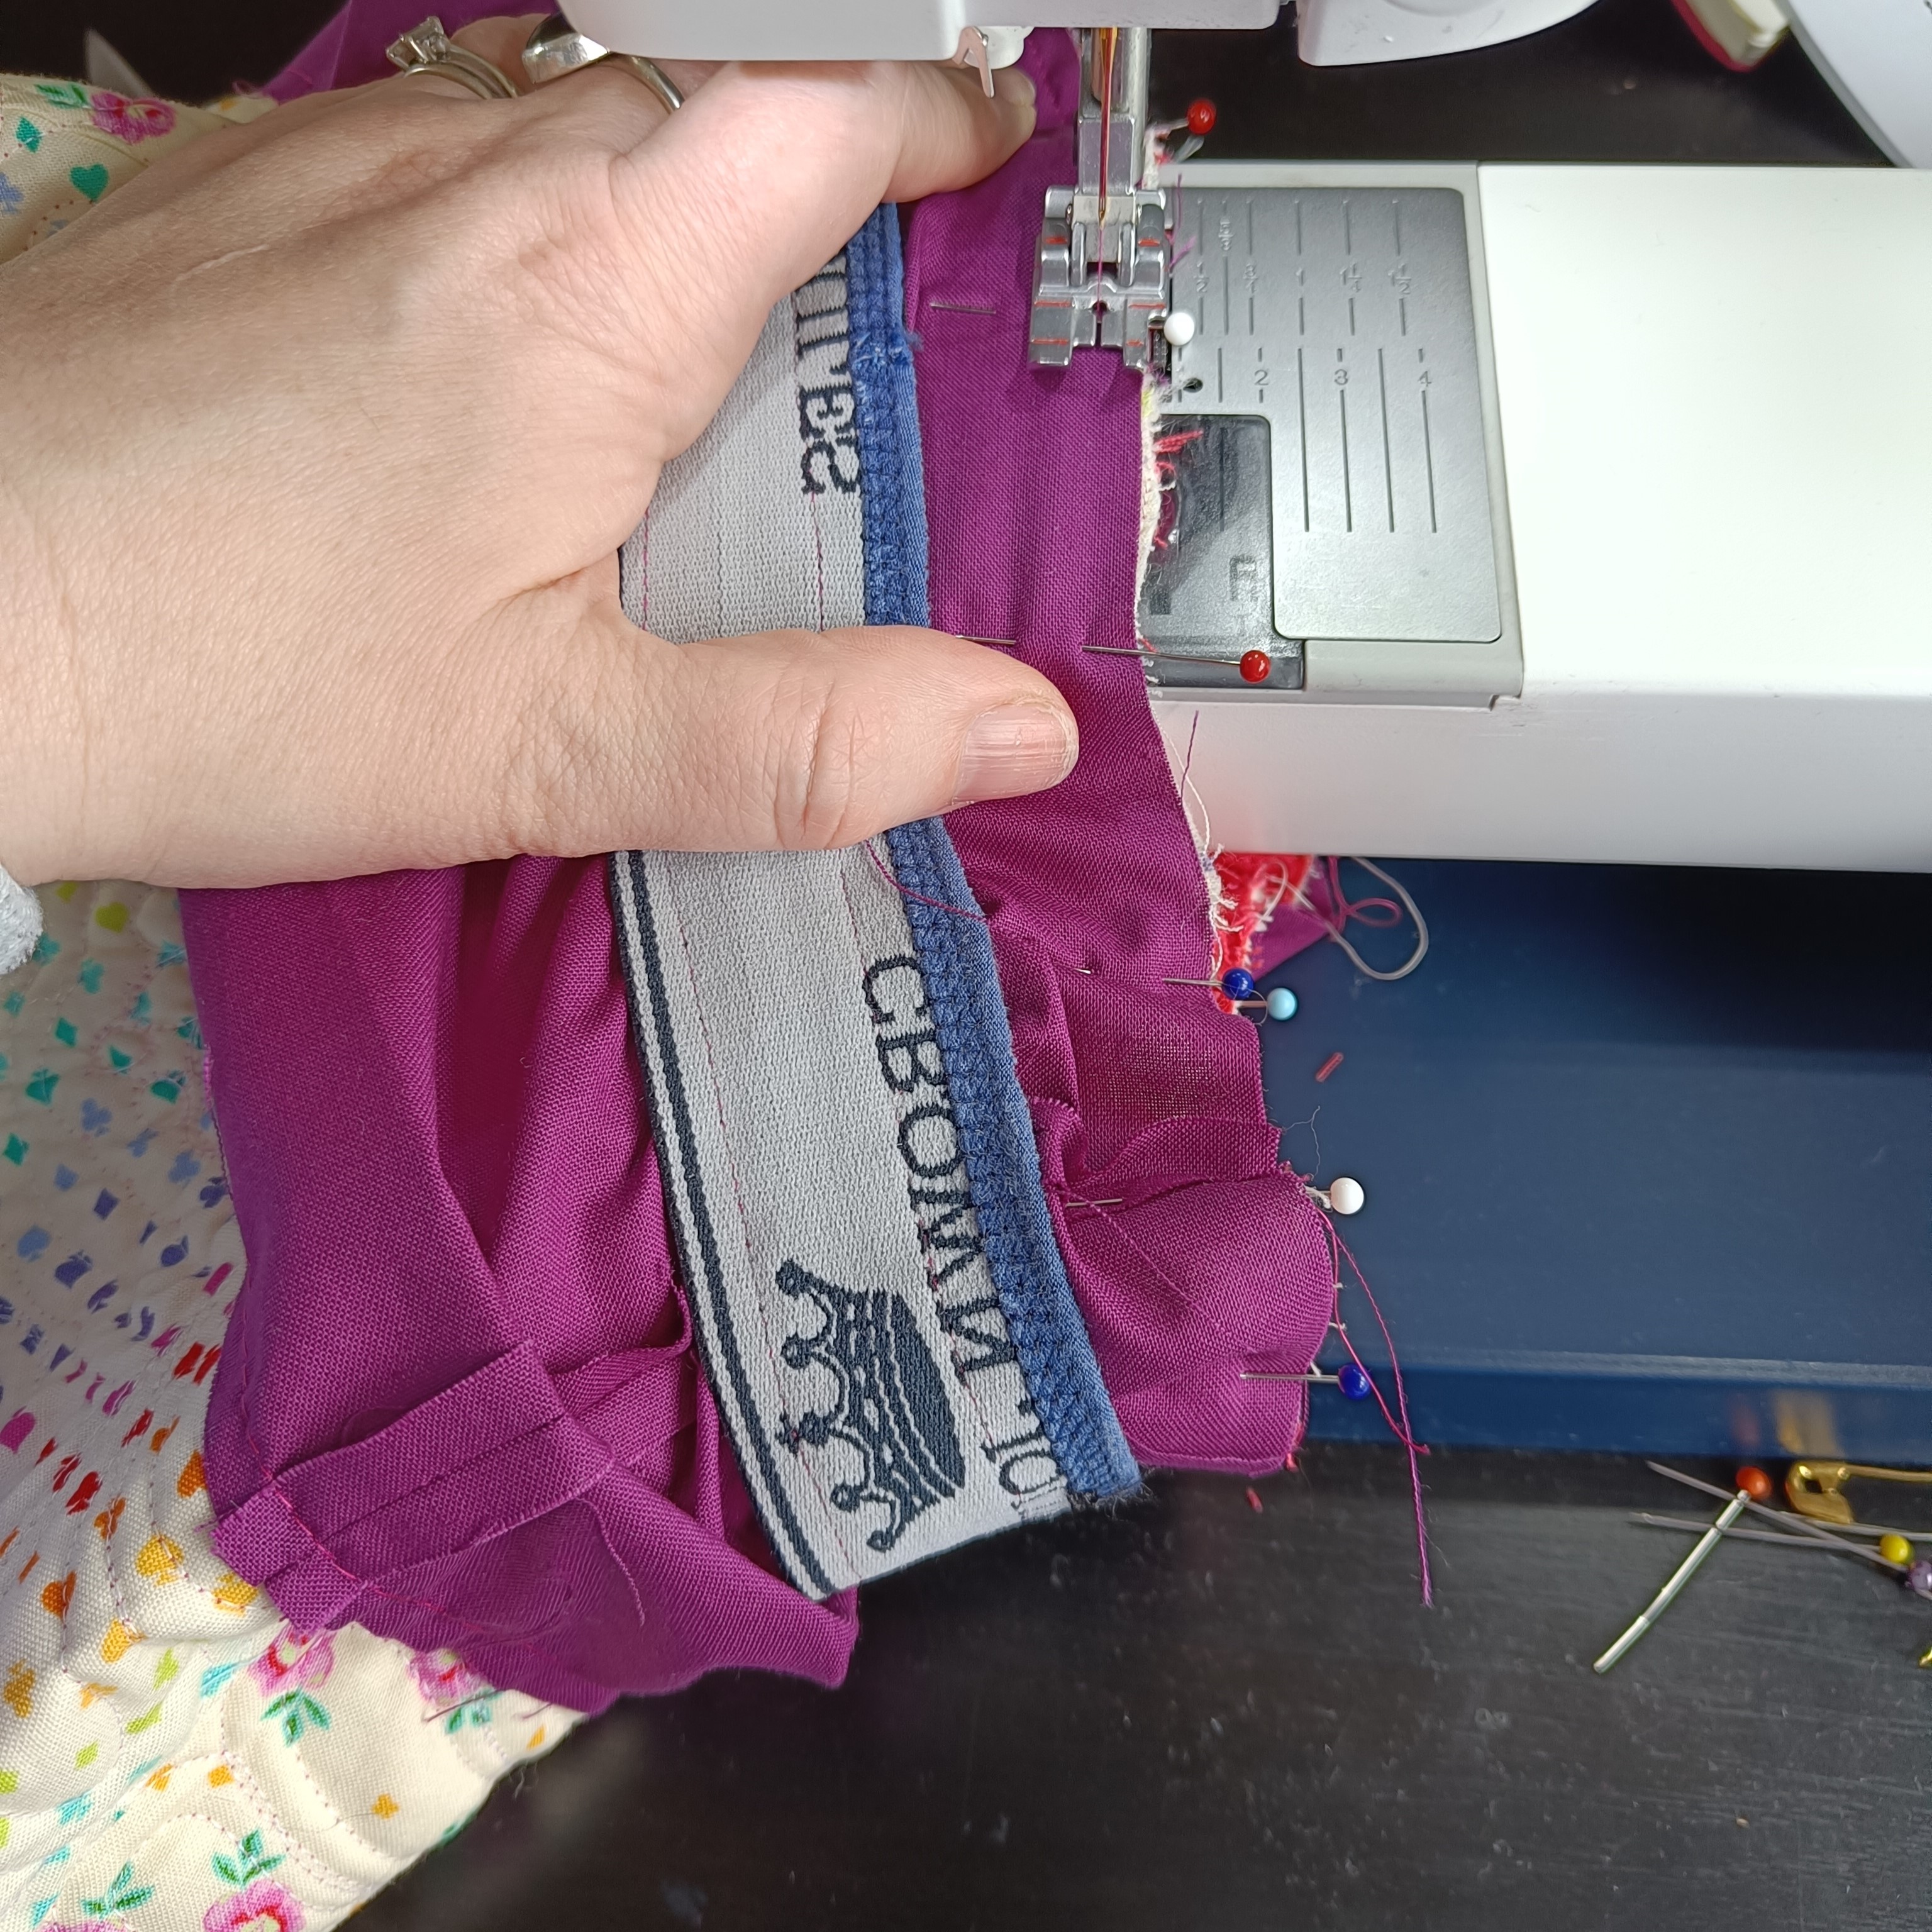
Until I got to the finishing stage I didn’t have a fully formed plan as to how i was going to achieve it. I had made bias binding while cutting out the templates very early on to ensure I had enough. I decided i wanted to face the piece rather than bind but realised when i was attaching the bias binding it would have been better cut with the grain (my only regret in the construction) as it stretched a bit and didn’t hold the edge as neatly as I would have liked. To enable me to face the top I used larger pieces for the same fabric for each of the blue flower points that the binding fabric could tuck under.
While I knew I could get a decent enough faced edge I still had to ensure my crazy circle with pointy out bits would hang properly and not flop at the sides or top. I started by taking some of my old plastic corset boning (thank you past obsession) and carefully shaping it using an iron and pining it till cool. I whip stitched these in place. While test hanging I also realised the lack of straight sides could cause a stretch in some weakened areas, so add herringbone tape (it doesn’t stretch) in the corners between the blue and green on the sides only.
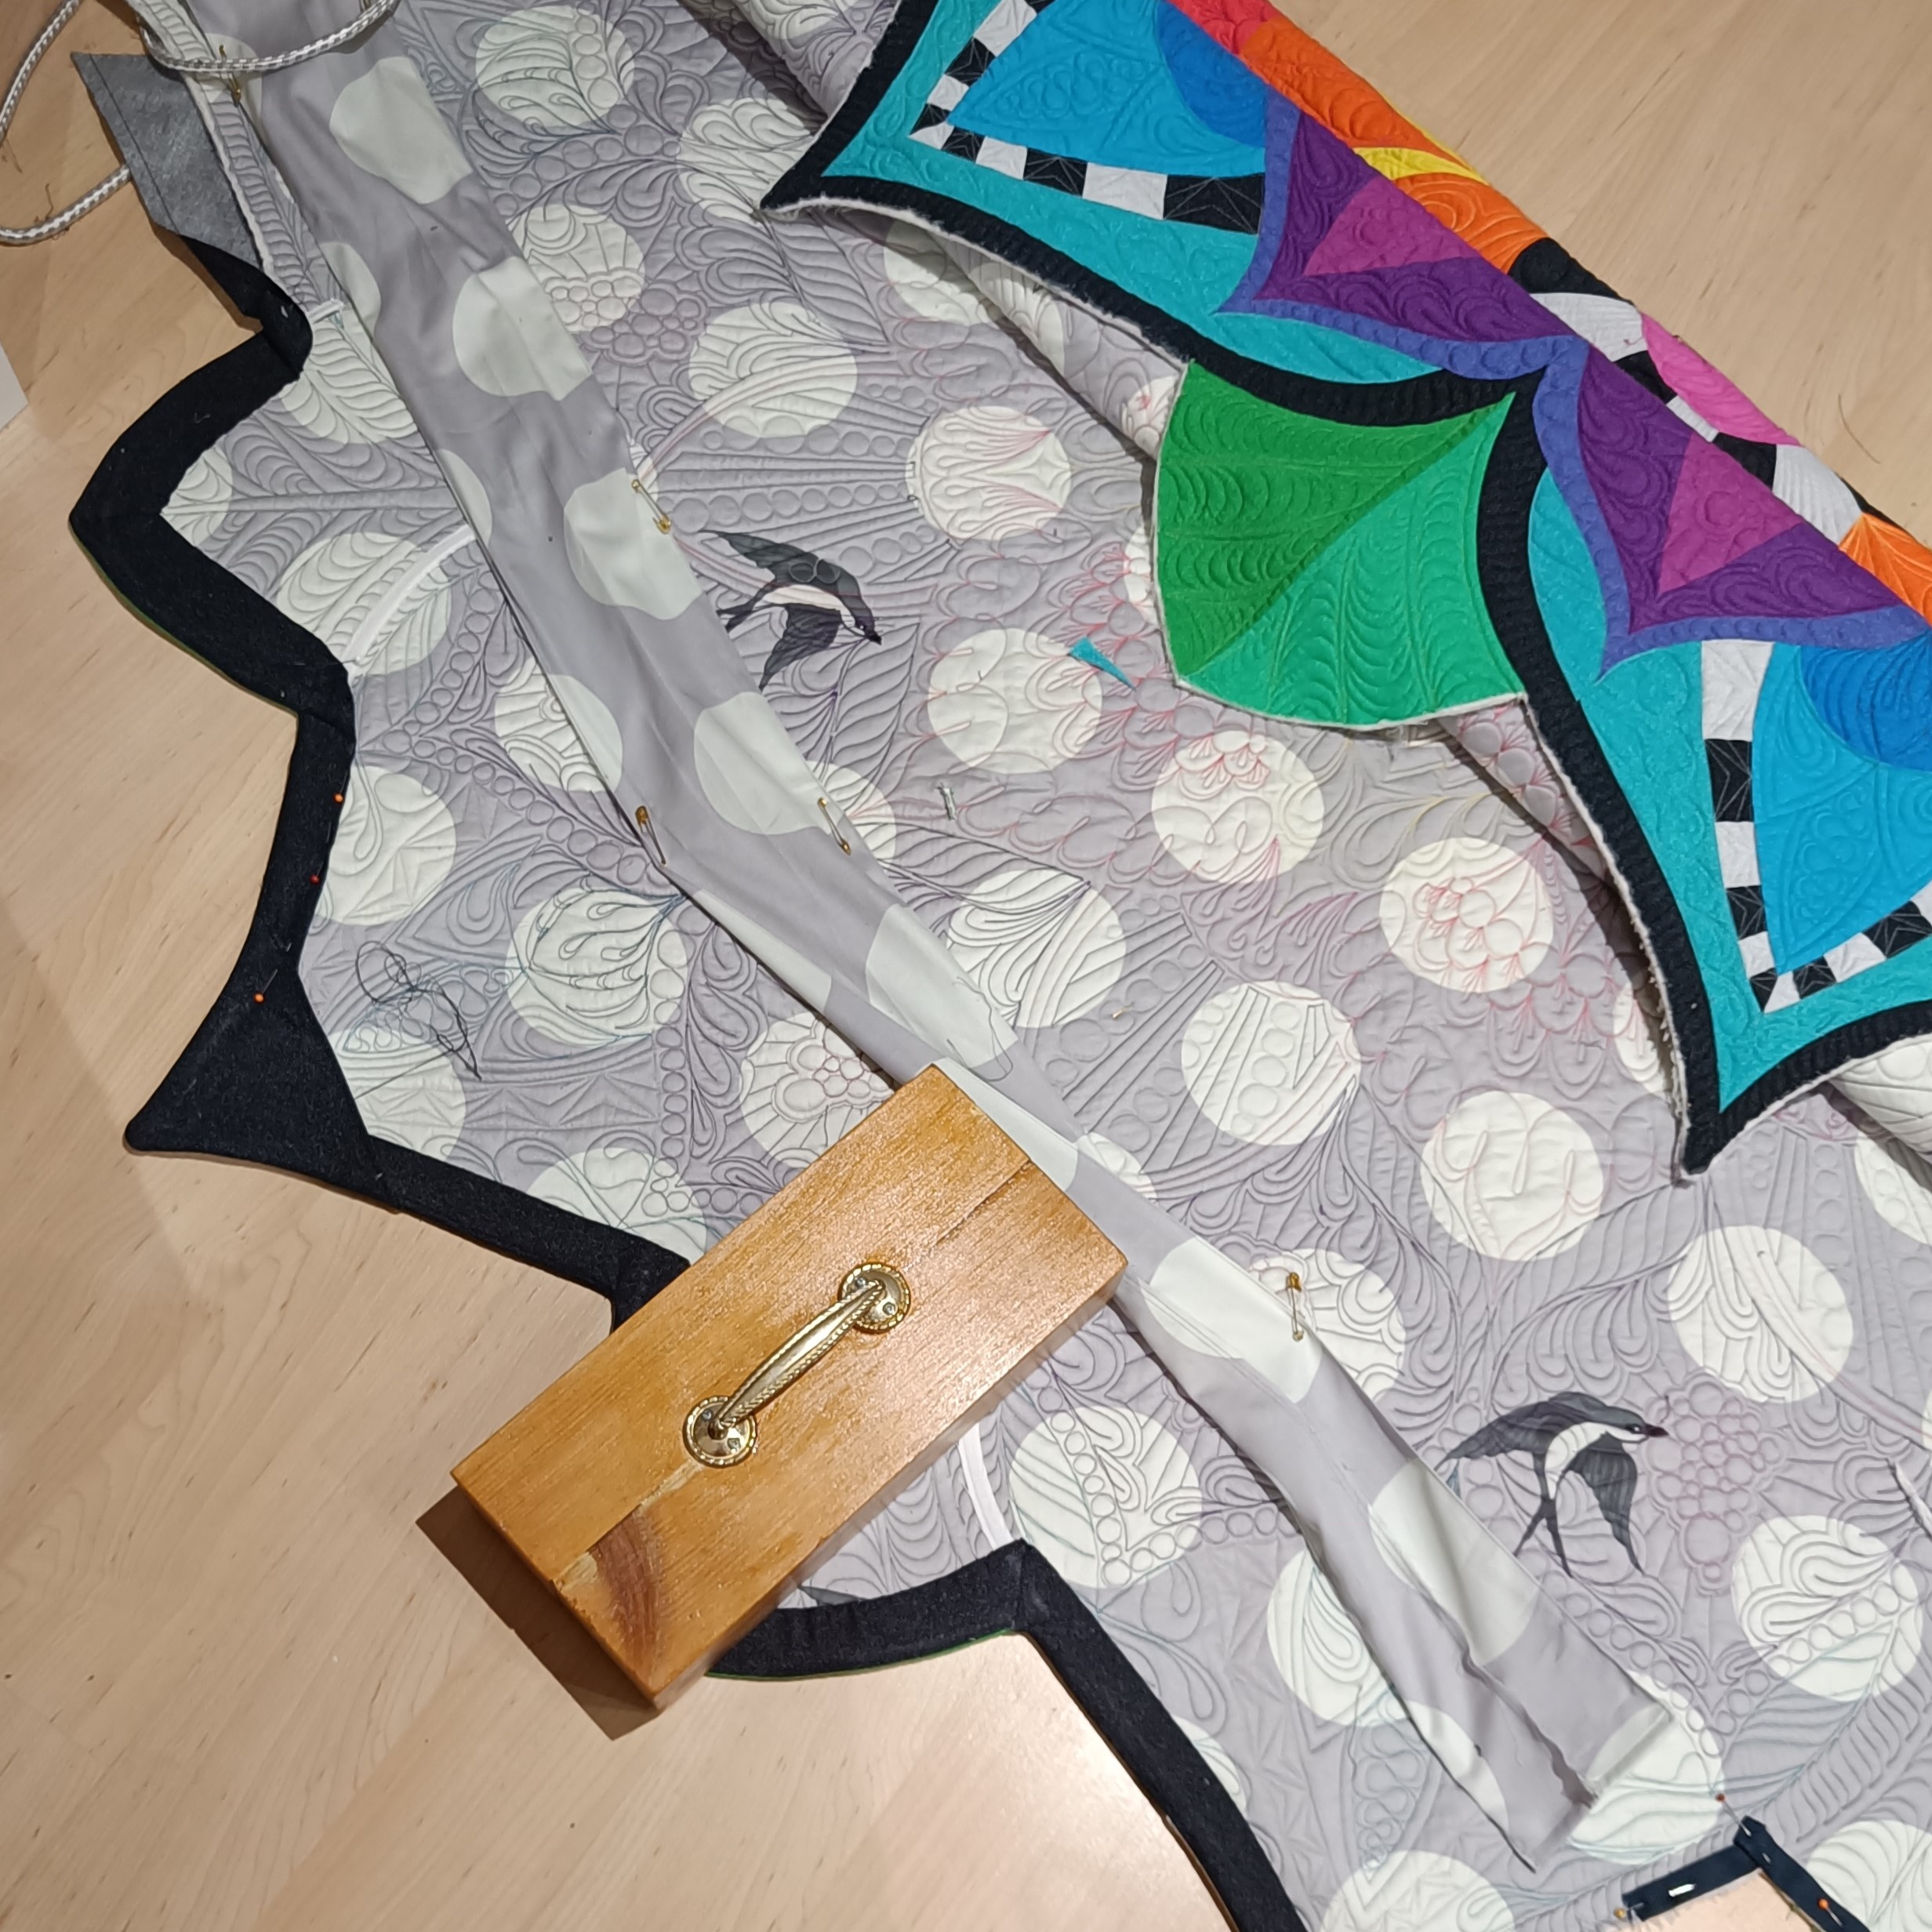

Lastly, after deciding the final position of the hanging sleeve I discovered the top edge of quilt had some erection issues! To correct this dysfunction I put 3 stronger (metal) corset bones from the 3 peaks down over the hanging sleeve towards the centre. The baton holds the points up when is tightened to the wall while the points are pushed against the wall as it clamps them in place.
MY REFLECTION
Exhausted from the usual creative journey of a piece going through excitement, despair, thinking it may work, and hate, I am now finally content. I see an achievement in curved piecing and improvement in my Free Motion quilting. I believe my confidence grew a little through the process and I am indeed writing these words to believe and solidify them in my head. Though I will be keen to see the judges’ feedback and of course would like some “credit” for this work, I don’t need it. I made this quilt for me and now I’m going to enjoy sharing loads of photos of it with you.
JUDGED RESULTS
Well would you believe it! I spent the whole of festival in a daze. Like it must be a dream. I have been working on believing in myself as I am my biggest critic! But after I had delivered the quilt I wrote the previous paragraph waiting for crushing disappointment to hit when I heard nothing and didn’t get the judged approval I have desperately seeking! (Why I’m seeking approval is because of my experience in education as a neurodivergent girl with additional learning difficulties and a story I’m trying to put to bed)
It never came… instead I got a call from a mystery number telling me I had won something, asking if I would be able to attend the awards ceremony? Well I played it cool but asked to know what I had won, worried my brain would run away with me over night if I didn’t know. Of course they wont tell you so I had to play it cool for the next 18 hours. As soon as I arrived I spotted my absolute gem of a friend @katemustsew who also had a call the night before and needed some grounding as much as me. We caught our breath and went to see if our quilts had been moved. I still didn’t know which of my 3 entered quilts had won something!
When I got to the place CT 08 should have been displayed it was blank!!!! This means it was in the winners gallery so it won something more than a 2nd or 3rd!! As my train had arrived in Birmingham only an hour before the awards ceremony we hot footed it there.
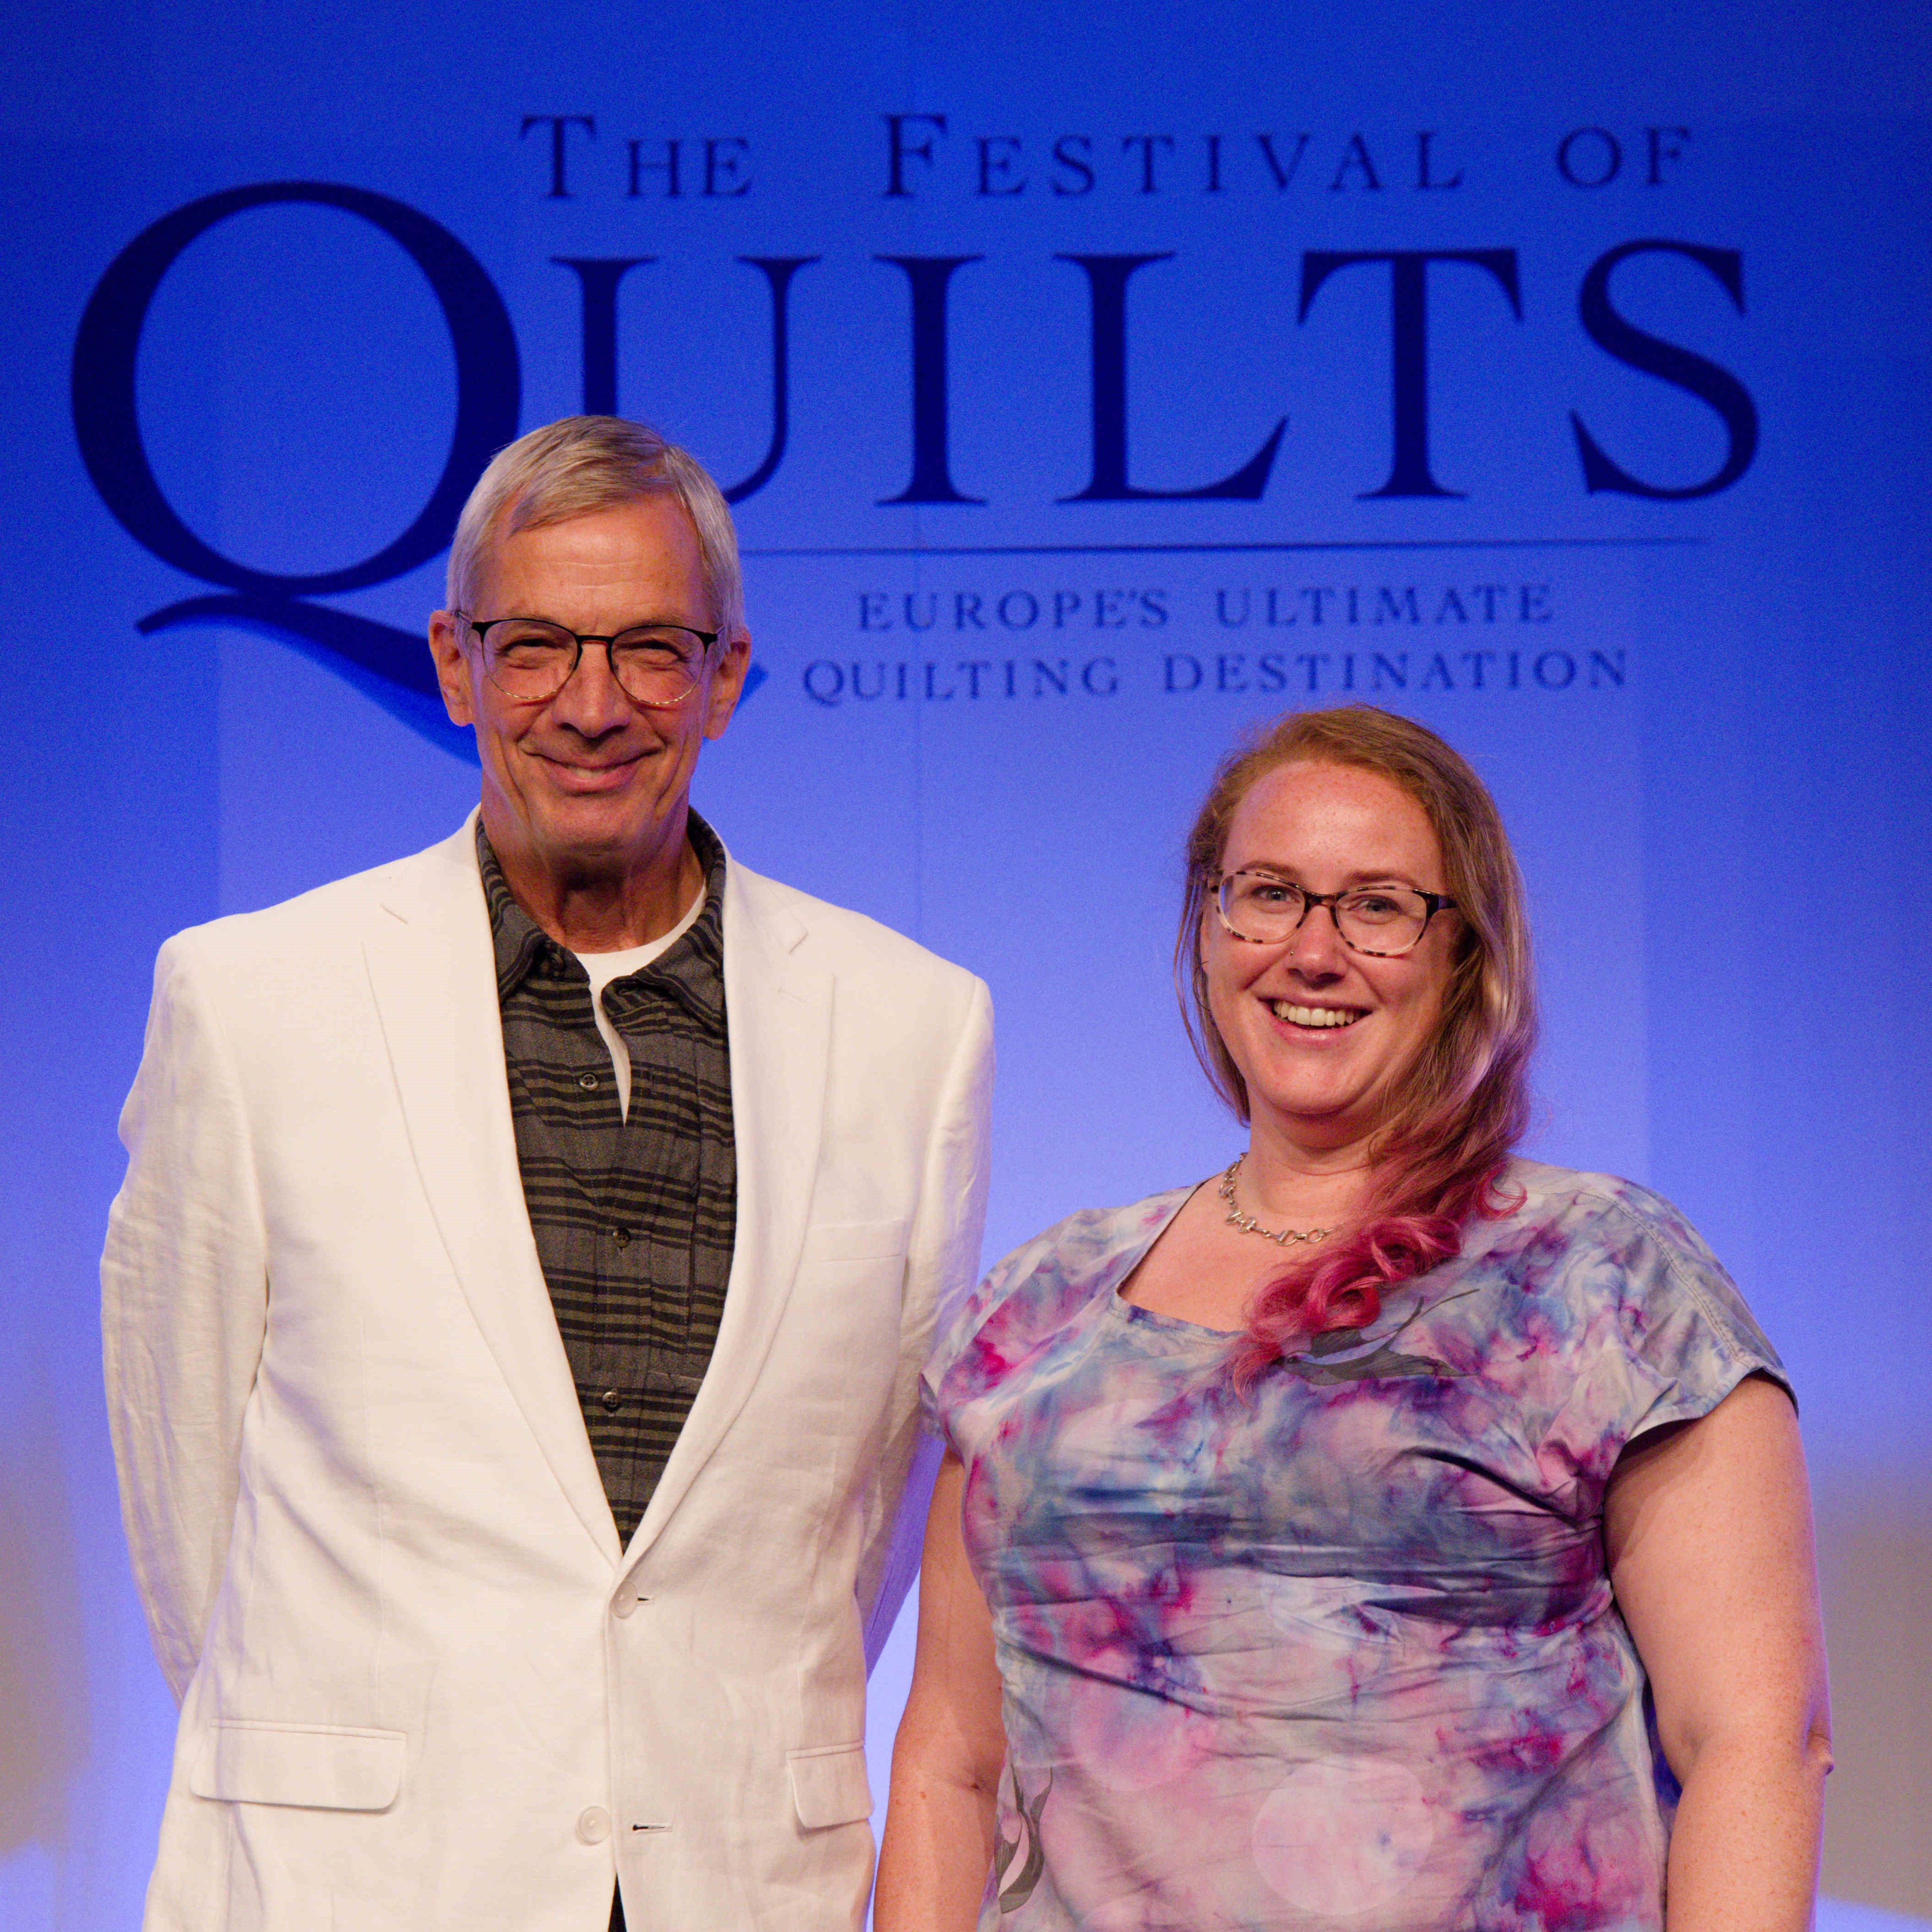
What I didn’t realize after collecting the overlay award was that my name was going to be called again when it was announced I got 3rd place in the contemporary category. I almost completely missed it!! I might have been busy on my phone sending the video and photos to the hubby and kids when i suddenly heard my name and realized I hade to go up again!!! That was completely unexpected!
During the 3 years I have submitted to festival of quilts I have found the feedback from the judges useful (also at times frustrating but that is another story!) I thought you might like to see the judges forms and comments. The first 3 are for the Contemporary category judging and the last two are for the Excellence in Machine Quilting Overlay Award.
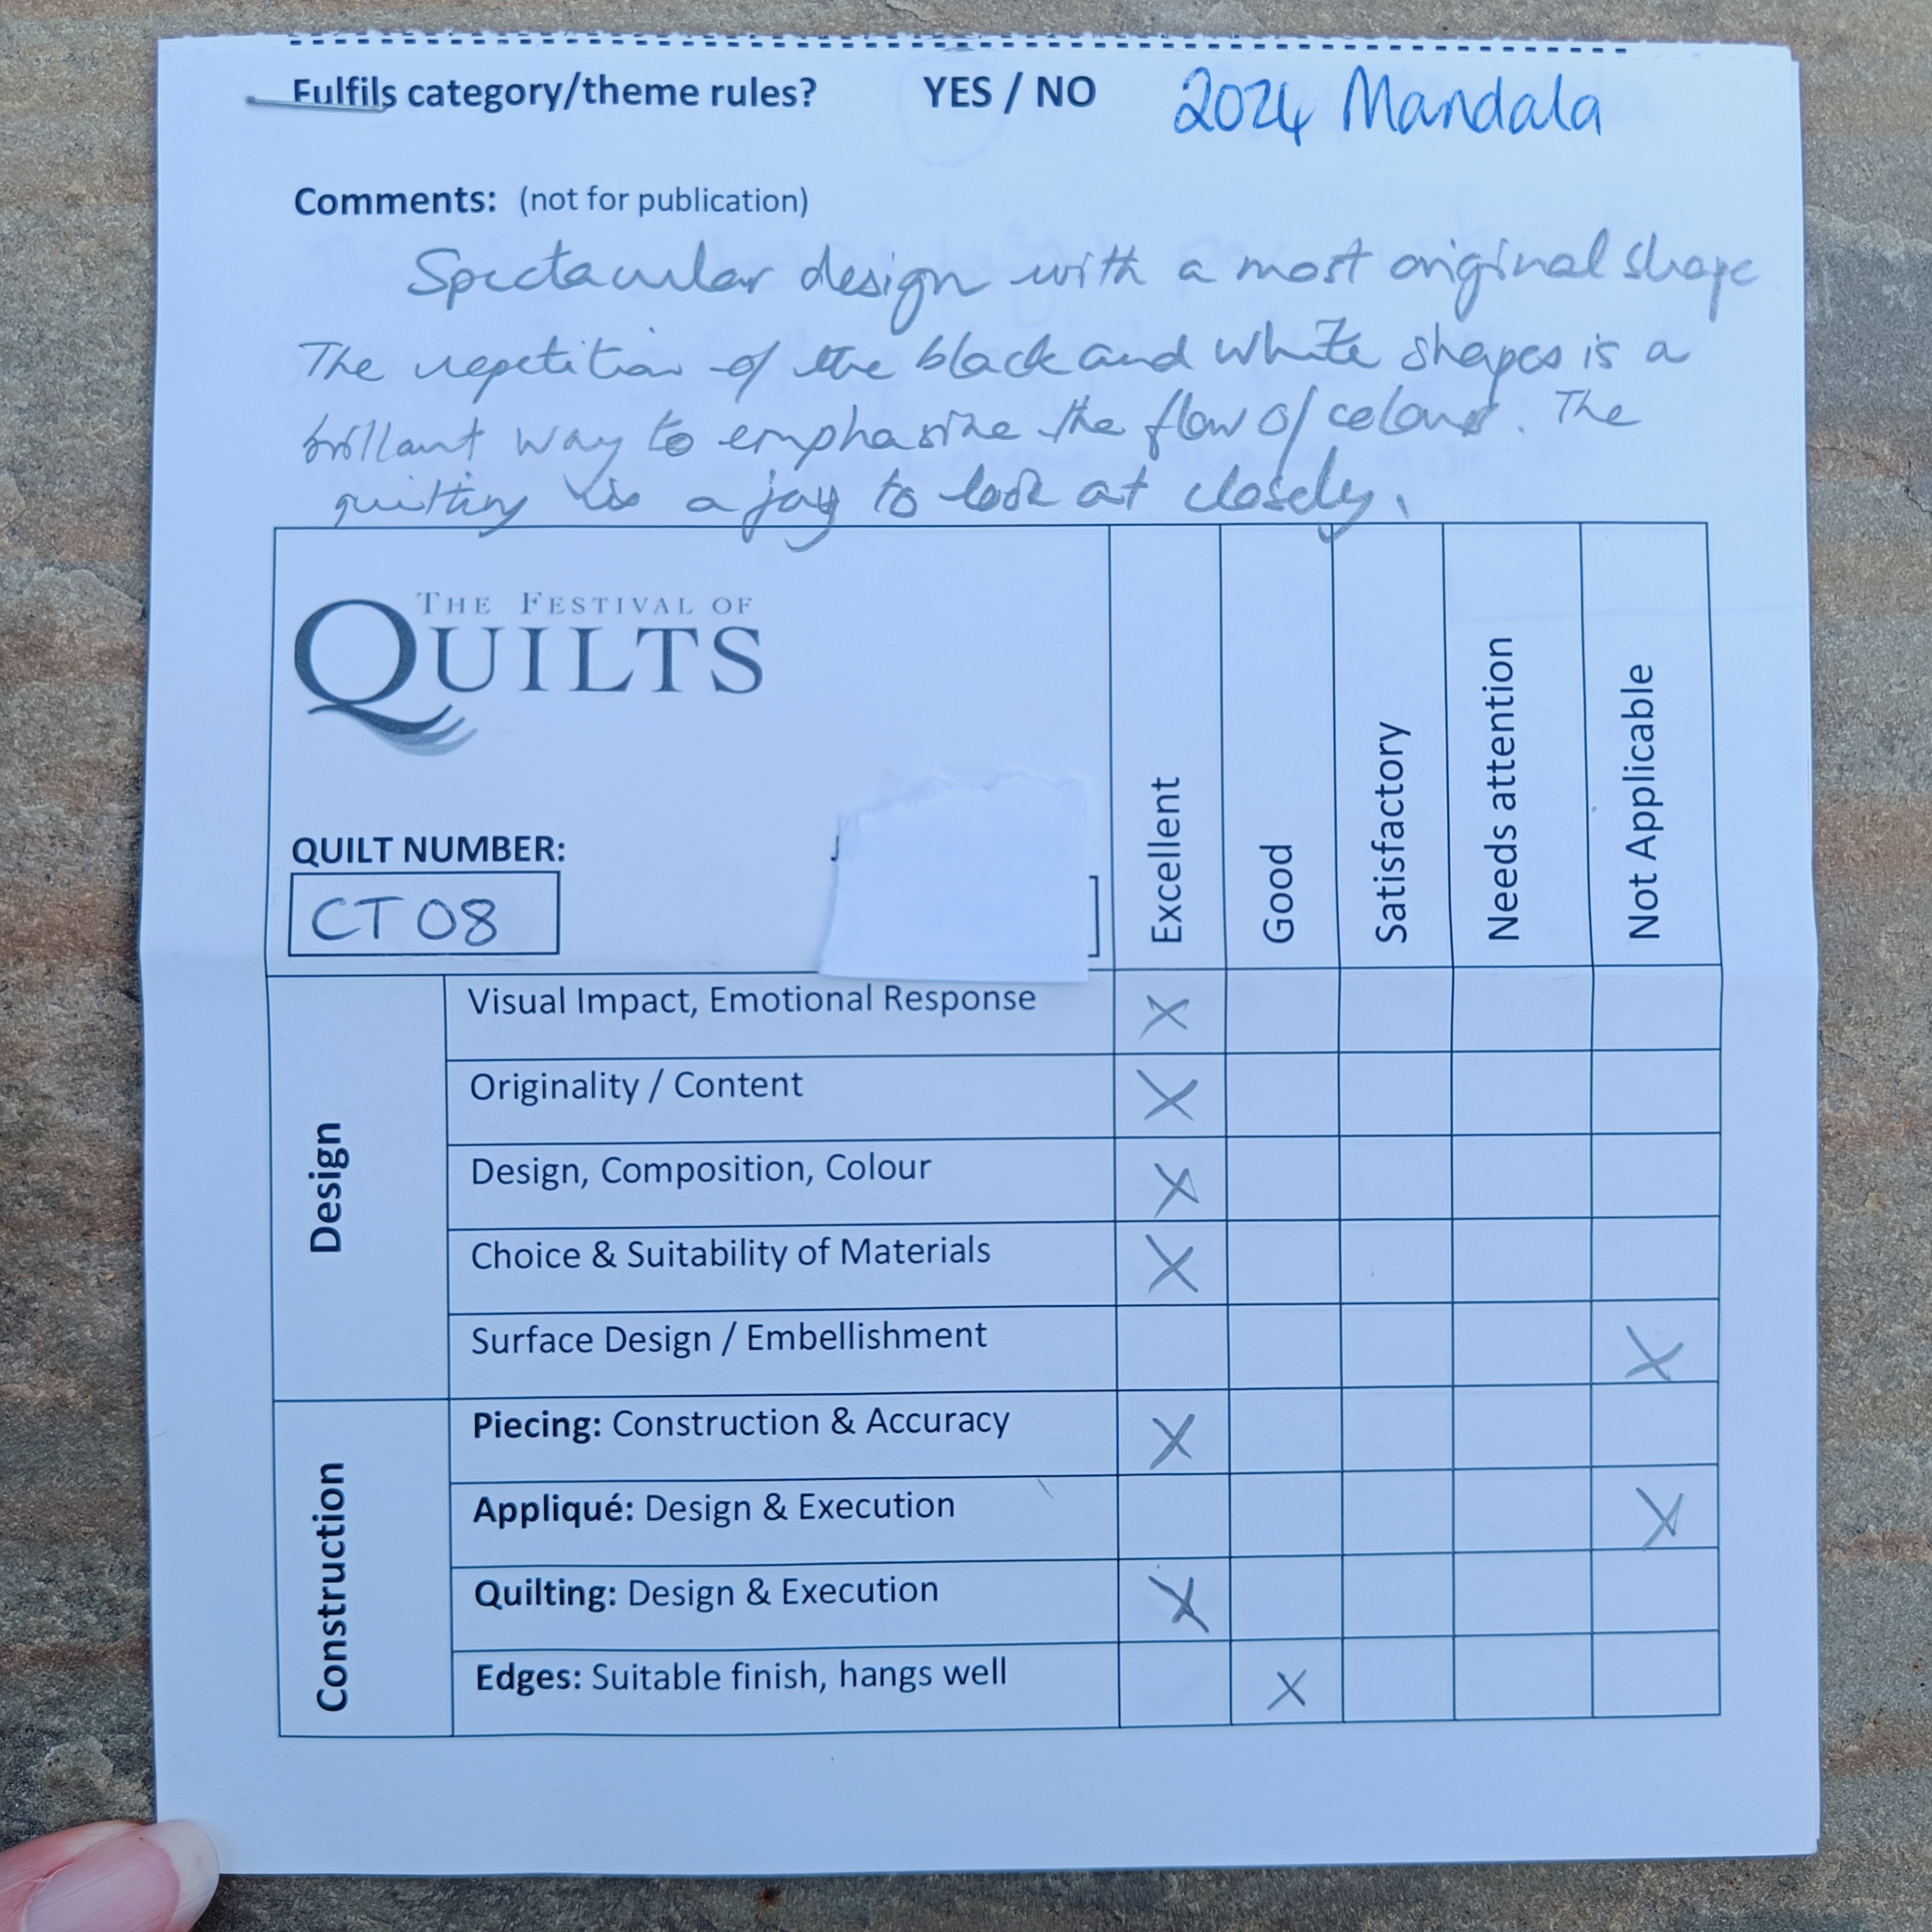
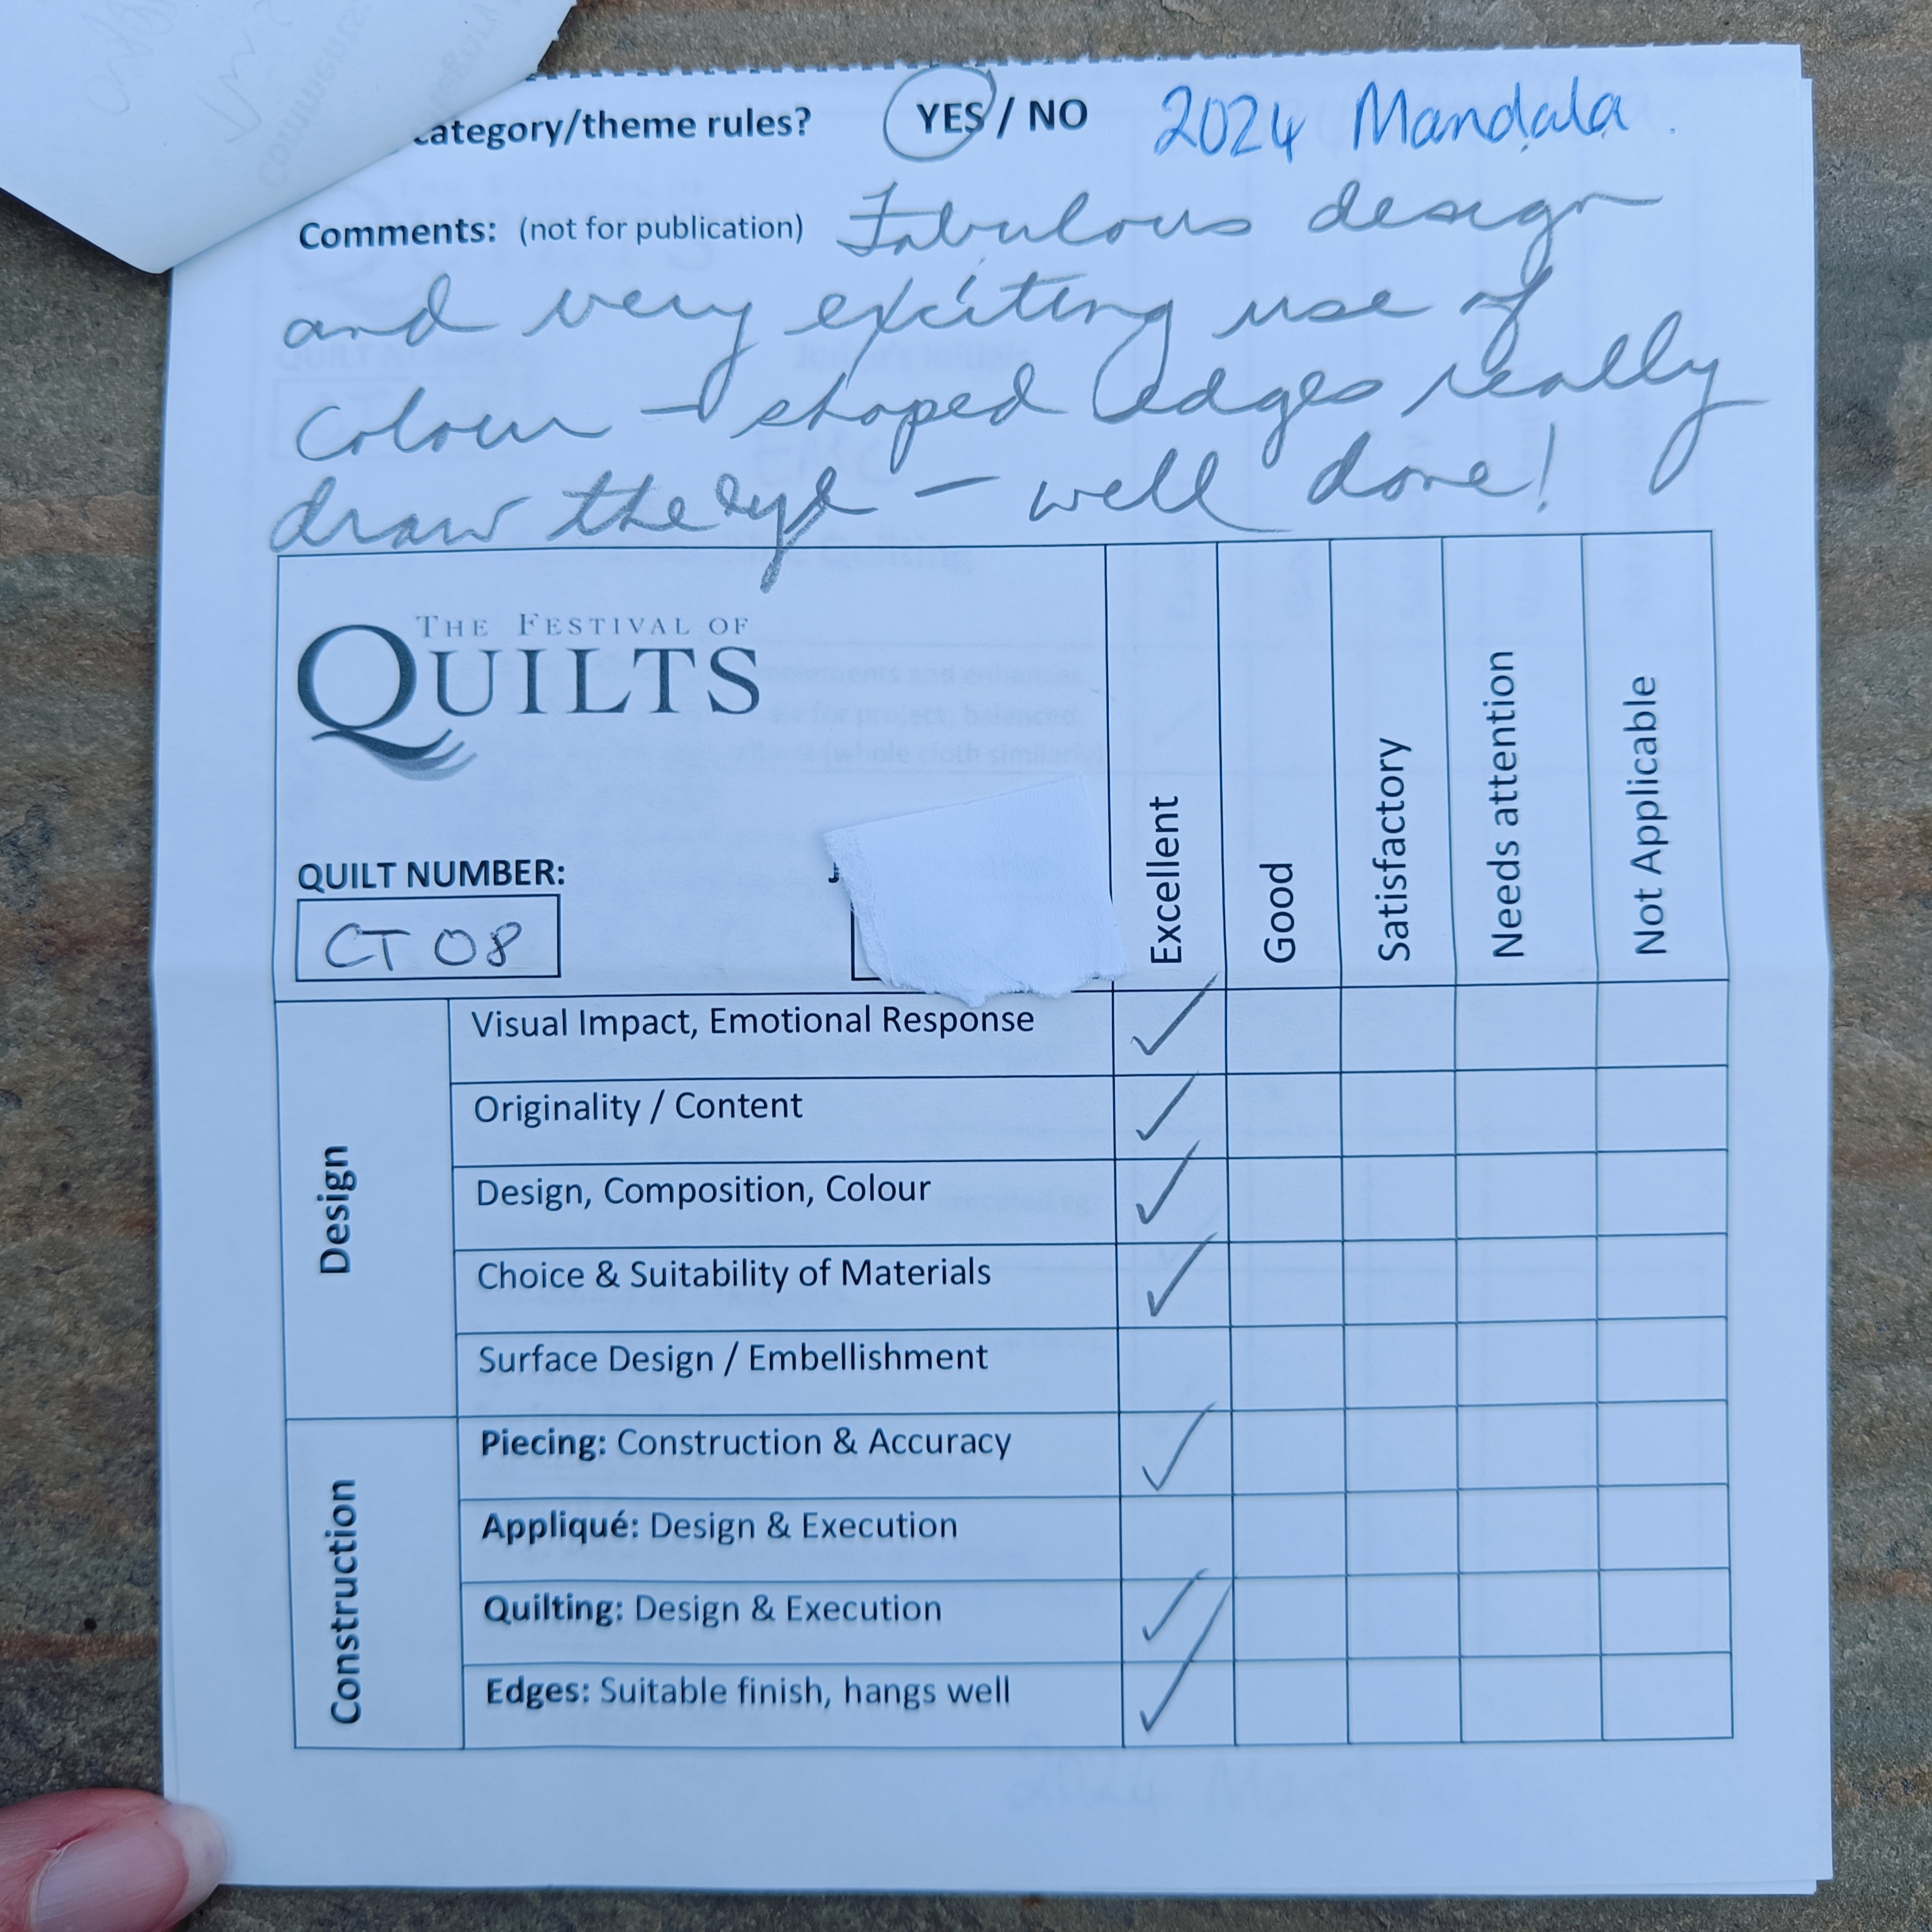
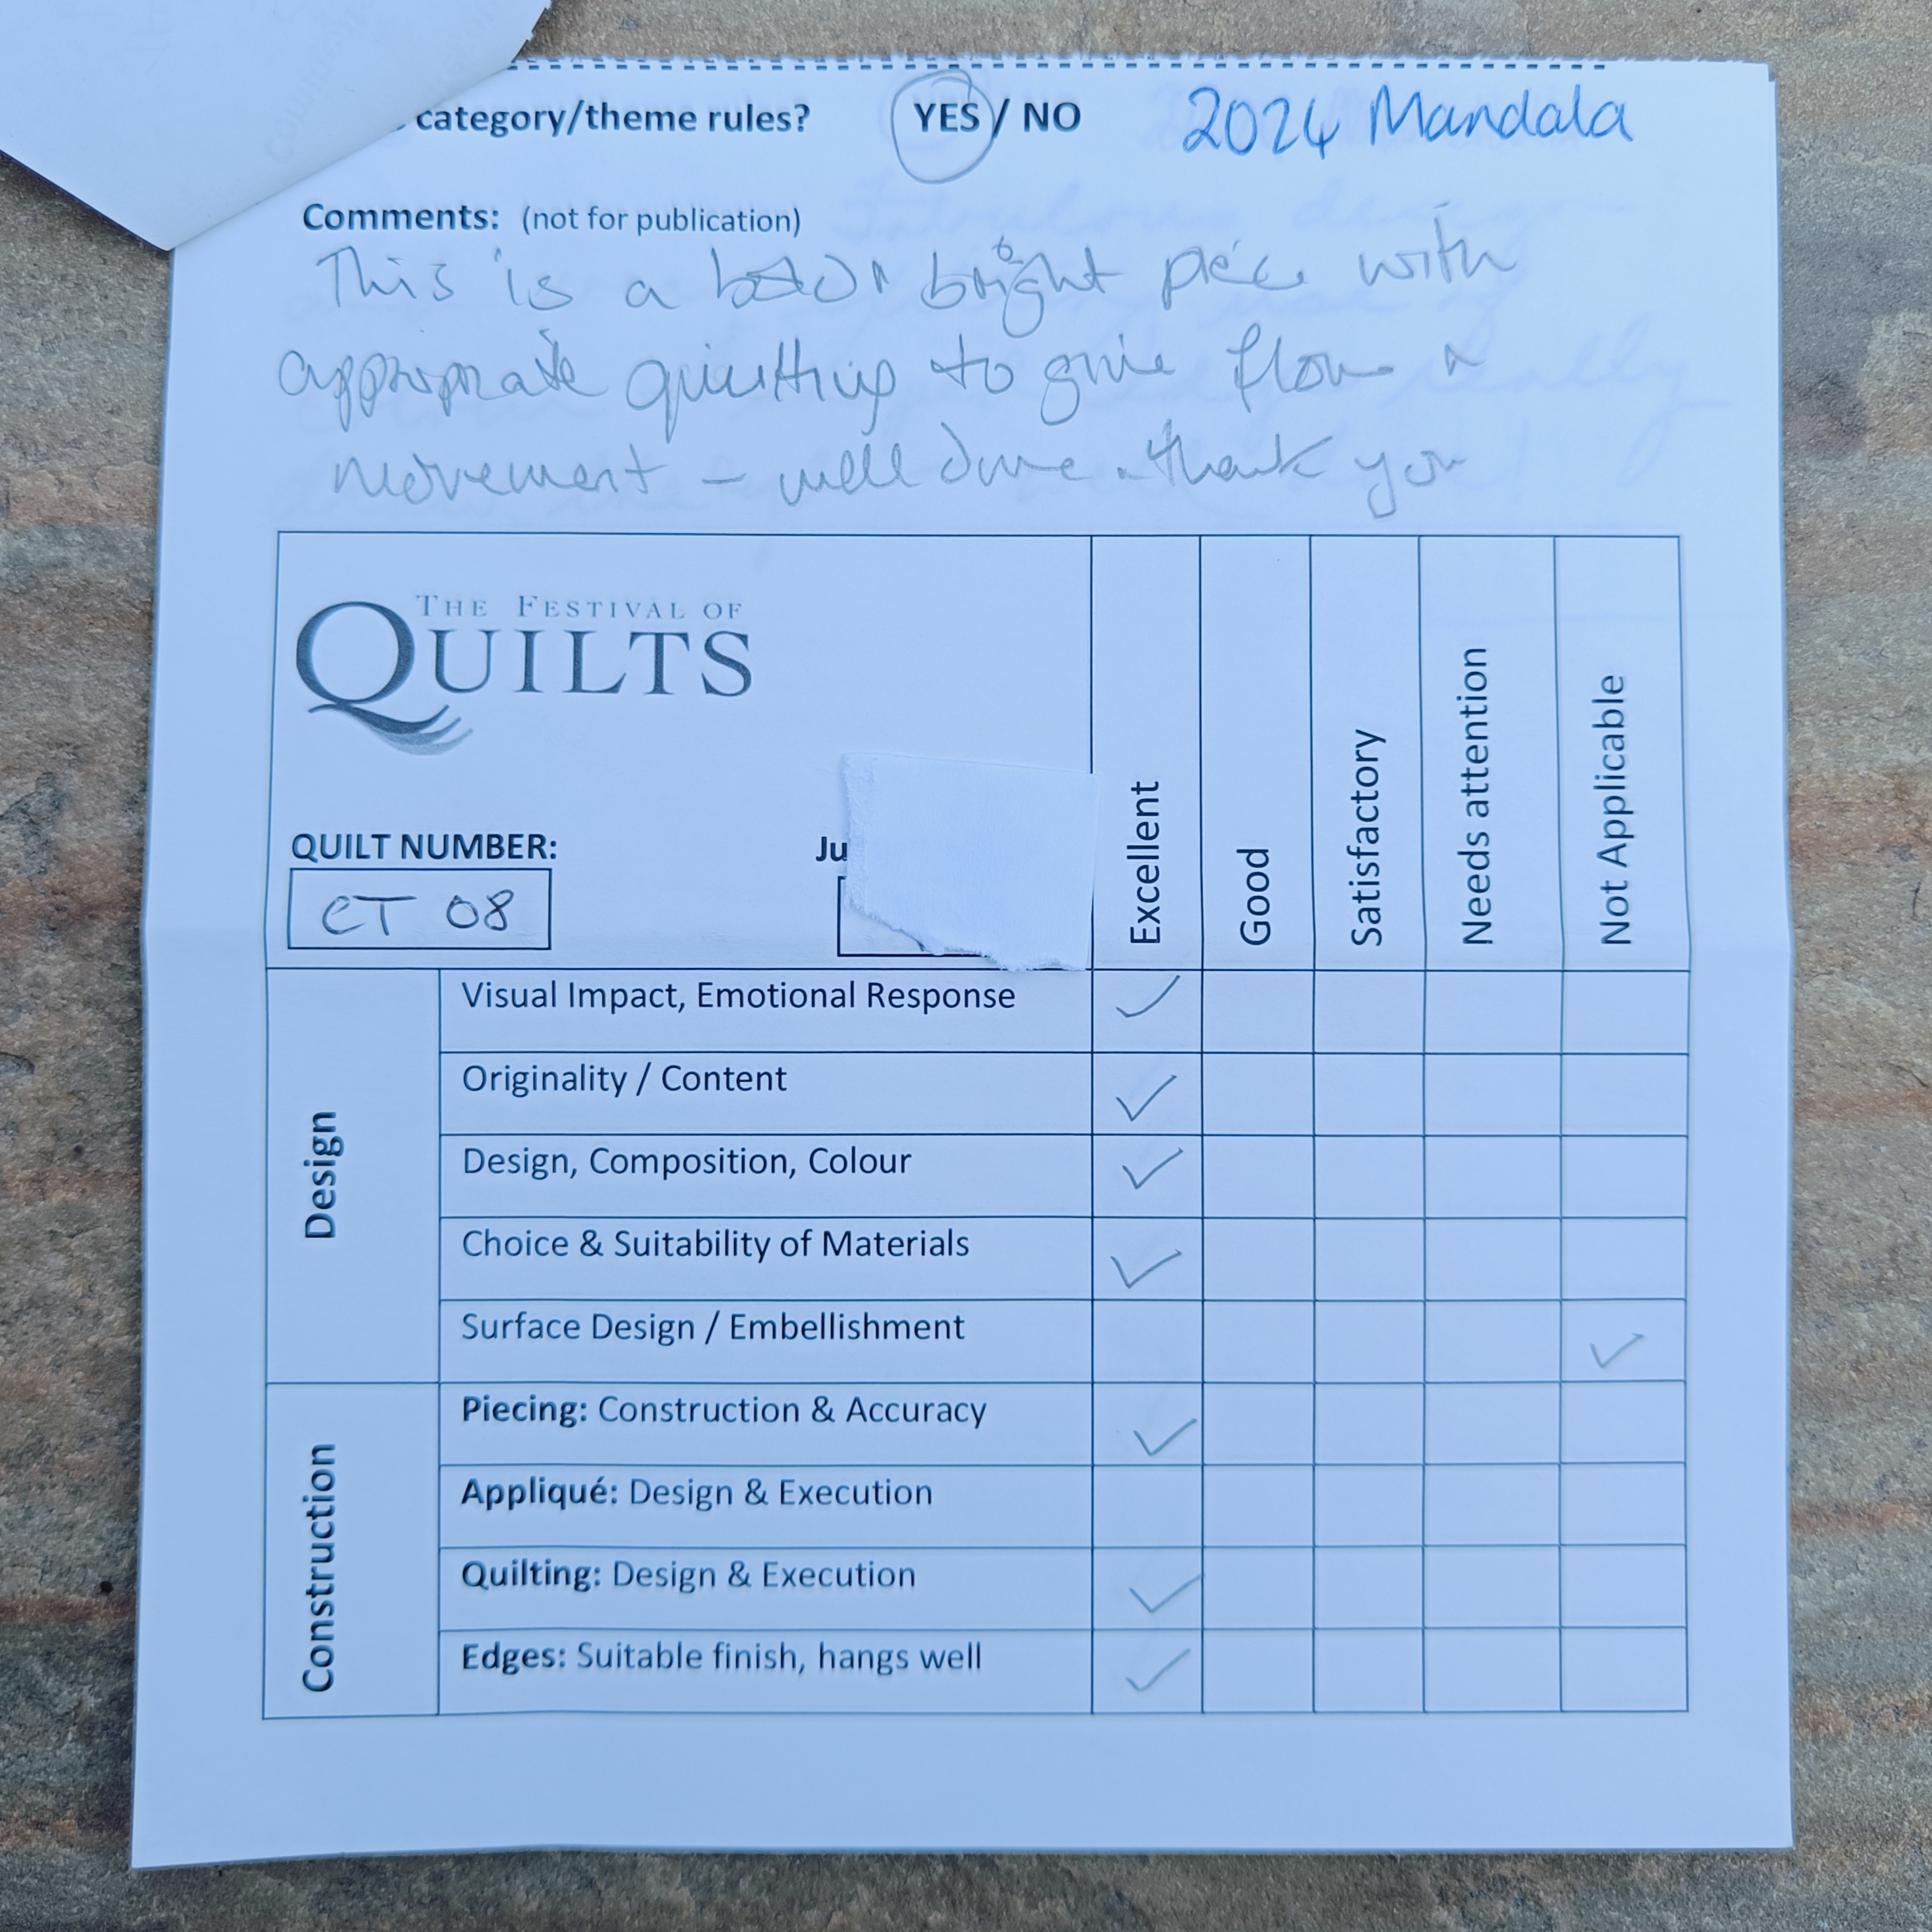
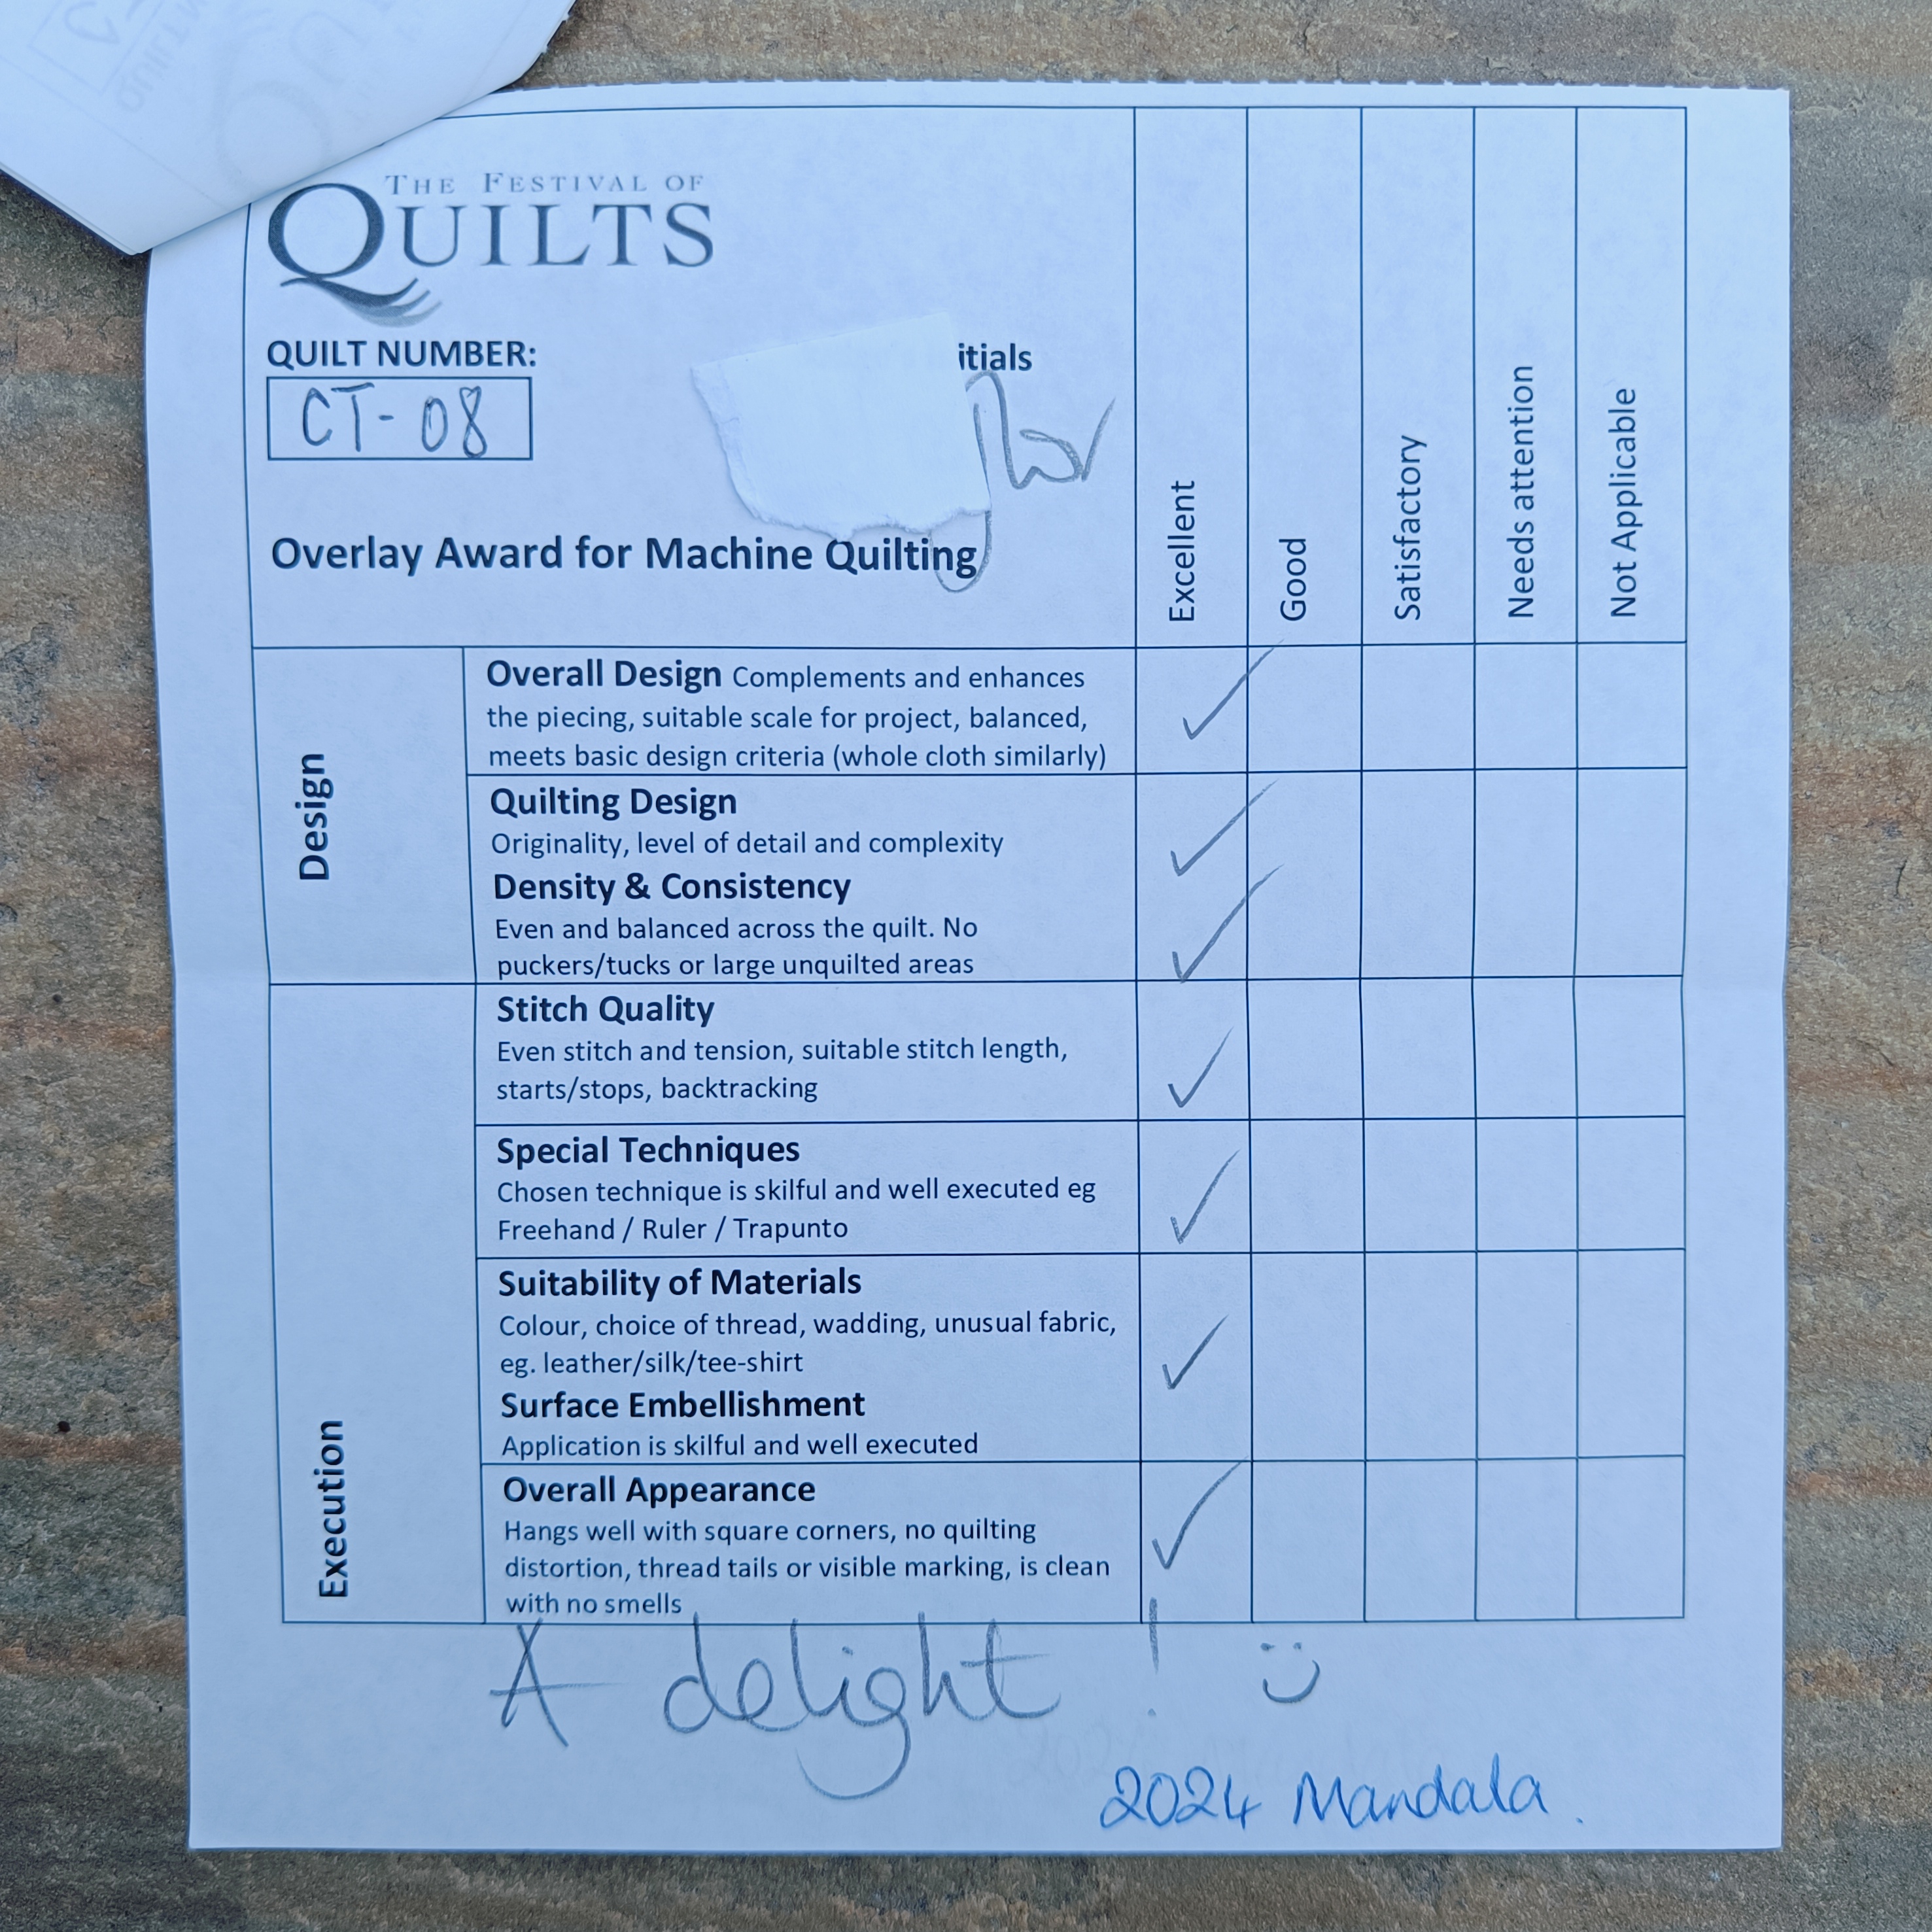

What I take away from these wins (and other feedback) is that fault can be found in anything but an overall decent standard of work and judges happen to have a great first impression of your work (this is something you can’t control) is how you win. It’s luck as to who is judging, what they like and how they are feeling.

Register your interest..
Would you like to know when this pattern is released? It maybe as a Block of the Month, single class or only the pattern.
FOLLOW ME
See what I’m currently doing and follow me on:
SUBSCRIBE
Want to know about new patterns and discounts. Let me know you email address and name. You select what type of emails you get.

Leave a comment