To celebrate the release of my new pattern the Fractured Skull Quilt I’m hosting a super friendly, fun, fpp-y and chilled sew along in time for Halloween! Last year’s Fractured Skull Panel Sew Along was amazing and I made so many new friends through it, and I hope this year will be even better. With the basic aim of making the top over 6 weeks you will have loads of time to catch-up or speed ahead and finish the quilt. Scroll down to see the schedule.
A sign-up will be at the top of this page if it is still open. Once you have signed repost this image and let the world and me know you are joining in, and follow #fracturedskullquiltsewalong. Then look out for my emails…
If you sign up you will get:
A discount on the quilt pattern
A short weekly email/ video outlining the aims, relevant tips or updates
A NEW block pattern totally FREE before general release
PRIZES – so far from Aurifil, Pappersaxsten, SewHot, PatternTrace – Check out the final list of prizes Here & contact me if you would like to offer anything…
Help from me if you need it during the 6 weeks*
Access to a Private Facebook group
I hope to do some zoom social sewing sessions where we can chat and chill but can’t guarantee I will be able
*Unless you are a confident sewer or have someone to help who can FPP I don’t recommend joining if you are completely new to FPP. I’m afraid I won’t be teaching the complete FPP technique only troubleshooting any issues you may have.
The quilt, unlike other large scale FPP patterns, can be made in 3 sizes – 80”sq, 60”x 80” or 60”sq
The pattern pieces (like dress making patterns) are on a large-scale paper format so will need to be printed at a copy shop. Cost and more information about large format patterns can be found in this new blog post.
I can’t wait to get started and see all your versions!
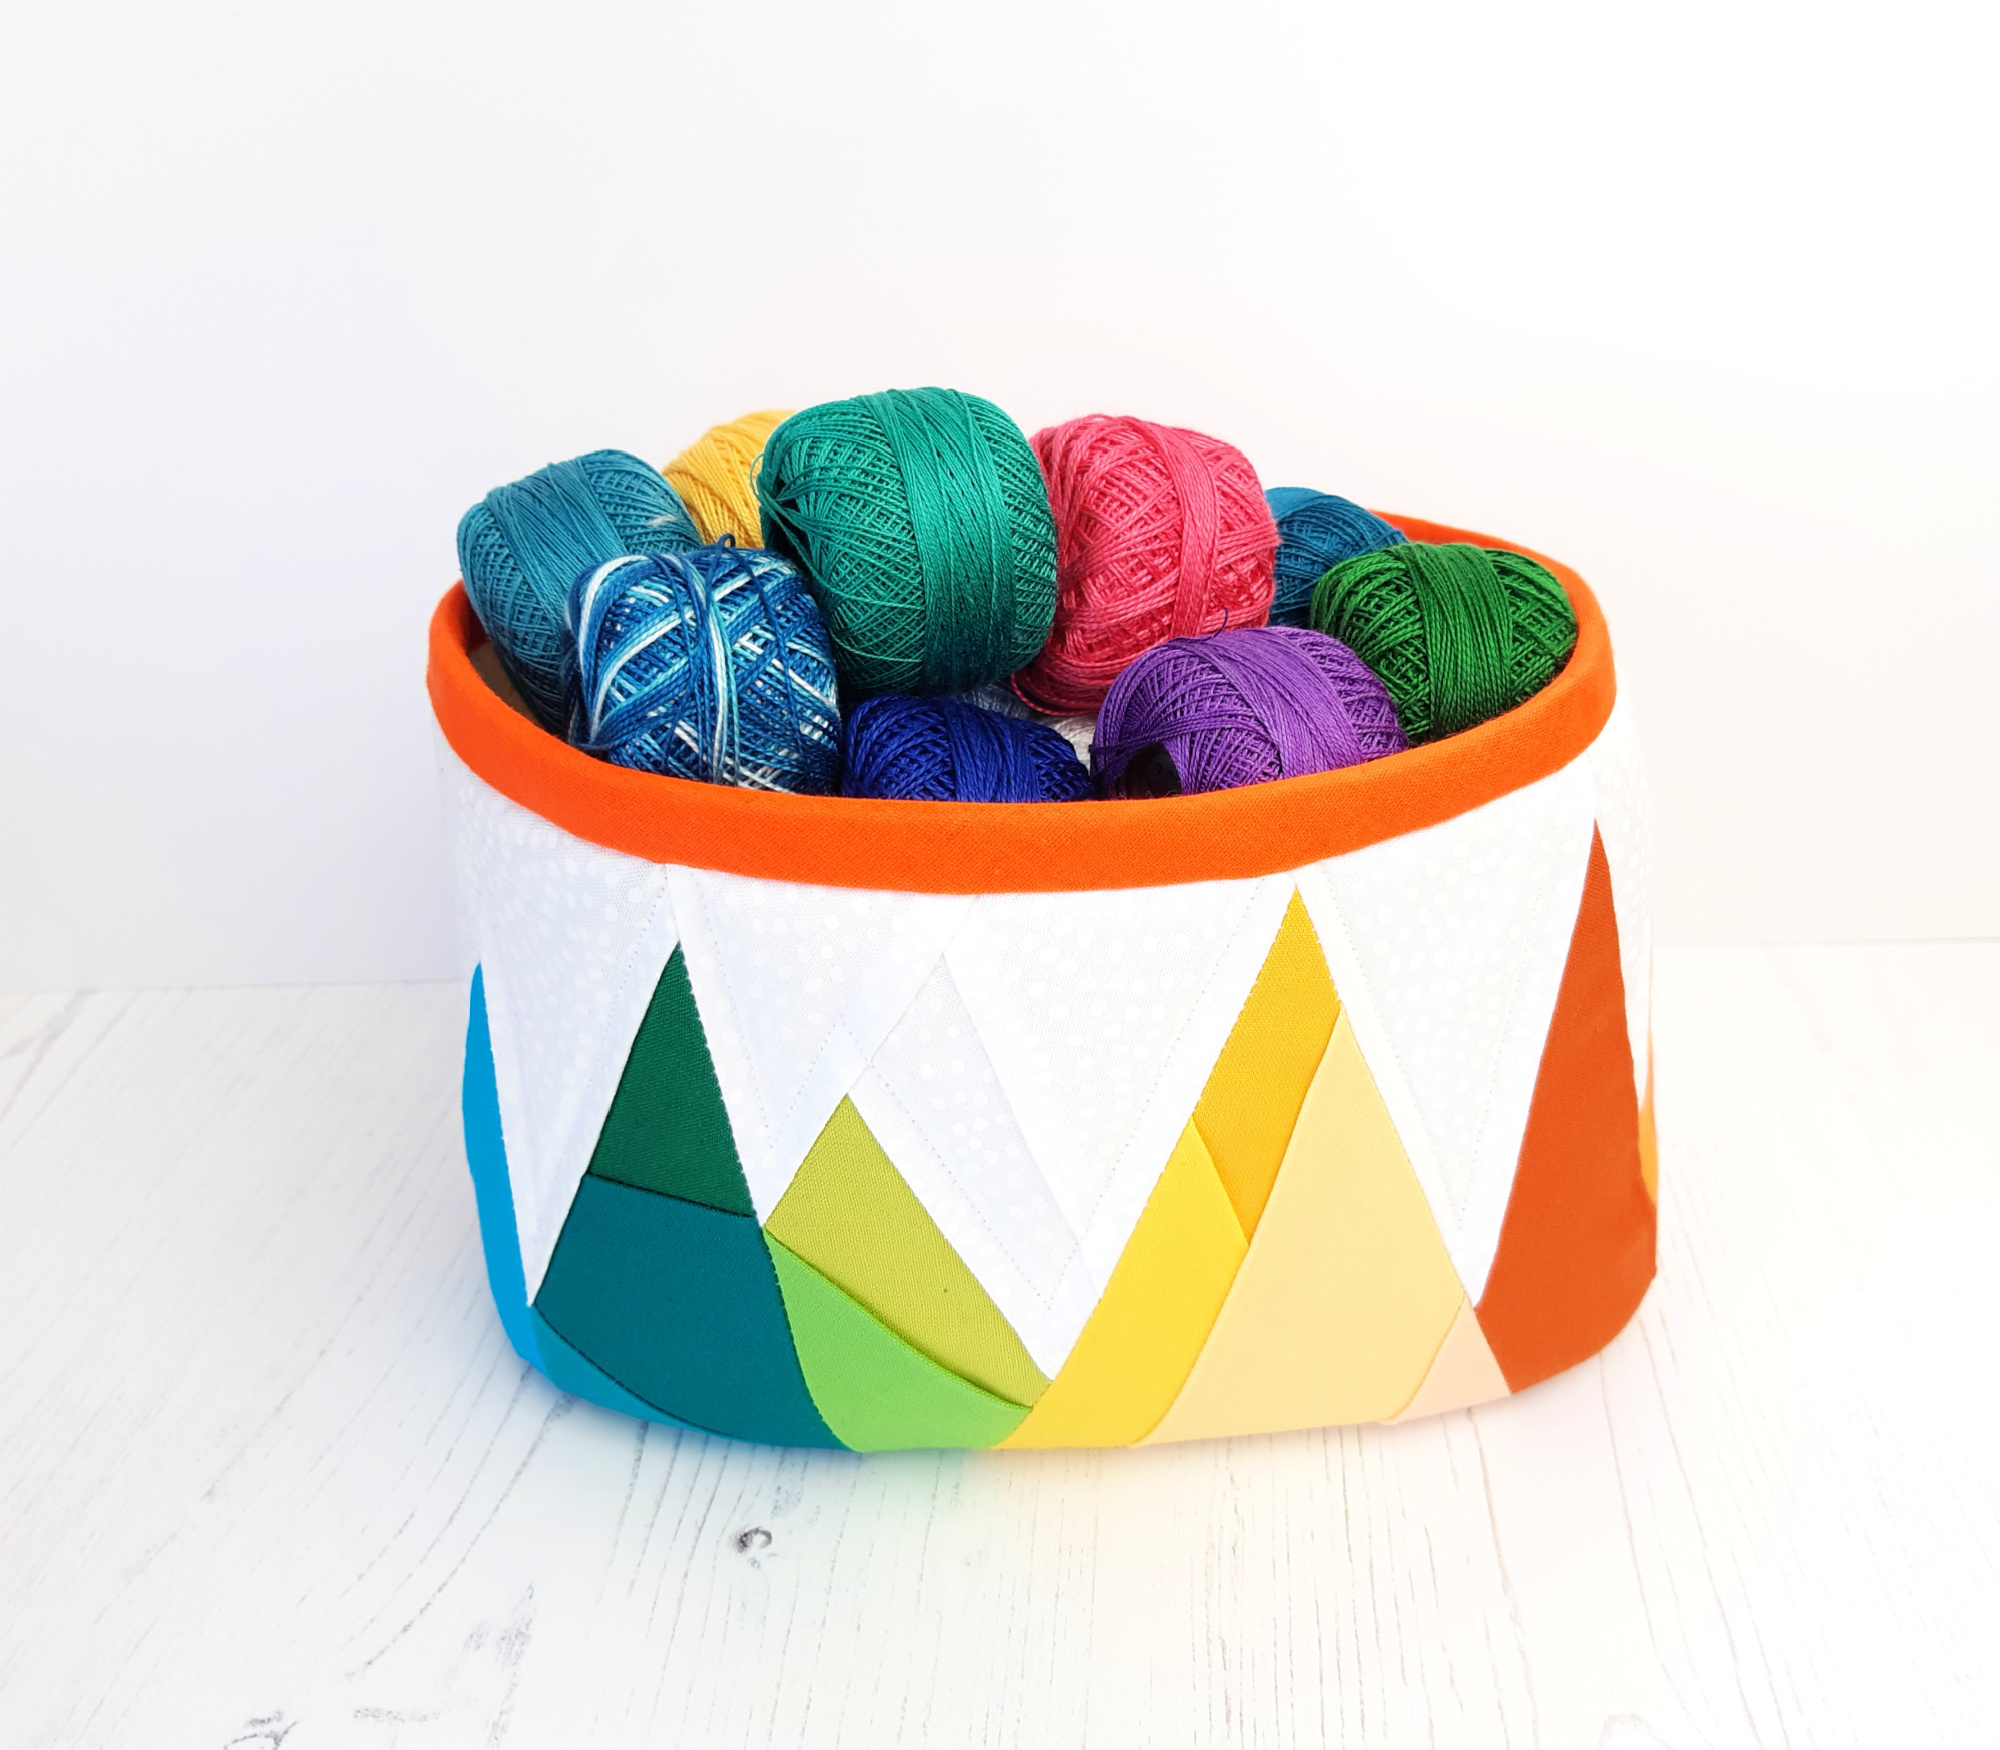
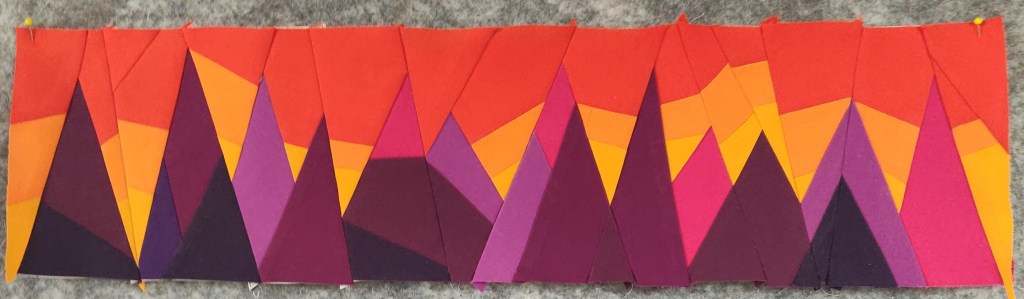
I was delighted when Fiona from PatternTrace asked if I would test her Mountain Tub Foundation Paper Pieced (FFP) pattern for her and even more so when I saw what she had designed. Immediately it appealed to me with the rainbow/ colourwheel mountains, ombre affect and simple geometric shapes.
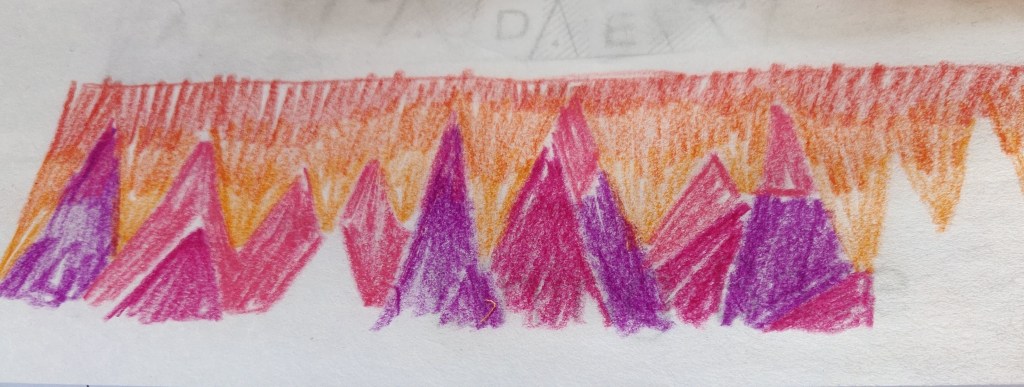
My immediate thought was to to make the sun set behind the mountains and with the left overs from my Entropy Quilt being a yellow, orange, red/pink and purple sat on my desk it seemed a no-brainer. I did a quick scribble with my colouring pencils on tracing paper over the construction diagram and that sealed the deal. I was inspired while at festival of quilts by the improv quilts so quickly joined some of the yellow orange scraps to make some panels I could cut the background from.
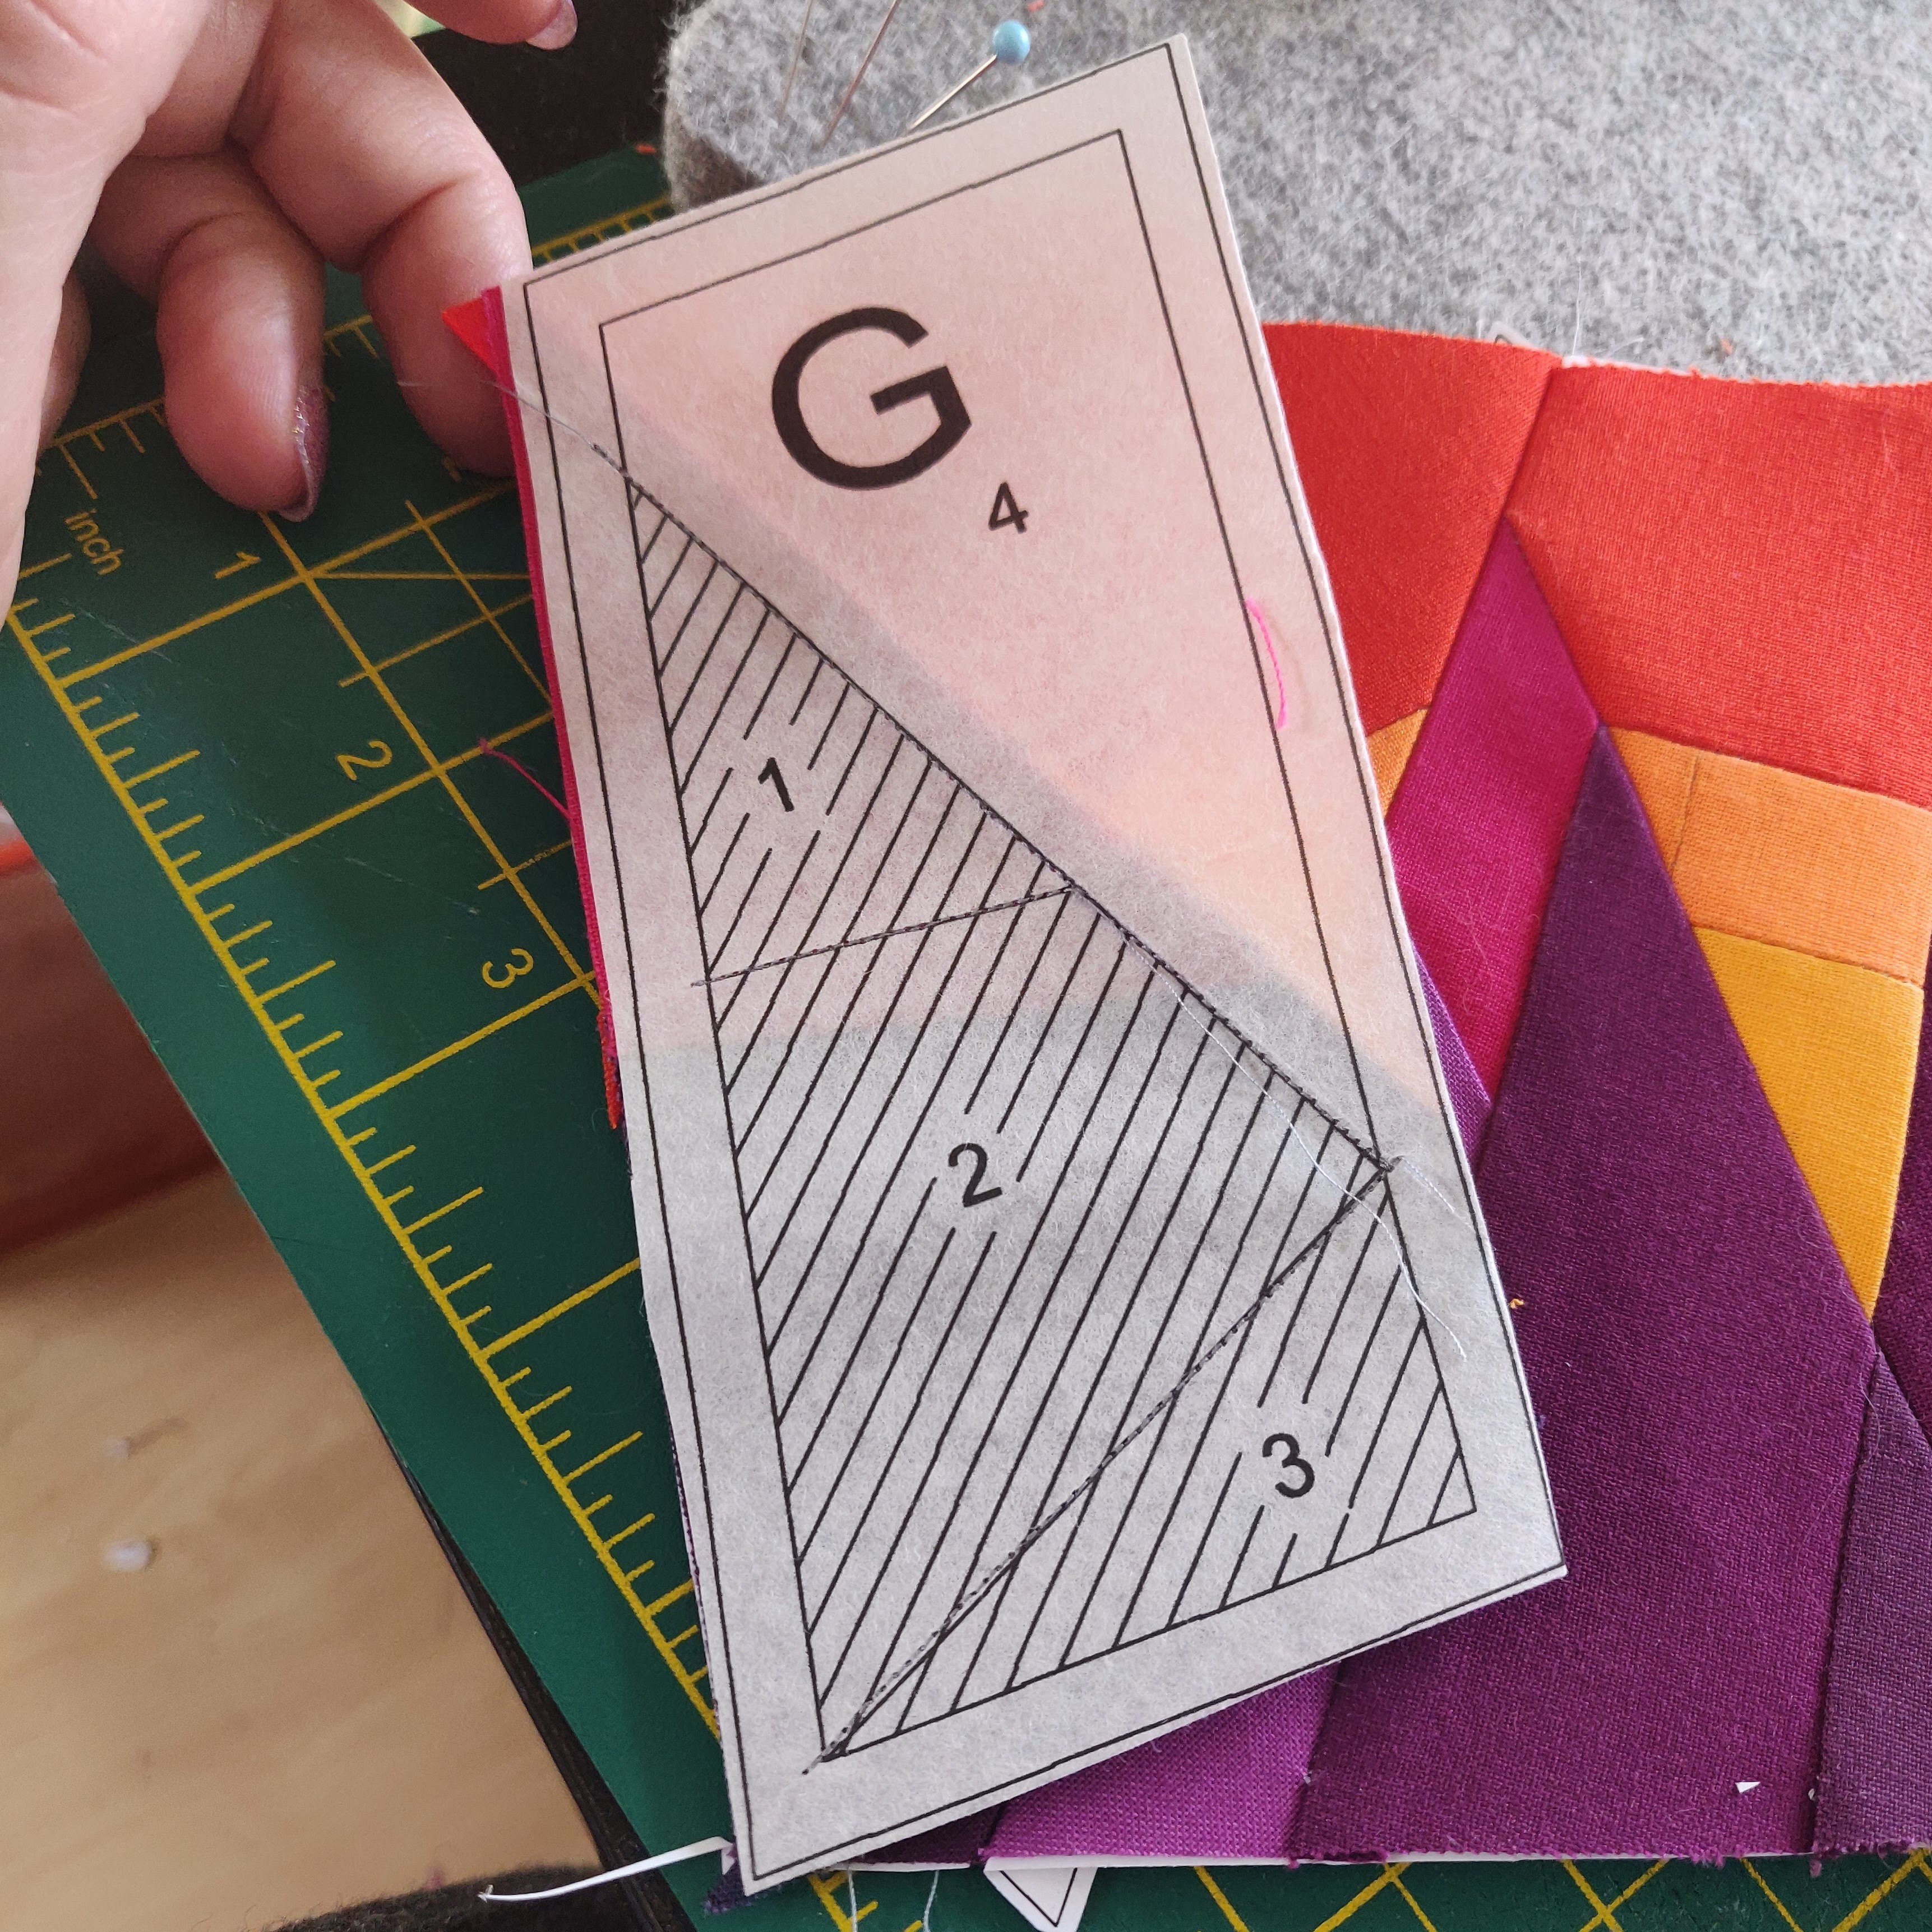
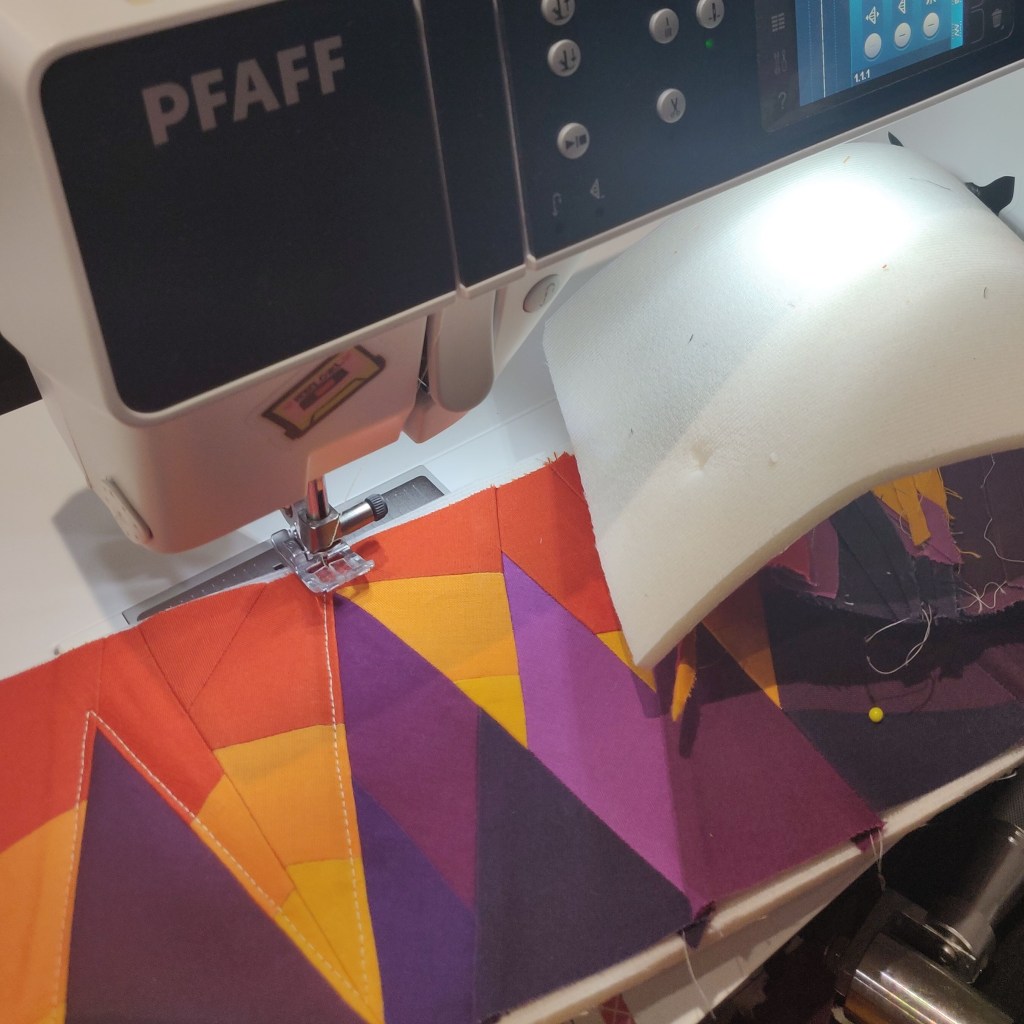
I used my favorite paper for foundation piecing which happens to come from PatternTrace* too. *Full disclosure – I am working in partnership with PatternTrace but I used their paper before this partnership and this is a genuine recommendation. I should do a proper blog post about why I like this paper, but in summary it’s because:
It’s semi-transparent so helps you pattern match or see where the fabric is
It’s thin and flexible so easier to work with than normal paper
It rips off easily, but not too easily (once sewn sections don’t start to fall off)
It’s fully recyclable as it’s 100% paper. I collect all my bits in a tub when removing the paper and throw it straight in the compost and it mixes in with the wet matter easily
For this partnership I help promote their products in exchange for 3 packs of foundation paper and can only assume I was selected because I had been genuinely raving about their foundation paper. This review is a true reflection of my experience of the pattern and not bias.
You can get 10% off your order with PatternTrace for Foundation Paper or any bundle which contains it using my code: “andsewi” & you will automatically get this Mountain Tub pattern added to your order FREE.
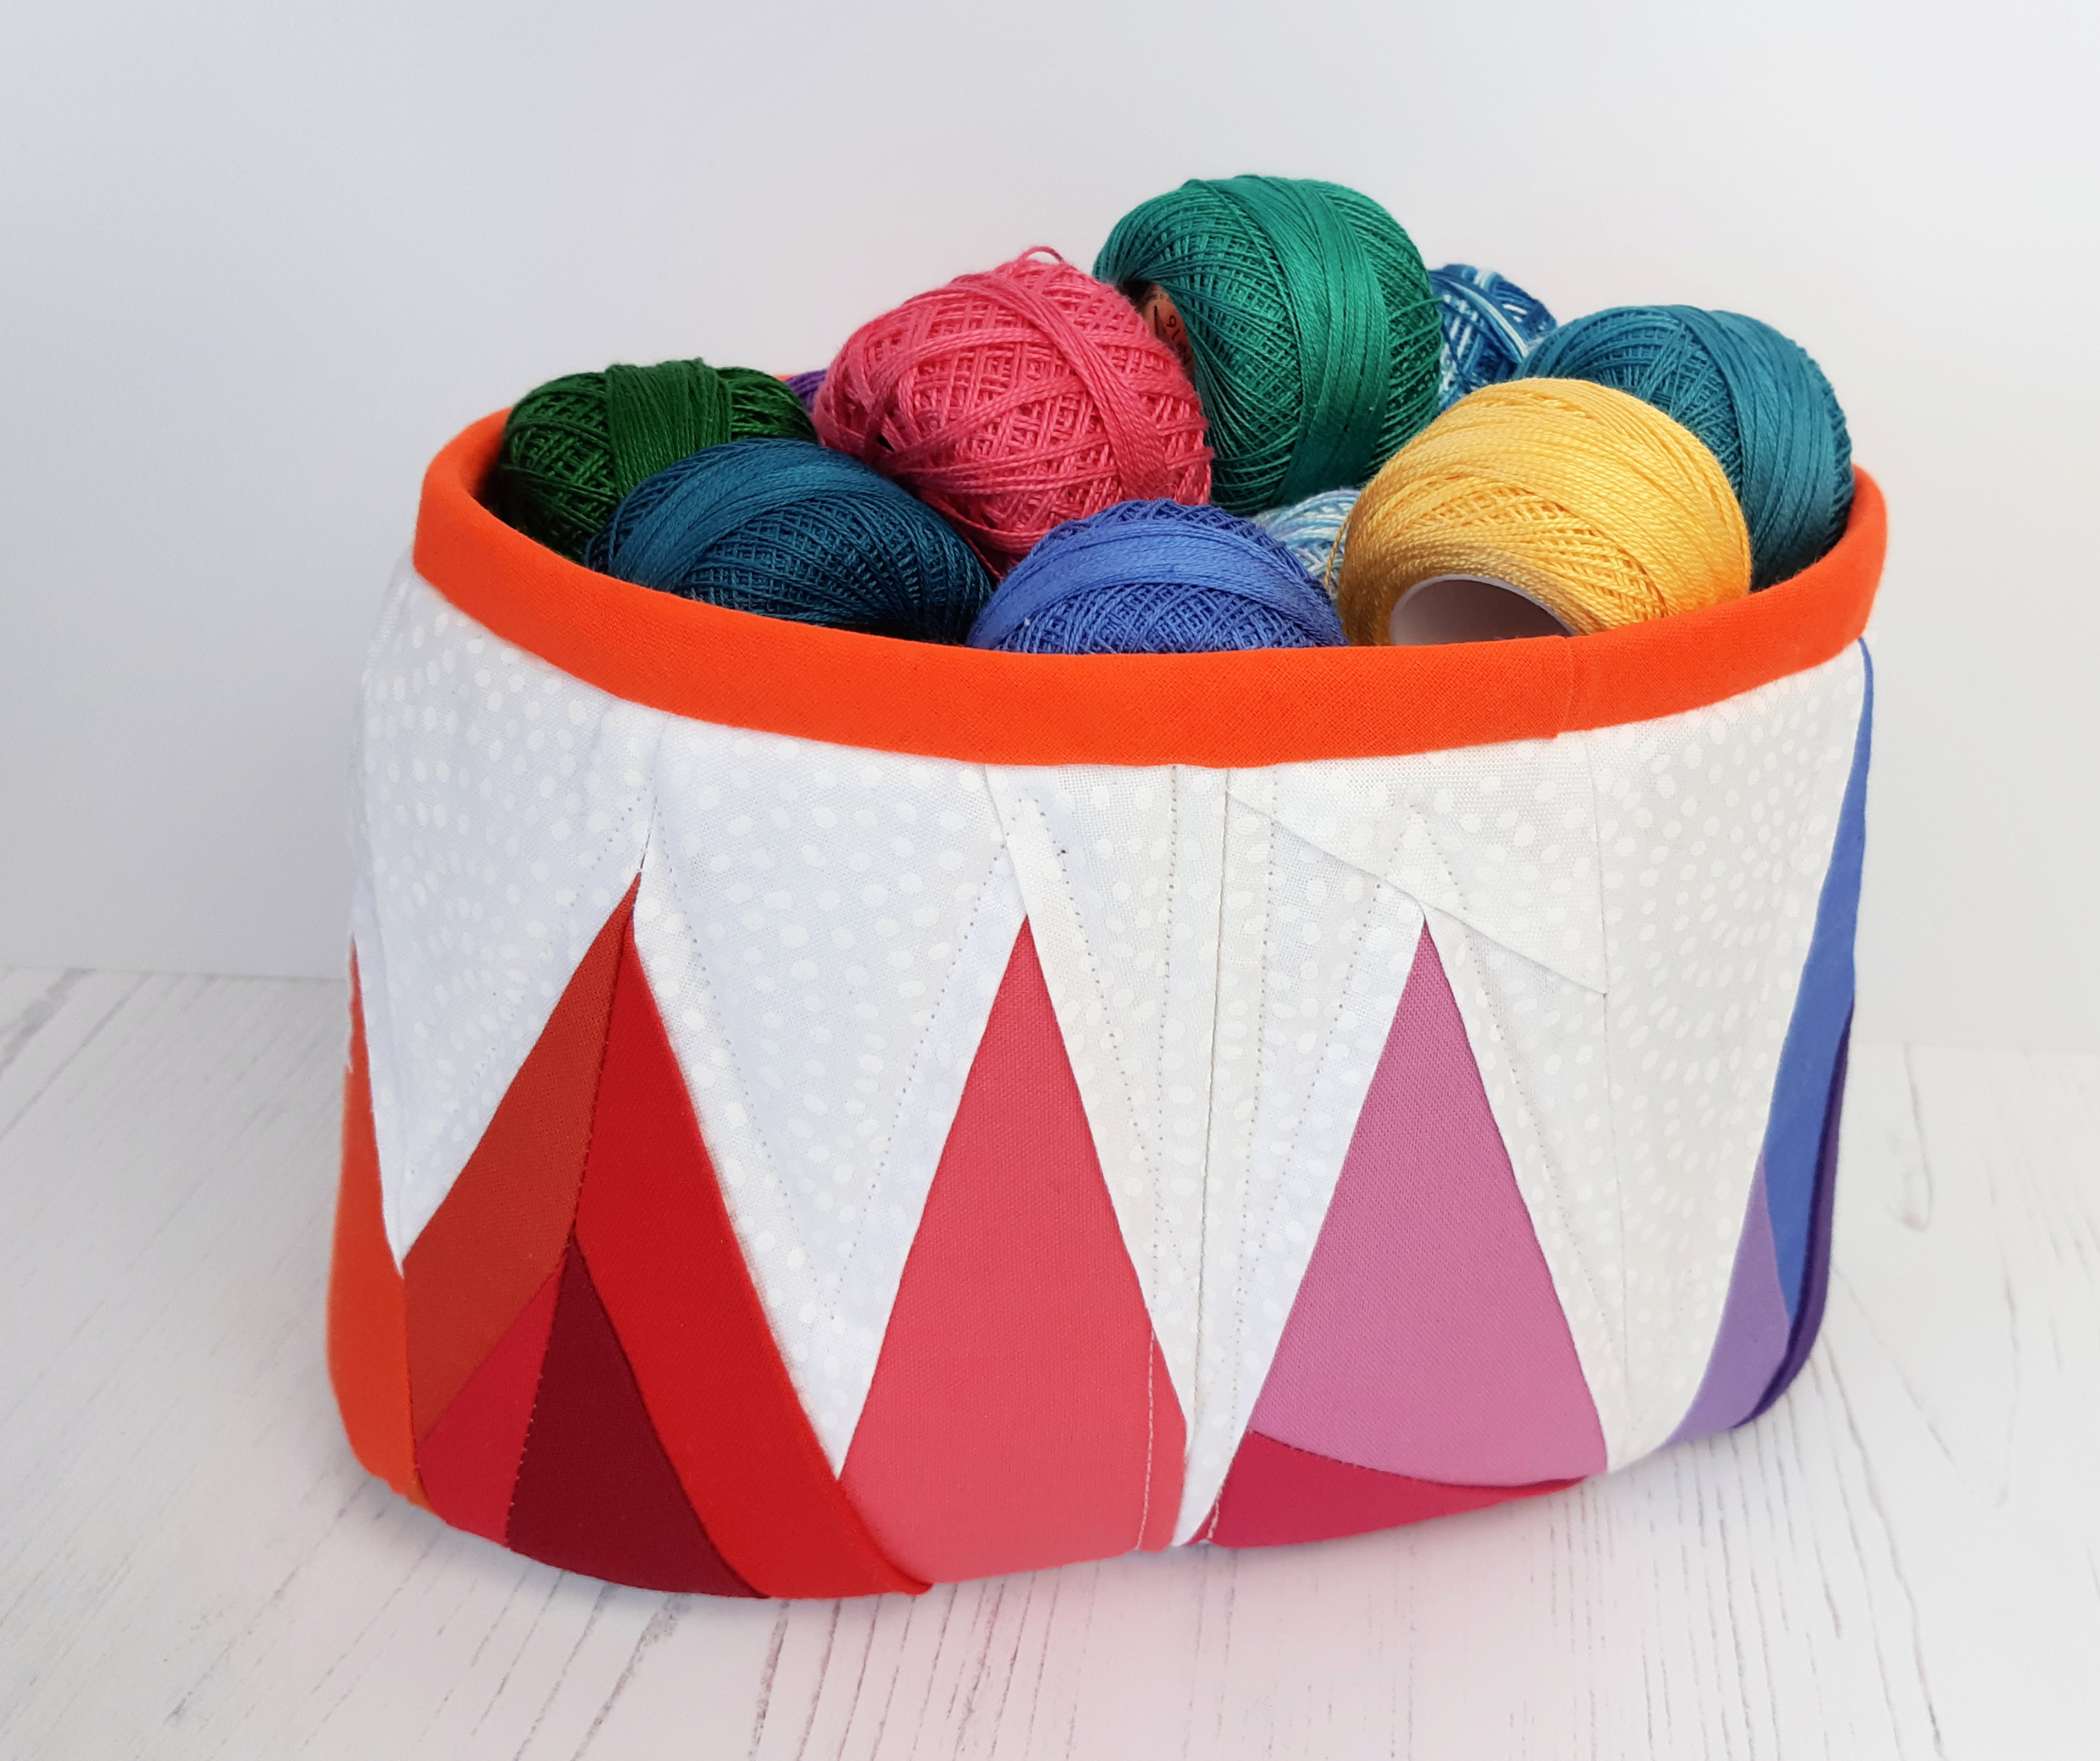
I didn’t have a set plan while I was piecing the main panel, I grabbed what I thought and went for it! I must have really enjoyed this part as I took no photos but each section went together quickly with 5/6 seams each, I felt quickly like I was making progress. Again the sections came together quickly and easily and before lunch I had a completed panel. To be honest I think you could use this pattern to make a nice wall hanging. With my ombre setting sun sky I started roughly matching the the yellow and orange shades but it quickly became apparent I didn’t have enough fabric left over to continue.
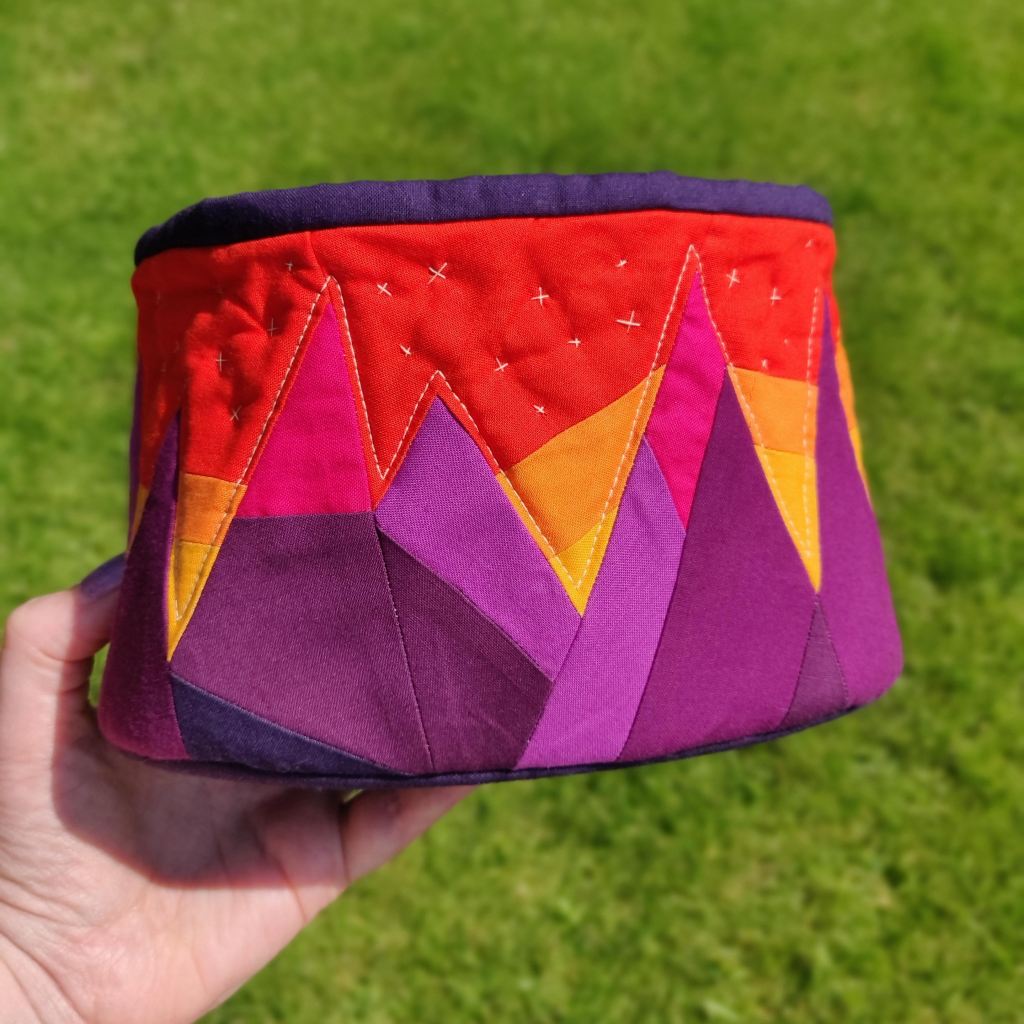
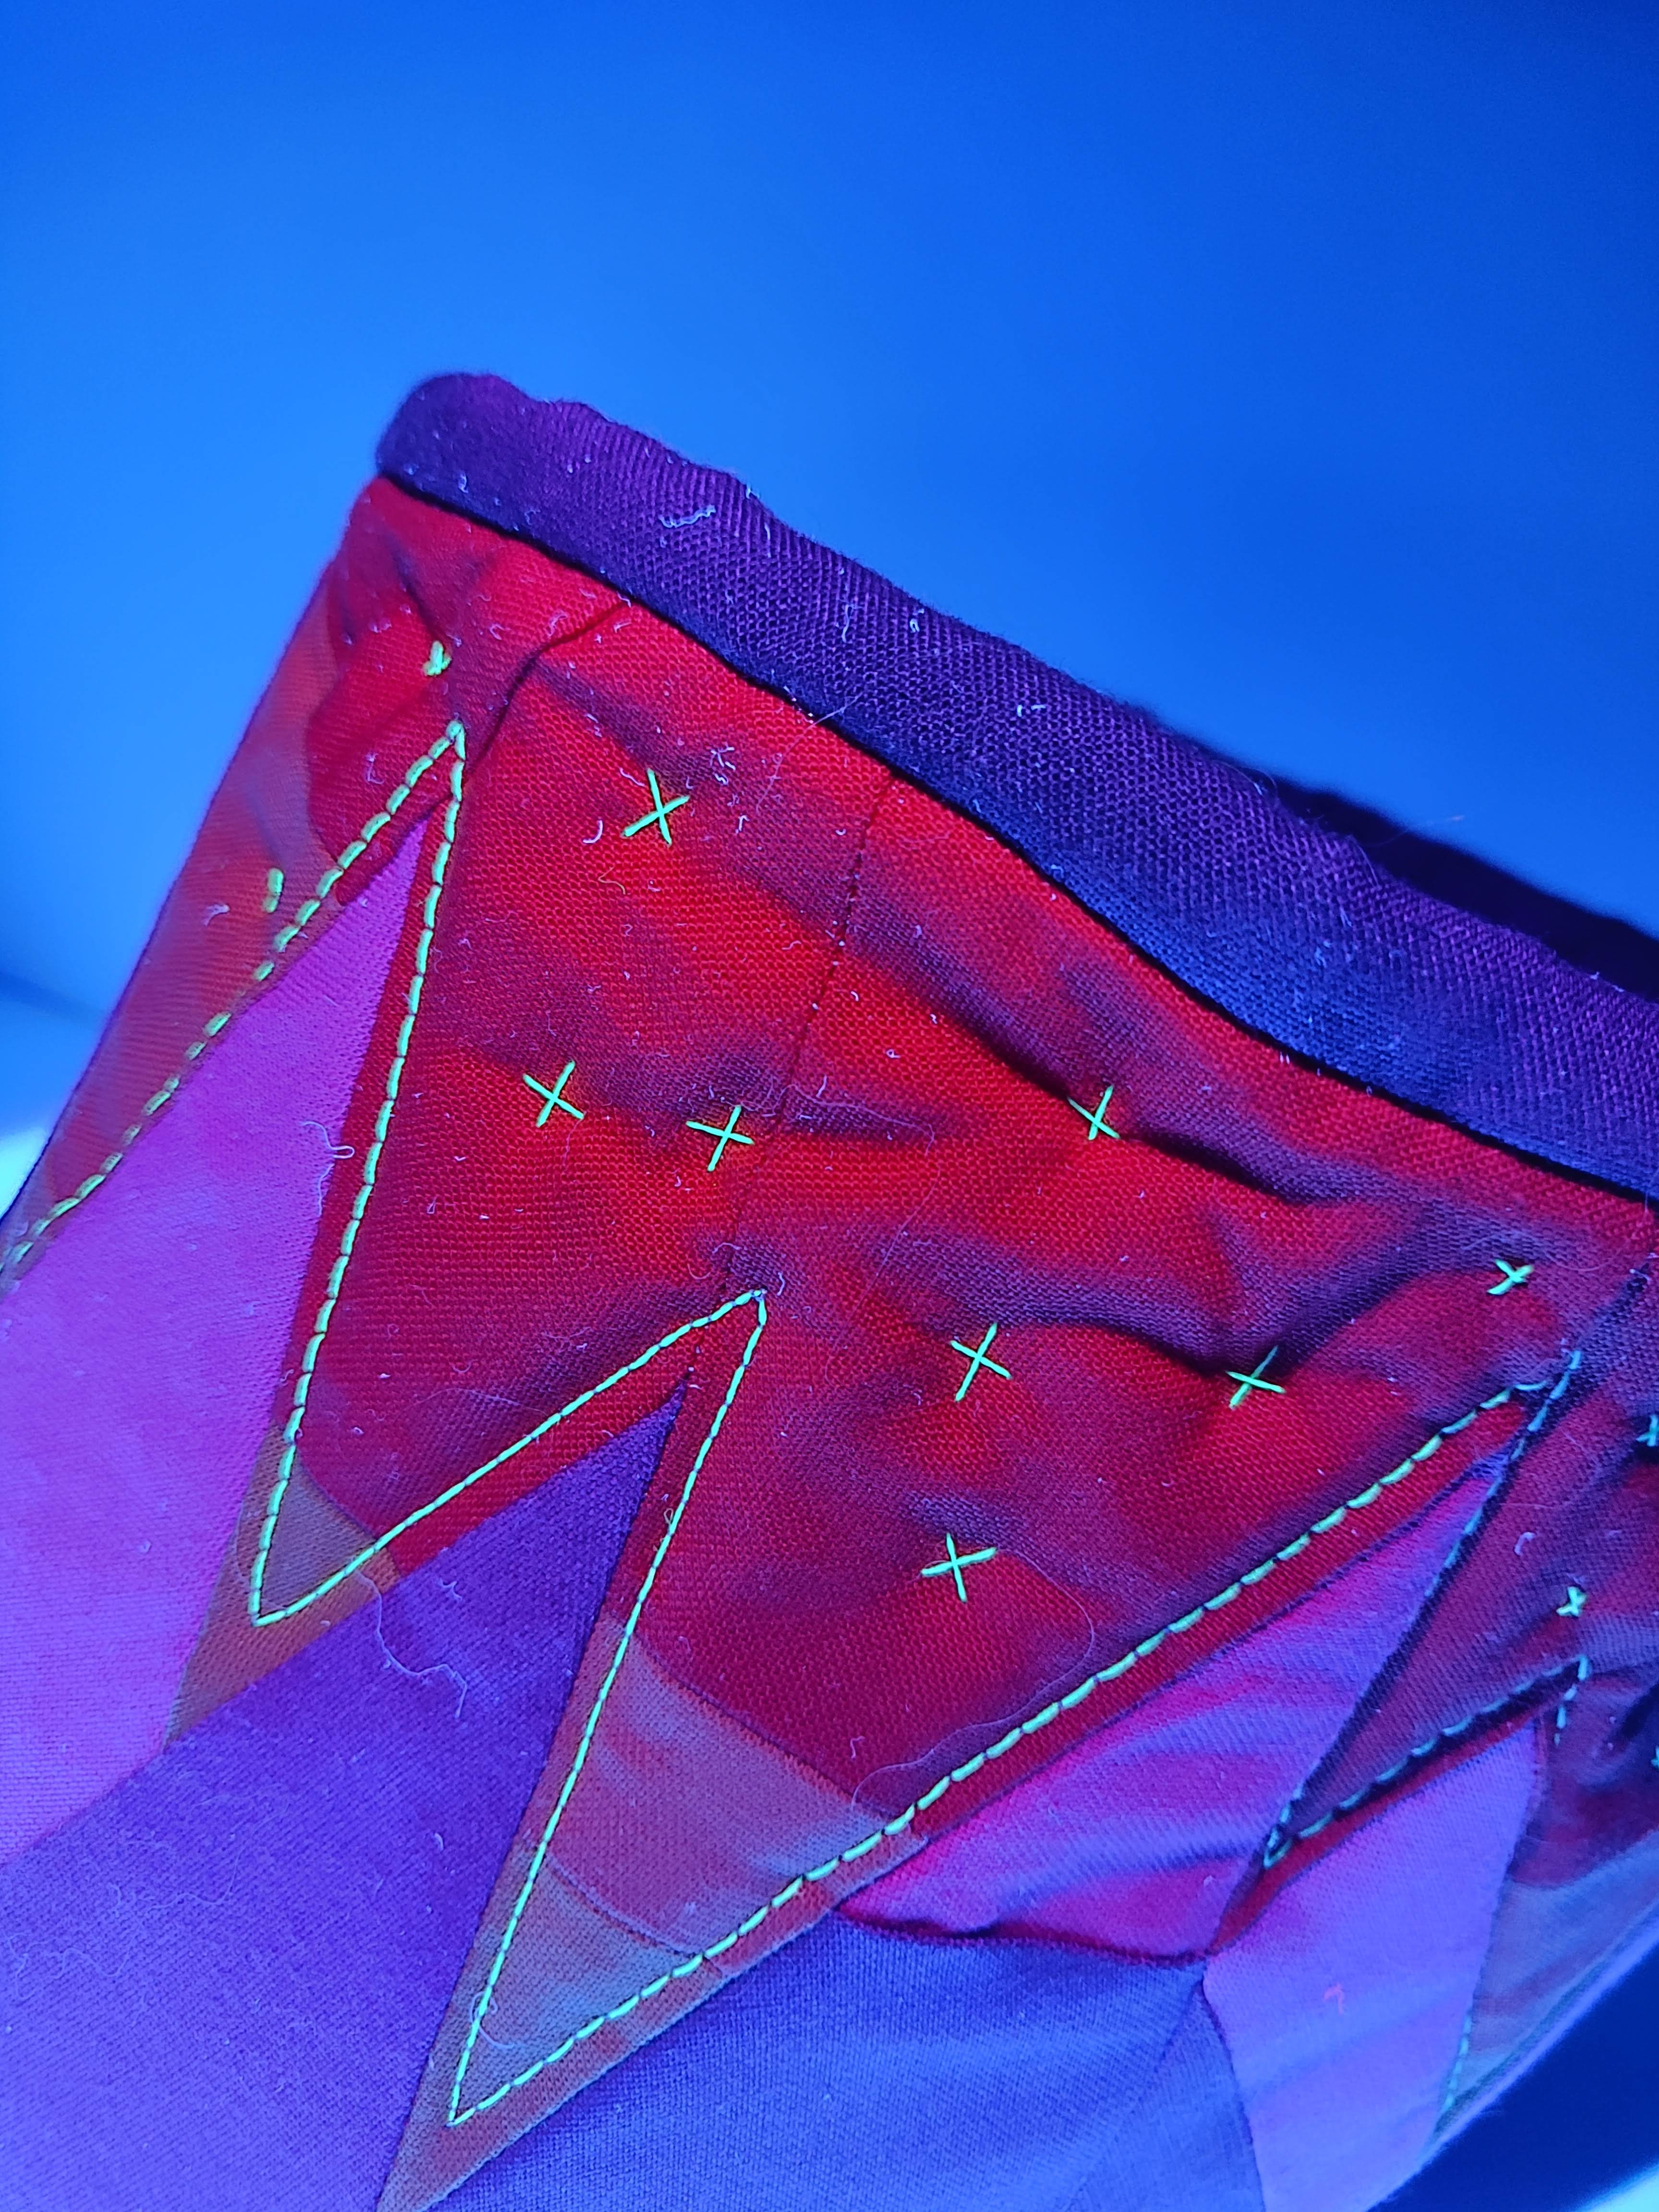
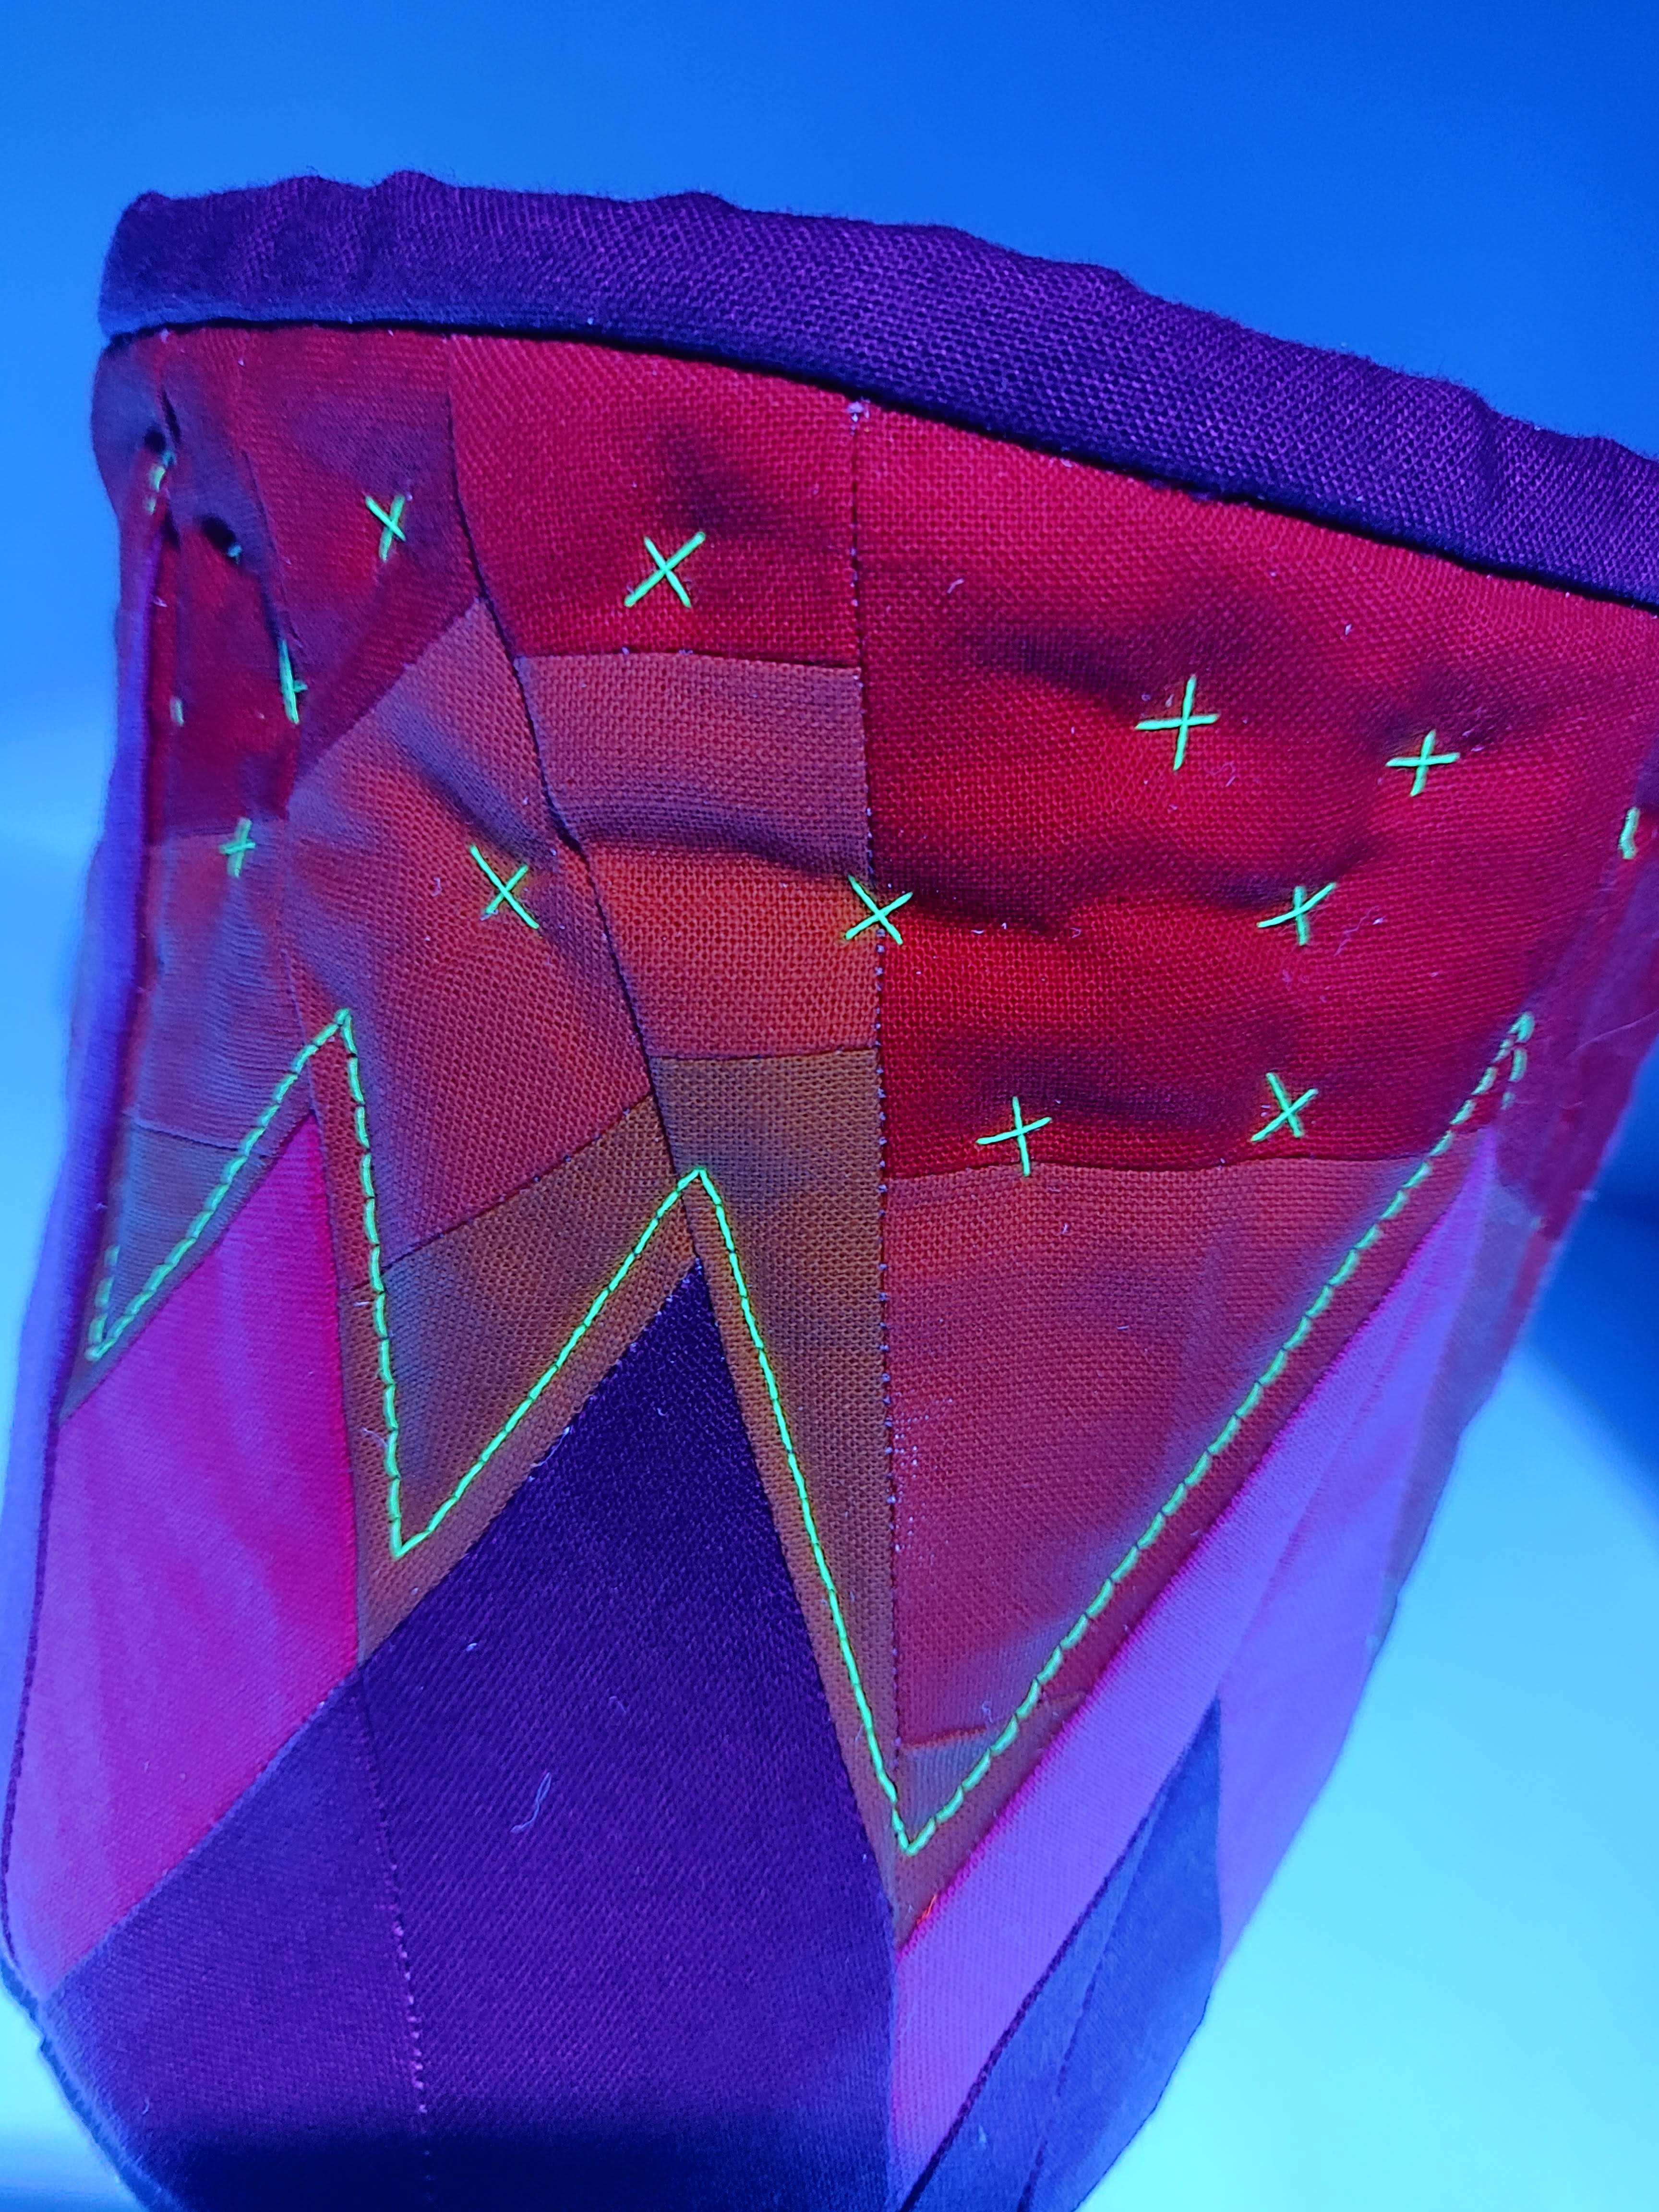
For quilting the panel I wanted to do it simply and not add to much detail so the FPP could really shine! I have only recently ventured into using heavier weight thread to quilt with and I maybe got a little to excited at the Wonderfil stand at Festival of Quilts. I had bought a glow in the dark 40wt thread (more about this later) in a light lemon colour and why not use it straight away! Hoping to replicate the last rays of sun coming over the mountain I echoed their shape with a simple straight stitch.
Joining the short end of the panel I certainly found Fiona’s tip for holding the seam allowance out the way gave a nice smooth joint and helped the tub keep a consistent shape.
The template for the base was perfectly sized and went on remarkably easily I think, maybe because it’s an oval (fantastic as it’s different to all the other tub patterns) and you have a straighter edge to start and stop on. It was well clipped and pined in place but it was a one hit and no seam ripper was required! Lining went it easy and the whole construction probably only took half an hour maximum. I did decide I had to hand finish the binding so that probably took longer.
I felt it needed a little something else and a fab quilty friend Lauran from @Lovevernhandmade on Instagram suggested some hand stitched stars! I think this cute little detail really makes my tub and I certainly need to be doing more hand sew little details like these!
In summary, this is a fab little pattern for a slightly different tub. A relatively quick make I would say it took me about 4/5 hours but I was not peddle to the metal as it was the summer holidays and I had to stop to Mum occasionally. It’s not overly complicated either in the FPP or tub construction. Hardest part for me was joining the bias finishing, getting the ends to join without excess… but don’t worry the instructions tell you how to join the bias: just run one over the other! That struggle was completely my own making – I should have followed the instruction! Sorry Fiona!
Don’t forget you can get the pattern for FREE if you buy foundation paper or a bundle containing it as well as 10% off using my code: “andsewi”.
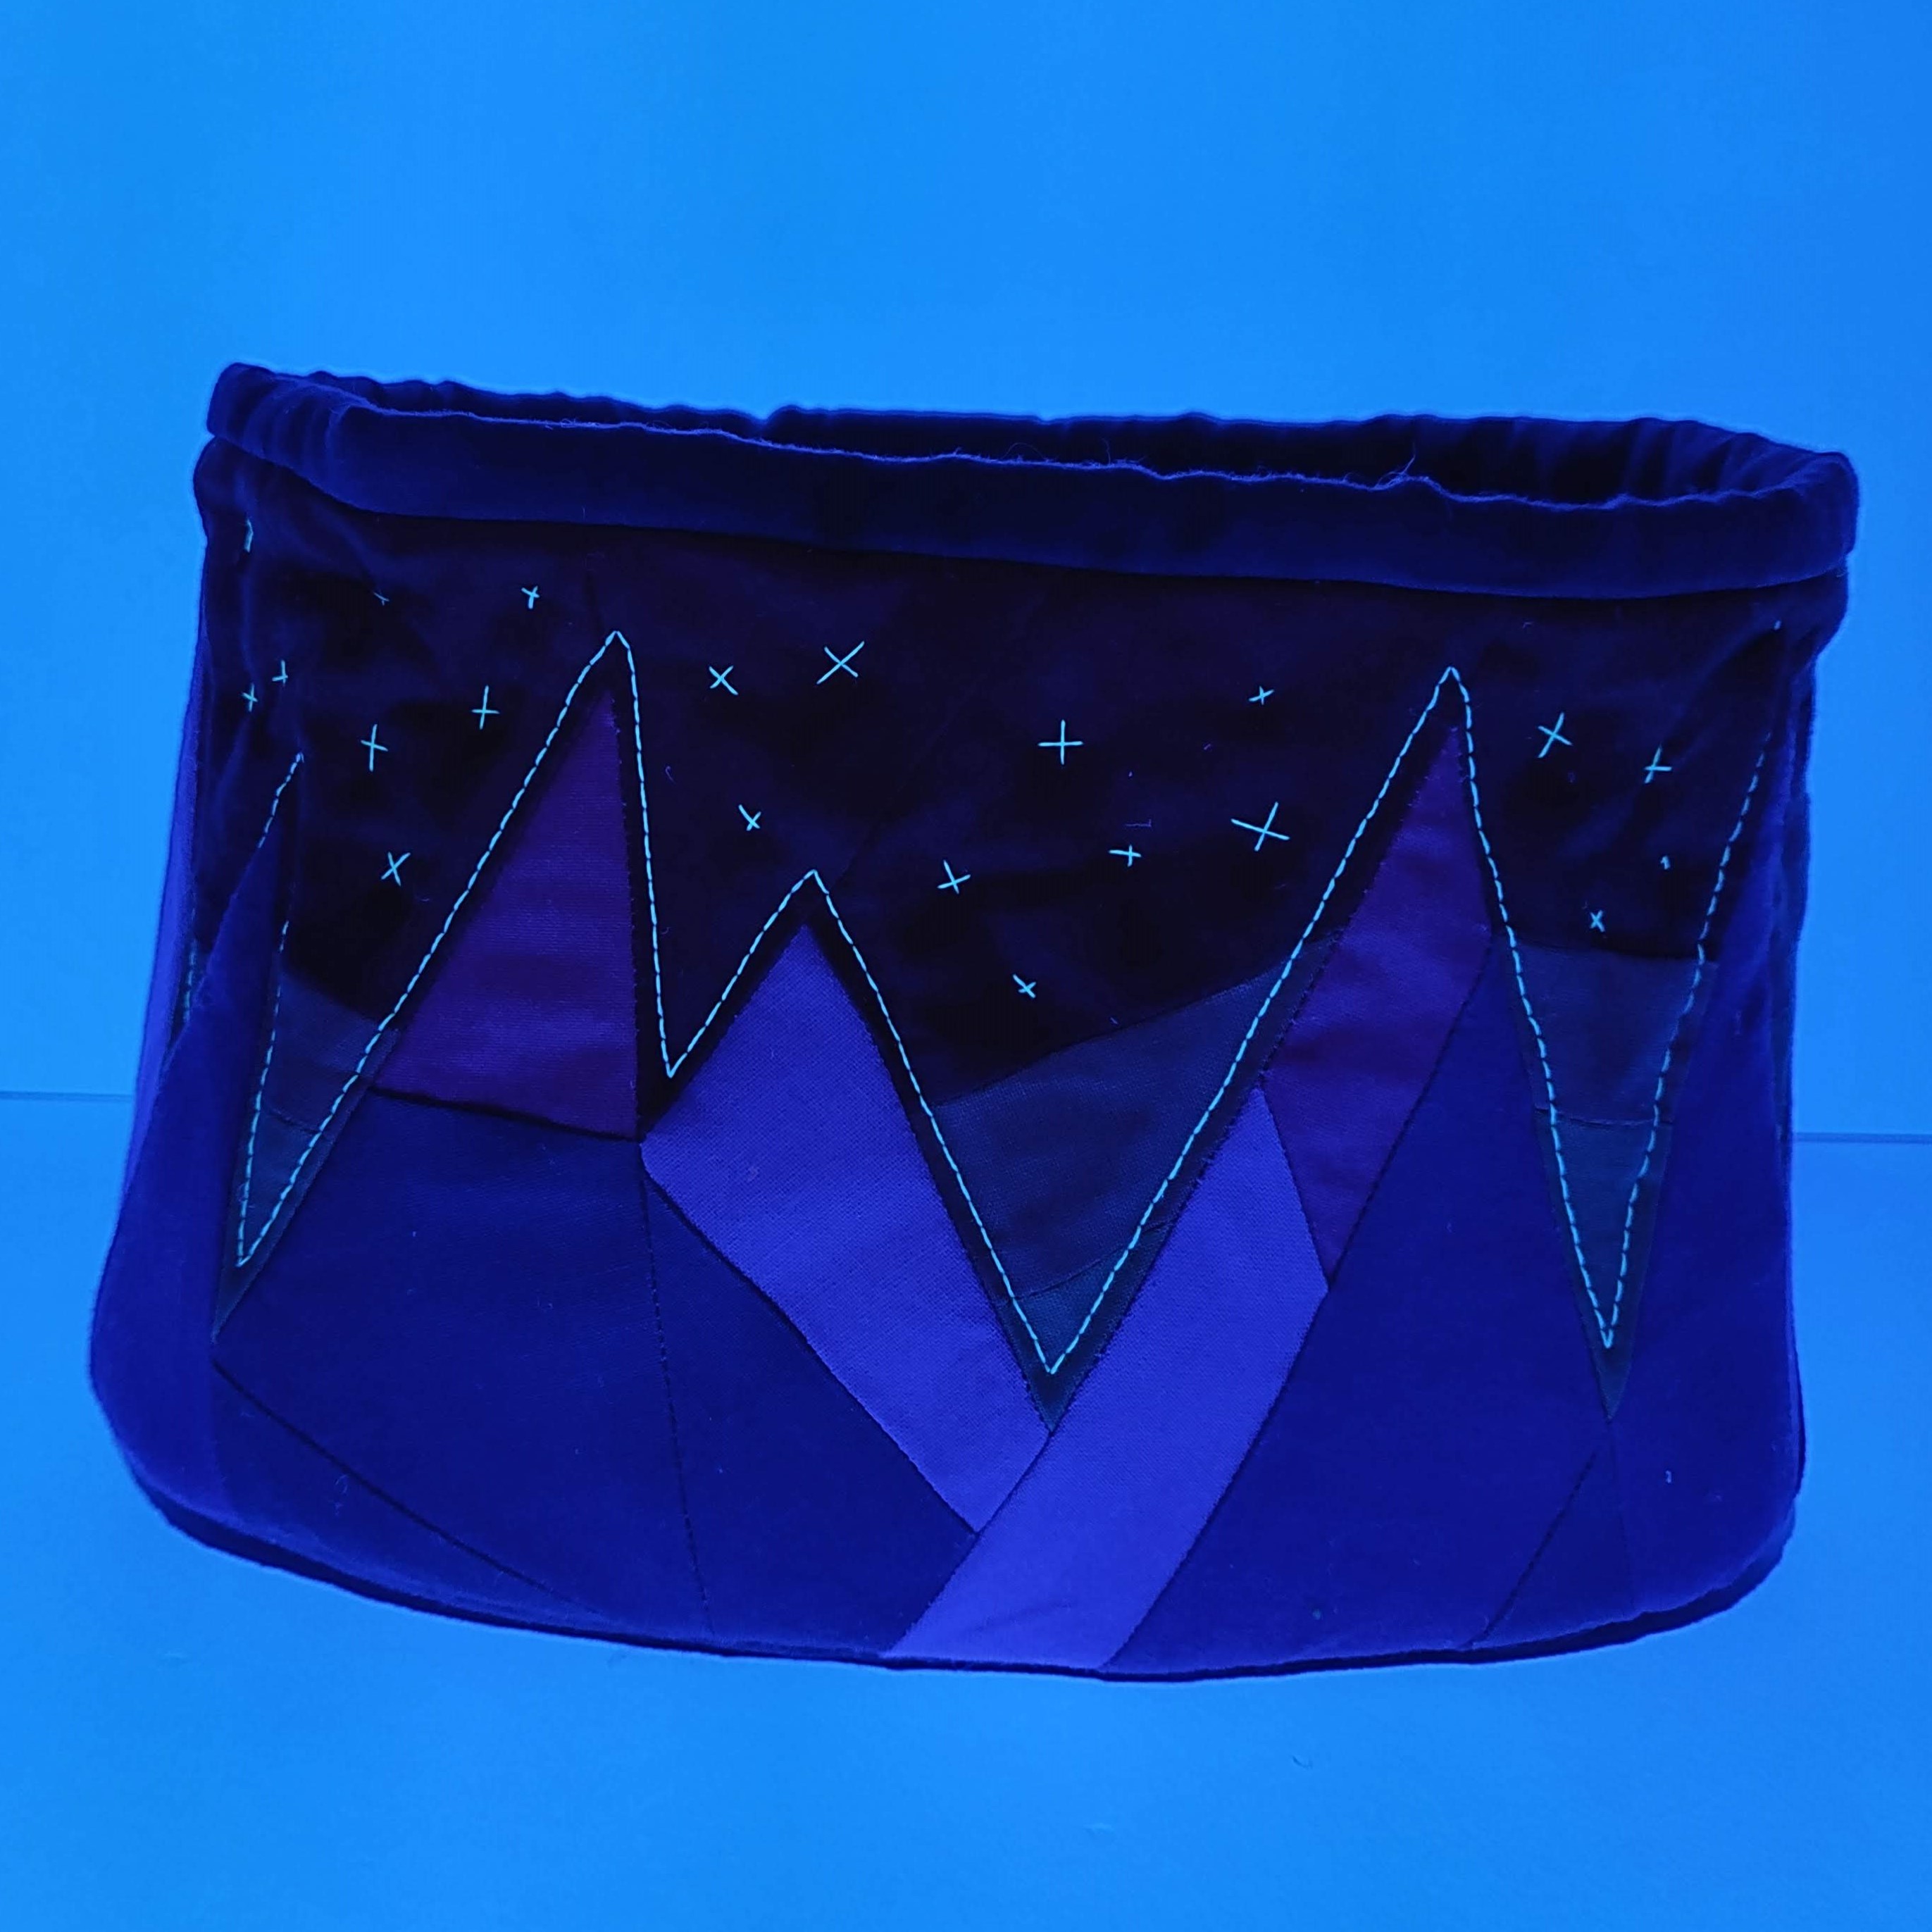
Now to the WonderFil Ahrora Thread, that is supposed to glow in the dark. Very disappointingly I couldn’t get it to glow no matter how much I charged it in direct or indirect sunlight for any amount of time.
My intention was to use this as a tub on my bedside table to hide some of the clutter and match my Entropy Quilt which lives on my bed along with the Nomad Cushion I pattern tested – both the work of @squats_and_runningstitches. The mountain outline and hand-quilted stars would offer something to admire during a sleepless night.
After doing some research I discovered they recommend using it in larger areas which to me defeats the point because you could use glow in the dark fabric. The only way I could get the thread to glow was by using a black light torch which I ordered. Once it arrived and I tried it out I realised pure white thread would glow better.
I can however confirm I am very happy with the WonderFil Flash Thread. It very much does flash back when you photograph the quilt. The colour and texture is nice but I have not used it in a project yet. I do have some ideas that I’m very excited to experiment with so if your are interested in this thread keep an eye on my feed.
I wrote this 2 years ago and never got round to posting it! Its not finished or edited but i’m going to share it as it is because this is me! I can’t wait to get to some galleries soon.
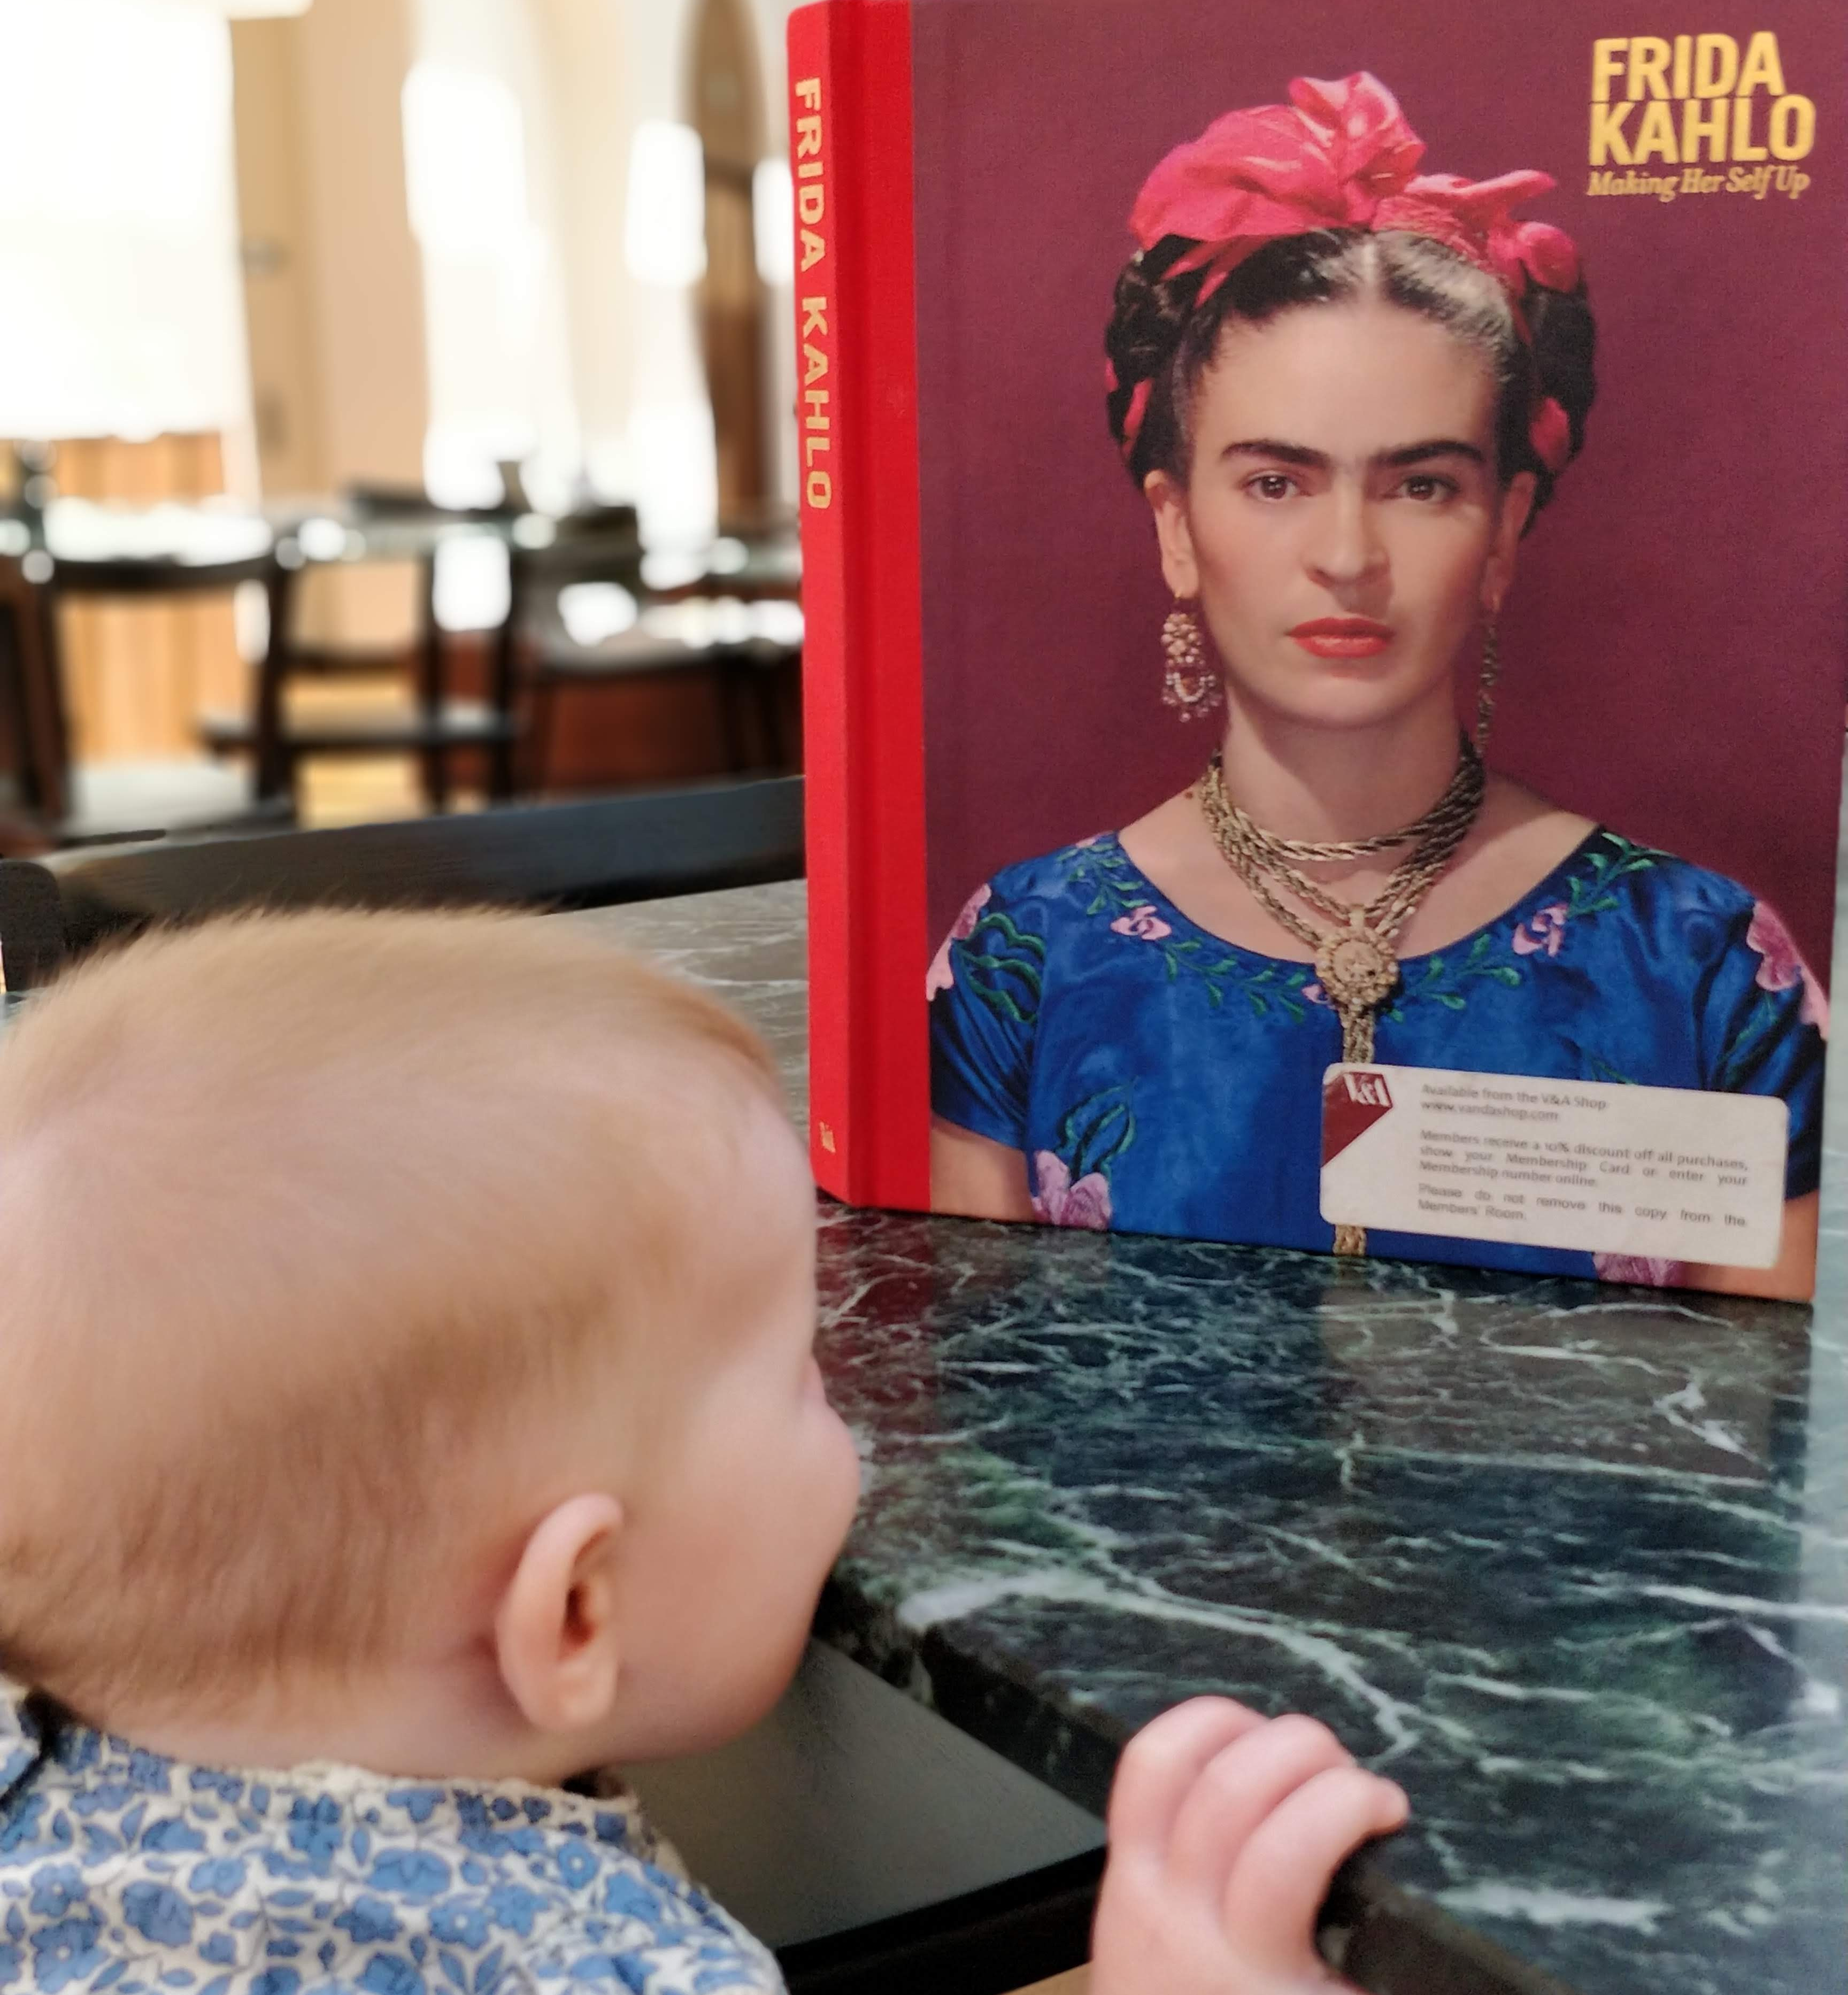
Last week baby and me escaped the house with my granny for a trip to the V & A for the Frida Kahlo exhibition – ‘Making Herself Up’. I know a little about Frida Kahlo and liked the strong colours and self portraits which I wish I could do! I really enjoyed the exhibition easy to chunks to read and just enough detail. The items were also well displayed. I enjoyed rediscovering and finding out more about her difficult life. I do now wish I had bough the exhibition book.
I didn’t realize quite how ill she had been all through her short life and how much that had impacted on her art. I know I should not but I wish I was bed bound to be able to do nothing but my art. It was the objects they had on display I found most interesting maybe as they are more easily absorbed when holding a wriggly baby or because I am the type of person.
photos of corsets (i now can’t find and this was pre IG account)
The idea that she had the guts to wear clothes that suited her requirements and not what was popular or socially the norm. Long skirts to hide the effects of polio on her legs and large tops to hide her medical corsets. Makes me wonder if I should have more confidence to wear what I like and not what is normal on just physically fits. Obviously I need the time for practice making clothes, adjusting patterns to suit my body shape mainly. I have been toying with the idea of making a set of long corded stays. A mixture of something which would go under a Jane Austin style dress and something made up in my head to smooth my double c-section tummy and nicely shape my huge post baby feeding boobs. Anyway I’m rambling. Look at these examples of Frida’s clothes. ALL THE COLOURS!
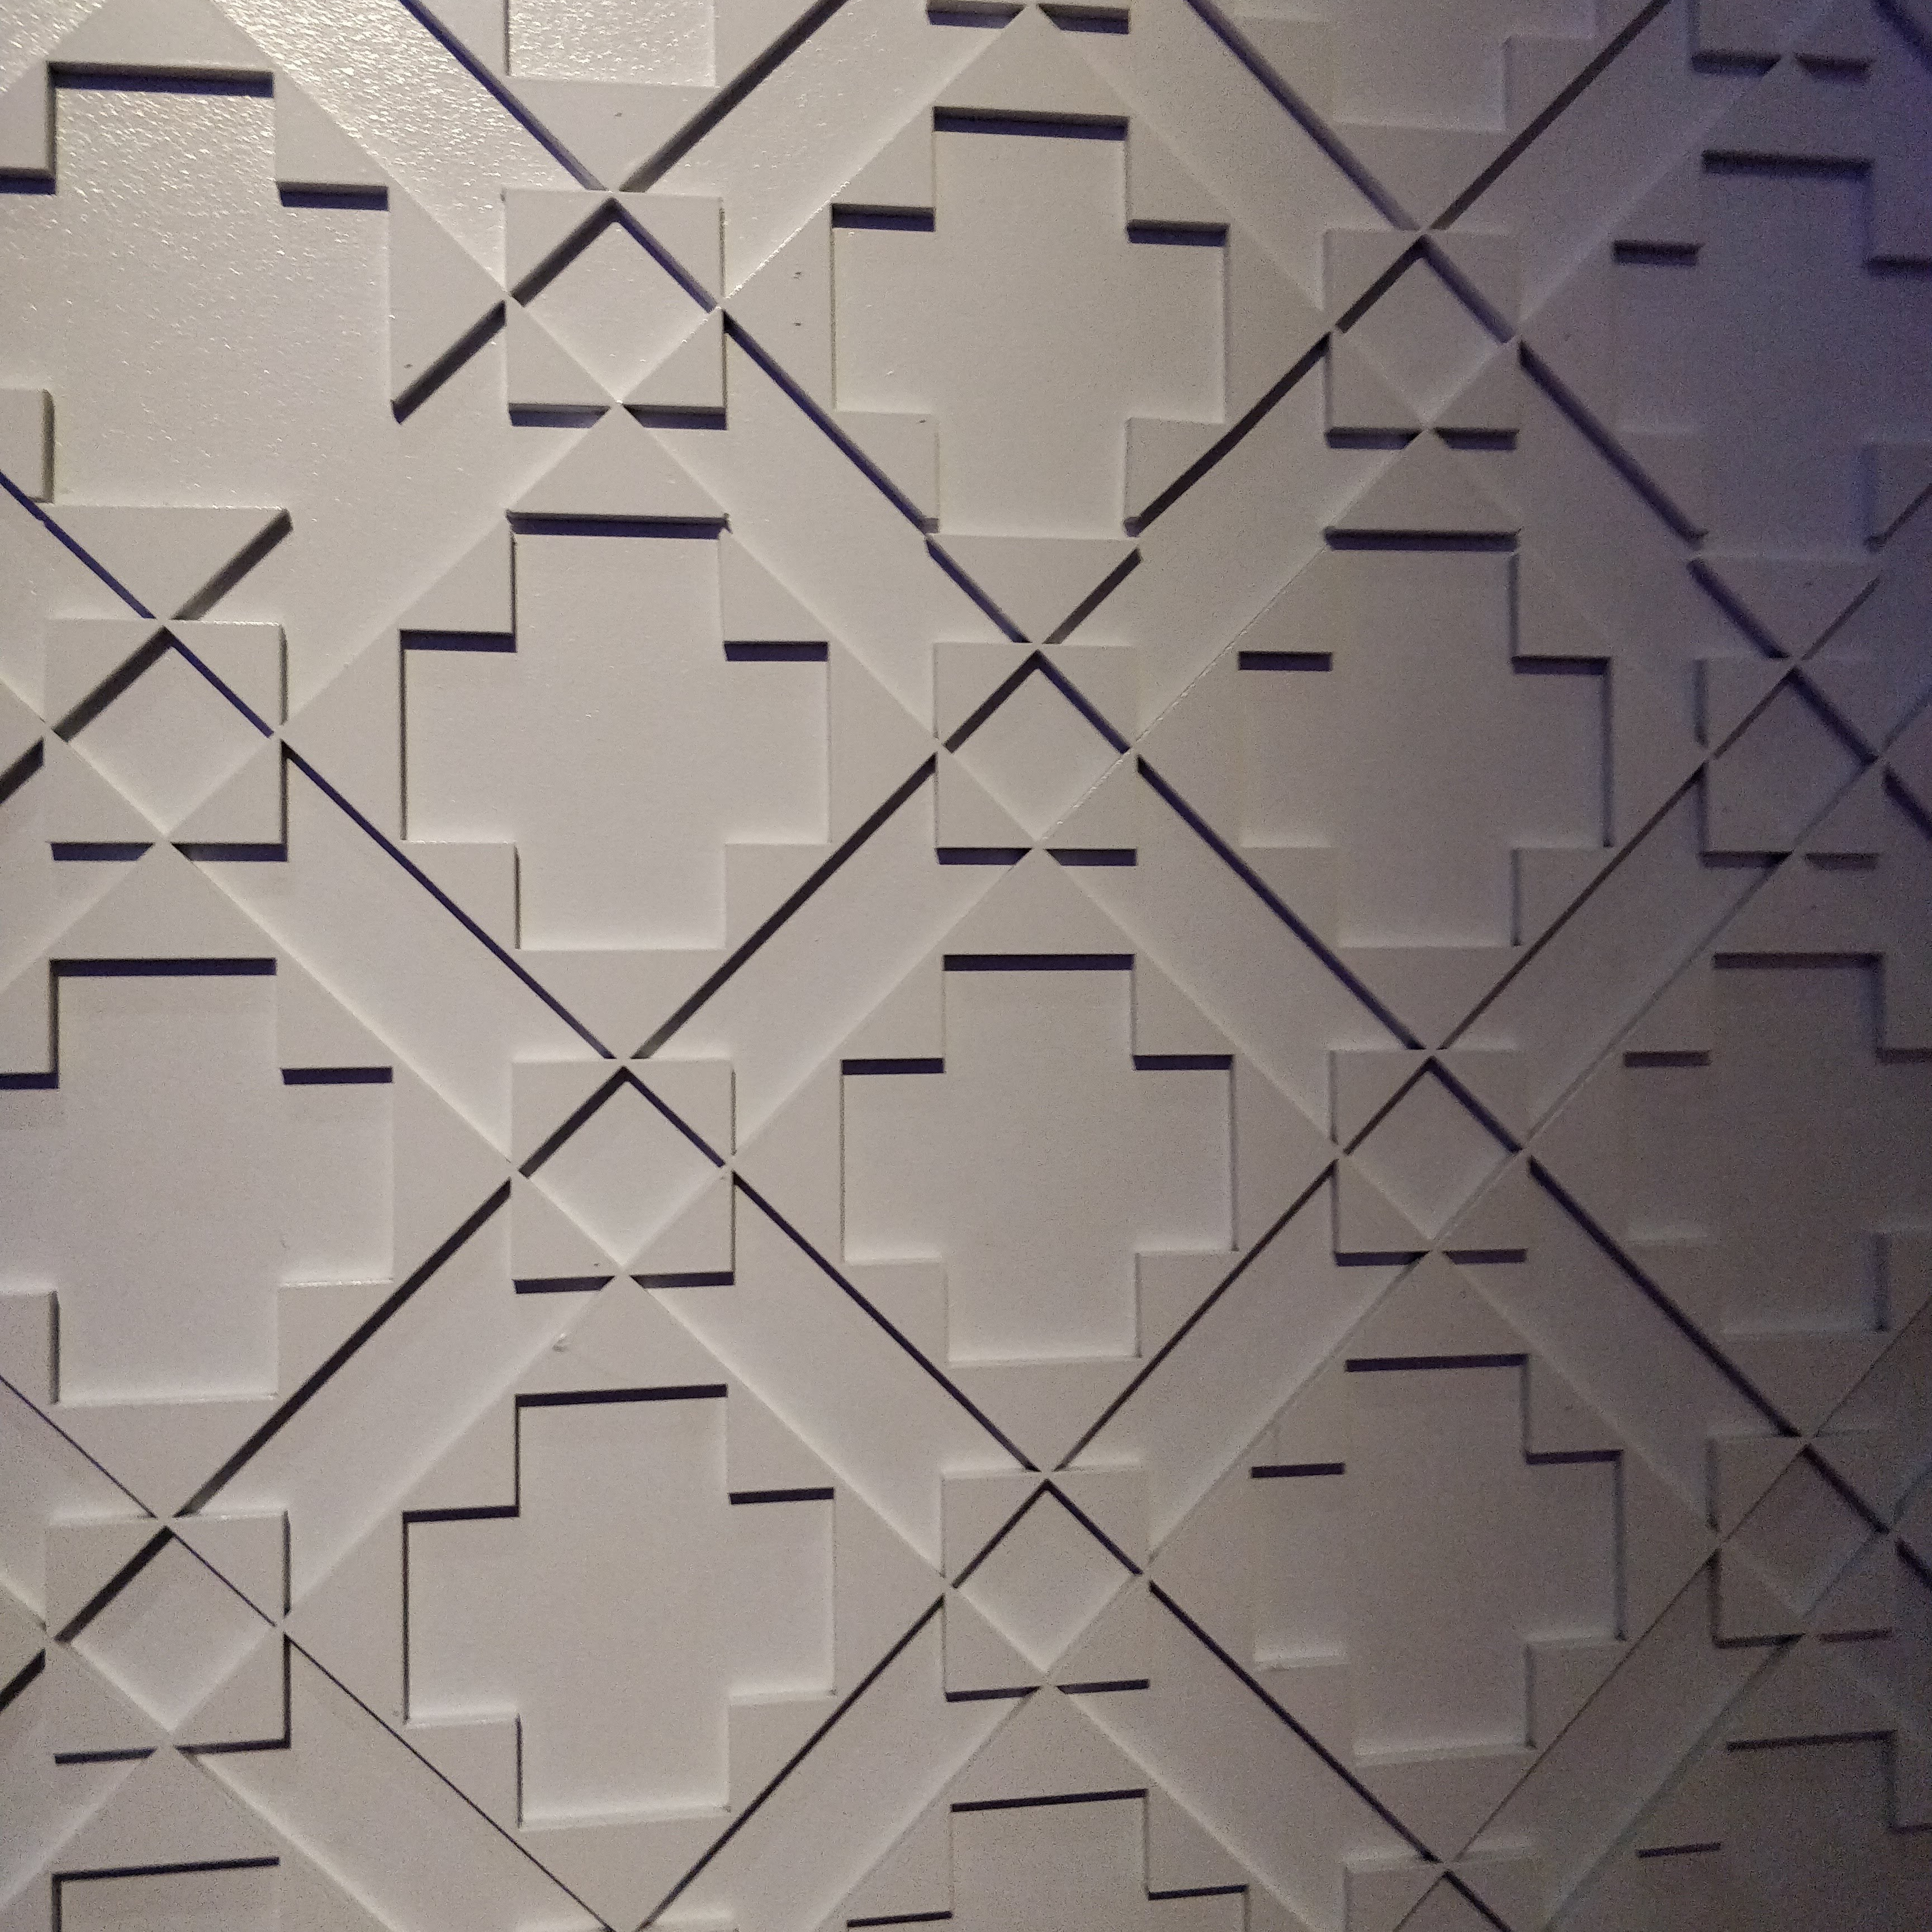
I of course I saw a quilt pattern where only other quilters would, this time in the exhibition backdrop.
It was lovely to get out the local area and wonder round London. I would have killed (not literally) to be baby free and be able to stop and sketch and do as I wished in my own time. Baby was fairly good! She drew in the crowds everywhere we stopped and always smiled or cooed appropriately.
After Granny went home me and baby ventured on the underground by ourselves with the big buggy which was not as bad as I feared! We went to meet the hubby at his office. on the way we walked through the Temple area of London. Wow… I never knew that such pretty Georgian/ Victorian lanes were just over the river from Waterloo. I felt like I could just step back in time. I could imaging my swishing skirts and holding a much better posture in a corset especially having a quick look round the fashion gallery before I left. In this heat it would have been unbearable.
After some baby appreciation at the office we walked to Covent Garden to go to my favorite restaurant – Flat Iron!!! If you have have not been you are missing out on the most amazing steak and chips. If we are ever in town its where I always want to go! Baby was very good until we almost arrived at our station and she woke up and ended up staying awake till 10 but the disruption did seem to help get over the bottle strike she has been on.
Overall a lovely day out combining my interests of art, architecture, costume, history and food! I must do it more often!
It’s been a long time! Sorry for that – I’ve had 2 lockdowns, more home schooling and life just like the rest of you I’m sure, since the last post. I have been busy; if you follow me on Instagram you will know and I suck at writing more than a few lines so these longer posts I keep putting off. I will do some catch up blog posts soon but for now I want to tell you about the Saturation quilt!
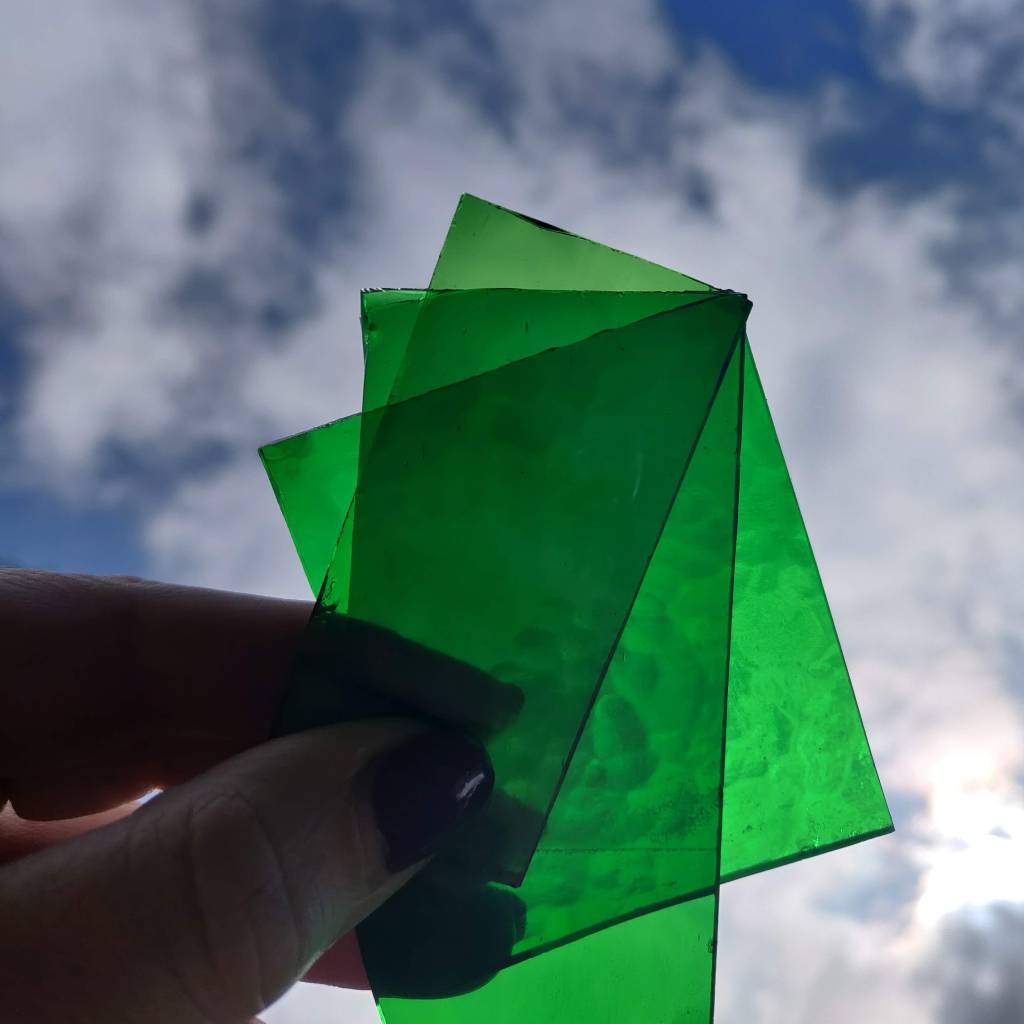
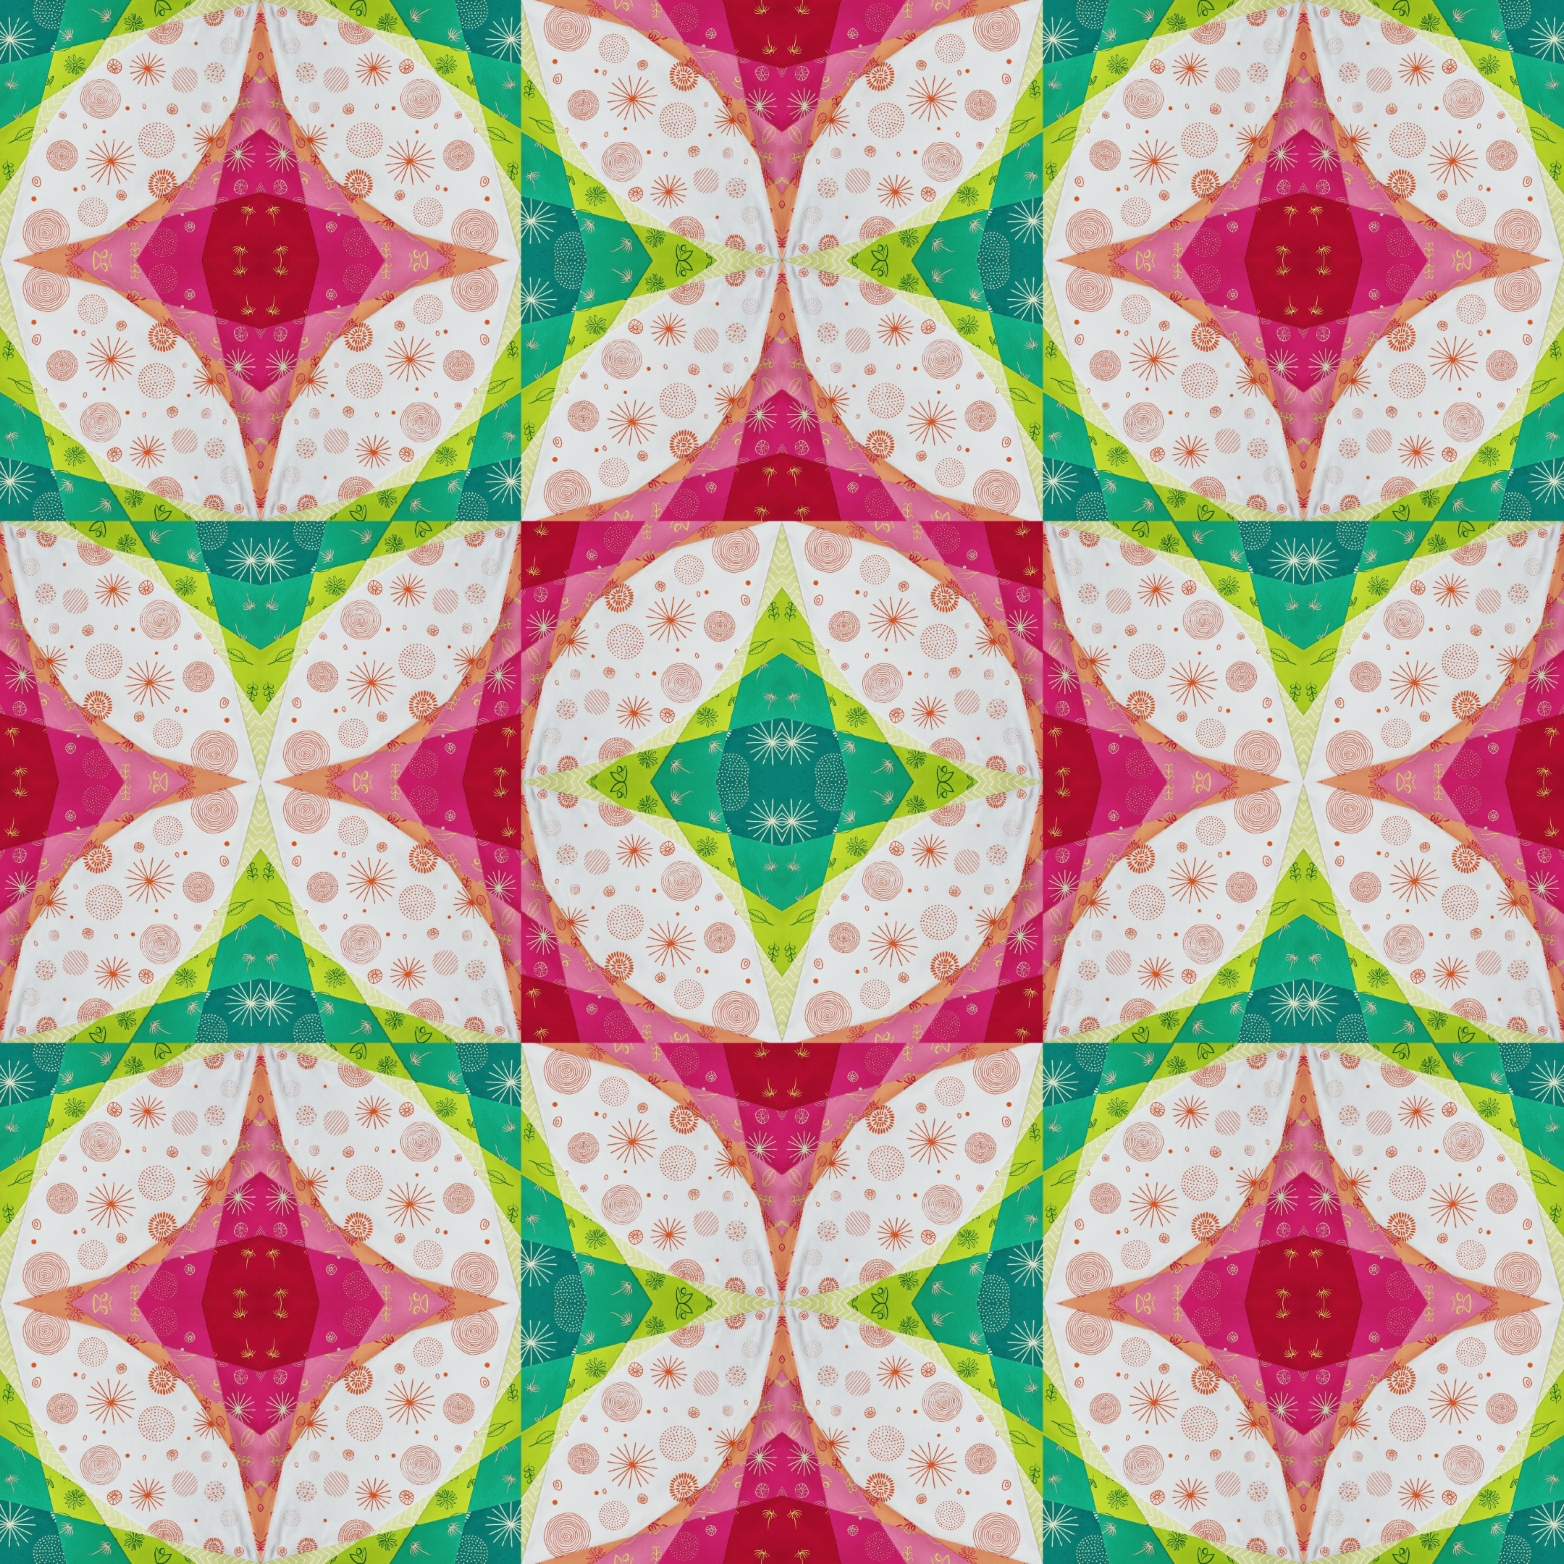
The Saturation idea developed way back in September 2020. I saw some stained glass in my Instagram feed – having done a glass course a few years ago and have a box of bits, it made me want to get them out and play. Stacking the glass but rotating the layers gave a cool effect and straight away all I could think of was a quilting block in solid fabrics.
Layers of Glass the initial inspiration for the Saturation blocks
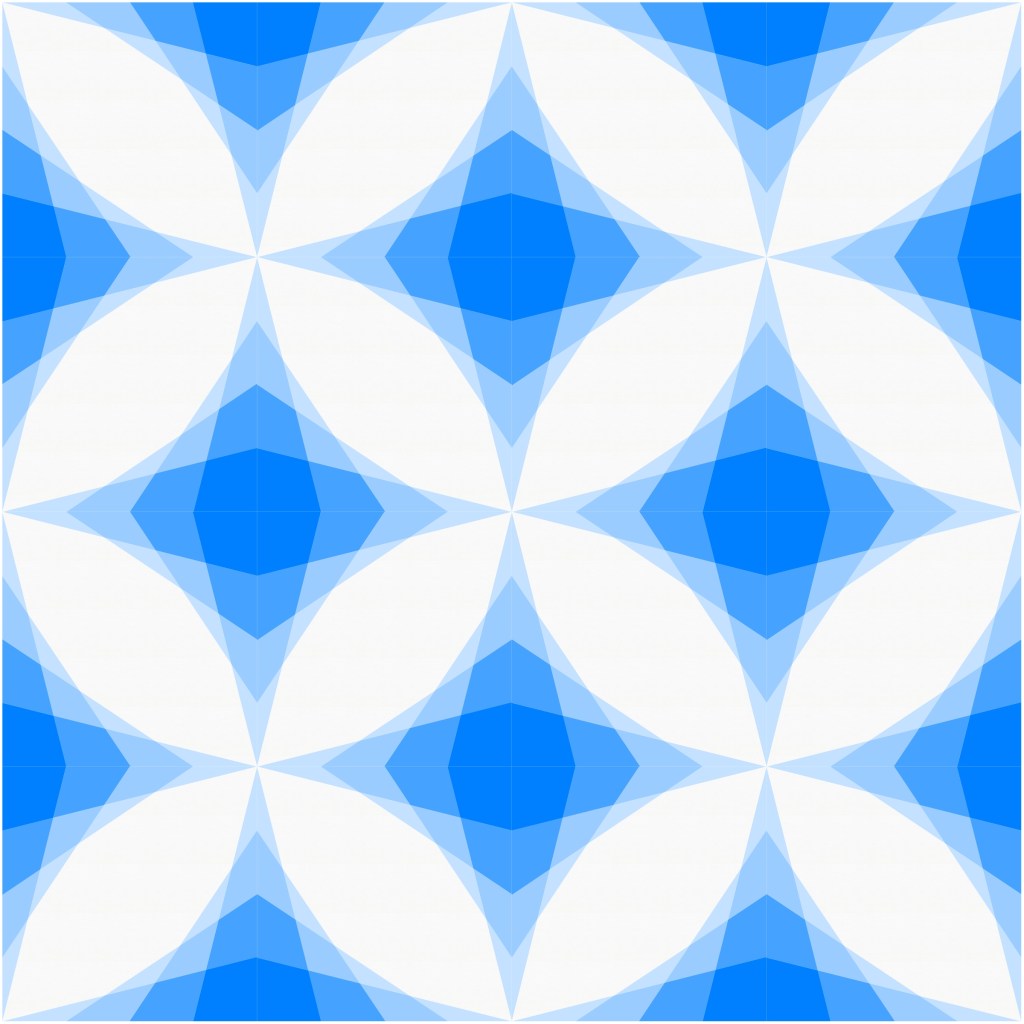
That night I had a block drawn up and a cool blue sea/glass mock-up got me very excited but I needed to be sewing up my fractured skull sample and pattern for Halloween so it was put to the side.
First mock up on EQ8
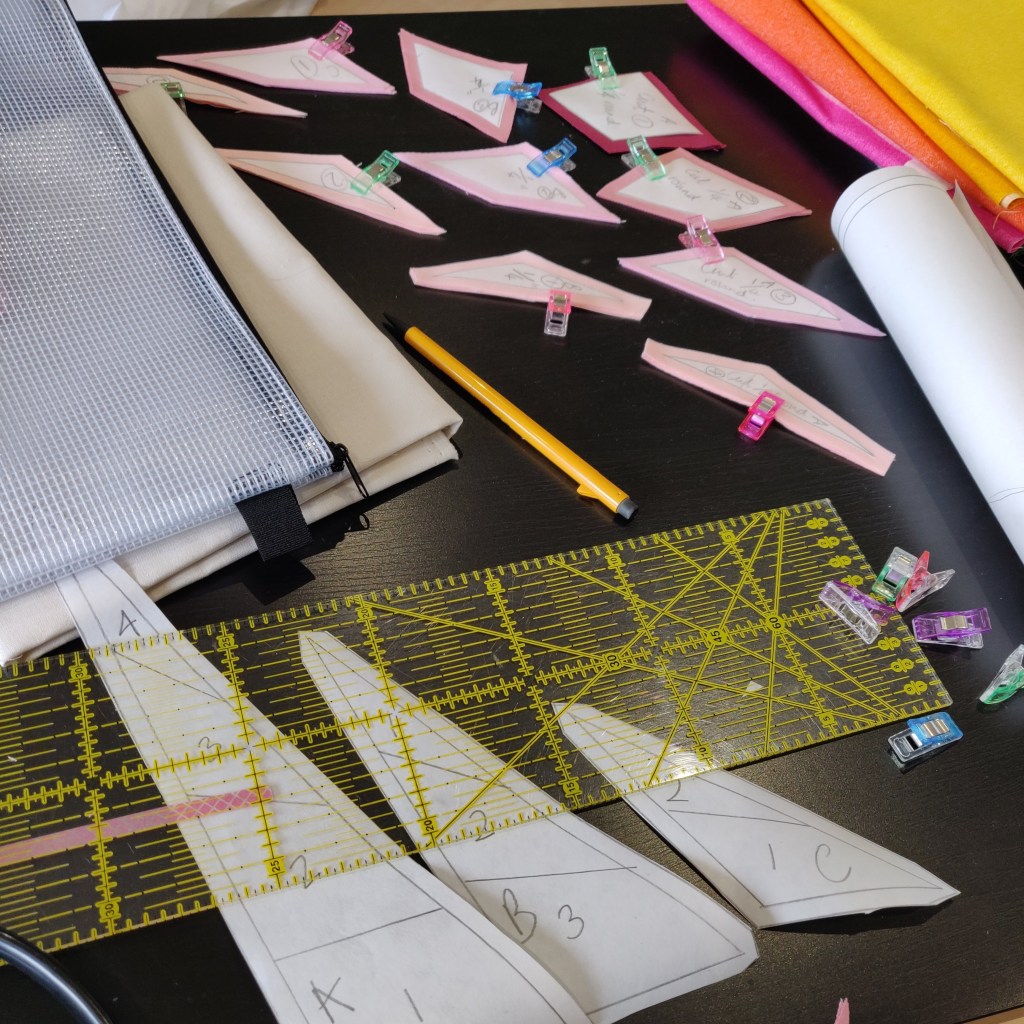
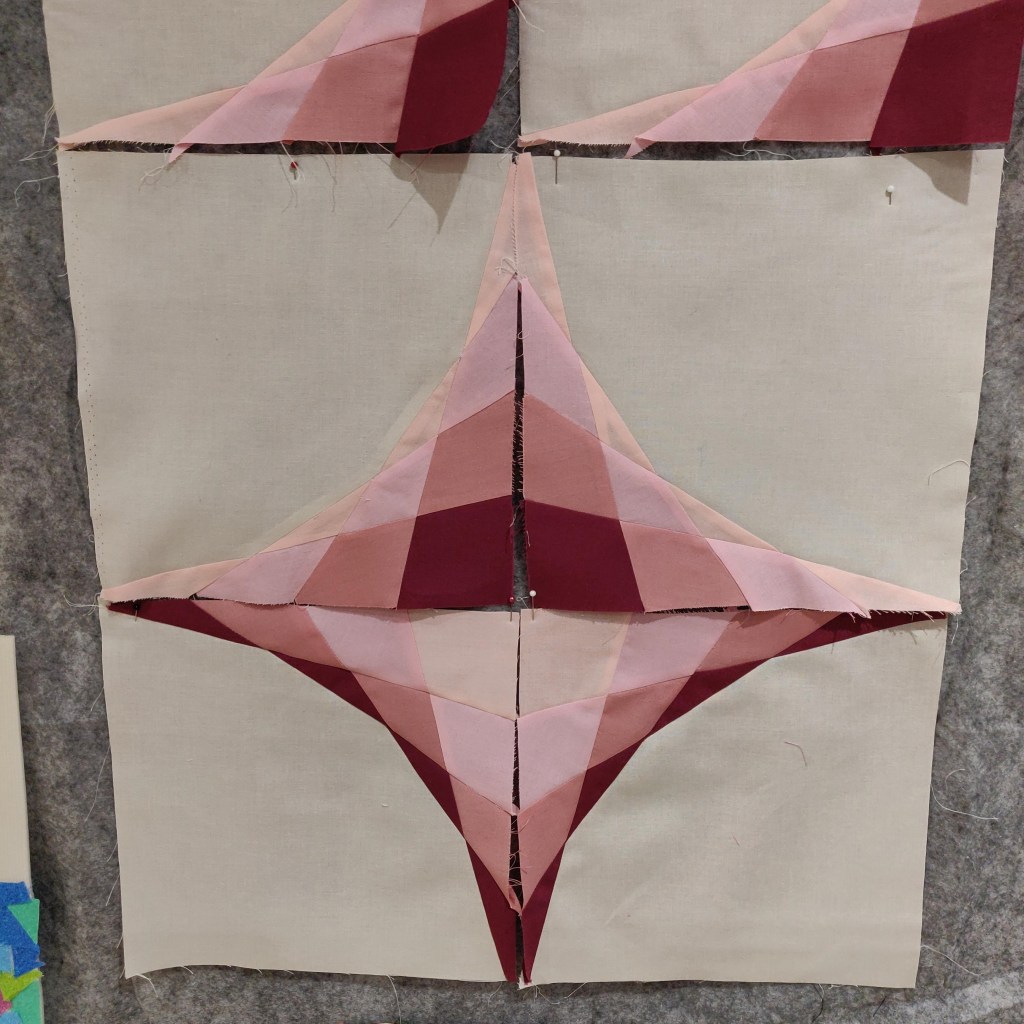
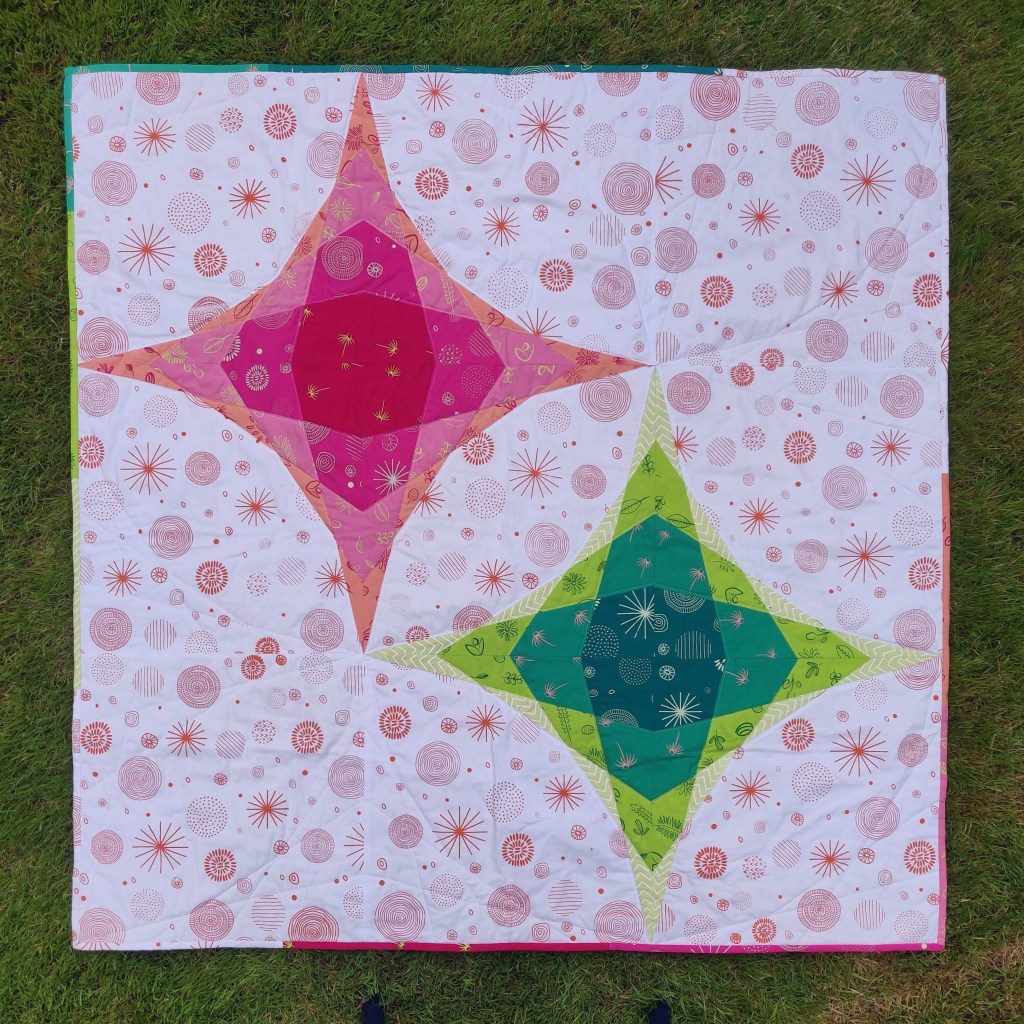
Once I was able to return to this embryo of an idea, I’d decided I would test the block trying a freezer paper technique – something I had wanted to try for a while but the pieces in my previous blocks were too small to be accurate. I made a sample and gifted it to my mum as her birthday present. I bought 4 FQ’s in a colour gradient I knew Mum would love and one metre of cream background fabric.
Process Photos – using freezer paper for the first time and playing with blocks on the design wall
Well, the birthday present turned into a Christmas present and was it was duly gifted. It looked great and I had really enjoyed experimenting with freezer paper (though the very acute points had been difficult to maintain) and with some different straight-line quilting.
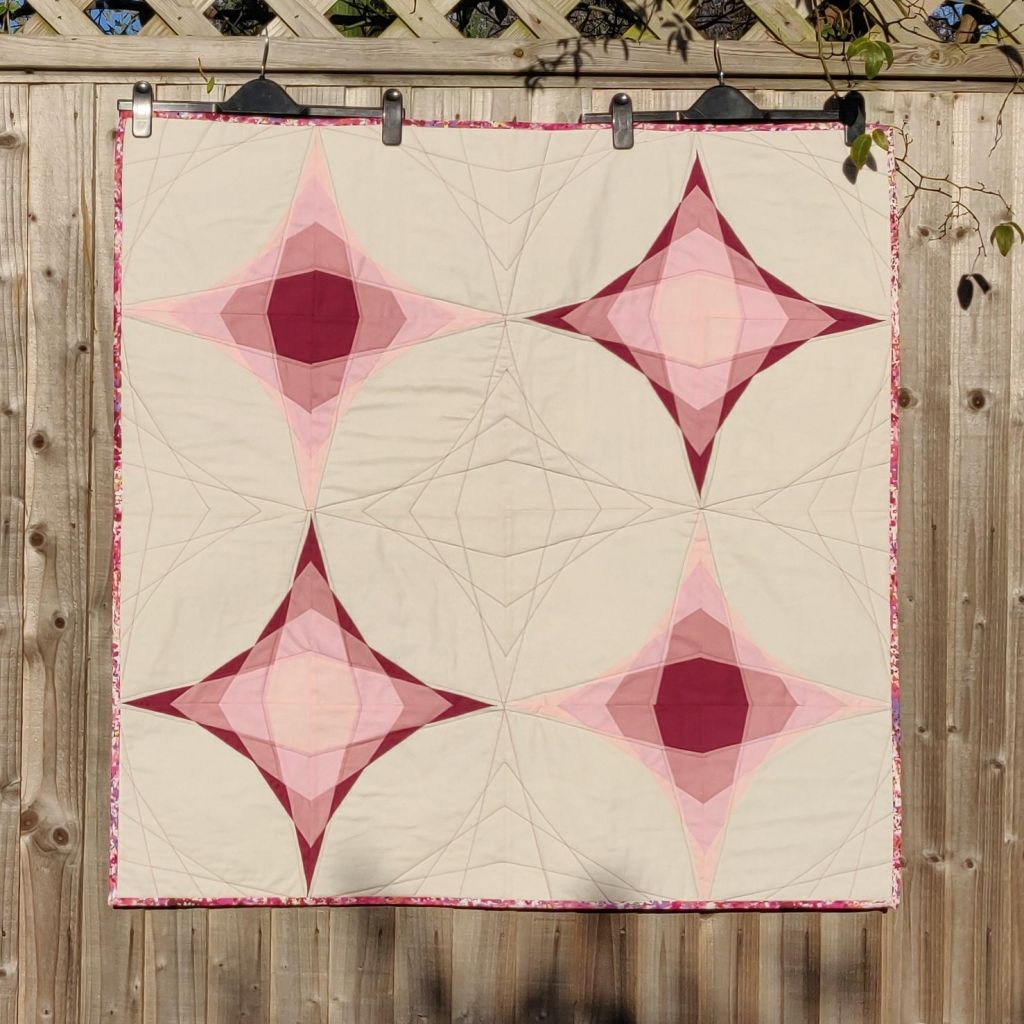
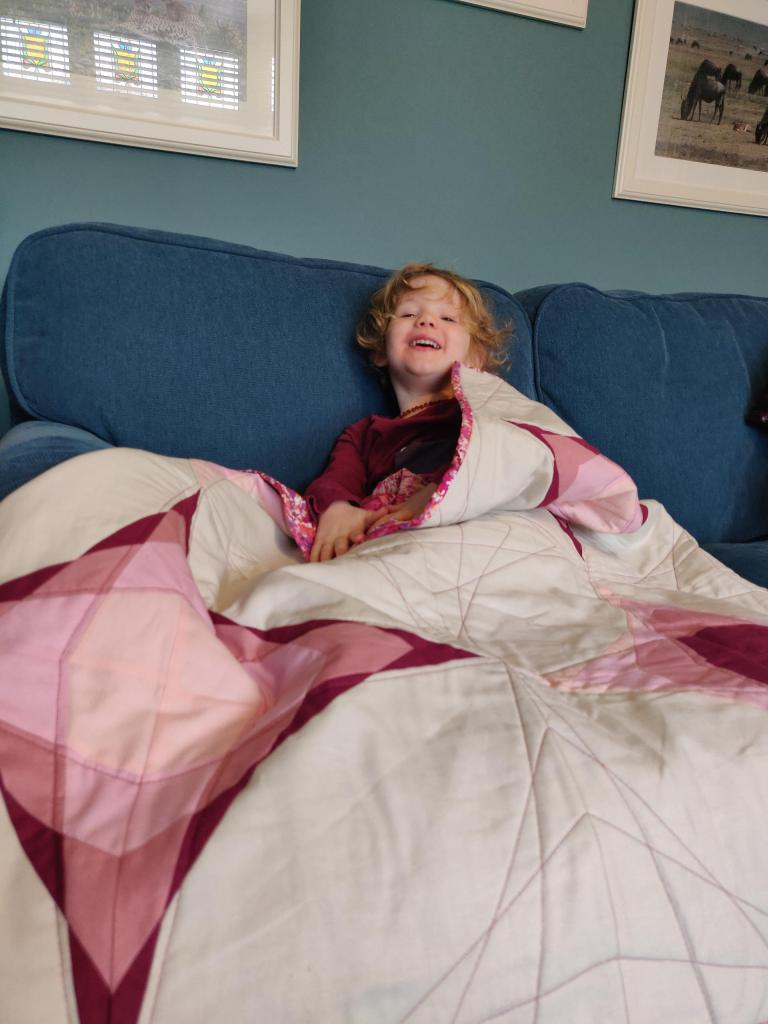
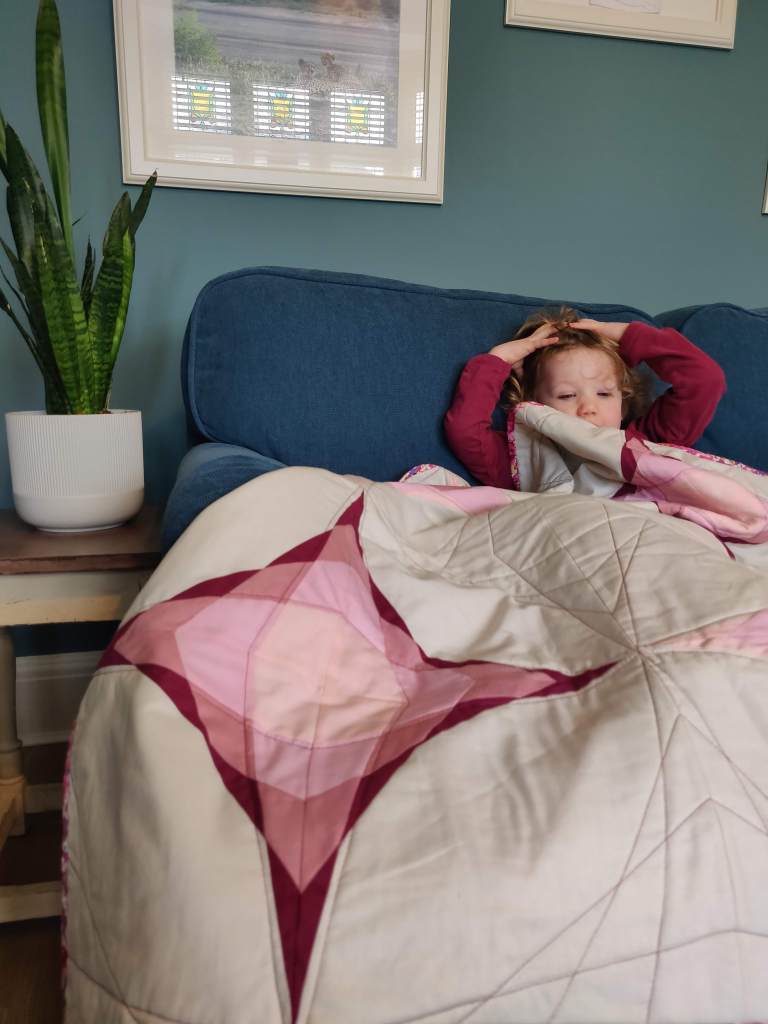
First Test Quilt made for my Mum in her colours
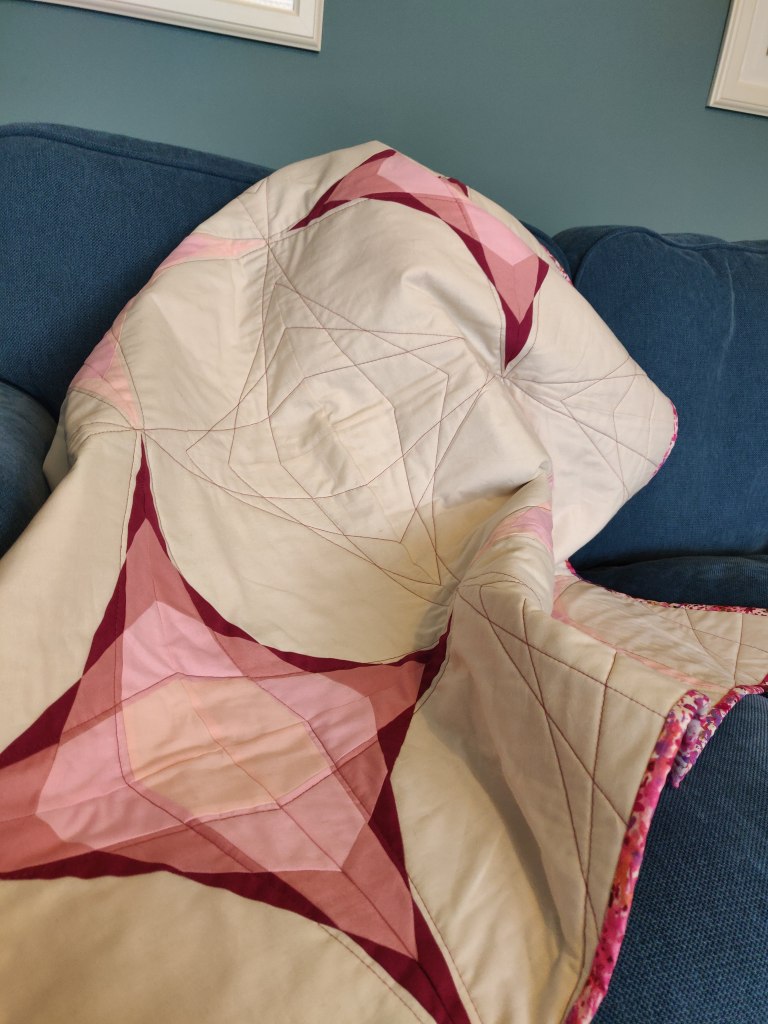
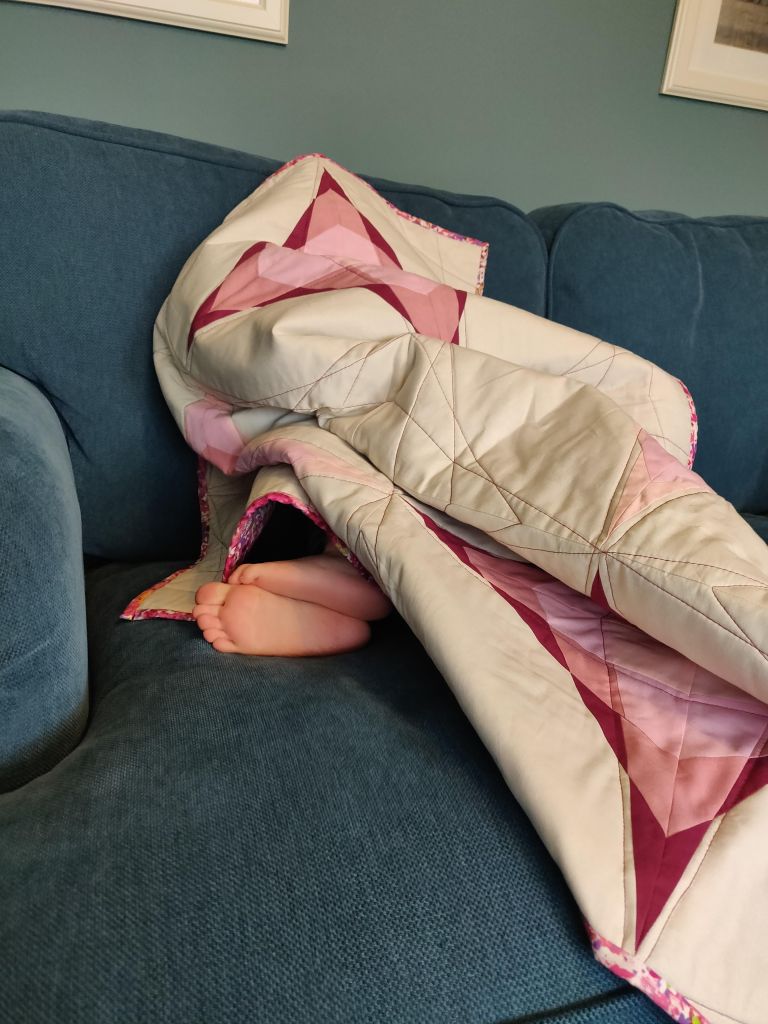
Mini mini quilt holder was not helpful but was very cute when we took photos before gifting
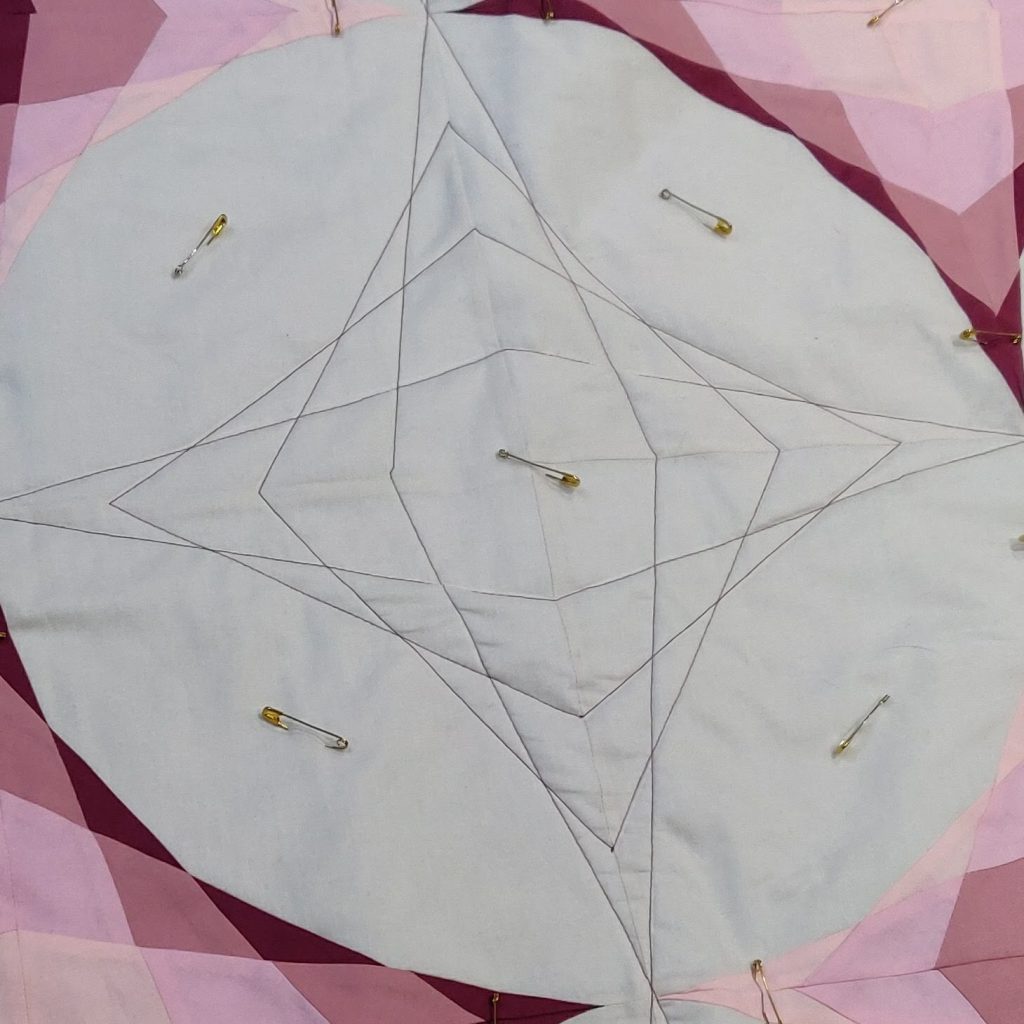
Quilting lines mirror the block line in the central space
Before New Year I did some proper planning and had scheduled my year with Saturation being my first quilt pattern to be released… then everything changed again! I had to home school for 3 months and after that I need to recuperate! After re-energising, sewing other people’s designs and projects (posts to follow), I cracked on writing the saturation pattern up, finding some testers and decided to release in mid-July.
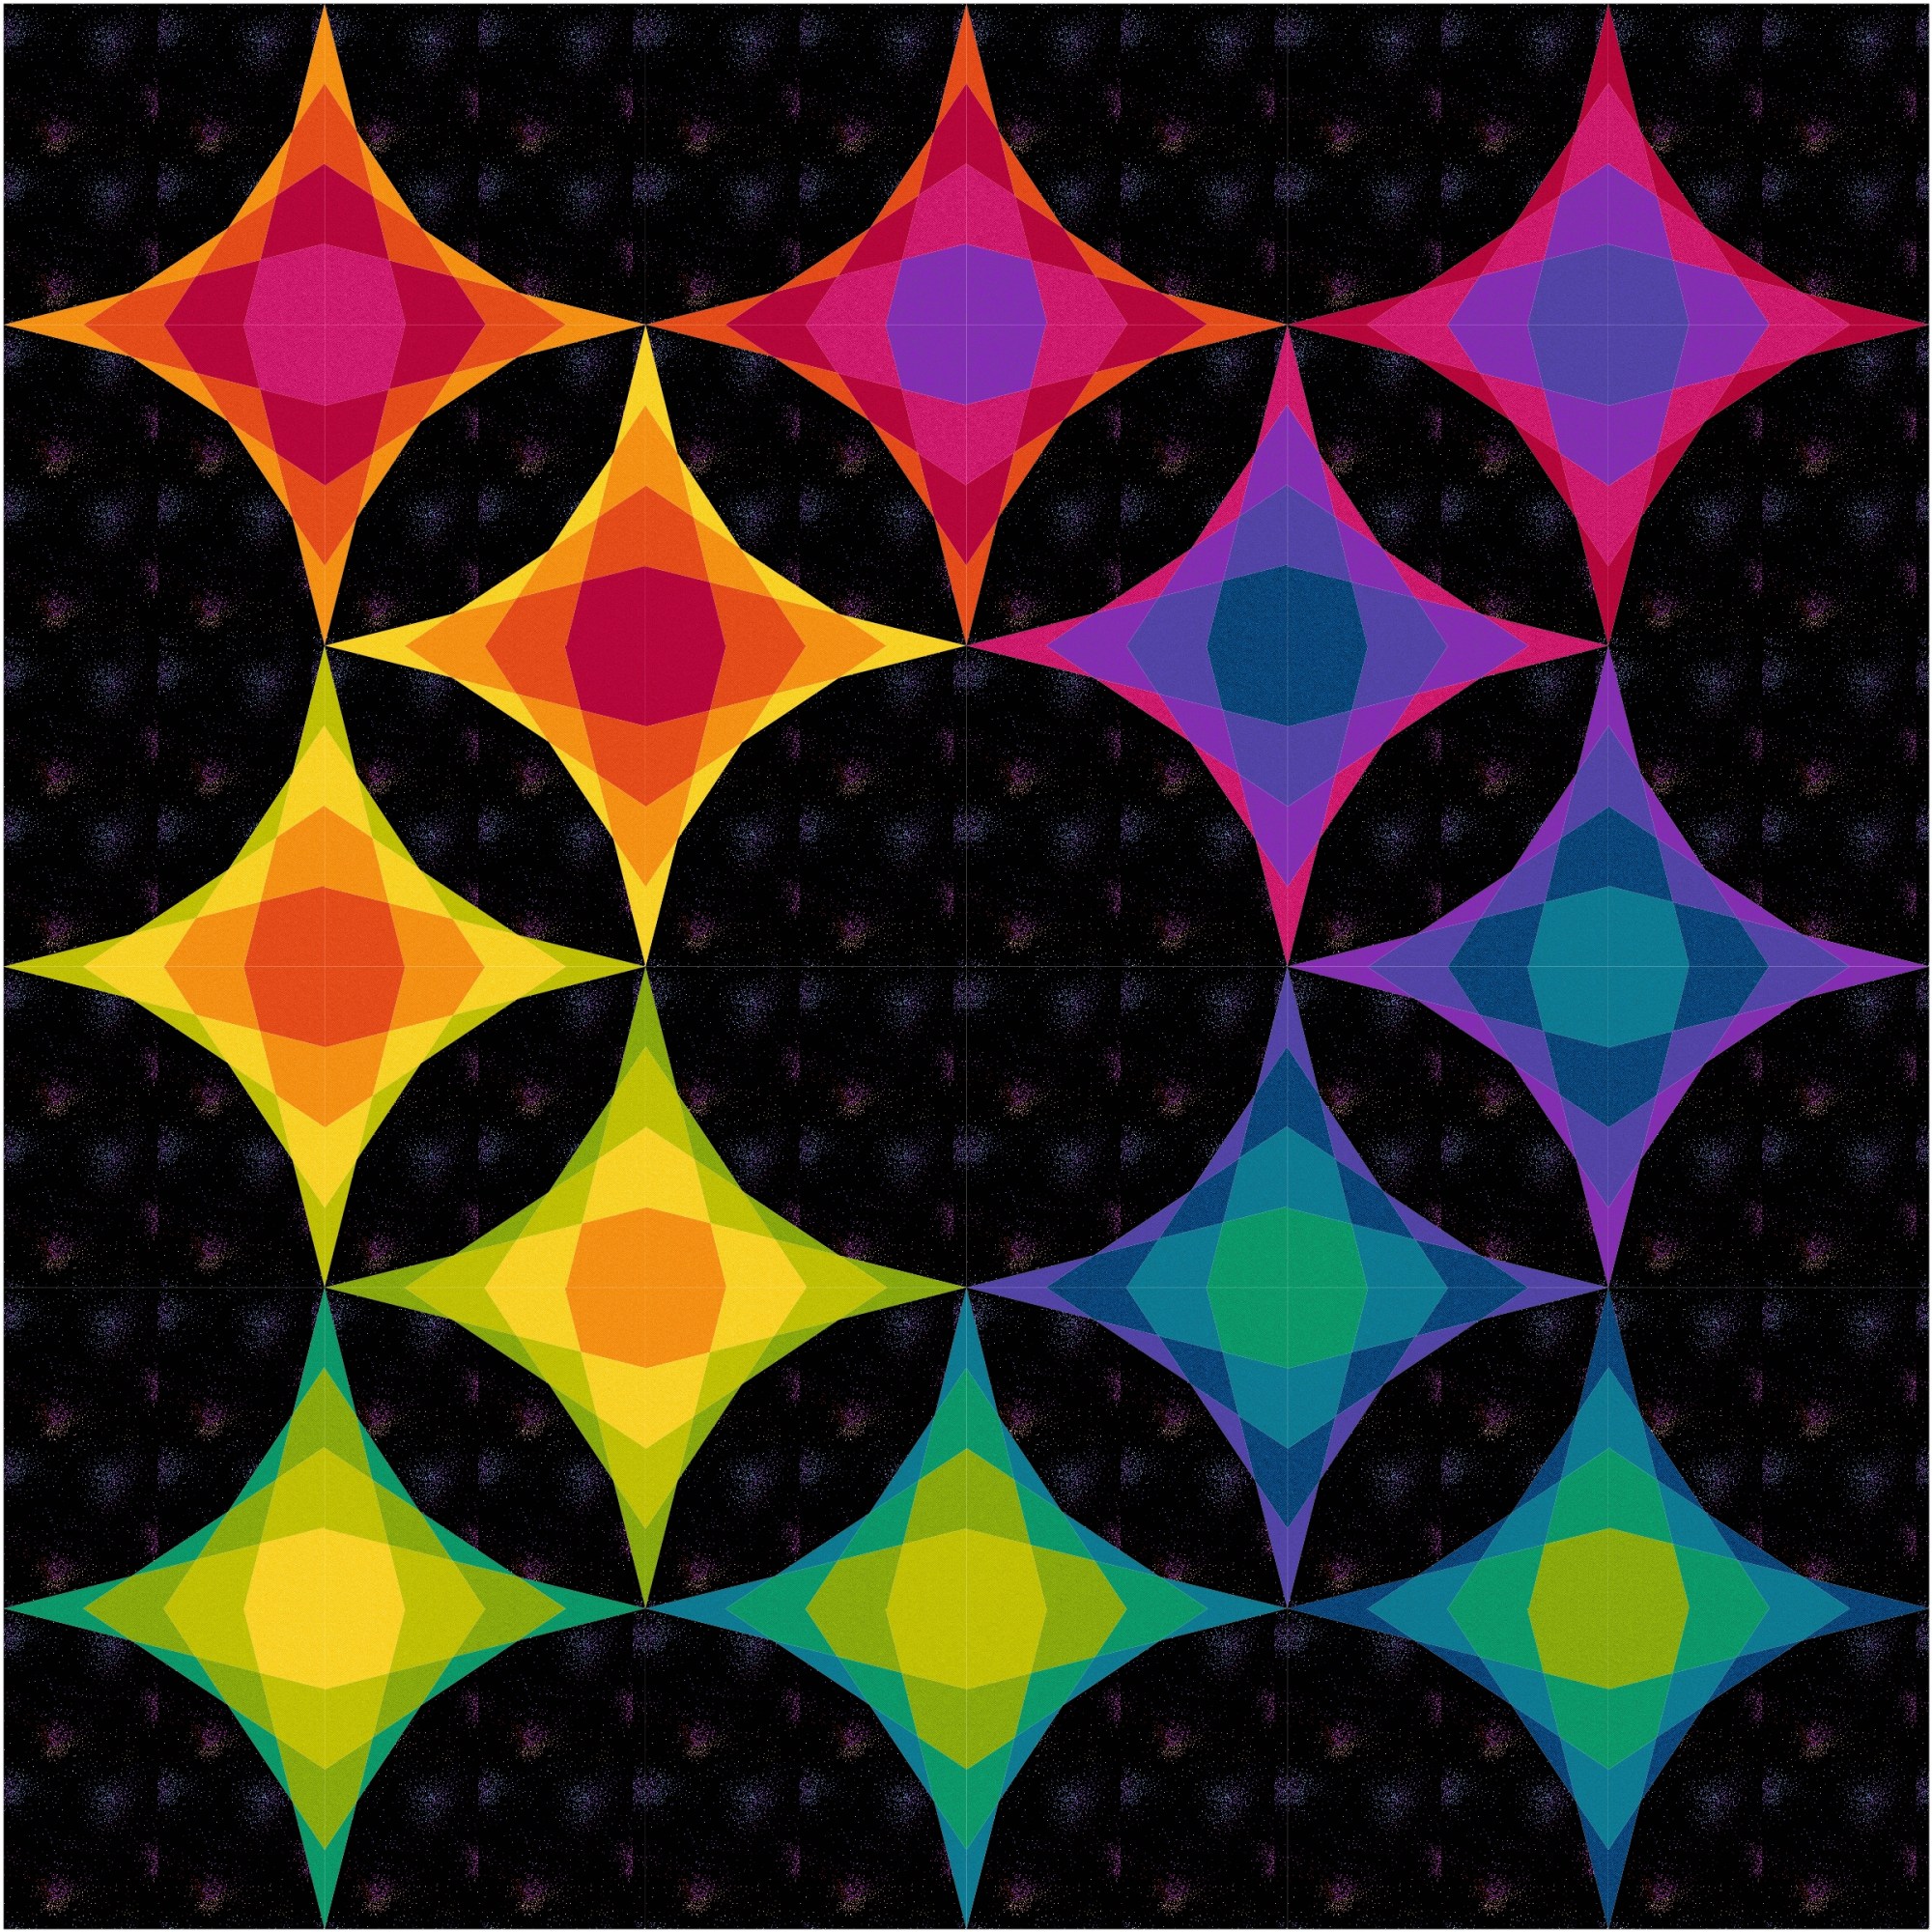
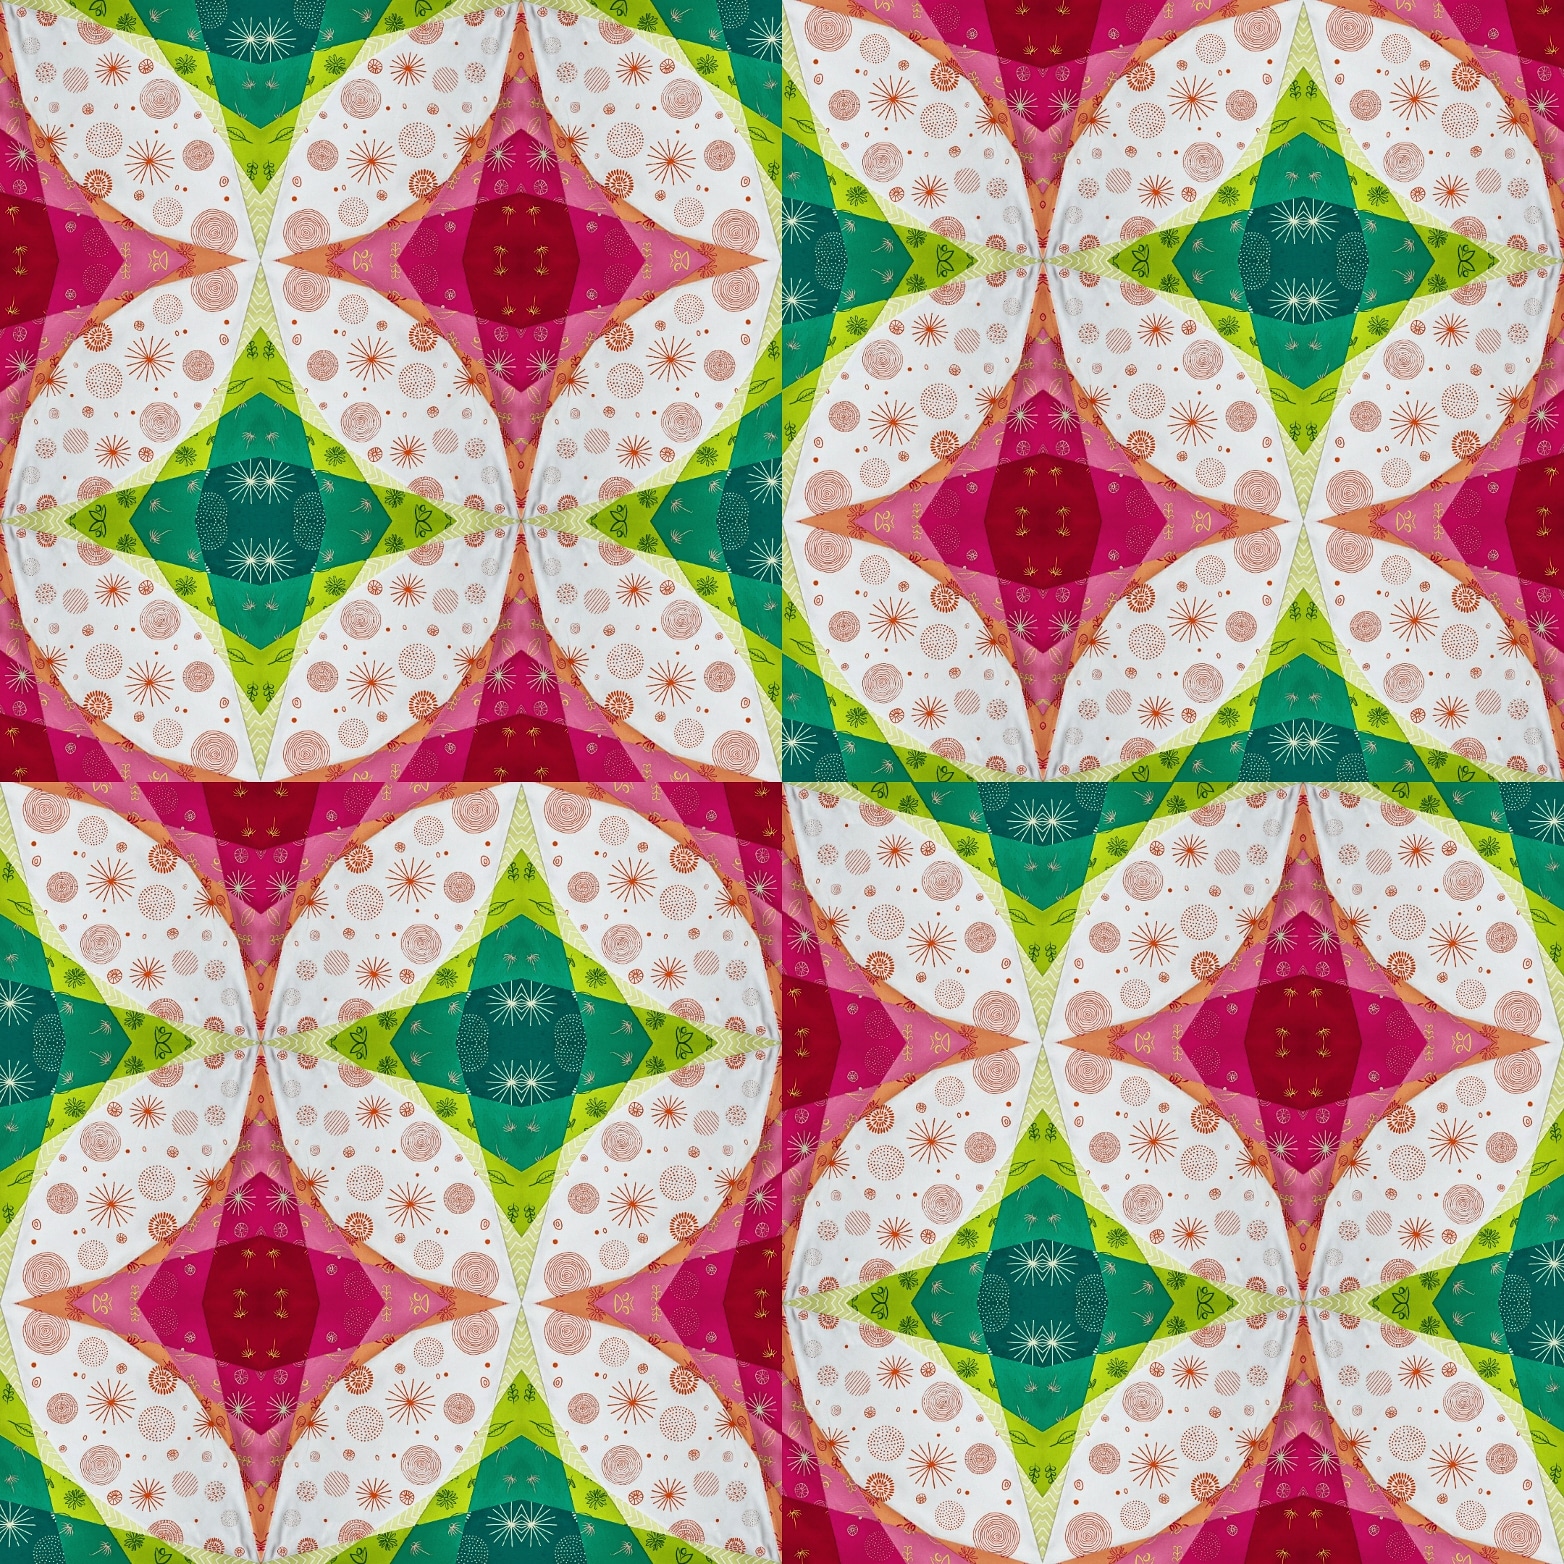
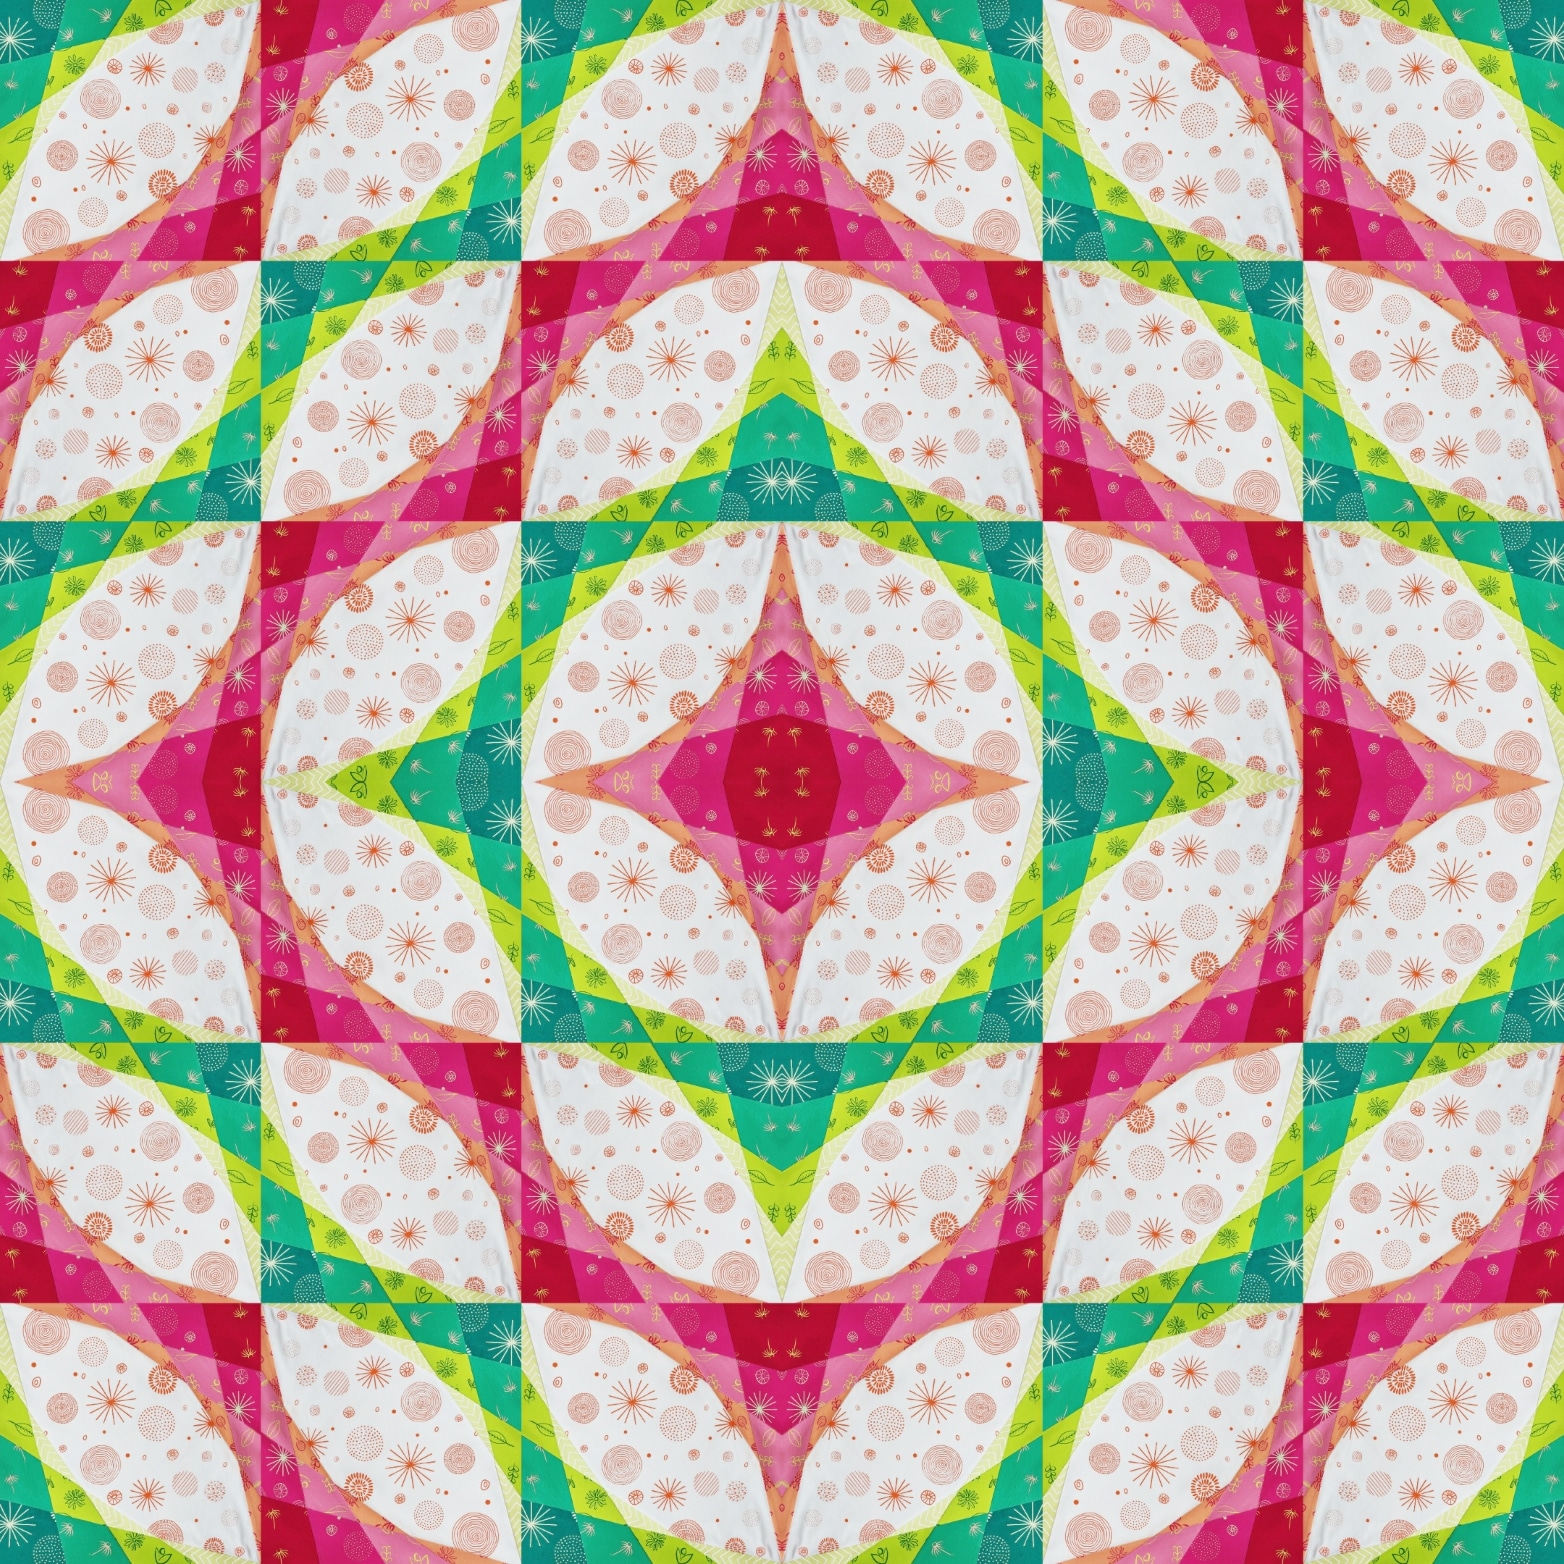
Now with EQ8 software at my fingertips I created mock-up after mock-up and realised how incredibly versatile the pattern would be. Knowing there are loads of amazing creatives out there I got more and more excited about the pattern’s potential.
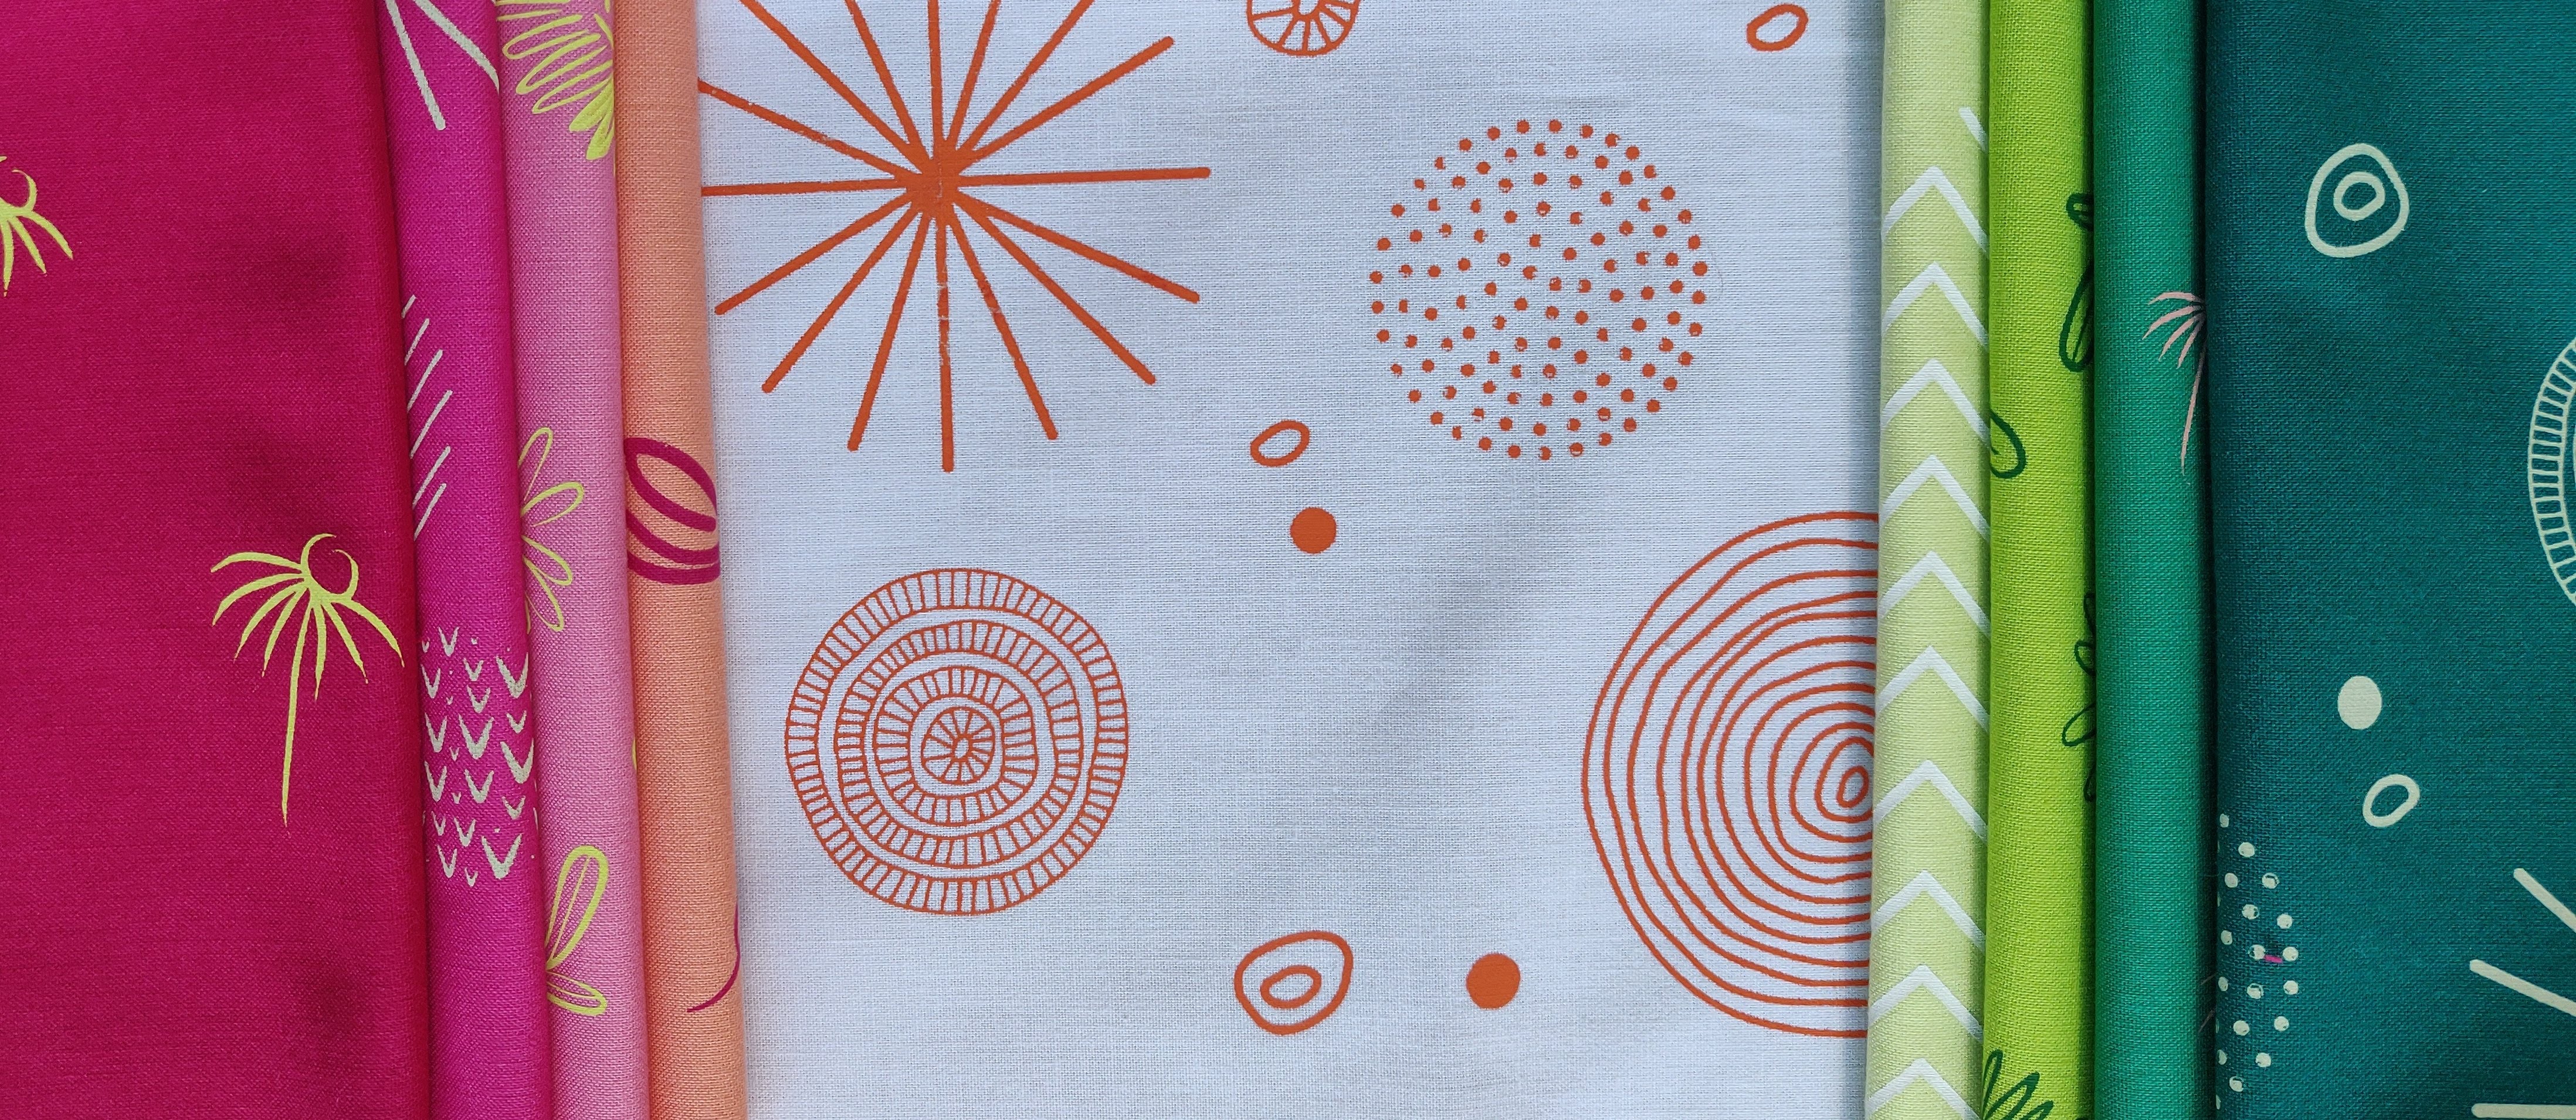
I wanted to support my friend Helen Steele , who screen prints her own fabric, with the launch of her first ever co-ordinated bundle – Lush collection. I suggested a collaboration and for me to make a saturation quilt in her fabrics which she could take to Festival of Quilts for her first ever stand there.
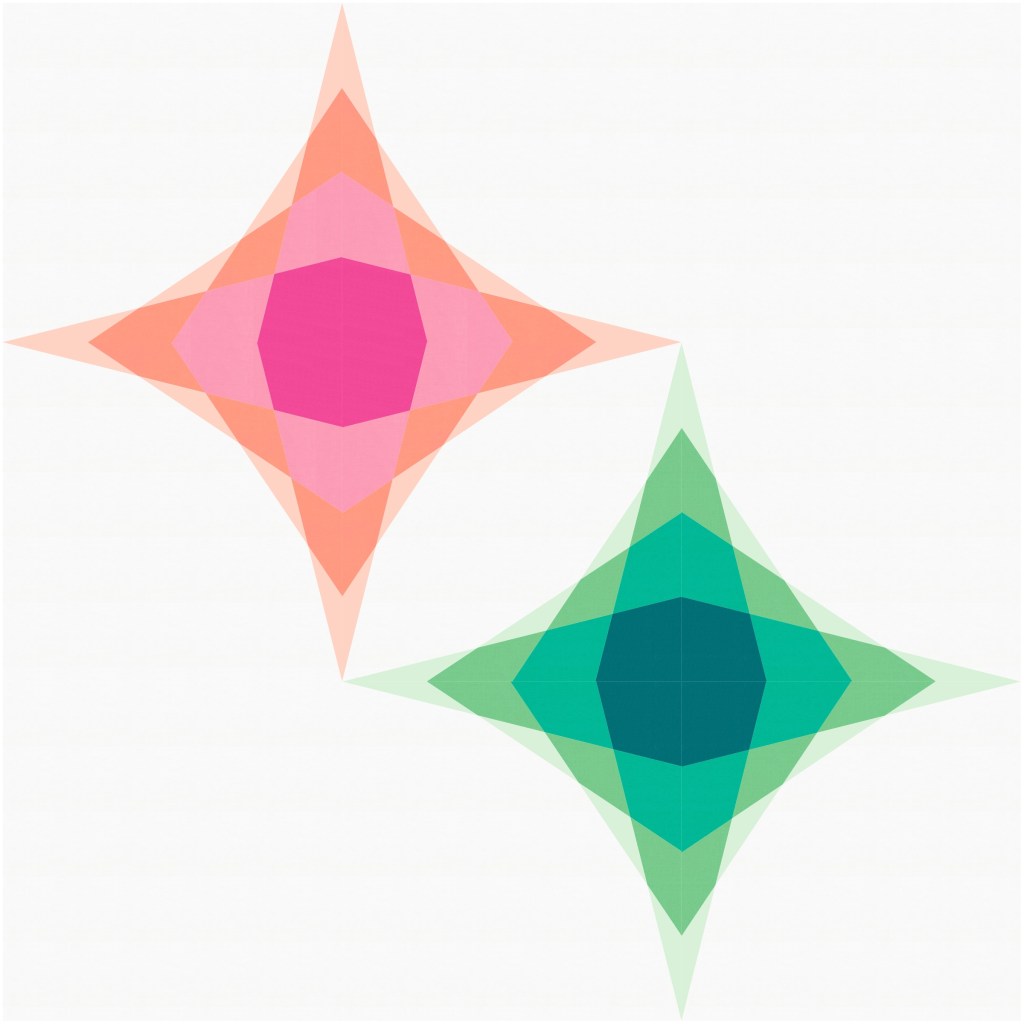
Mock-up of 48″ Saturation quilt in Helen Steele’s Summer Lush Bundle colours
After seeing a mock-up of how the quilt could look Helen and myself adjusted the bundle and settled on these beautiful prints.
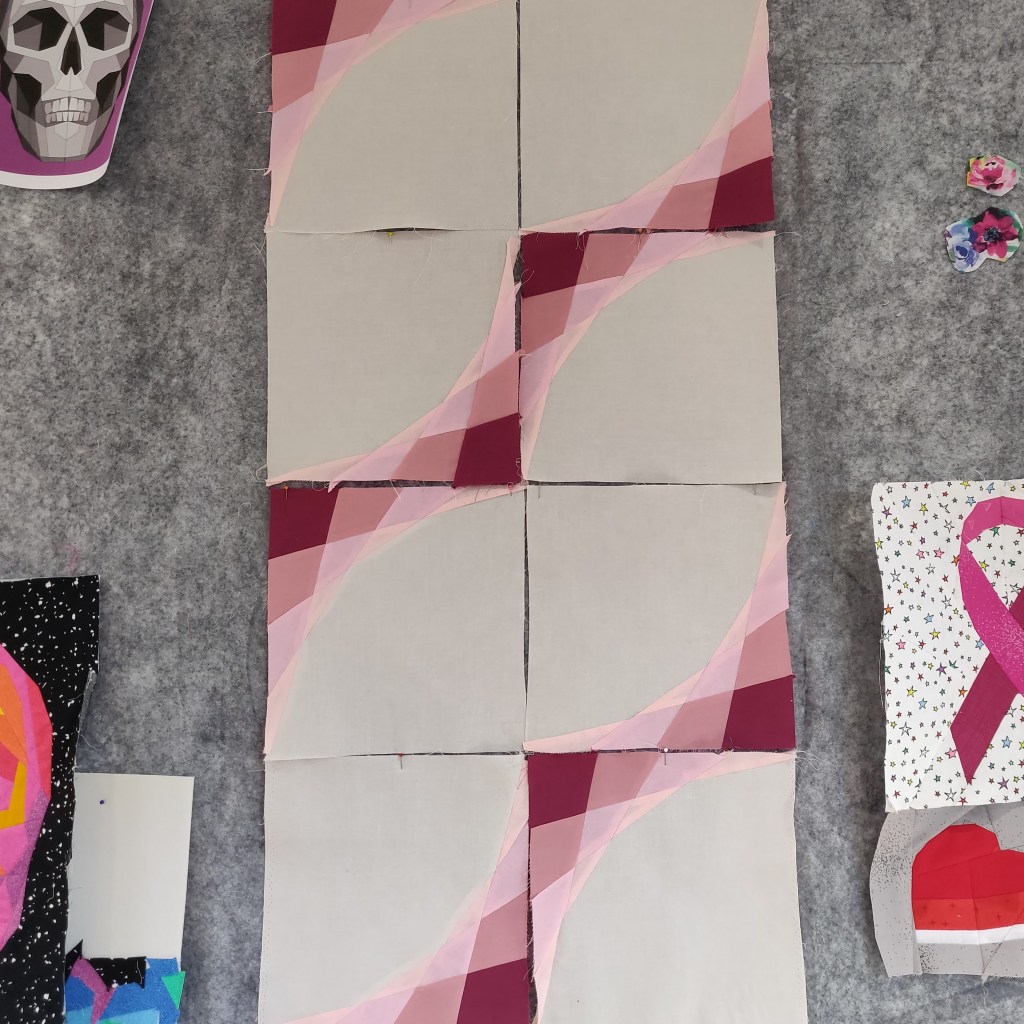
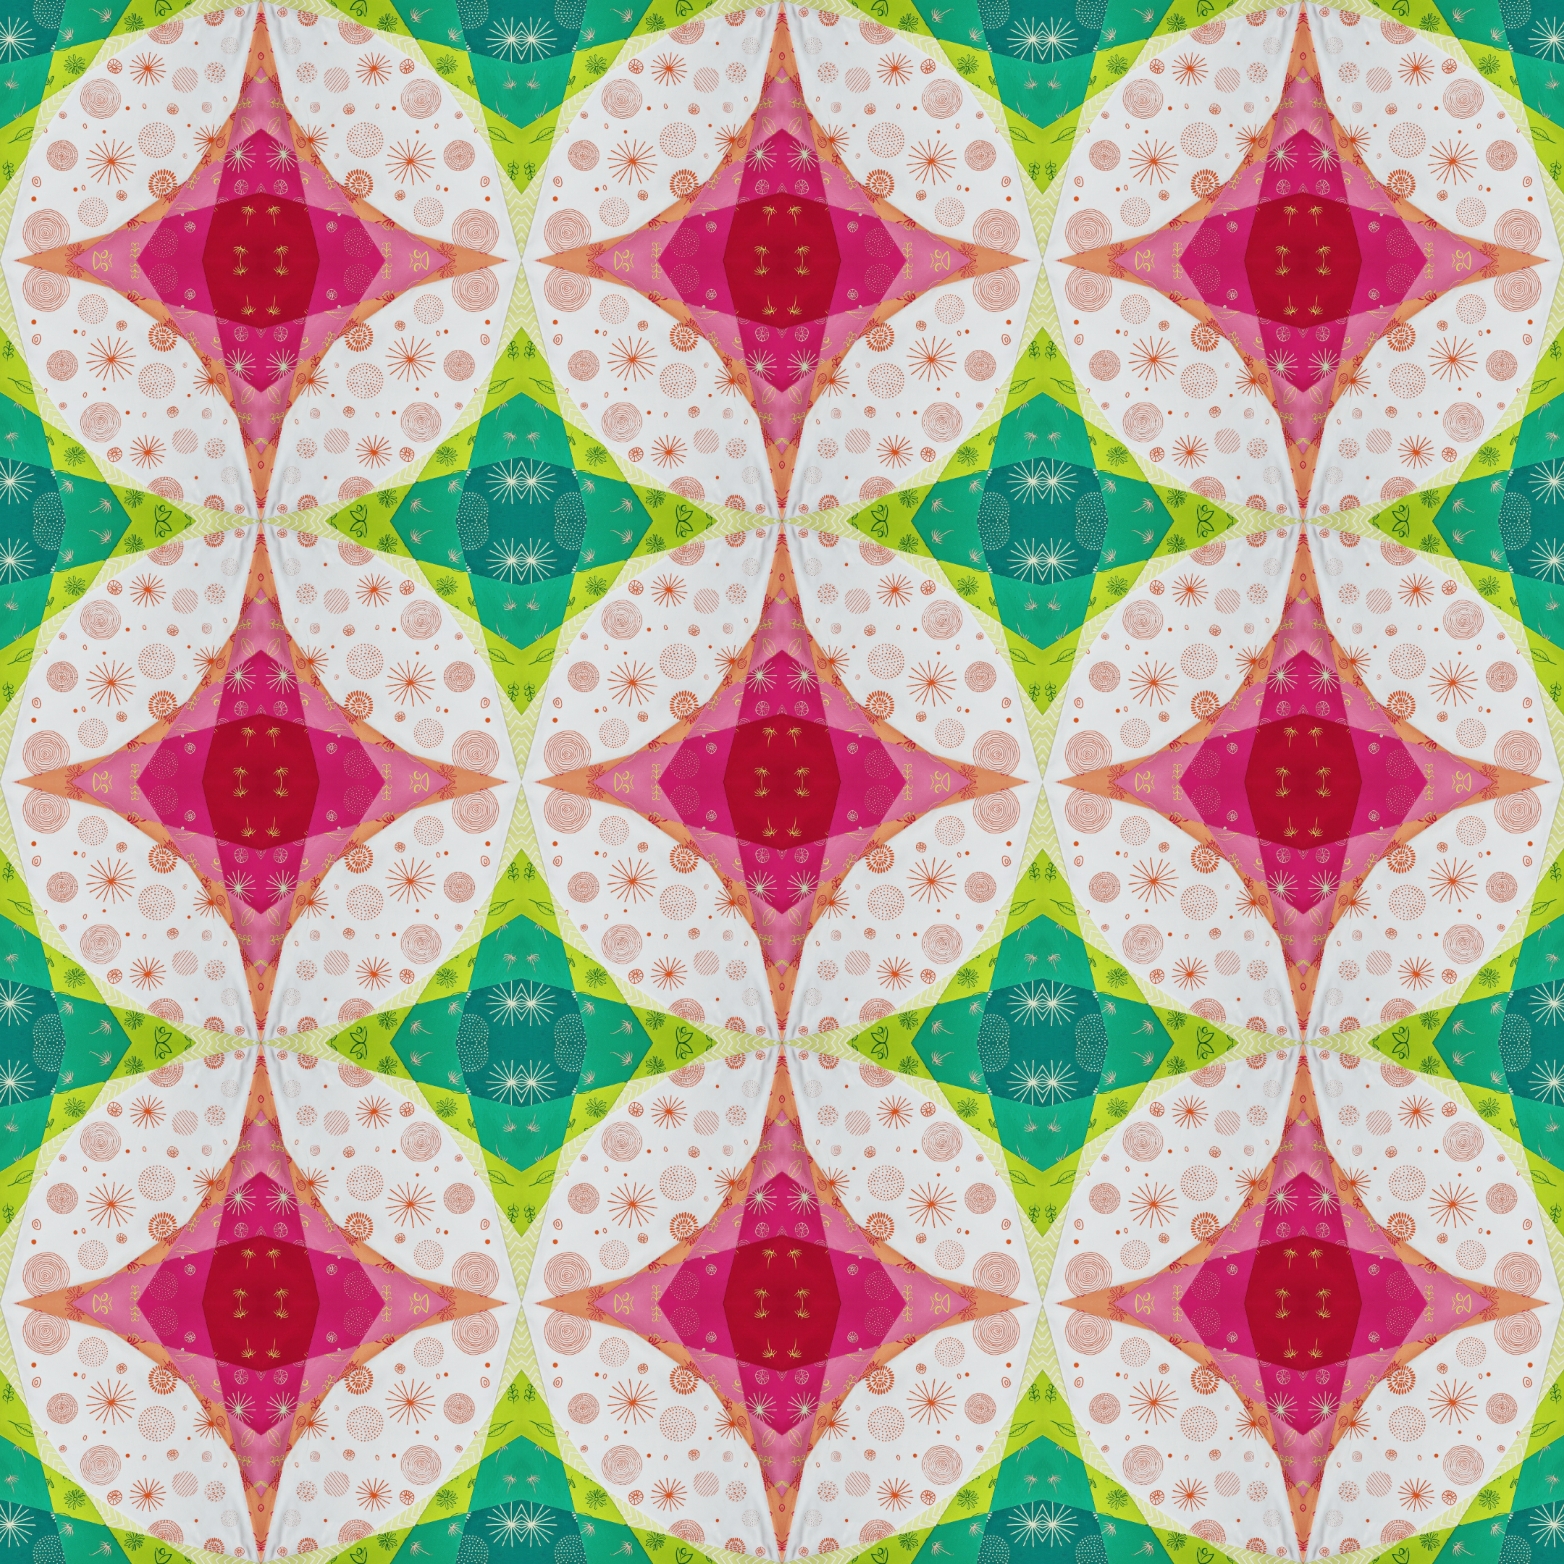
I couldn’t wait to start sewing and pre-cut all the sections as soon as I got my hands on the fabric. While Helen printed some more of the background fabric I used the photo of the double curved block already made to play and generated these layout options which were popular on Instagram. Opinion was split between the 2nd and 4th from the left.
In the pattern I recommend using freezer paper for at least the A sections of each block type to significantly reduce the amount of printing and cutting and sticking you do. All sections can be done in freezer paper but I found reusing the smaller acute angled triangles lost some of the accuracy as they lost their stickiness. Being accurate with this pattern really pays off as the matching points really made the design. Don’t worry about getting the points spot on, it is not difficult and I recommend if not experienced with freezer paper piecing to use standard or specialist foundation paper for all sections other than A. Below is a video where I show you how to use the freezer paper for this pattern.
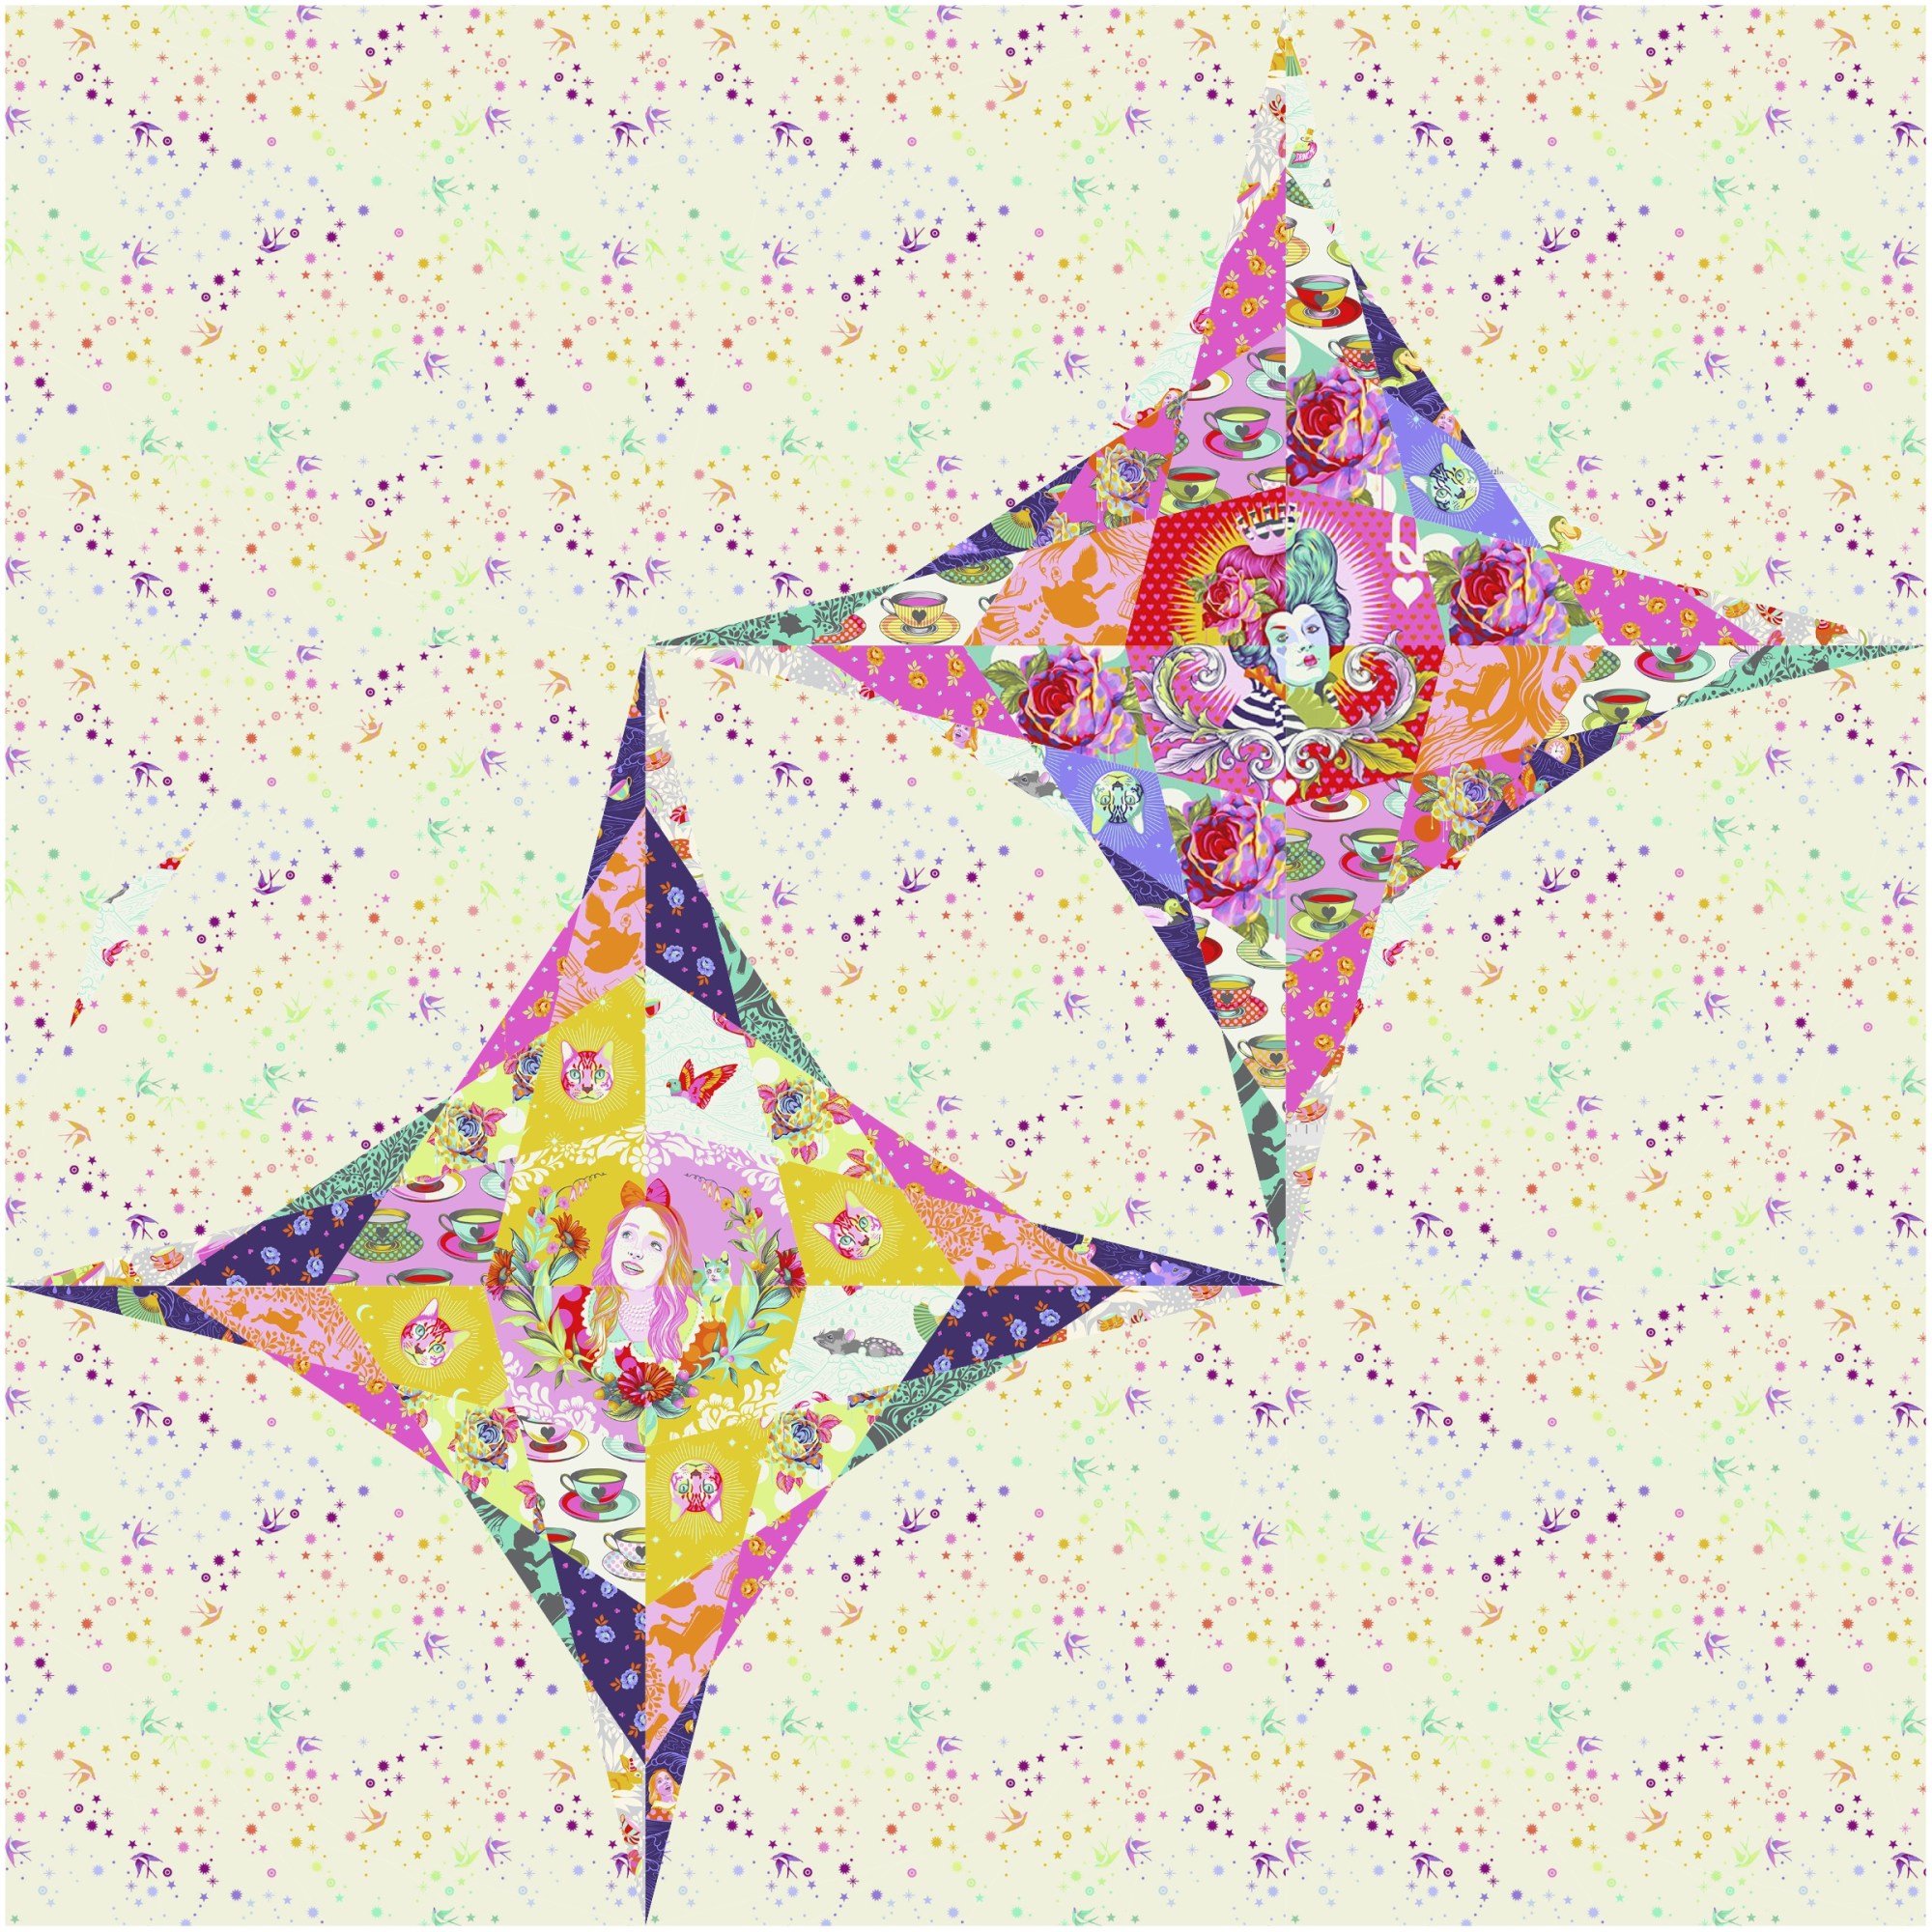
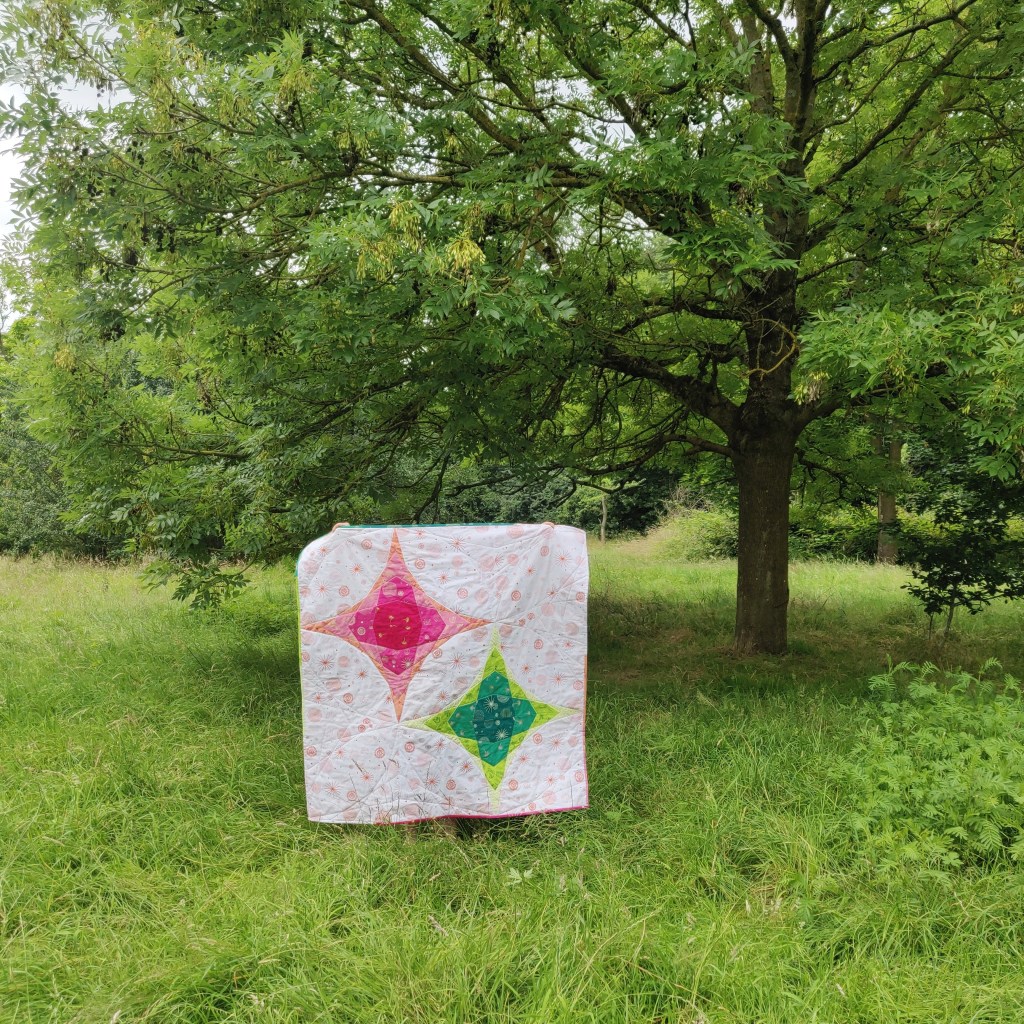
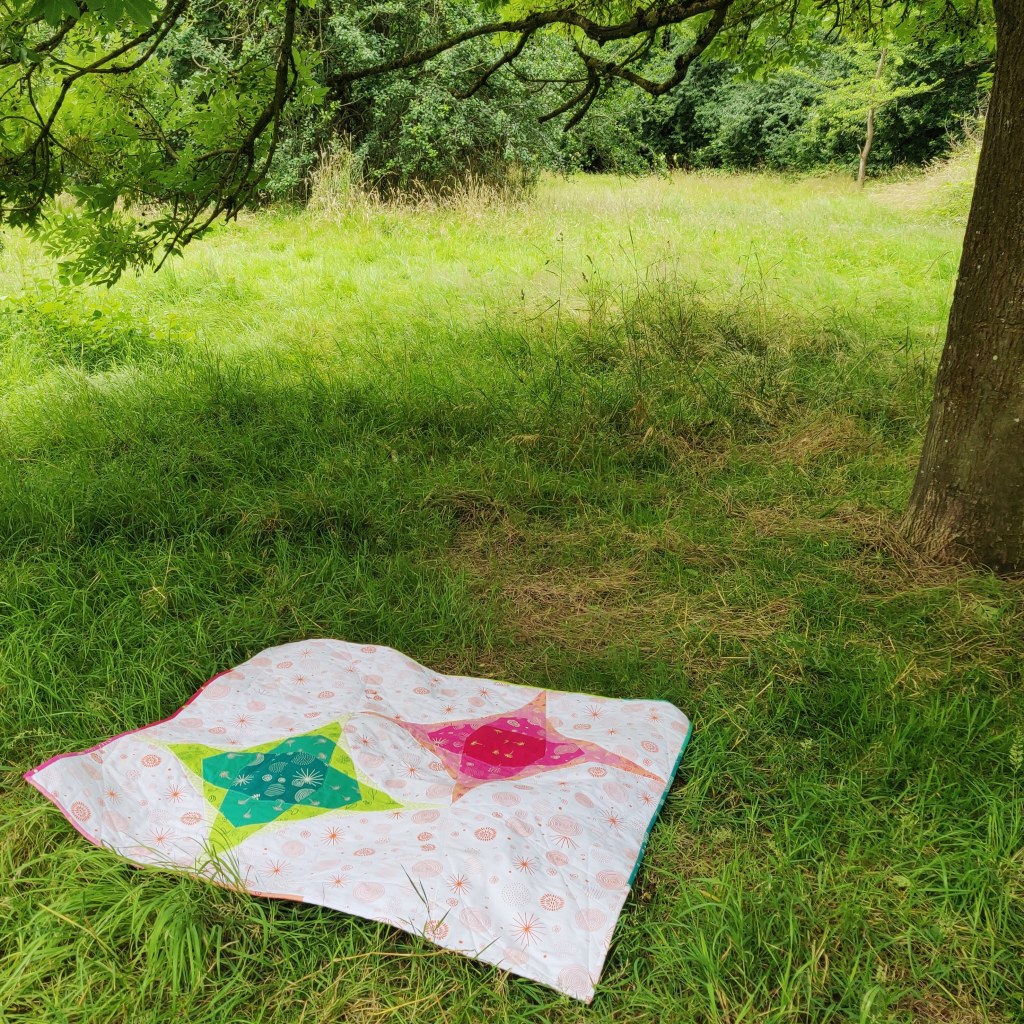
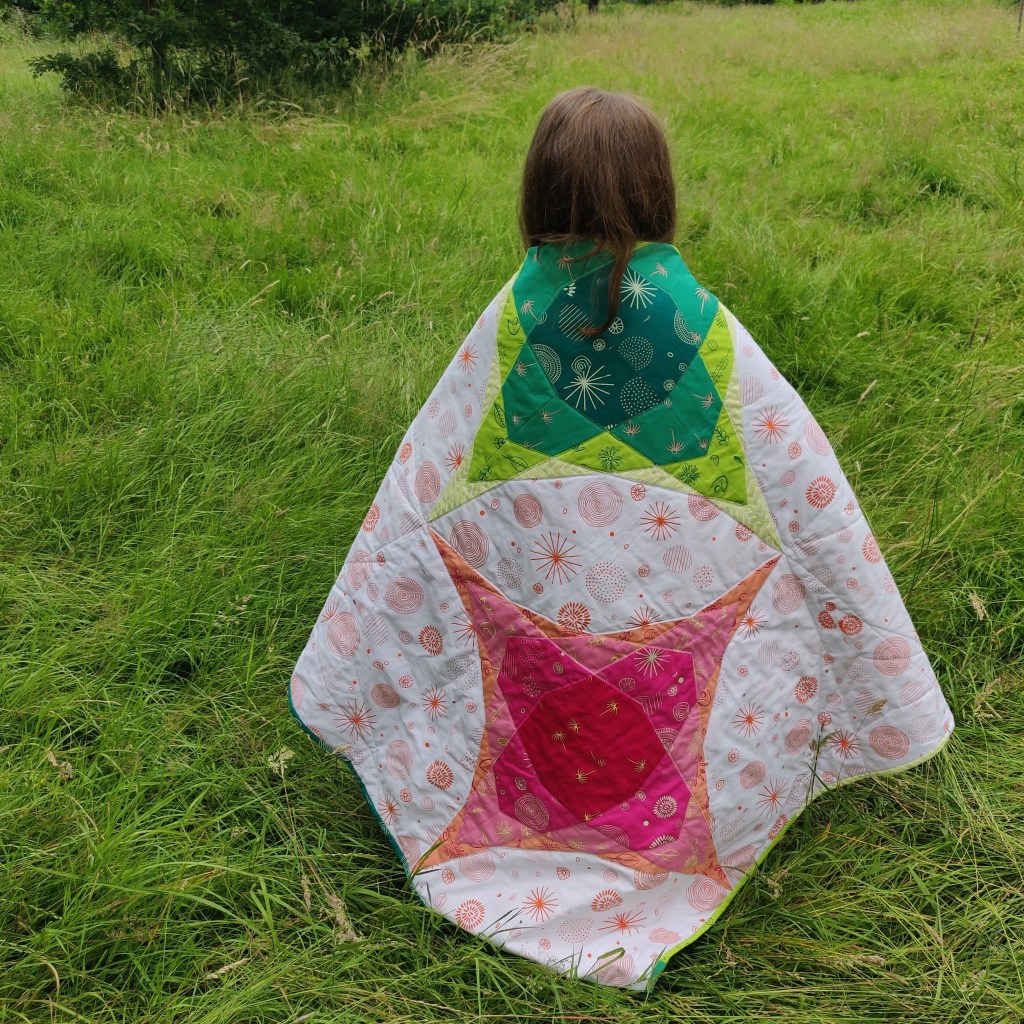
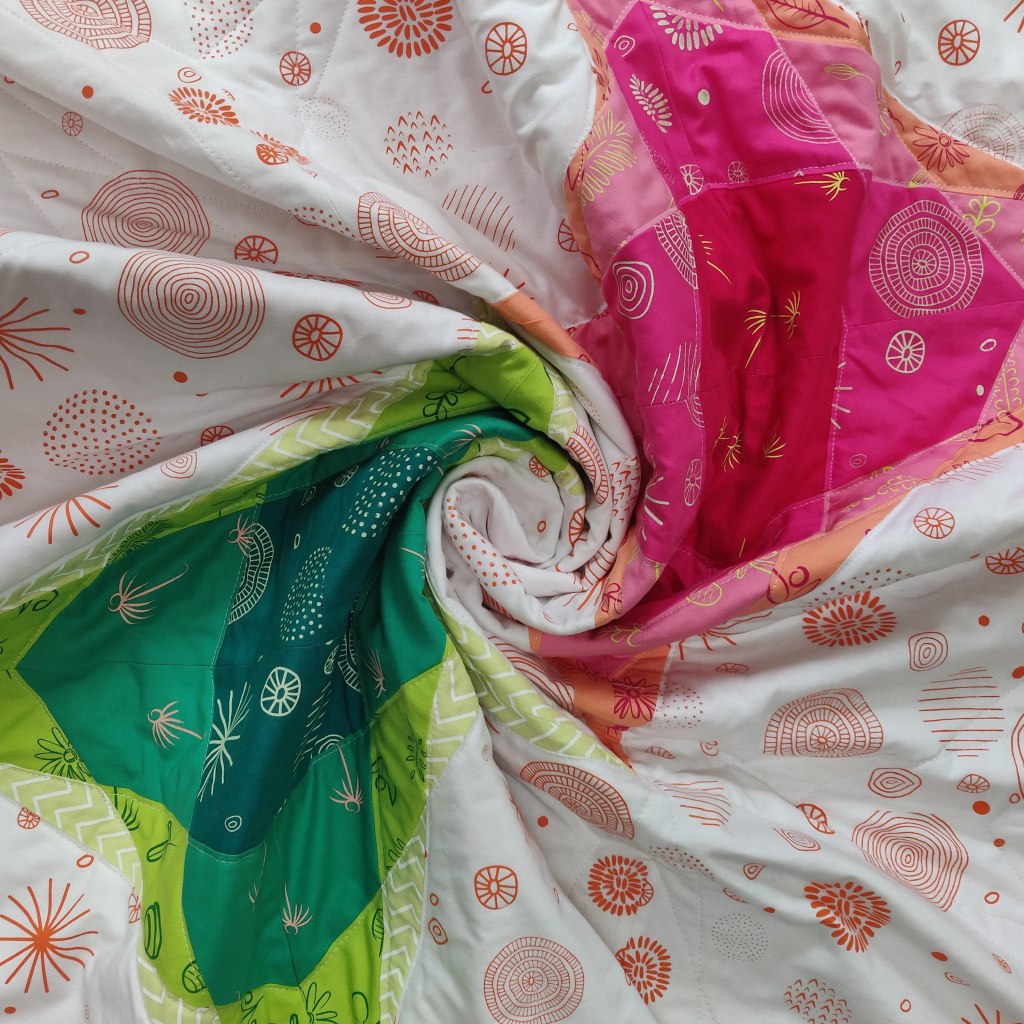
Here is the finished quilt! I quilted it similarly to the one for my mum but with white thread so it didn’t standout. I bound it using strips cut from the … For the eight single curved blocks, Helen specially printed me pieces slightly larger than her normal panel size and I only needed one panel of each of the other colours.
Of course my mini quilt holder and I took some #quiltinthewild photos.
I’ve been really pleased with the response to Saturation and had some great reviews. Any creative will tell you we are in it for these kind of comments and not the money. Your makes and words really do mean the world!
Review from @natalies_needles on Etsy
As Natalie mentions, the Saturation pattern has 6 pages of alternative layouts with a basic breakdown of how to make them and fabric requirements to help those less experienced quilters and illustrate the versality of the pattern.
I’m taking a few paper copies of the pattern to festival of Quilts at Birmingham NEC next weekend and will be on stand G56 with Helen Steele for the majority of the show.
I have a bed size version I want to make so I am planning a sew along at some point – maybe starting in November 2021 as the fabric I want to use is not yet out and I might have something I need to work on for Halloween.
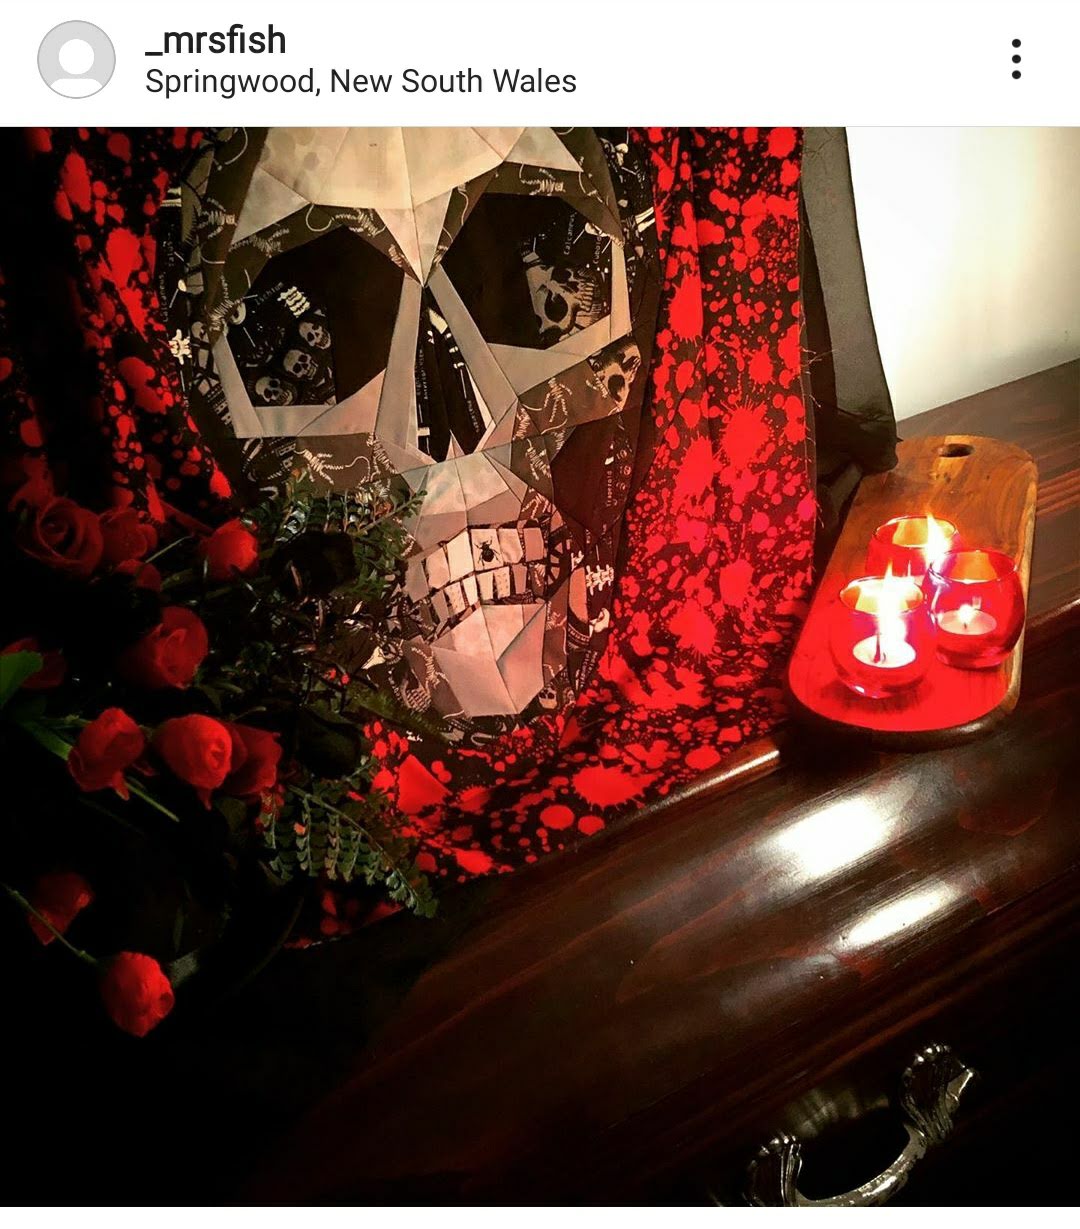
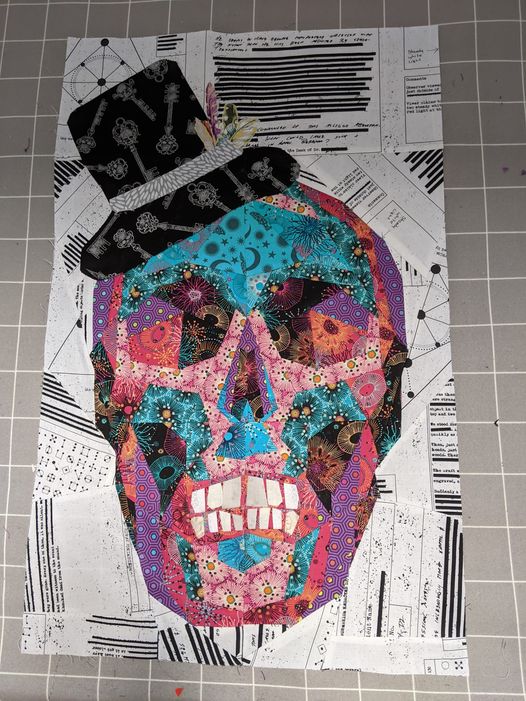
The first prize I’m going to award was not even a prize before today. I felt the creepiest and spookiest (to me) of the skulls needed some recognition. @_mrsfish’s panel not only has all the bones and skull fabric, a beetle in the mouth and blood spattered fabric as the background, but when it was pointed out the skull was on a coffin a shiver when down my spine! So @_mrsfish a skull pin and maybe some other little bits will be flying over to you in Australia as soon as possible.
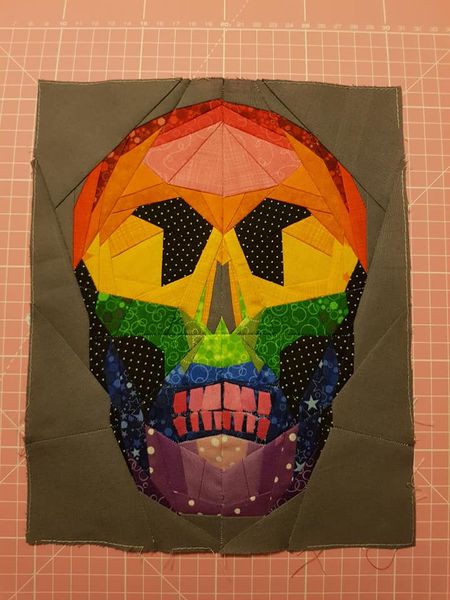
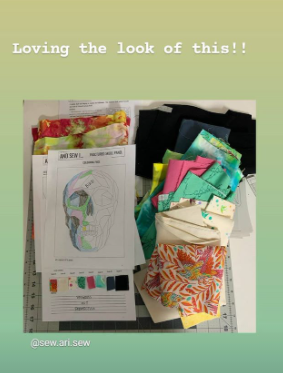
So now to start with the original prizes – @robotsmumsews unicorn thread gloss is going to go to this beauty!! My biggest daughter loved the ‘fire’ background of @sew.ari.sew ‘s version. I was super impressed with the fussy cut on the forehead, the home ice-dyed fabric which went into it and colour pallet I wouldn’t normally go for. Well done Ari, fantastic effort for someone relatively new to quilting.
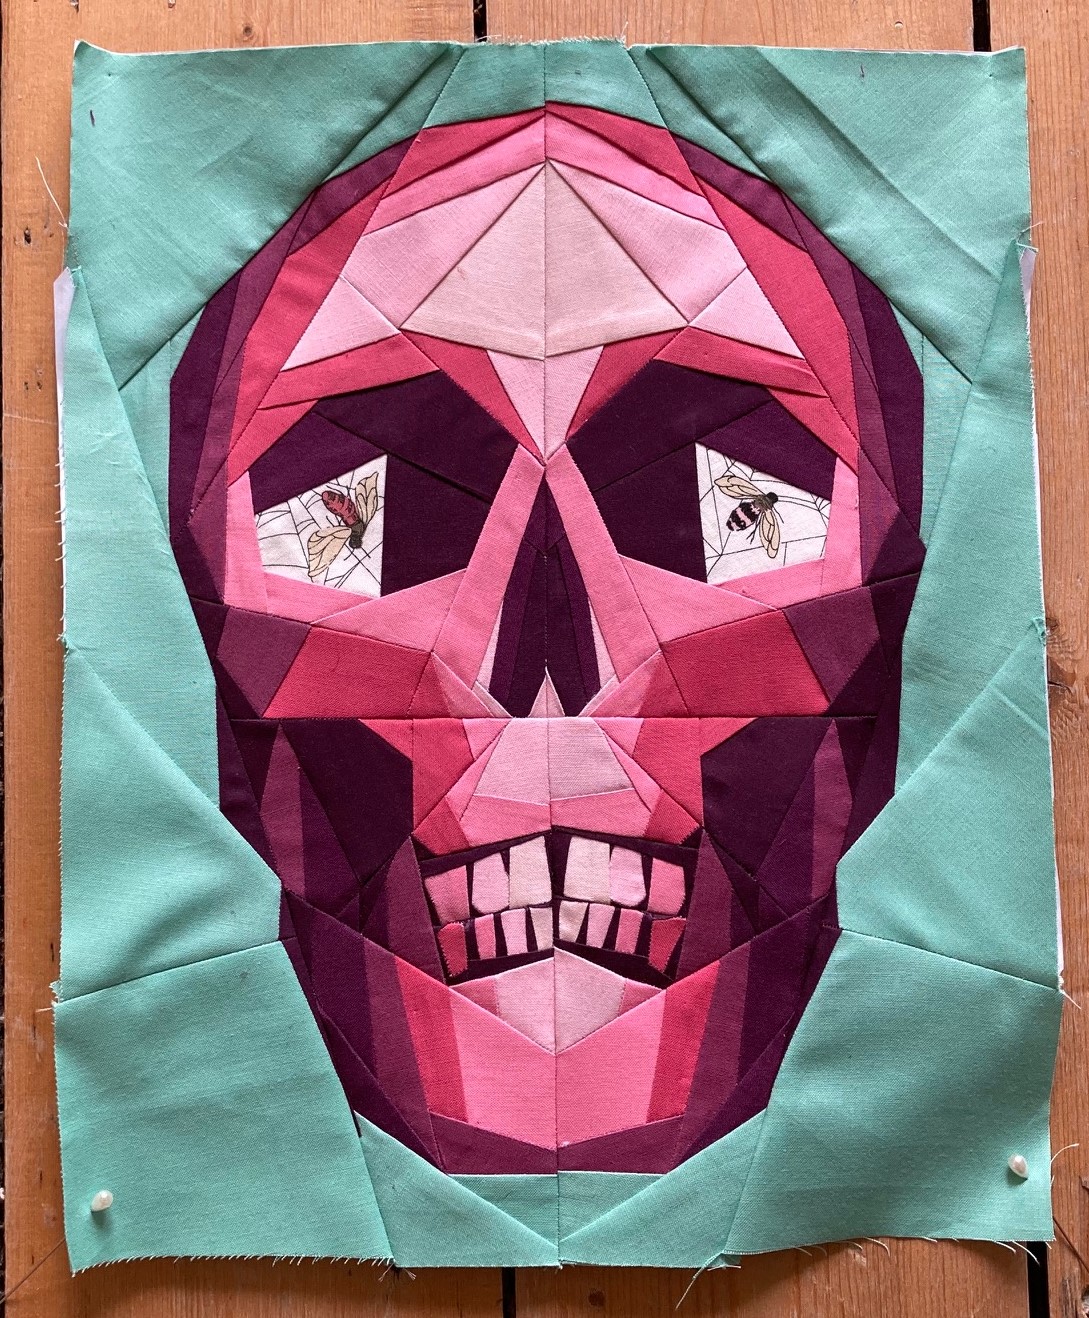
Next is the bundle of fabric and scrap pack from @oliveandflohandcraft which goes to Carol @therunninghare as I love the pink and would never have put this soft green with it. Combined with the accurate piecing and fussy cut bugs in the eyes I couldn’t resist.
@therunninghare
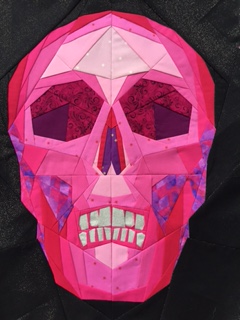
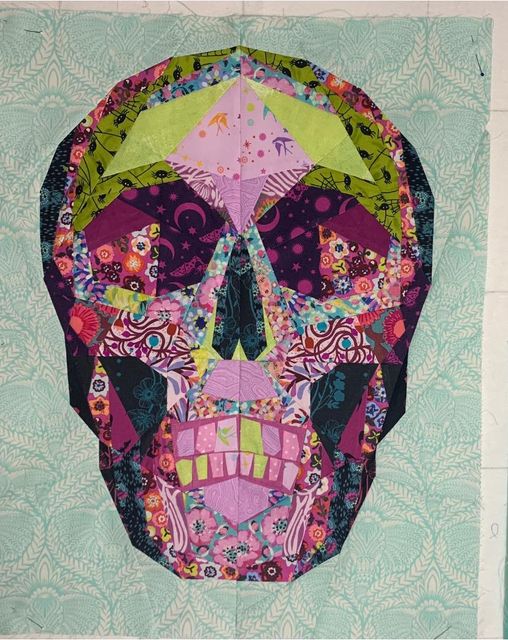
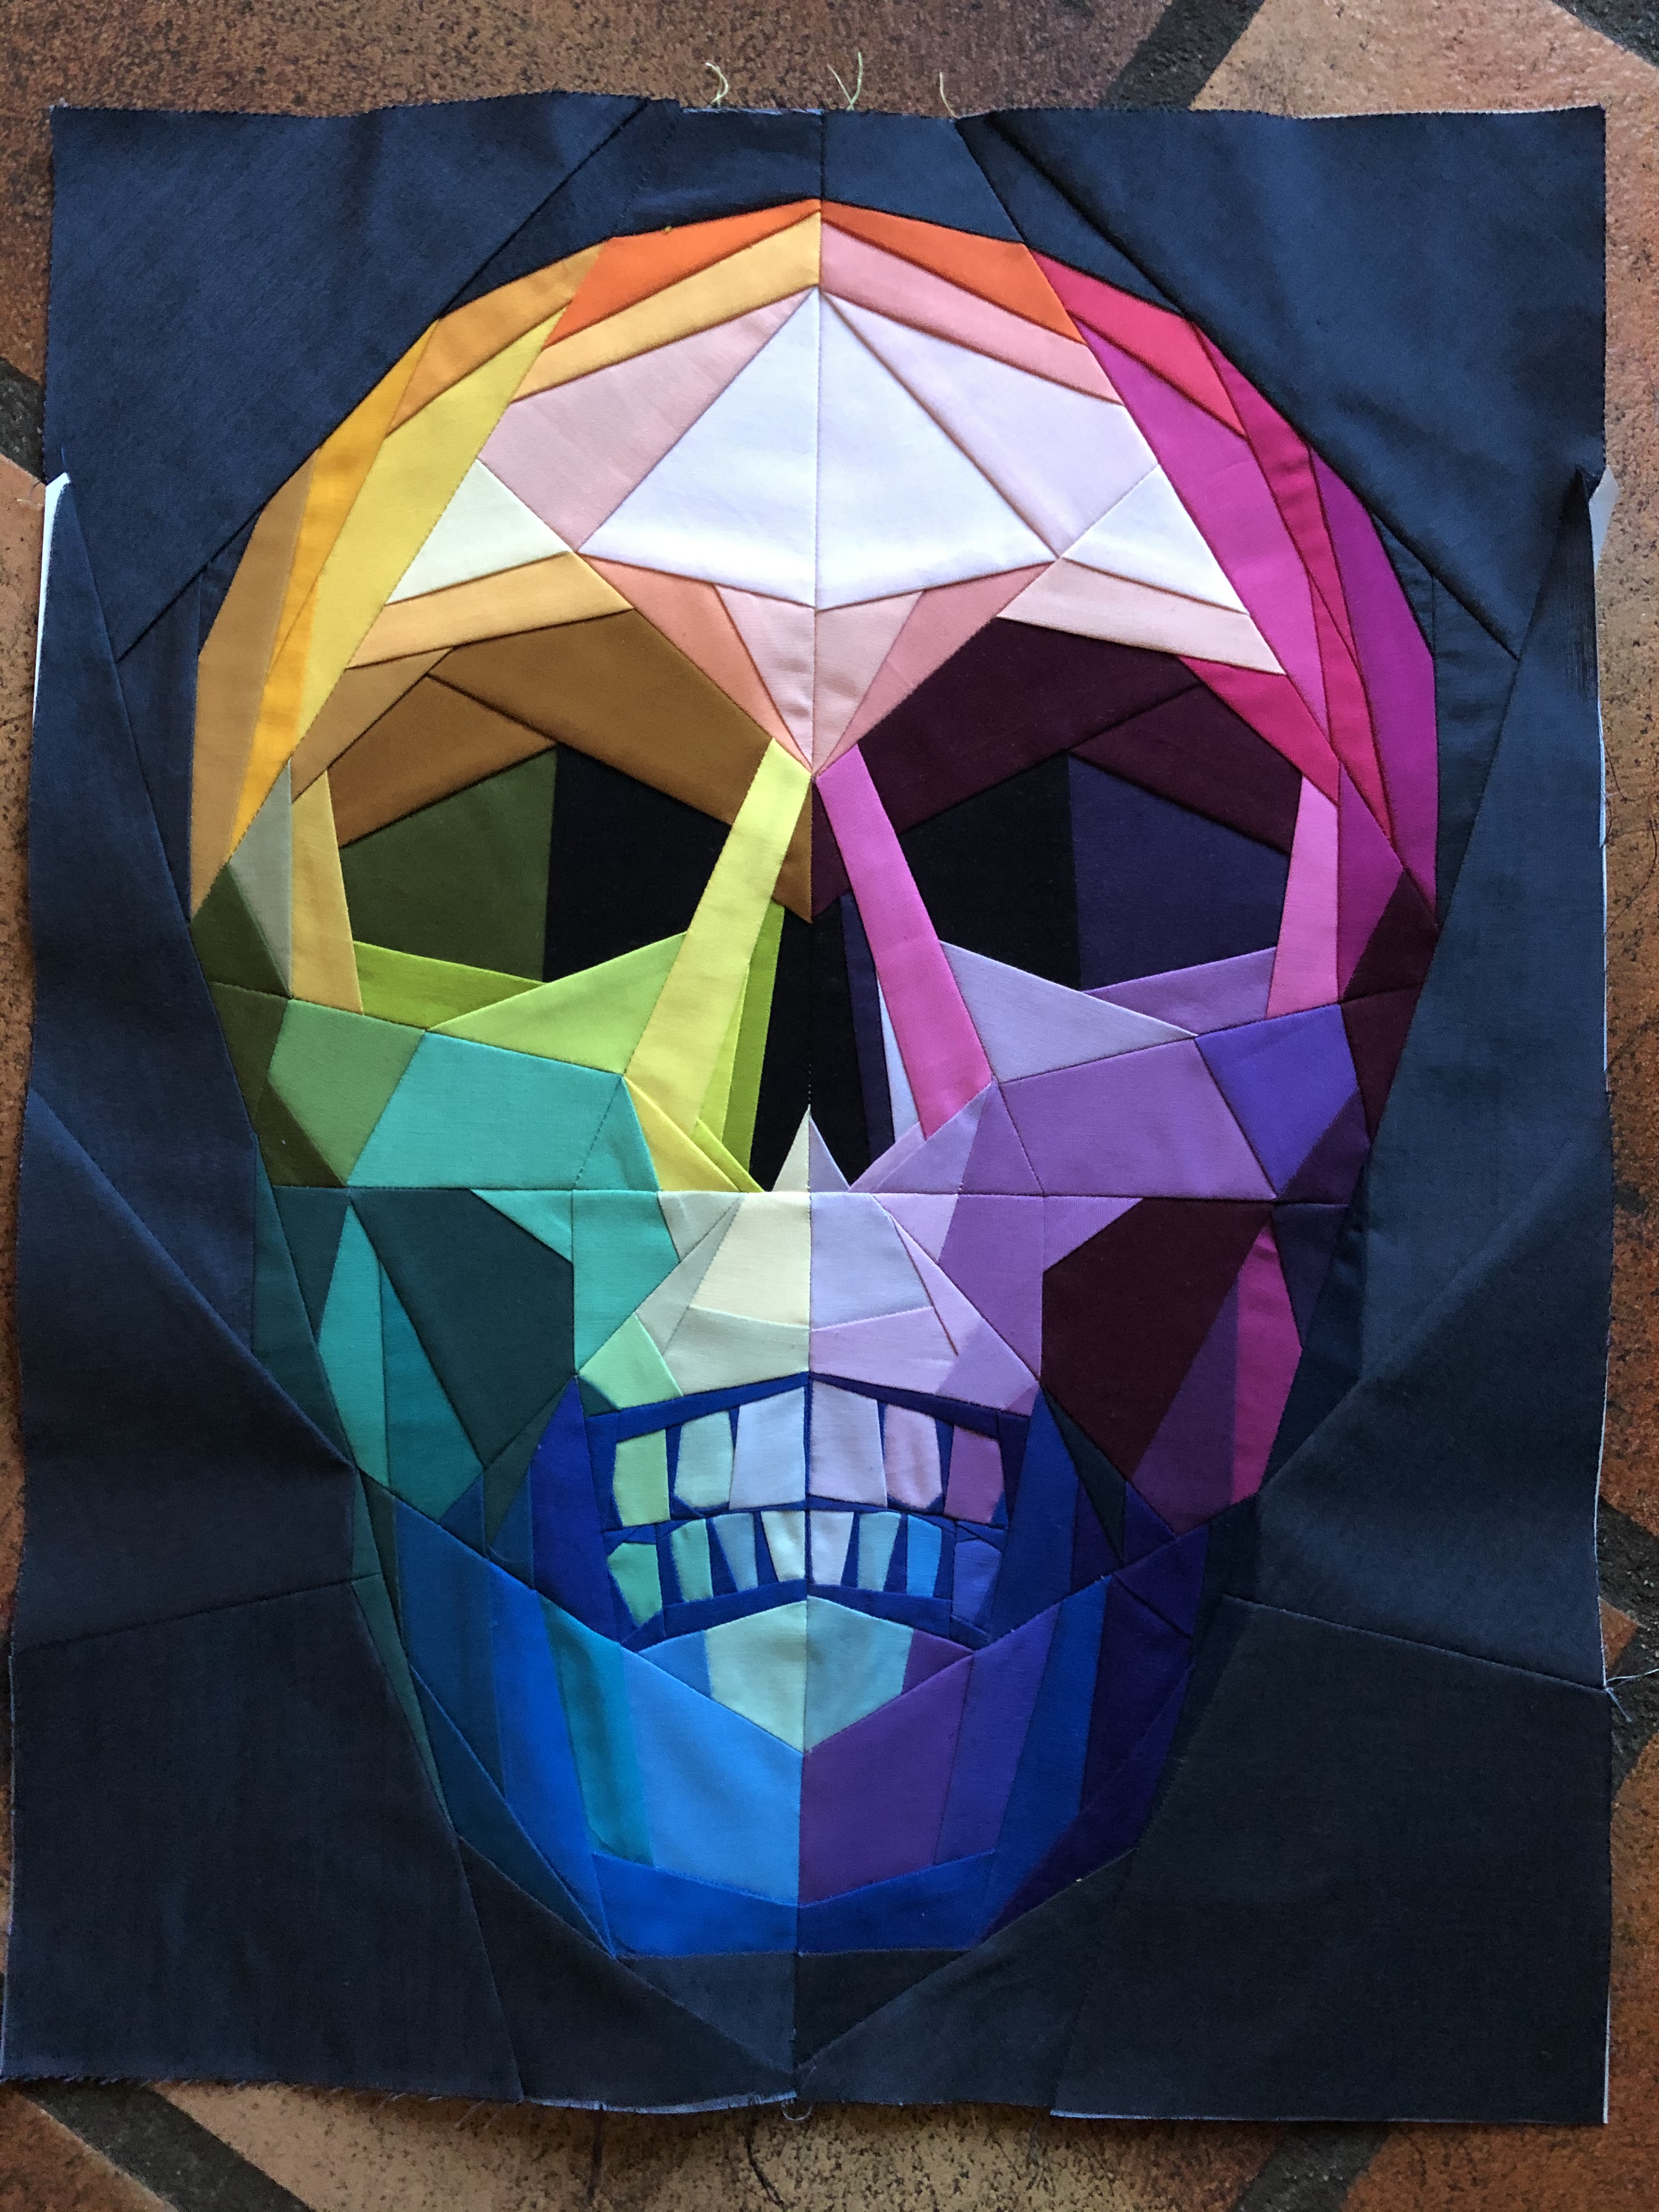
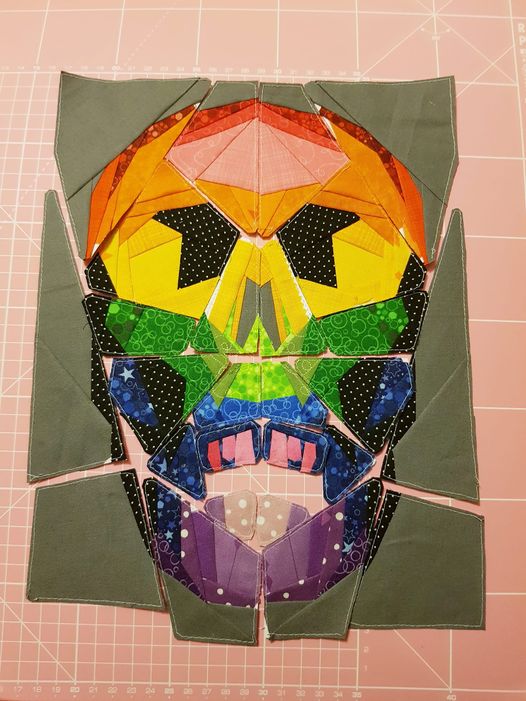
The next prize is the Karen Lewis £30 voucher donated by @patiagnesd. This goes to @nathaliedelesse who blew me away with her beautiful scrap colour wheel skull. I’m a massive sucker for a colour wheel/ or gradient and this is just stunning and something I would never have thought of!
@nathaliedelesse
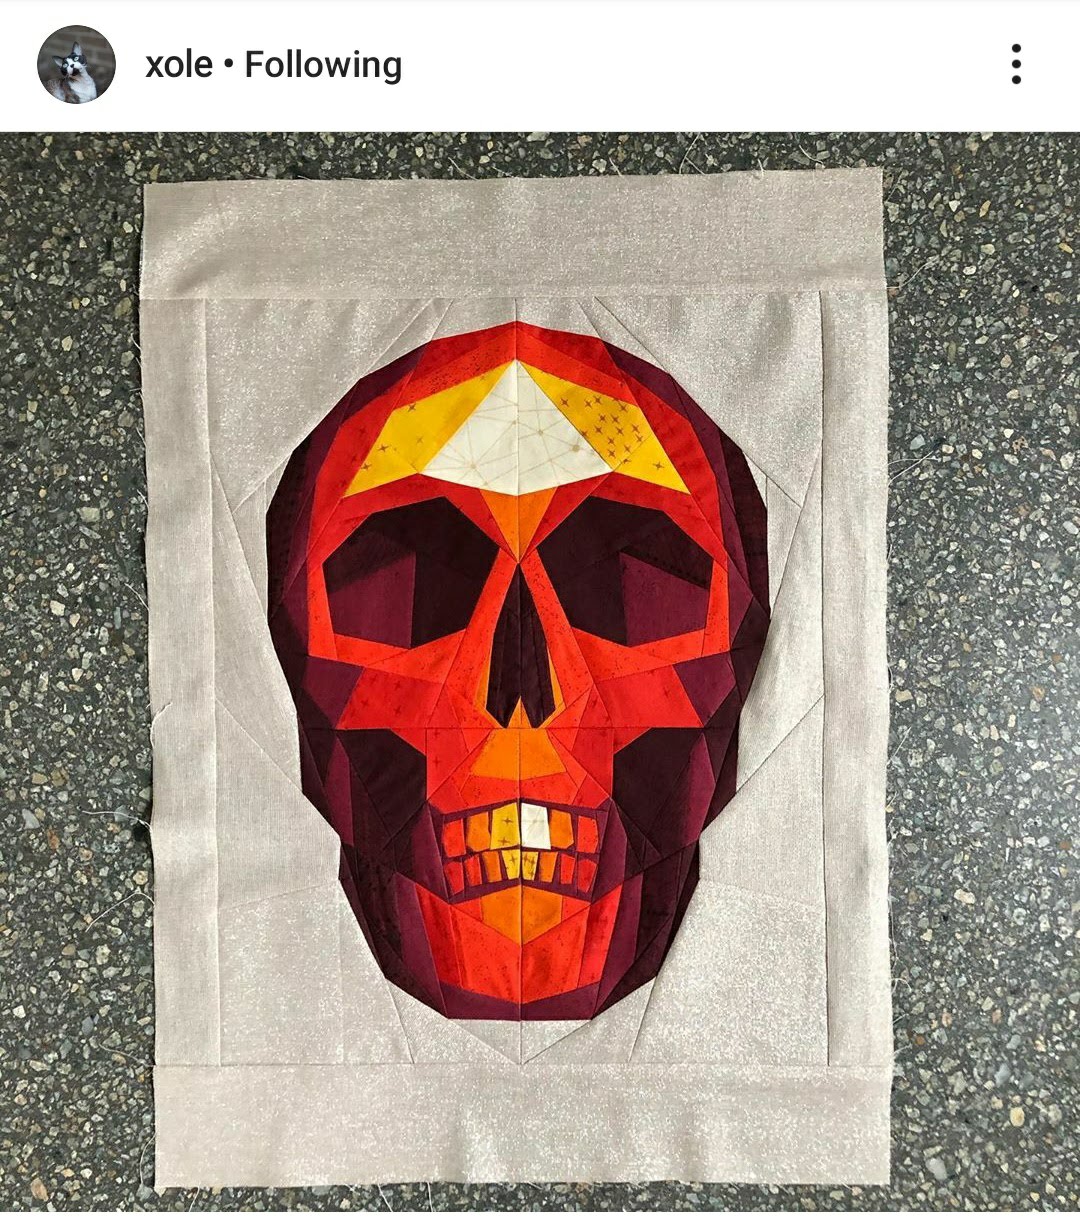
So you know I said I was a massive sucker for a colour wheel or gradient I’m afraid that is why I couldn’t resist @xole’s Giucy G fire skull. The neutral background really let the dominant skull burn into my mind. The gradient really is perfect to me. Xole gets an electrinic copy of her choice of Lou Orth’s quilt patterns which should suit your style down to a T.
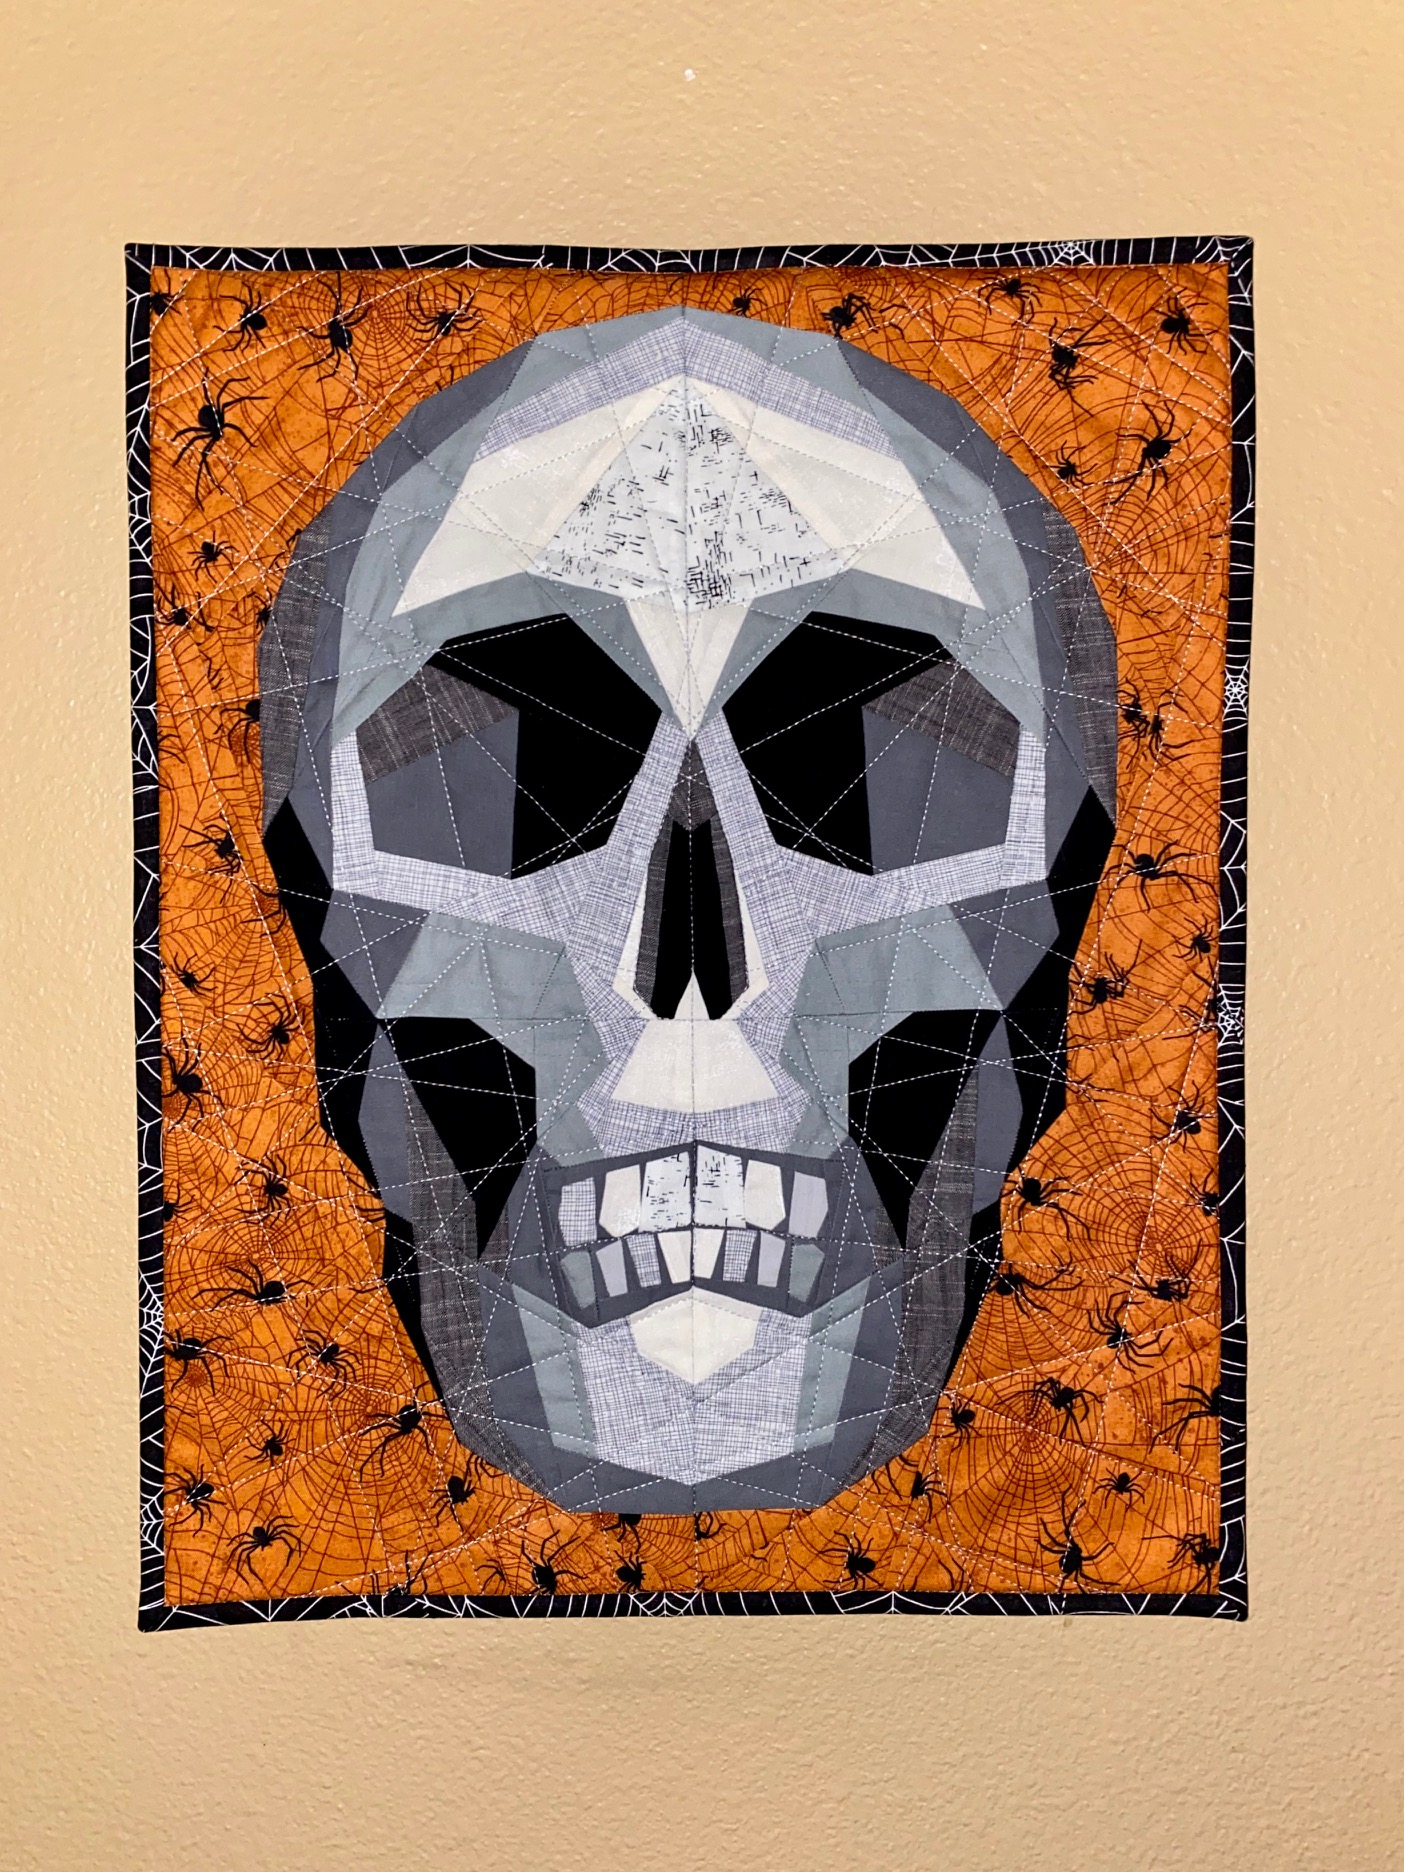
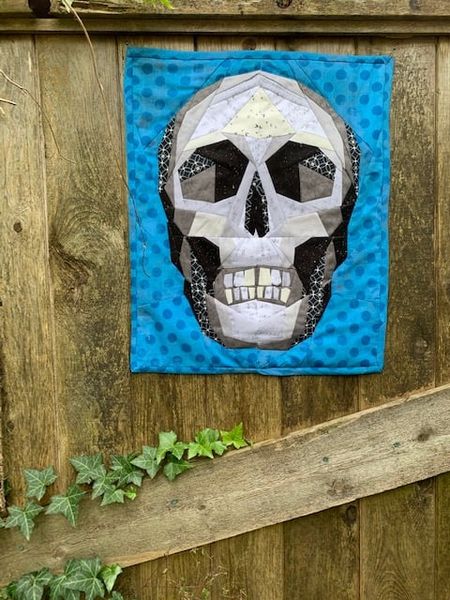
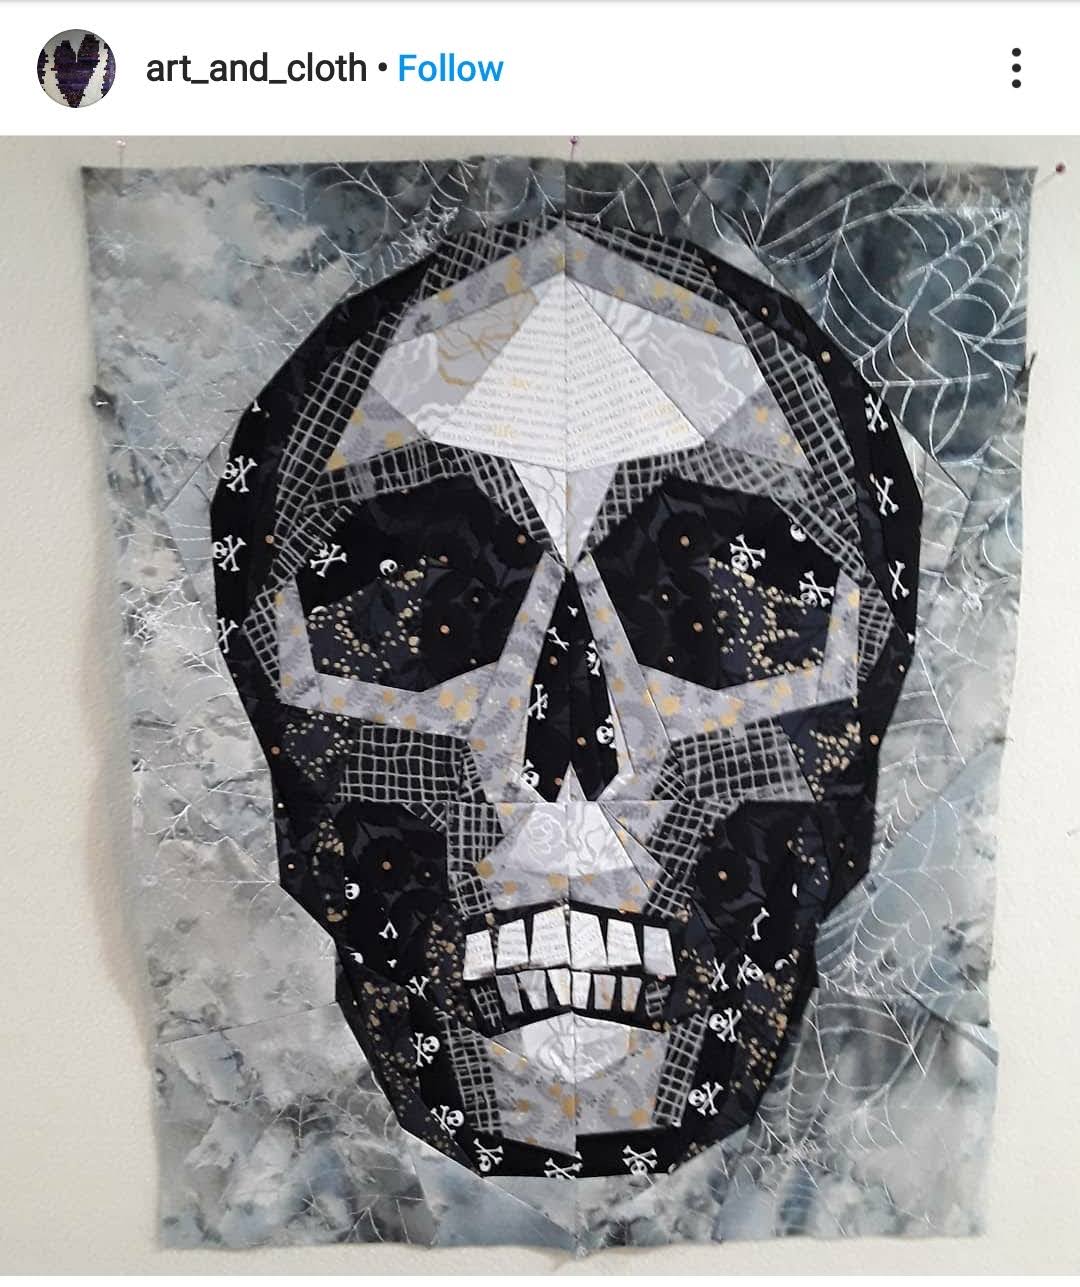
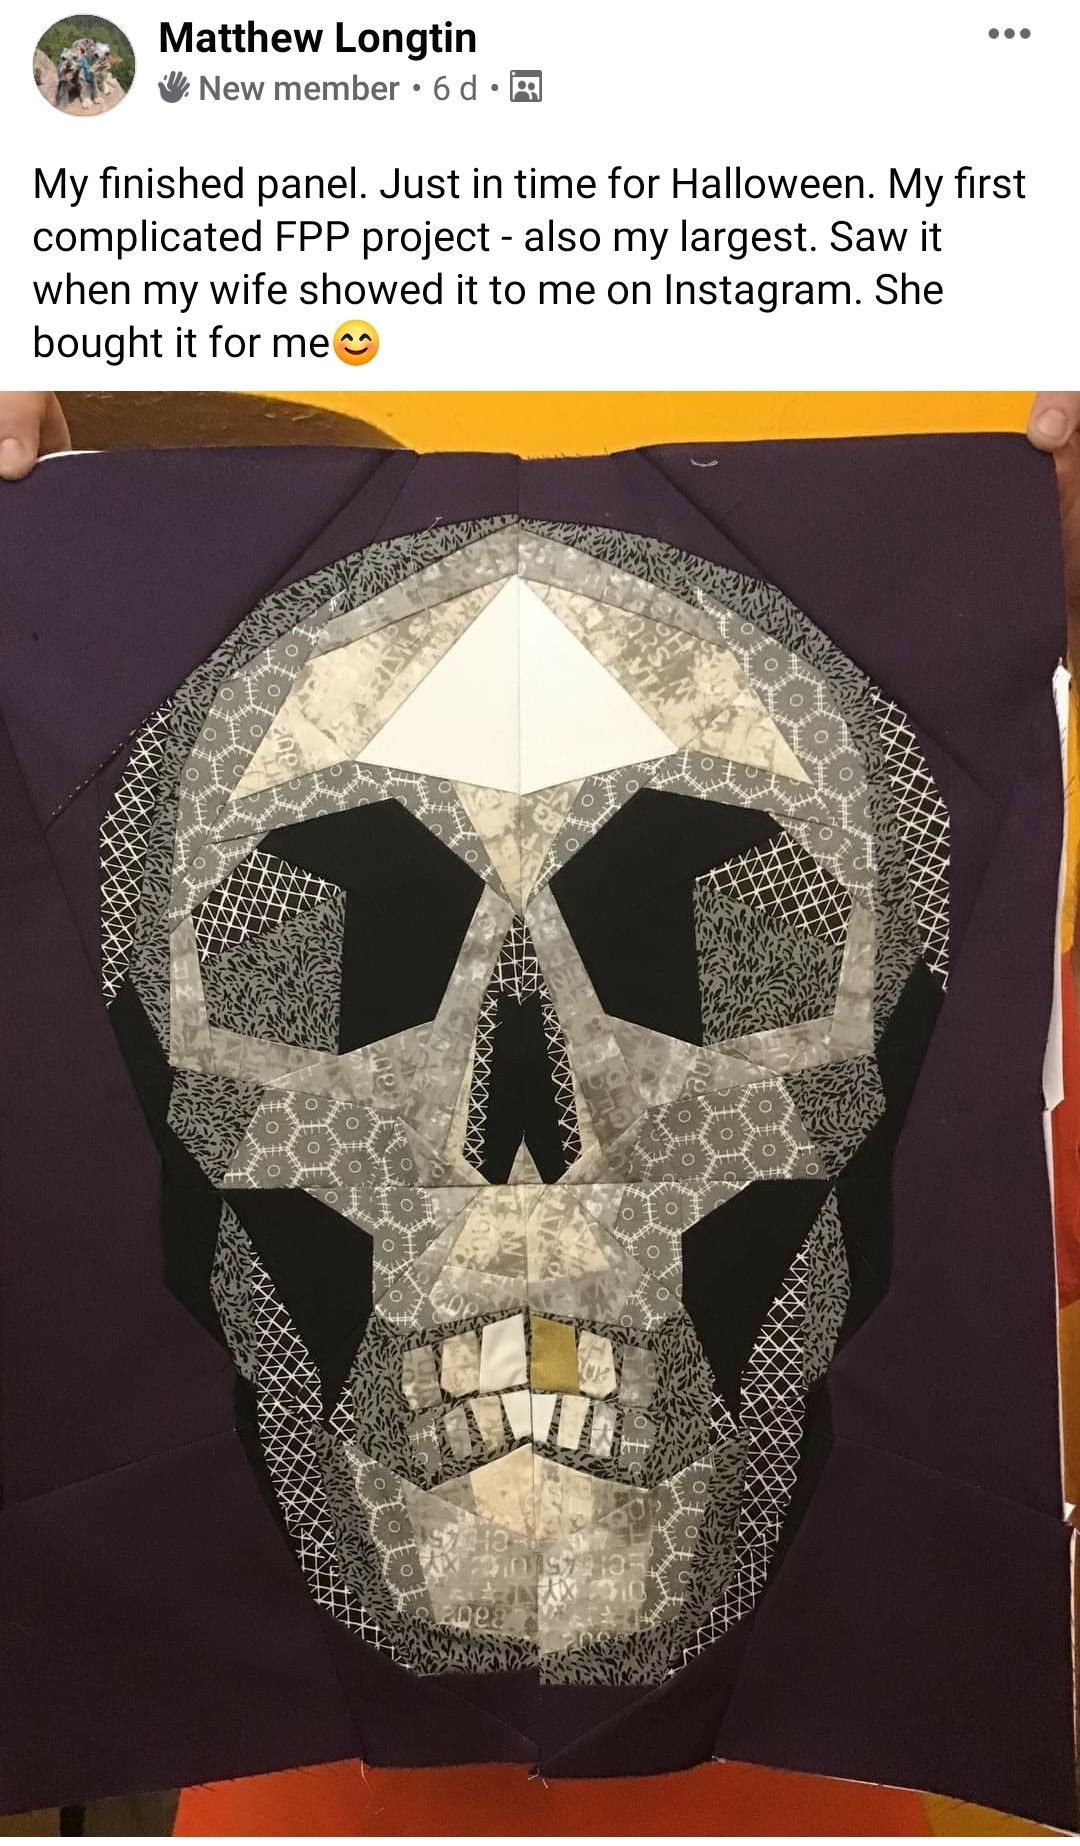
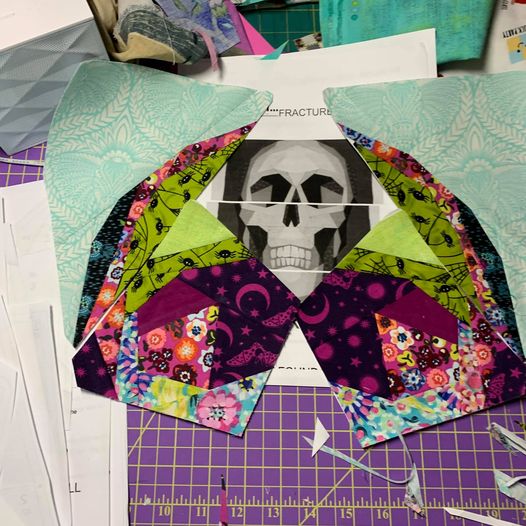
Lastly (well almost), is the electronic copy of the Fraktal quilt pattern, Modern Quilt Club’s collaboration with Paula Steel. This goes to @pattiknitsandsews for her perfect skull. This panel is a better version of what I originally envisaged with the skull design. I love the simplicity of the grayscale skull offset with the orange background. Made perfectly halloweenie with the spiders. What nailed it for me was the quilting which looks like the spiders webs over the skull, the straight line quilting which kind of looks random but well thought out and beautifully symmetrical.
Finally, I wanted to do a completely random winner so all those who participated were written on a bit of paper and popped into a Disney frozen bowl and on my Instagram ‘live’ I pulled out @finecityquilting. So you also get a Lou Orth pattern of your choice.
Picking winners was really difficult there are so many skulls which look amazing and others you could see the effort which had gone in. Thank you all so much for participating in my first sew along I hope you have enjoyed it as much as me.
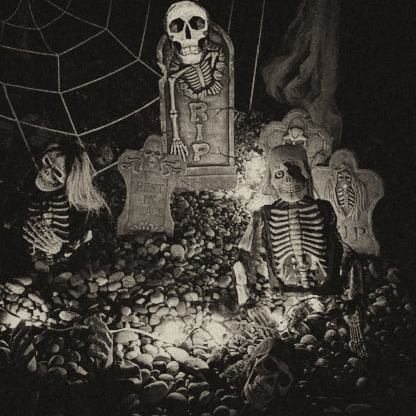
Thank you everyone who took part! First a special shout out to those who took on my bit of fun spooky picture challenge:
@thebeveleh Chris Ostenstad
Patricia Dunham
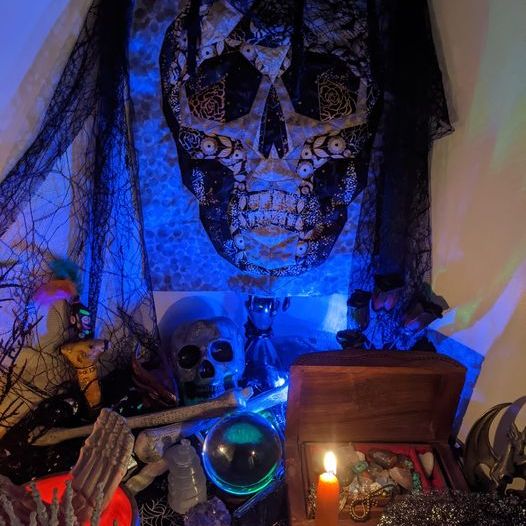
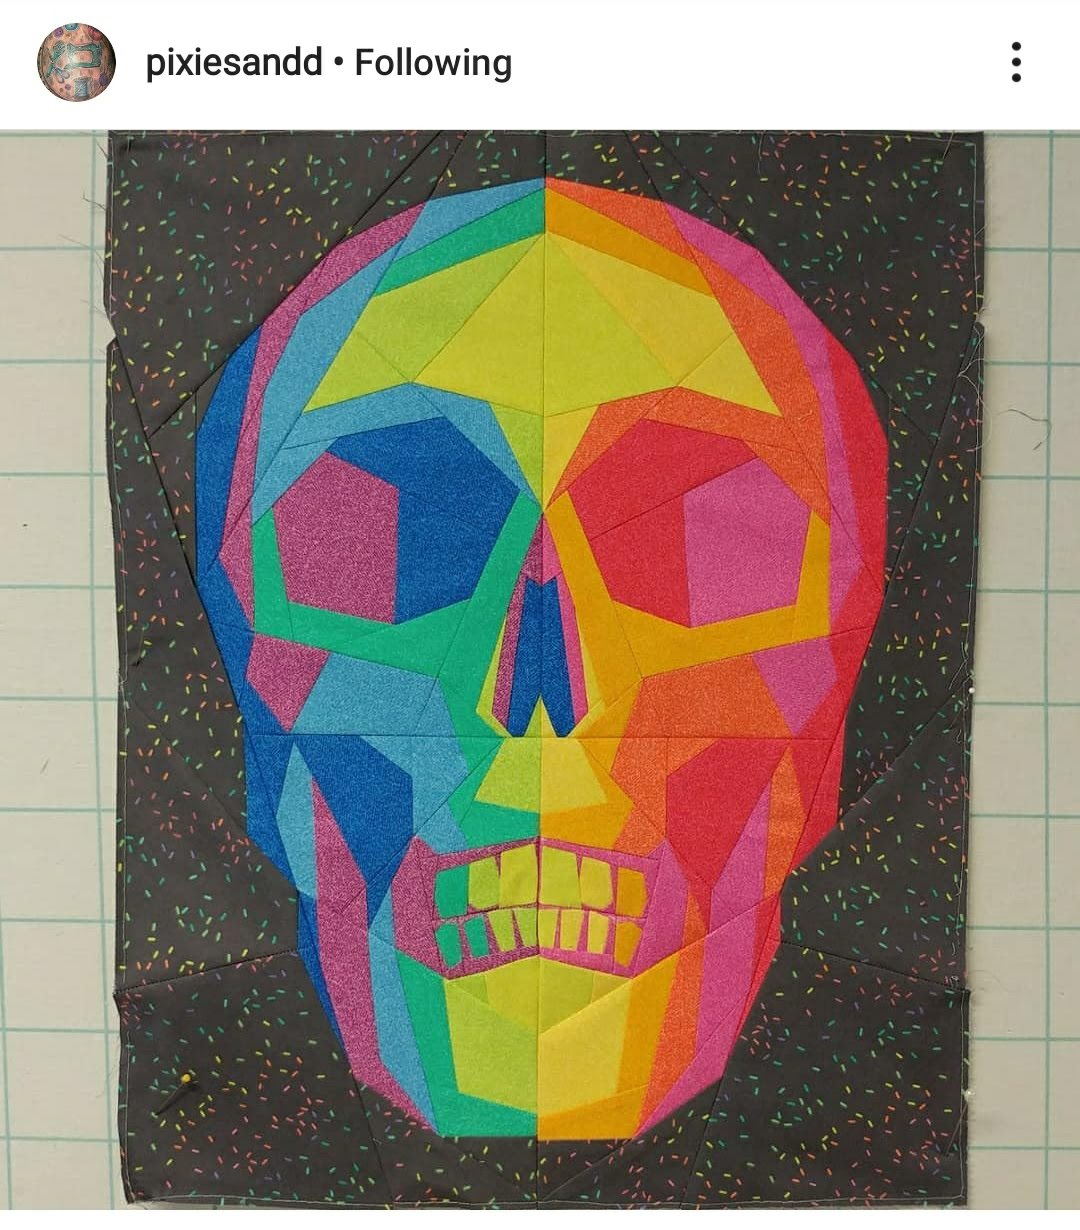
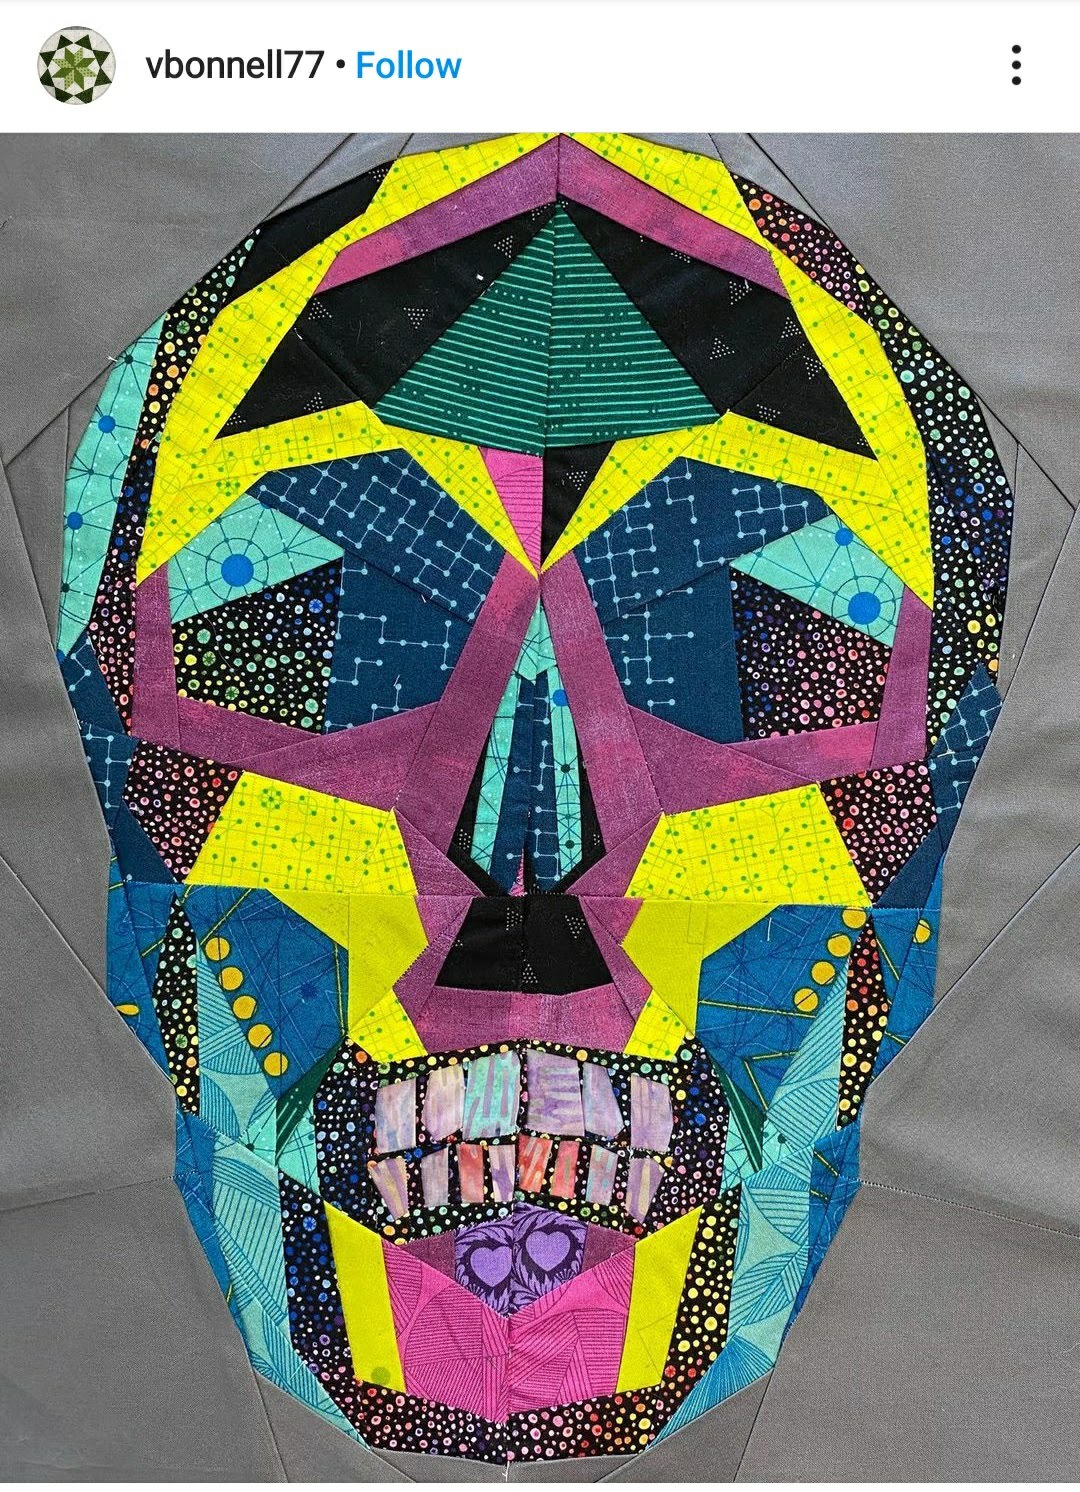
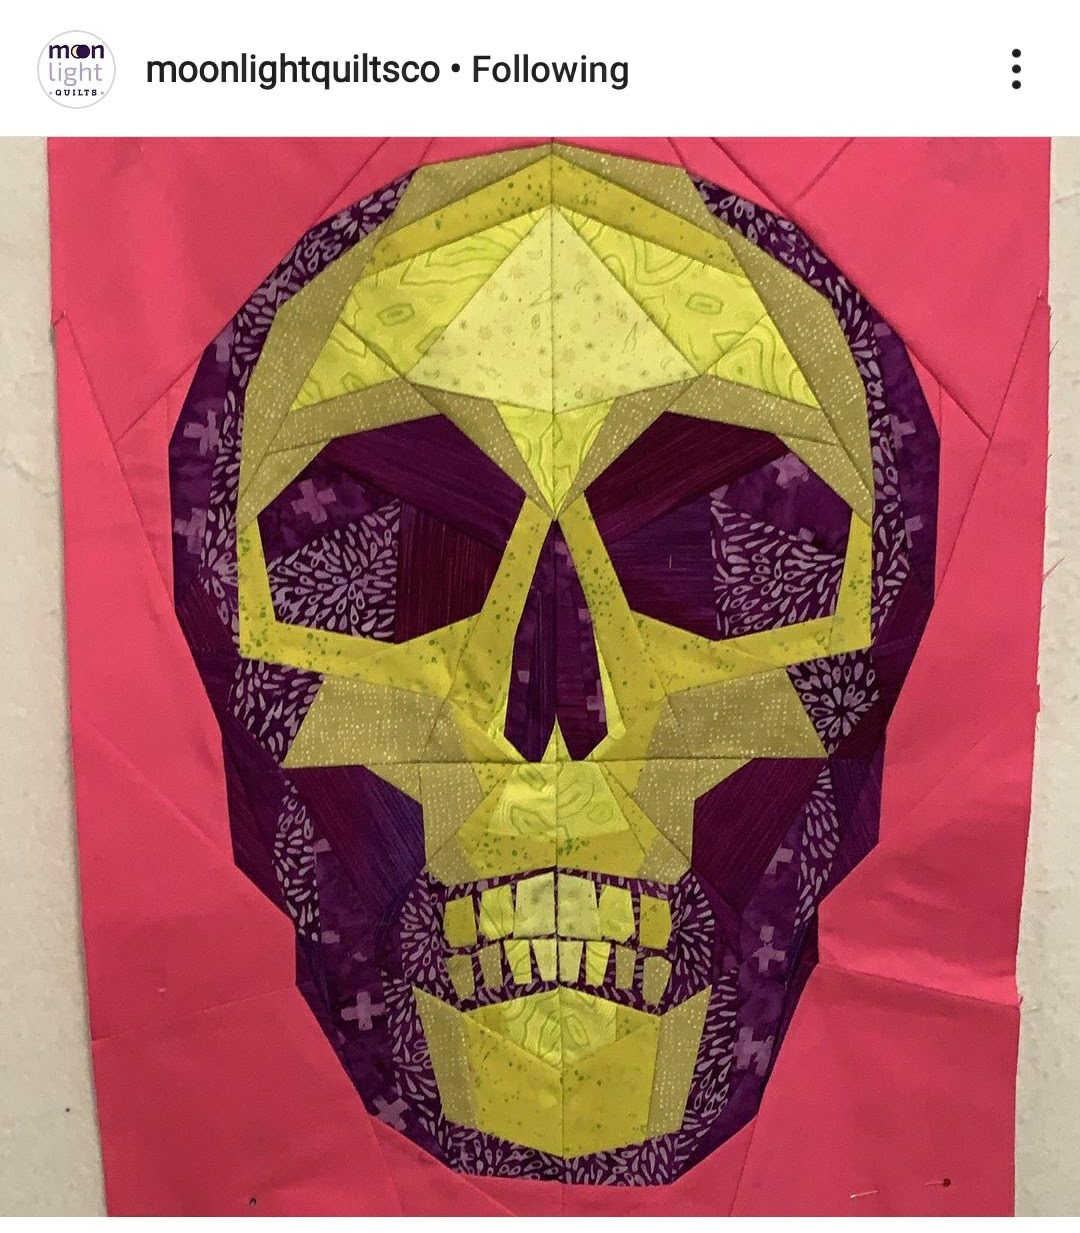
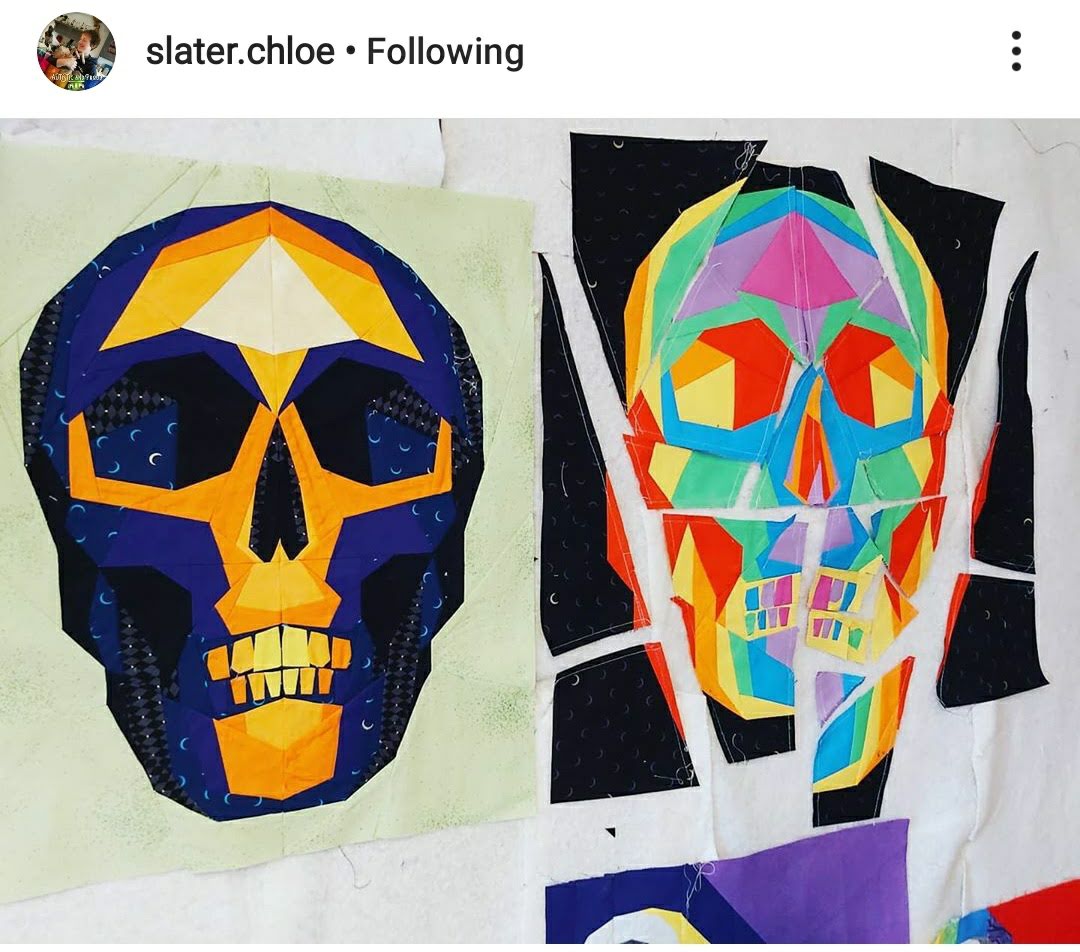
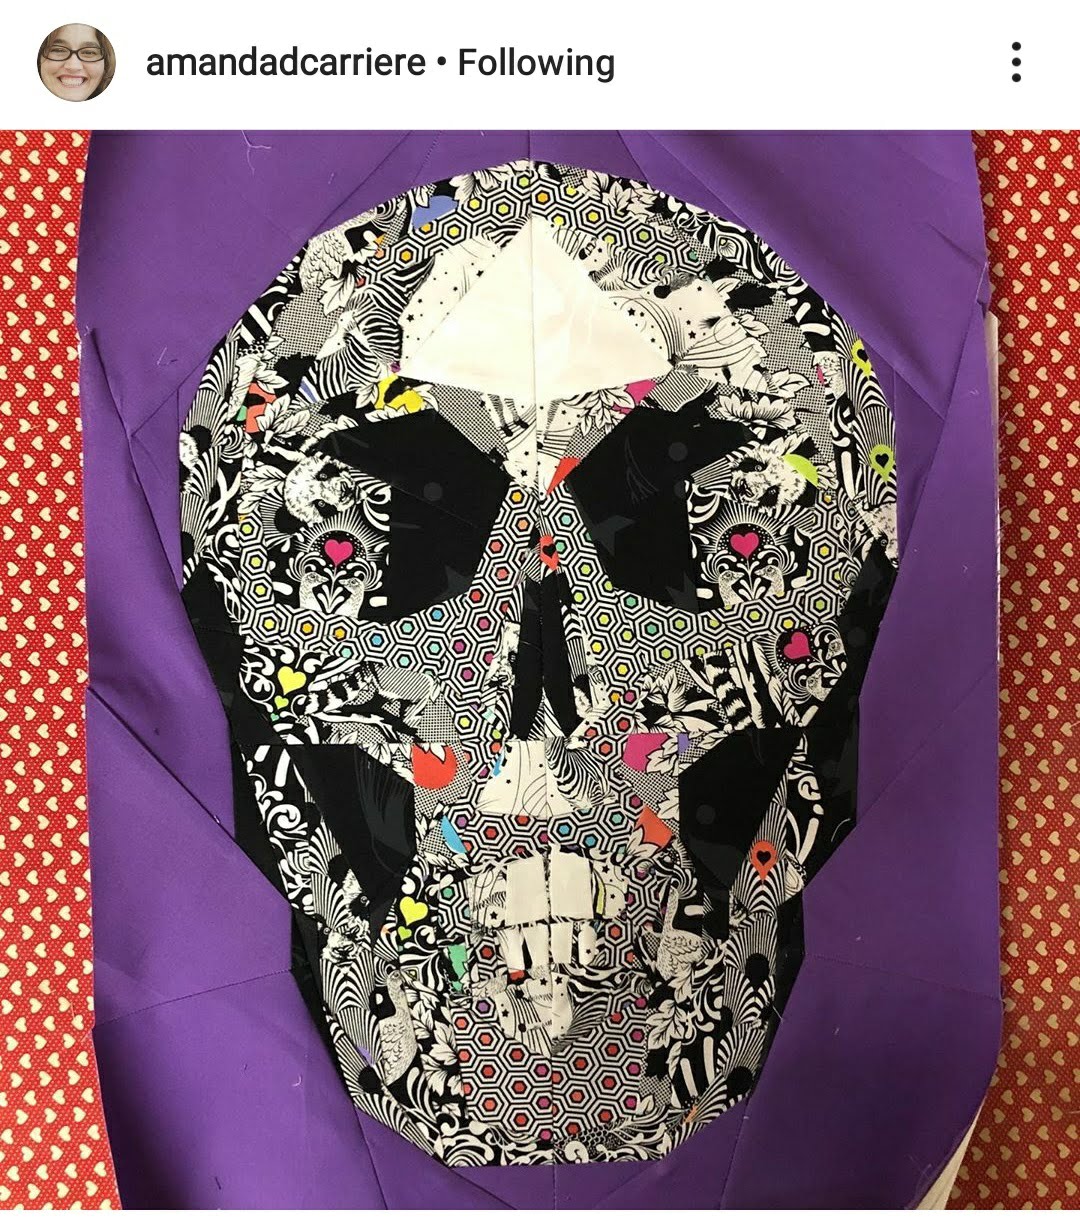
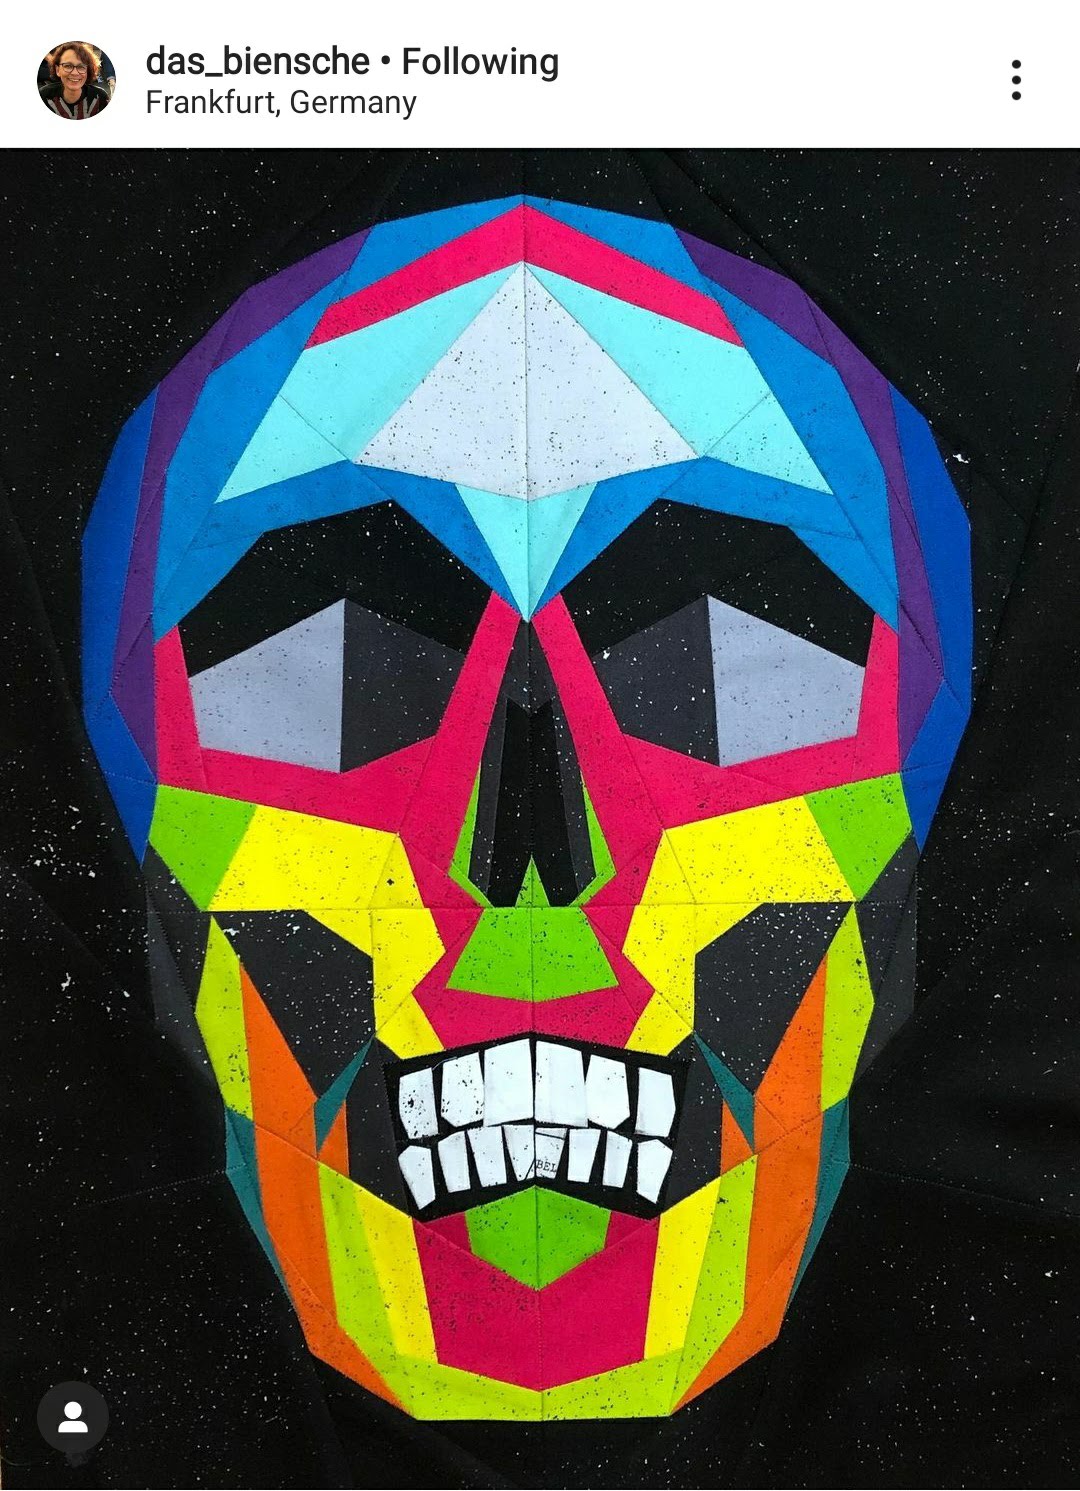
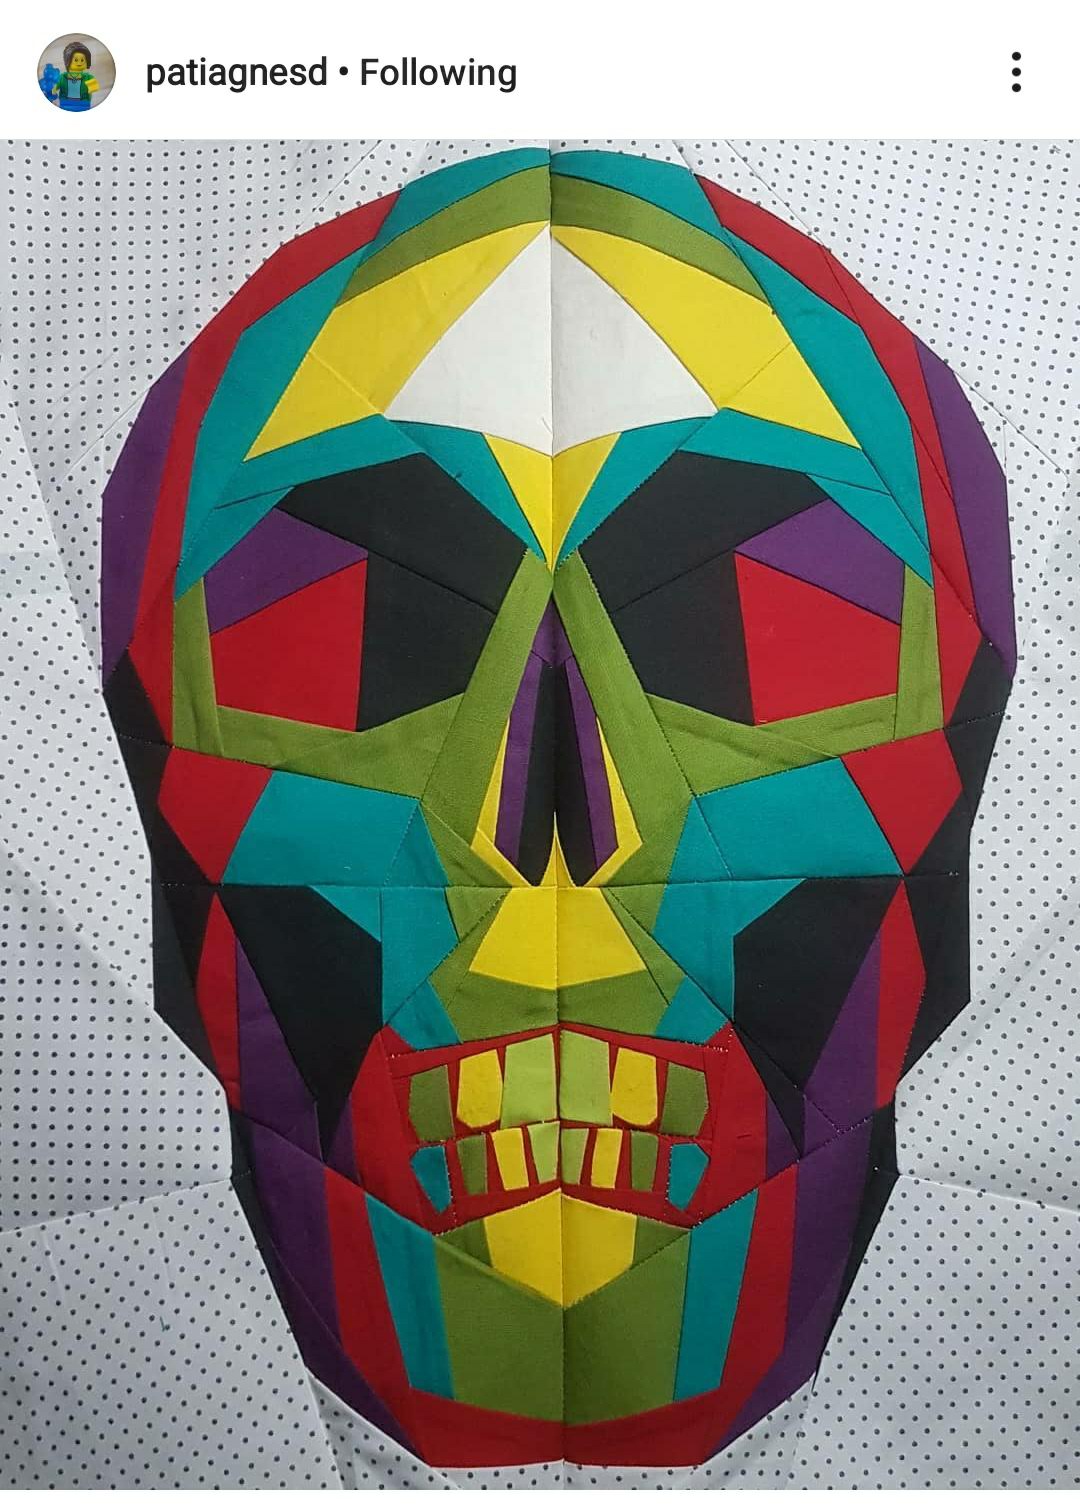
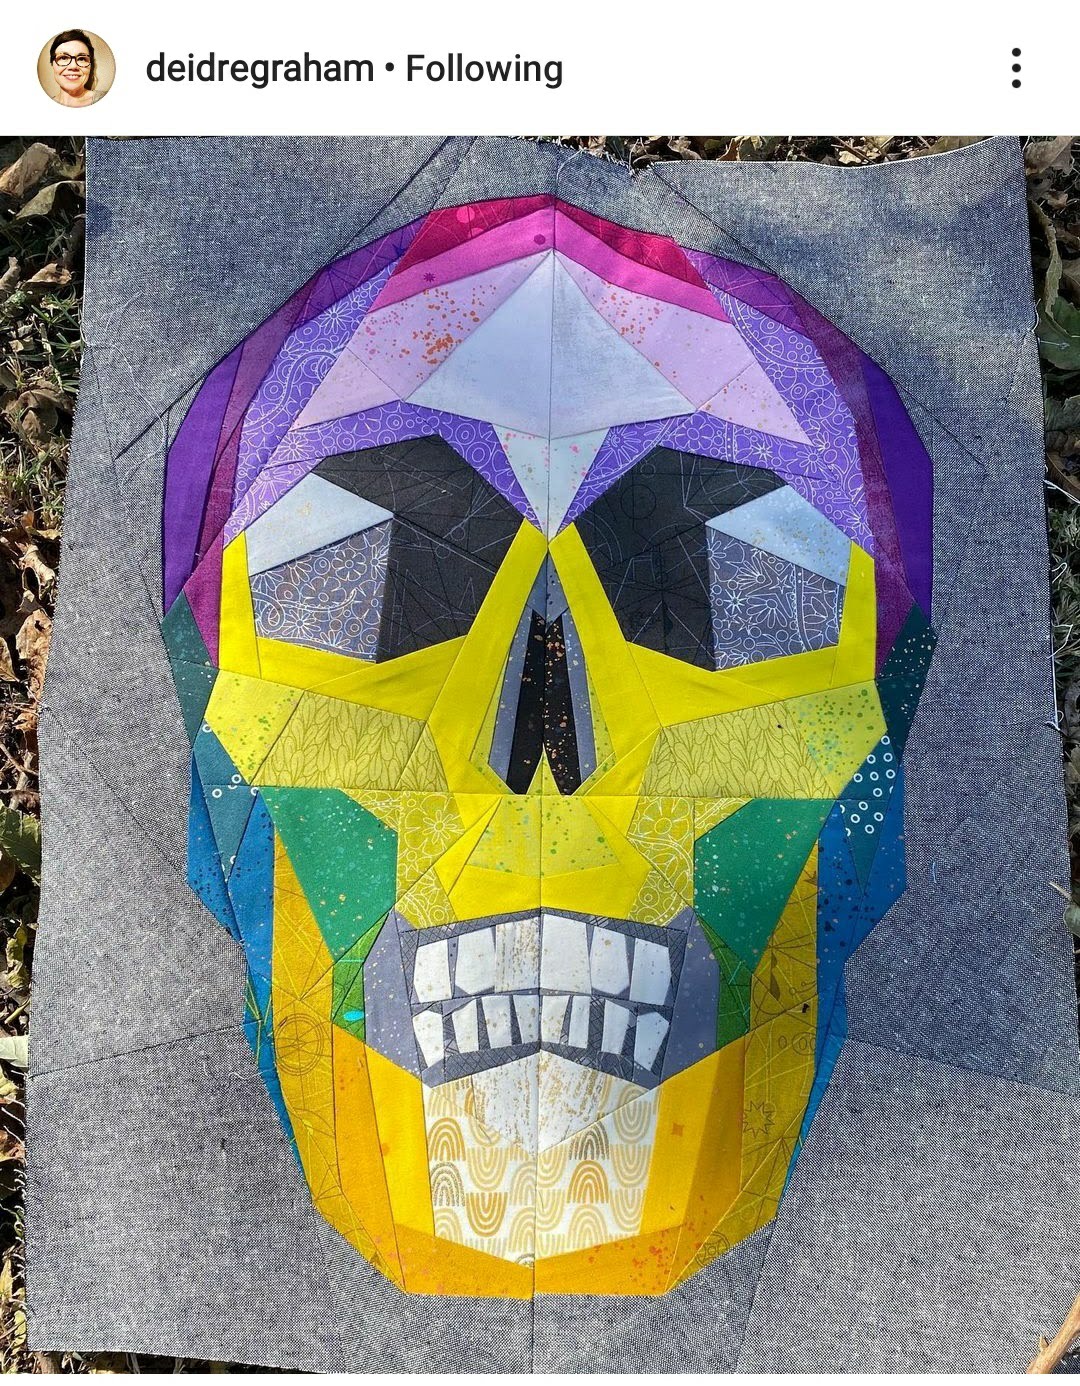
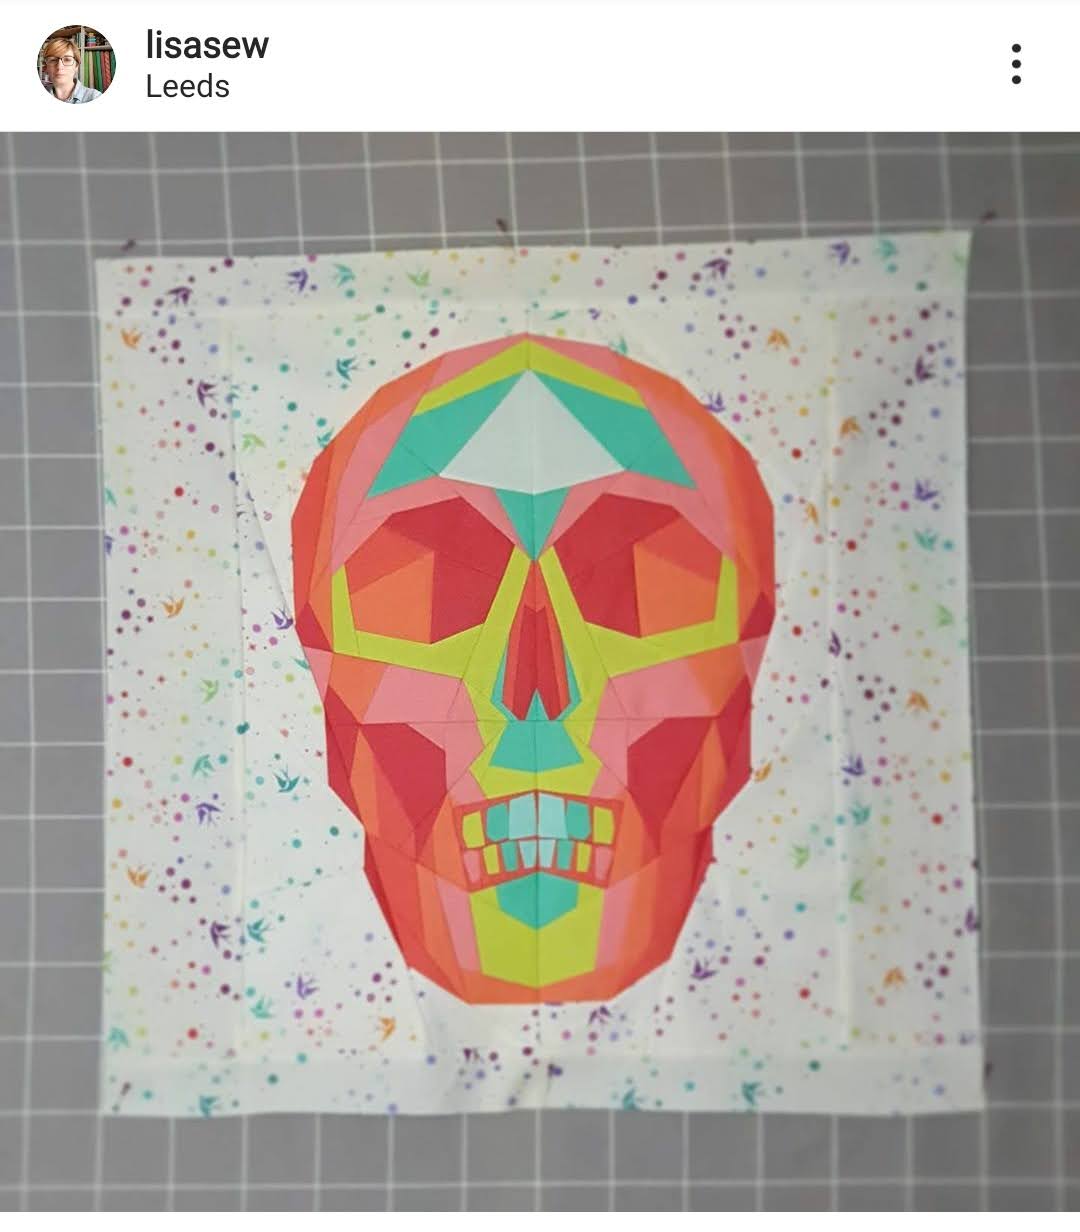
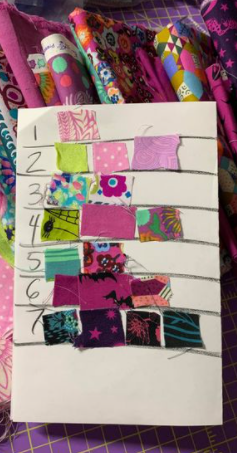
Now for a gallery the finished skulls. I have tried to get everyone but please message me if your missing. They are in no particular order:
From left to right : @mopheaded1 , @pattiknitsandsews, @maikahaza
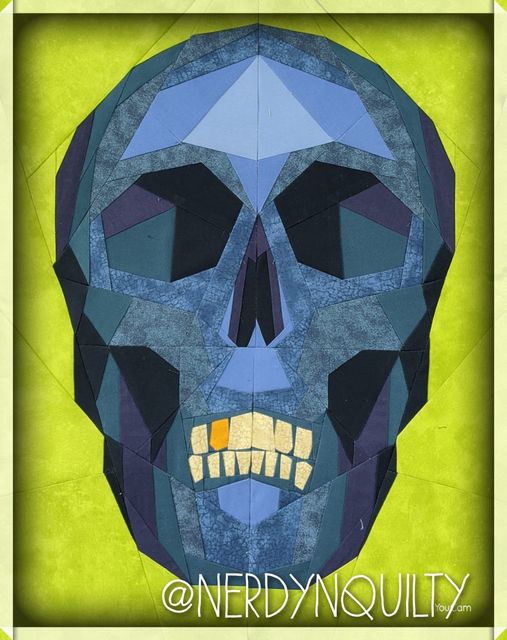
From left to right : @nerdynquilty, @ma1anie, Margaret Pannell Vachon
From left to right : @therunninghare, @missmerrycherry, @ringaringarosie
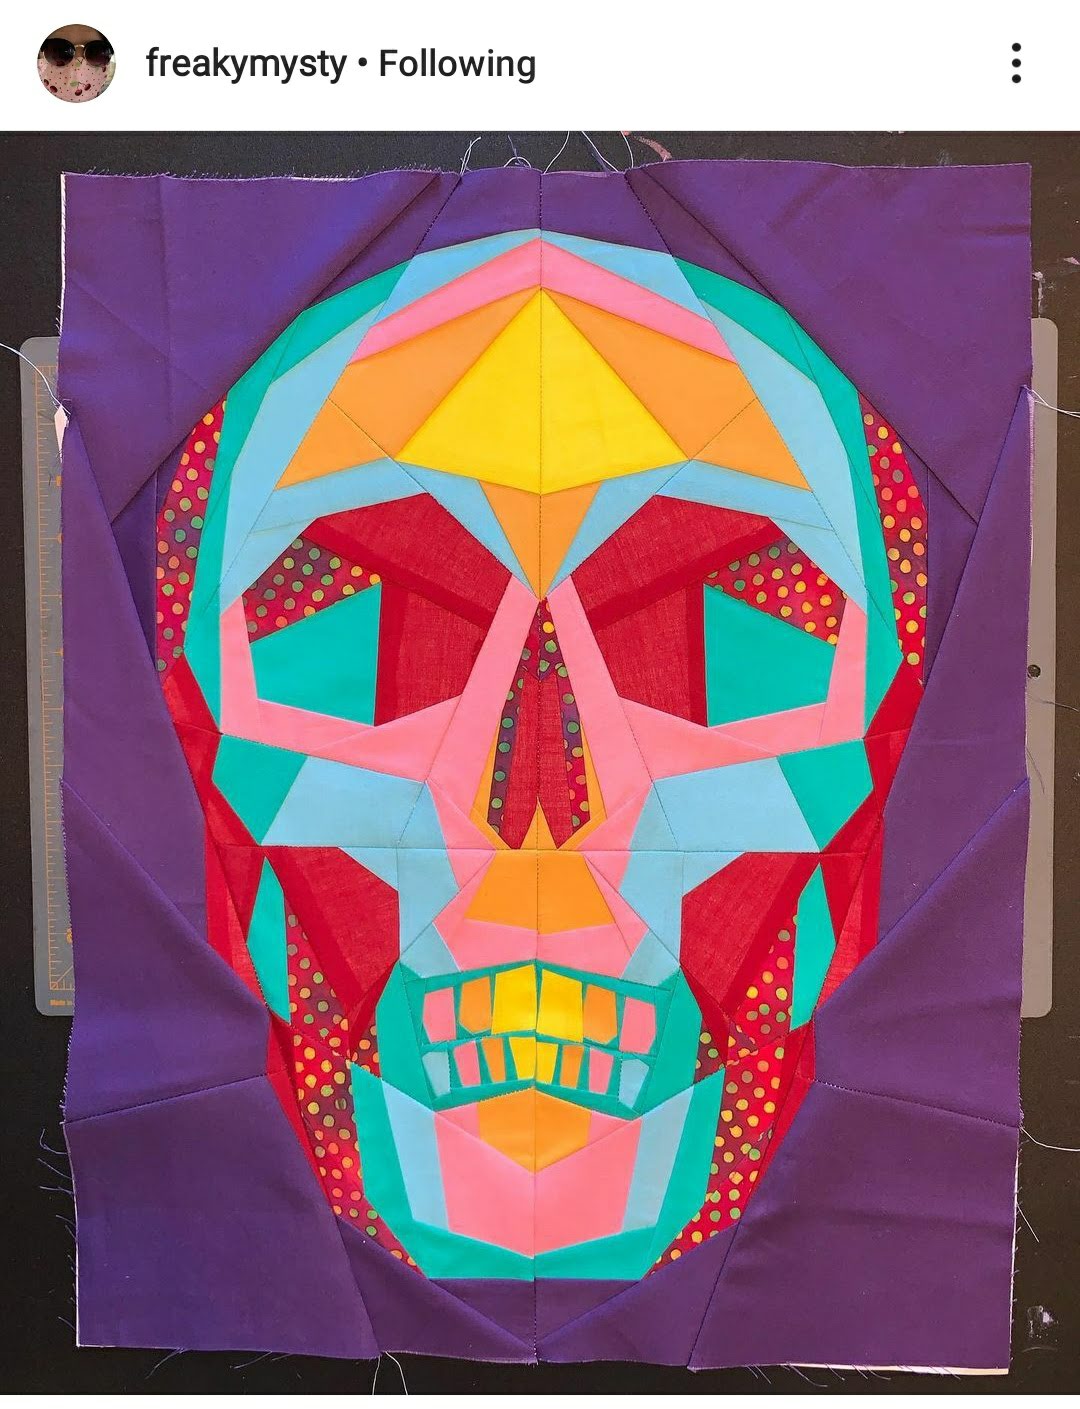
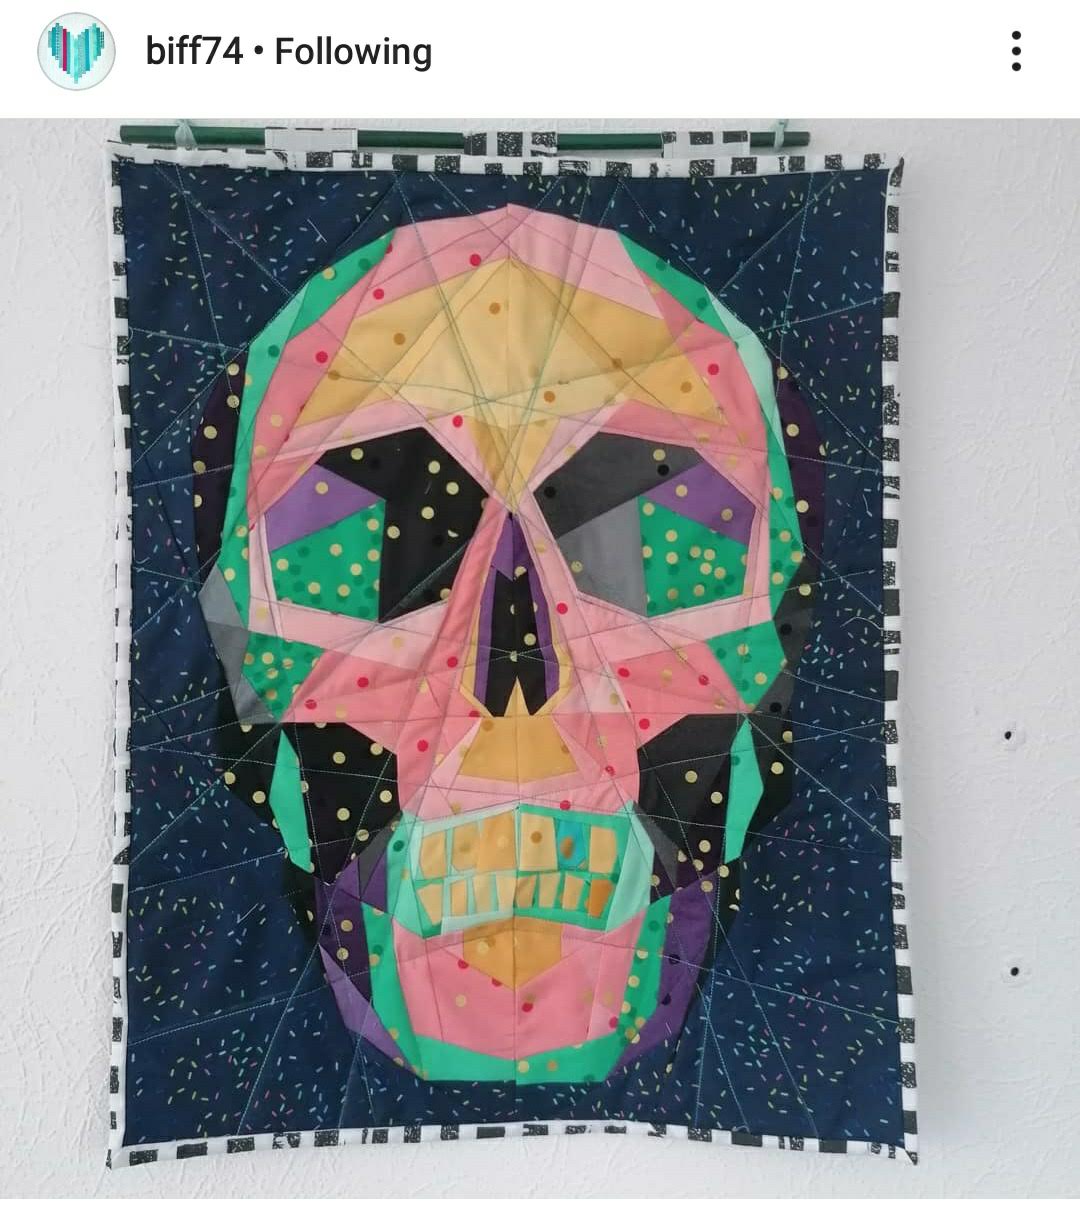
From left to right: @nathaliedelesse, @tish.dunham & @freakymysty
I love the diversity of all of these and have no idea how I could possibly pick just 5 prize winners! Honestly thank you so much all of you for making my first Sew Along ‘sew’ much fun!
I loved seeing the participants faces and being able to put them to the names and the sewing! Unsurprisingly I’m a visual person so this really helps me link everything together across Instagram and Facebook.
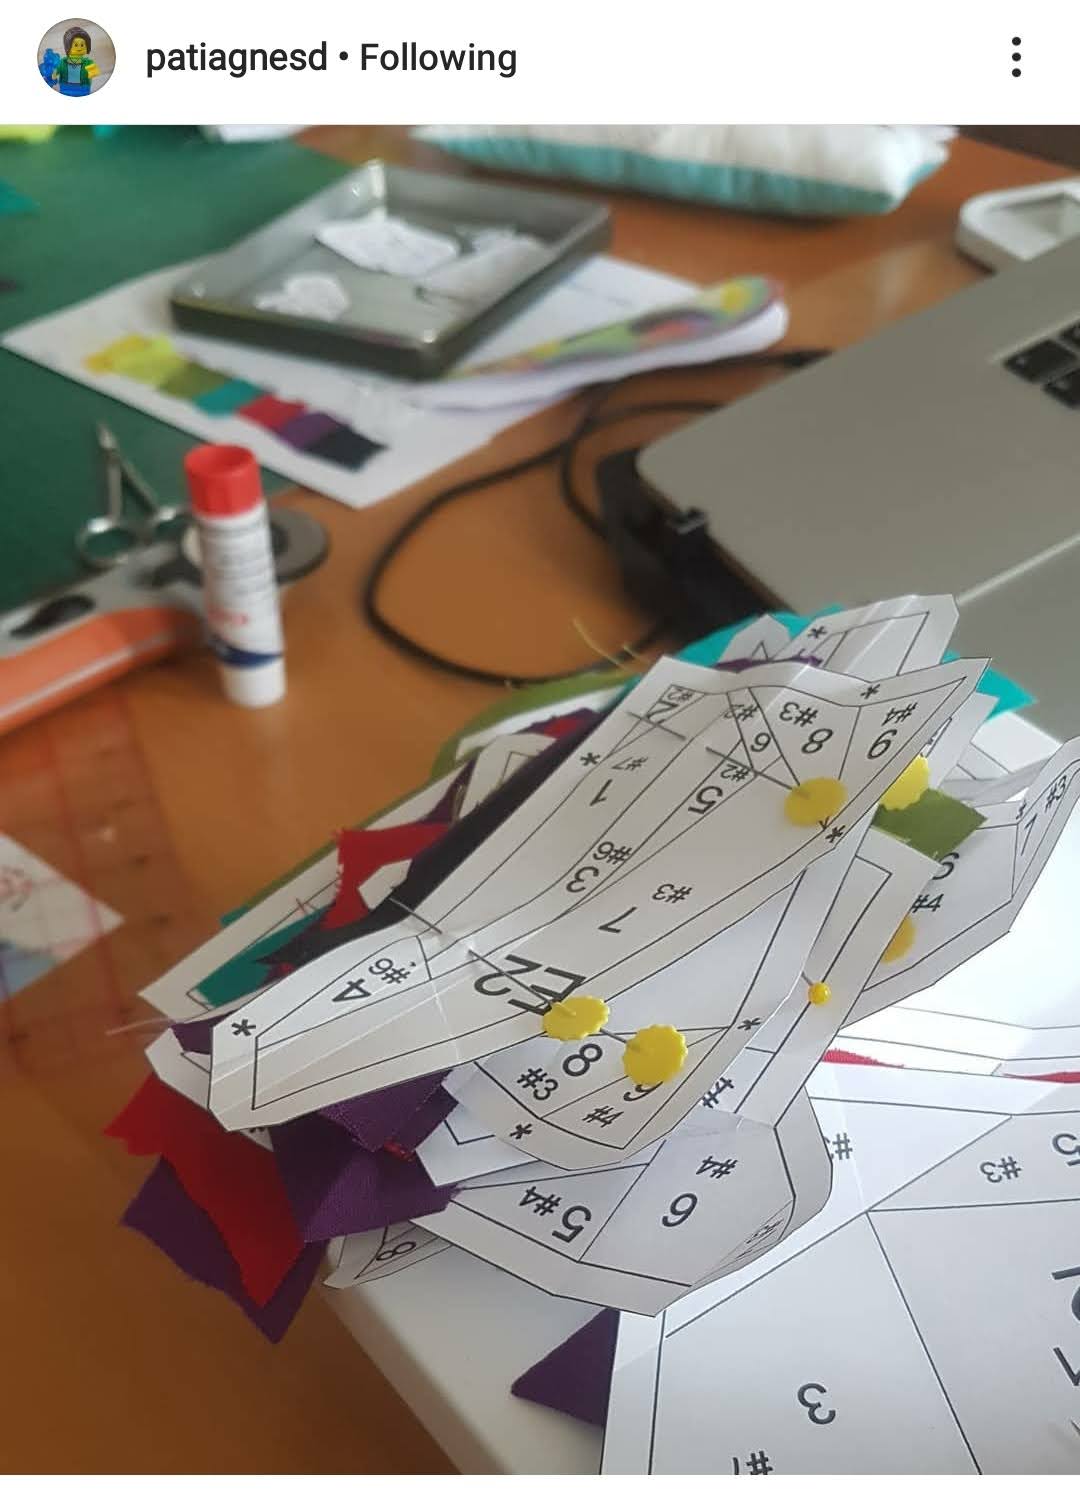
Here are a few of the Fabric Pulls and Colouring pages
From left to right: Marie-Anne Sewingmum, Margaret Pannell Vachon, @maikehaza
It’s Breast Cancer Awareness Month in October and this year it is also the first anniversary of the death of the mother of my daughter’s best friend. I unfortunately didn’t get to know her very well before she died as the girls had only been together at school for a little over a year. My daughter’s friend and her dad have coped incredibly well and I feel honoured to have been there to help. But I want to do more. I don’t want others to have to lose their mother, wife or daughter.
For my small contribution to the cause, I have designed a Foundation Paper Piecing block. It’s the iconic pink ribbon (an international sign), symbolic sometimes of loss and sometimes of success. This block is free to download here.
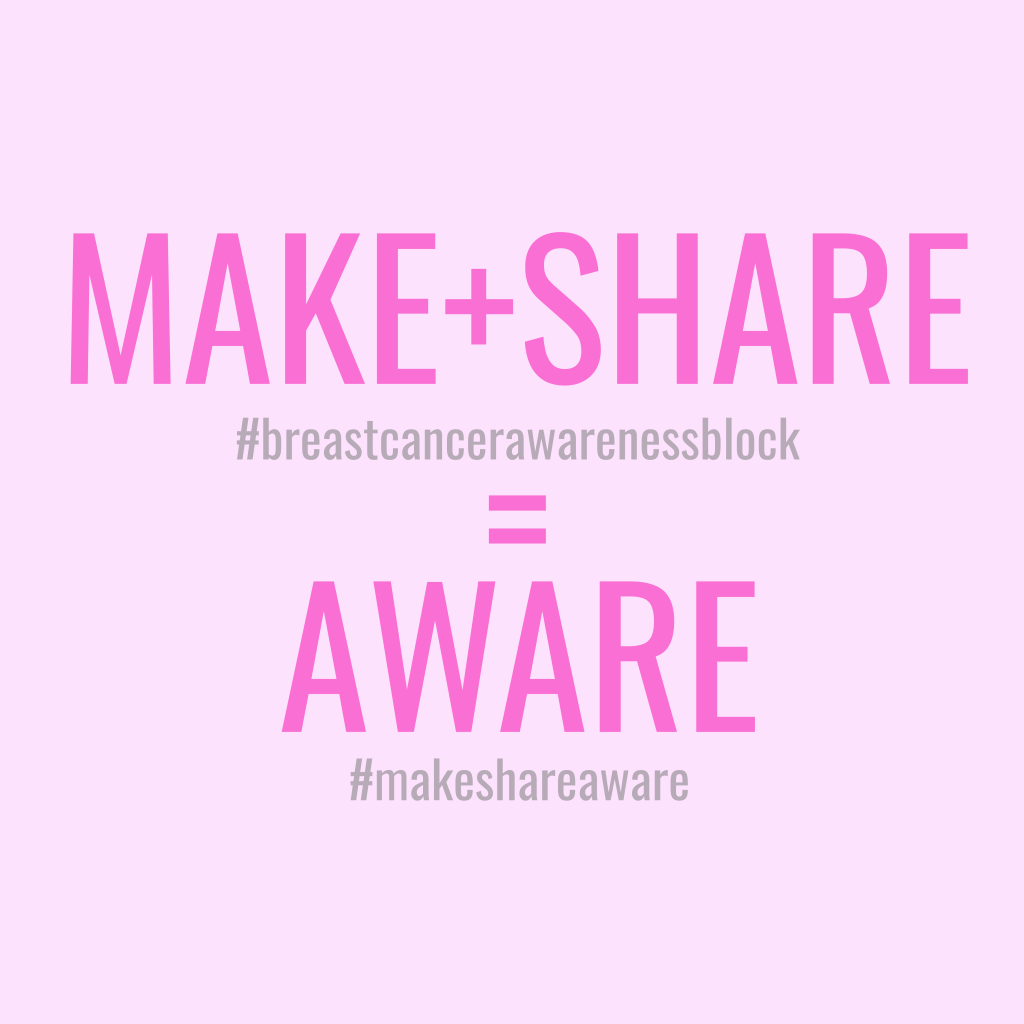
I would like as many of you lovely people as possible to make this block in October and share it on social media with a link to how to check your breasts such as this to make others aware. I have tried to make this catchy with the slogan ‘Make + Share = Aware’ in the hope more will social media users will pay attention and join in!
I would like you to tell your sewing friends and get them to do the same. Just doing this will be enough but if any guilds or groups would pool their blocks and make a quilt that could be auctioned or raffled or donated to someone in need that would be amazing.
If anyone would like to donate any money for using the block, I have set up a Just Giving page. This money will go to Macmillan nurses in the UK as that is the charity that our friend wanted any money, raised in her memory, to be donated too.
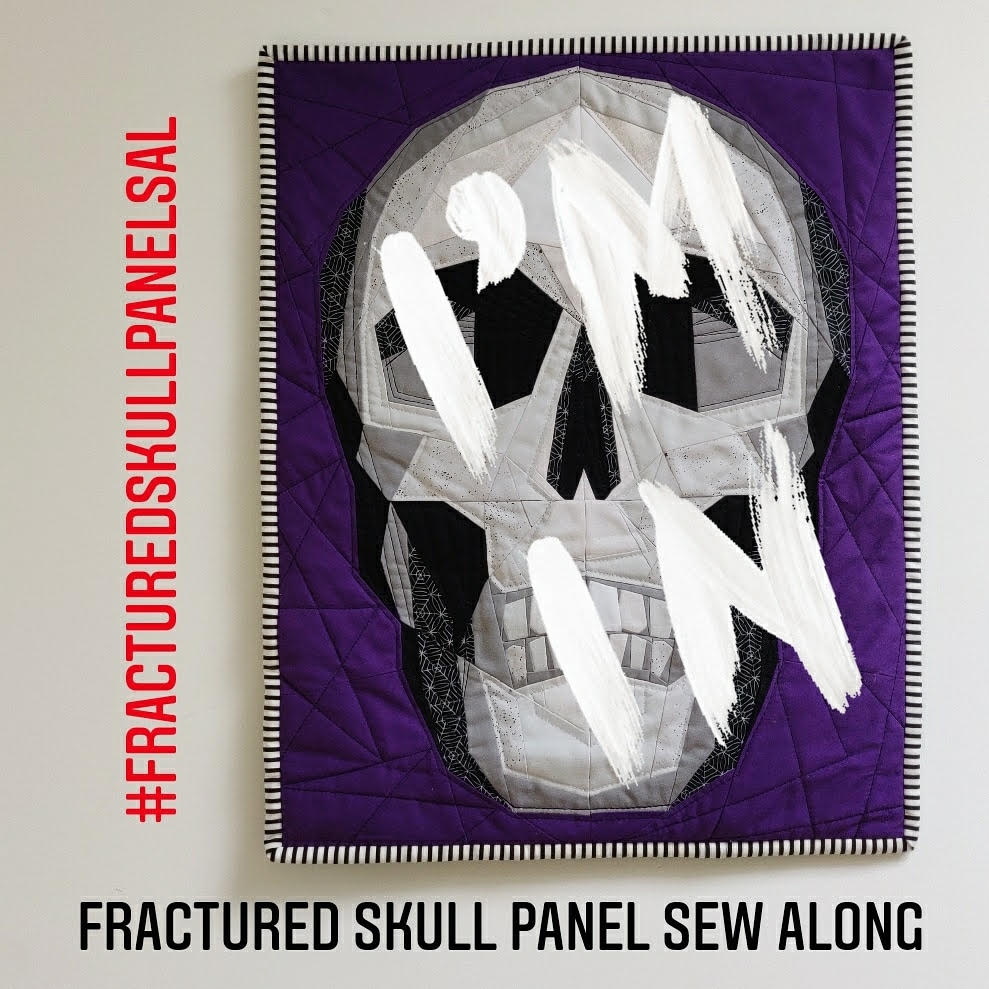
HELLO and thank you for joining me here. I’m doing a sew along for the Fractured Skull Panel …eek! I am so excited to see some more skulls in fabric combinations I’m sure I will have never thought of. And to be sewing another myself!!!
I only released the pattern last week and decided to do a sew along on Saturday so still doing some planning so bear with me. I want to do some ‘live’ chats each week to introduce what we’re going to do and answer any questions you guys have.
I plan to do these on a Saturday night 10PM GMT so 5pm EST or 2pm PST or 8am (Sunday) AEDT. I will confirm the platform this will be on but most likely Zoom or Instagram/ Facebook Live.
Most of you guys use Instagram but a few of you are Facebook users so I have set up a Facebook group found here. Those of you who use both please could you post on both.
I will endeavour to help any of you struggling with anything and respond to any direct messages as soon as possible but with 2 young kids and ME/CFS my free time can be unpredictable. I also welcome any suggestions and feedback but it must be delivered with kindness. This leads me to the boring bit…
The Rules
1- Be nice or don’t say anything,
2- Have fun!
This sew along will be super chilled. If you start late, no problem. Or if you don’t keep up, don’t worry! … Loads or a little participation is great!!!
I will send out more detailed info on a Thursday night confirming what we will be doing and giving details of live chats or updates.
Estimated time required: 10mins to 10hrs depending on how quickly you can make fabric decisions.
Week 2 – 17th October – Most of the Sewing
Estimated time required: 8 to 10hrs depending on how quick you sew. If you think you will be slow or short of time this week, I would suggest starting to sew in week one.
Week 3 – 24th October – Joining Sections & Finishing
Estimated time required: 2- 8hrs depending if you will just finish the panel or make it into anything?
FINAL DAY – Halloween 31st October – The Big Reveal
I will pick a winner (not exactly sure if it will be my favourite or randomly) in the first week of November. I don’t want anyone to feel left out or excluded if they are struggling because of the technicality or due to life getting in the way, so you will be eligible as long as you have signed up and done something. Prizes are still being organised so will be announced as we go along!
Lastly, if you have not already got yourself a copy of the pattern link to shop is here.
And if you’re on Instagram please post to your feed the sew along ‘I’m in’ image so your friends know you’re doing it and can join before it’s too late.